

A garden hose is an indispensable tool for any homeowner, but it can quickly turn from a helpful friend to a tangled, kinking mess. A disorderly hose is not just an eyesore; it’s a tripping hazard and can lead to damage that shortens its lifespan. Learning how to wrap up a hose correctly is a simple skill that saves you time, frustration, and money. It prevents kinks, extends the life of your hose, and keeps your yard looking tidy and safe.
This guide will walk you through the process step-by-step, transforming this common chore from a struggle into a satisfying part of your gardening routine. You’ll soon see that a properly coiled hose is easier to store, quicker to deploy, and ready for action whenever you need it.
Why a Properly Wrapped Hose Matters
You might wonder why there’s a need to learn a specific technique for coiling a hose. The answer lies in preservation and convenience. When a hose is left in a tangled pile, it develops kinks and weak spots. These bends restrict water flow and, over time, can lead to cracks and leaks, forcing you to buy a replacement sooner. Furthermore, a messy hose lying across your lawn or patio is a significant safety risk.
It’s easy for anyone, from children to adults, to trip over it, potentially causing injury. A neatly wrapped hose, on the other hand, is easy to store on a hook, in a pot, or on a reel. This protects it from sun damage and keeps your outdoor space organized and safe. Taking a minute to wrap it correctly ensures your hose remains a reliable tool for years.
8 Step Methods Guide on How to Wrap Up a Hose
Step 1: Turn Off the Water and Release Pressure
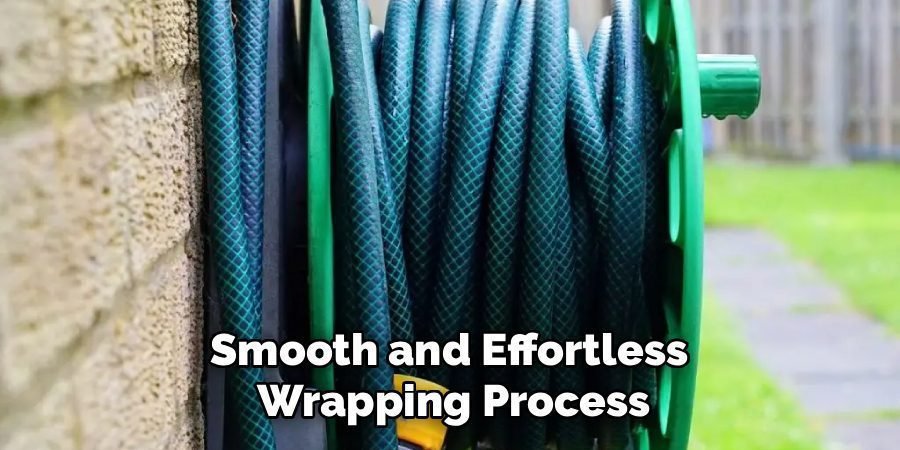
Before you begin coiling, always make sure the water spigot is turned off completely. Next, you need to release any pressure trapped inside the hose. Simply squeeze the handle on your nozzle or sprayer until the water stops flowing. This step is crucial because a pressurized hose is stiff and much harder to handle. Draining the excess water makes the hose more flexible and lighter, setting you up for a smooth and effortless wrapping process. It also prevents you from getting an unexpected shower when you disconnect it.
Step 2: Lay the Hose Out Straight
Find an open area in your yard and stretch the hose out in a straight line, removing any obvious twists or large loops. This is a vital preparatory step that untangles the hose and “resets” its memory. Working with a straight hose prevents new kinks from forming as you begin to coil it. If you try to wrap a hose that’s already tangled, you will only tighten the existing knots and make the job more difficult. A few moments spent straightening it out will save you significant frustration during the coiling process.
Step 3: Start Coiling at the Spigot End
Begin coiling from the end of the hose connected to the water source, not the nozzle end. Hold the end of the hose in one hand and use your other hand to create your first loop. The size of your loops will depend on where you plan to store the hose. For hanging on a wall-mounted holder, aim for loops about two to three feet in diameter. If you are storing it in a large pot or container, you can make them slightly smaller. Consistency is key, so try to make each subsequent loop the same size as the first.
Step 4: The Over-Under Coiling Method
This is the professional’s secret to a kink-free coil. For your first loop, twist the hose towards your body (over). For the second loop, twist the hose away from your body (under), creating a figure-8 motion before laying it on top of the first loop. This alternating technique counteracts the hose’s natural tendency to twist in one direction. It might feel a bit awkward at first, but with a little practice, this over-under motion will become second nature, ensuring your hose lies flat and uncoils without any frustrating tangles.
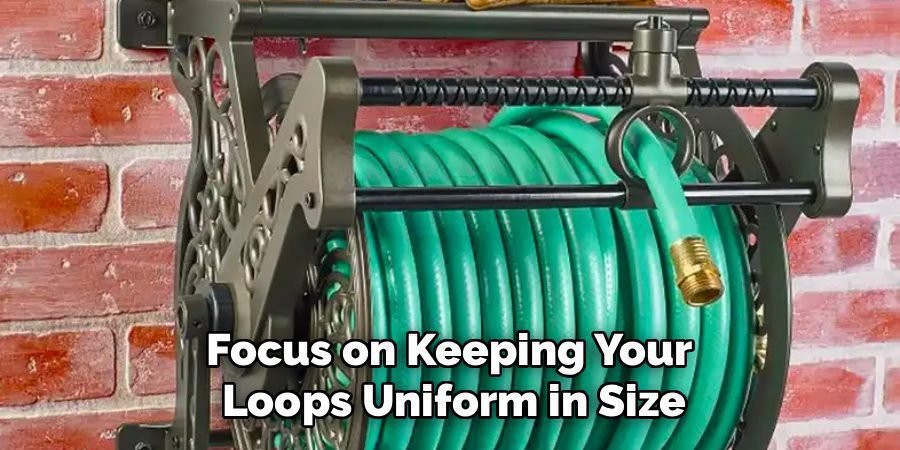
Step 5: How to Wrap Up a Hose with Consistent Loops
As you continue the over-under method, focus on keeping your loops uniform in size. Consistent loops not only look neater but also stack more evenly, making storage much easier. Hold the forming coil in your non-dominant hand and use your dominant hand to feed the hose and create the alternating twists. Let the hose guide you; don’t try to force it into a loop. If you feel resistance or see a kink starting to form, pause and straighten that section before continuing. This patient approach is a key part of learning how to wrap up a hose effectively.
Step 6: Walk the Hose as You Coil
Instead of trying to pull the entire length of the hose toward you, it’s much more effective to walk along the hose as you coil it. As you form each loop, take a few steps down the length of the hose. This method prevents you from dragging the hose across the ground, which can cause abrasions and wear on its outer jacket. Walking with the hose also helps you maintain control and spot any potential tangles or twists before they become a problem, ensuring a smooth coiling process from start to finish.
Step 7: Managing the Nozzle End
When you reach the final few feet of the hose, you’ll be left with the nozzle or sprayer. There are a couple of neat ways to handle this. You can simply tuck the nozzle into the center of the coil to keep it secure. Alternatively, you can use the remaining length of the hose to wrap around the coiled bundle two or three times. Some people then tuck the nozzle under one of these wraps to secure the entire coil, creating a tidy, self-contained bundle that won’t unravel.
Step 8: Securing the Coil for Storage
Once your hose is perfectly coiled, you need to secure it to prevent it from unwinding. A hook-and-loop strap, often sold as a “hose strap” or “cable tie,” is an excellent tool for this. Wrap the strap tightly around the coiled hose to hold the loops together. If you don’t have a dedicated strap, a short piece of rope or a bungee cord works just as well. This final step ensures your hard work pays off, leaving you with a neat bundle that is ready for storage.
Inspecting and Maintaining the Hose
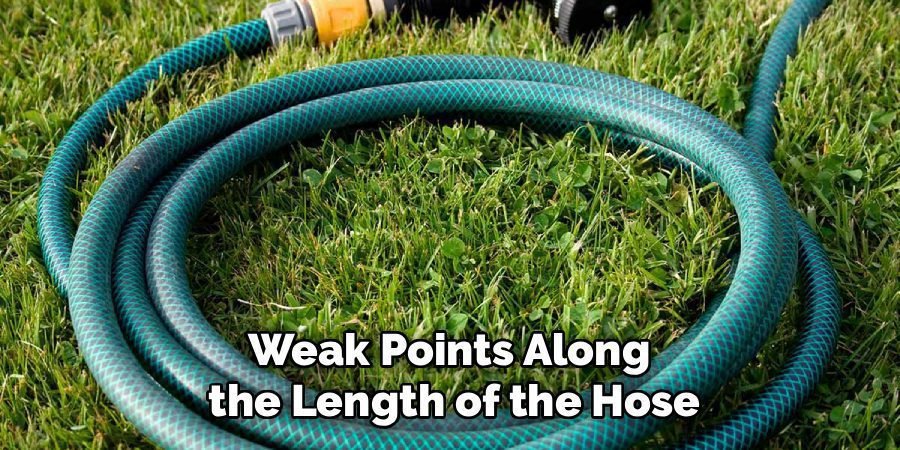
Before putting the hose into long-term storage, take a moment to inspect it for any damages or wear that might have occurred during its use. Check for cracks, leaks, or weak points along the length of the hose, especially near connections and fittings. If any issues are found, consider repairing or replacing those sections to ensure the hose is ready to use when needed again. Regular maintenance not only extends the life of your hose but also saves you from potential frustrations down the line.
Frequently Asked Questions (FAQ)
What Is the Best Way to Store a Garden Hose for Winter?
For winter storage, it’s critical to drain all water from the hose to prevent freezing, which can cause it to crack. After coiling it neatly, store it in a garage, shed, or basement. Keeping the hose indoors protects it from harsh winter temperatures and UV rays that can degrade the material over time. Avoid leaving it outside, even if it’s coiled, as prolonged exposure to freezing weather will significantly shorten its lifespan.
How Can I Stop My Hose From Kinking?
The best way to prevent kinking is to uncoil the hose completely before turning on the water. When you’re done, use the over-under coiling method described in this guide to wrap it up. This technique prevents the hose from twisting and developing a “memory” that leads to kinks. Investing in a high-quality, kink-resistant hose can also make a big difference, but proper wrapping and storage habits are the most effective long-term solution.
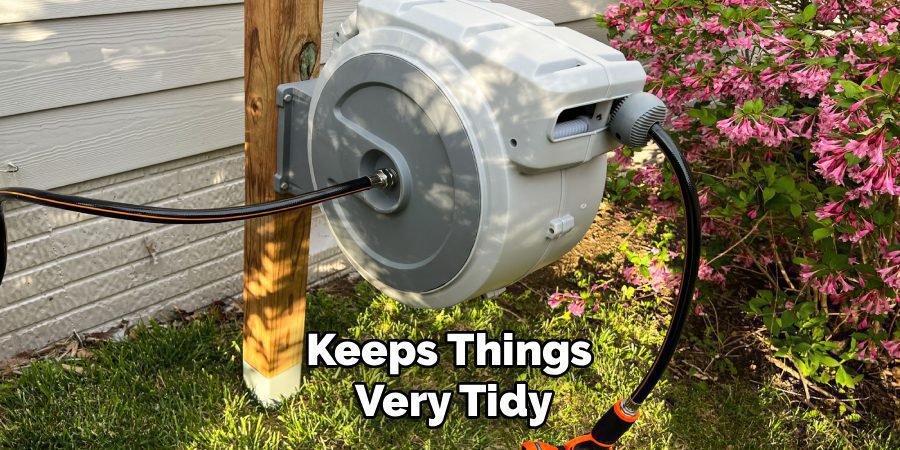
Should I Use a Hose Reel or Coil by Hand?
Both methods are effective, but they suit different needs. A hose reel is convenient and keeps things very tidy, especially for longer hoses. It does the coiling work for you, though you still need to guide the hose to prevent twisting. Coiling by hand using the over-under method gives you more control and is the best way to prevent kinks. It’s also a great option if you don’t have space for a reel or prefer to store your hose in a pot or on a simple hook.
Can I Leave My Hose Out in the Sun?
It’s best to avoid leaving your hose in direct sunlight for extended periods. The sun’s ultraviolet (UV) rays can break down the materials, whether it’s rubber or vinyl, causing the hose to become brittle and prone to cracking. After each use, coiling your hose and storing it in a shaded area, a shed, or a covered hose pot will protect it from sun damage and dramatically extend its usable life.
How Often Should I Replace My Garden Hose?
The lifespan of a garden hose depends on its quality, how often it’s used, and how well it’s maintained. A high-quality hose that is properly drained, coiled, and stored away from the elements can last for 5 to 10 years or even longer. You should consider replacing your hose if you notice multiple leaks, cracks, or if it has become stiff and constantly kinks despite proper handling.
Conclusion
Mastering a few simple techniques can completely change your relationship with your garden hose. By releasing the pressure, straightening the hose, and using the over-under coiling method, you can put an end to the daily battle with tangles and kinks. This not only makes your gardening chores more enjoyable but also protects your investment by extending the life of your hose and keeping your yard safe and organized. Now that you know how to wrap up a hose like a pro, you can tackle this task with confidence. A neatly coiled hose is a small but satisfying sign of a well-tended garden.
About Ravuk Barg
B.Sc. Horticulture Science | Certified Master Gardener
Ravuk Barg has spent more than a decade with his hands in the soil and his head full of questions about why some gardens thrive while others struggle. What started as a single raised bed of tomatoes and basil in a modest backyard has grown into a deep, working knowledge of everything from seed germination and soil amendment to companion planting and seasonal pruning.
Over the years, Ravuk has gardened through drought summers, waterlogged springs, and pest invasions that would make most gardeners hang up their trowels for good. Those hard seasons, he’ll tell you, taught him more than any perfect growing year ever could. He writes from that earned experience—covering vegetable growing, ornamental planting, houseplant care, composting, and garden design with equal confidence and curiosity.
Philosophy & Approach
Ravuk’s approach to gardening is rooted in practicality. He favors organic methods not out of dogma, but because they work long-term—resulting in healthier soil, fewer inputs, and stronger plants. He has a particular fondness for heirloom vegetable varieties (the kind with proper flavor), unruly cottage-style flower beds, and the stubborn houseplants that everyone else gave up on.
The Mission: Give readers the honest, experience-backed advice that helps them actually succeed in their gardens—not just the ideal version, but the real one; weeds, failures, and all.
Education & Credentials
-
B.Sc. in Horticulture Science
-
Greenfield Agricultural University
-
Focus: Plant Physiology, Soil Ecology, and Sustainable Crop Production
-
-
Master Gardener Certification
-
Cooperative Extension Service
-
Focus: 200+ hours of hands-on practical training and community garden work
-
Continuing Education
-
Organic Pest Management
-
Native Plant Landscaping
-
Sustainable Crop Production