

Keeping your lawn lush and green often requires more than a single sprinkler can handle. If you have a large or irregularly shaped yard, you know the struggle of moving a sprinkler from spot to spot. Fortunately, there’s a simple and effective solution.
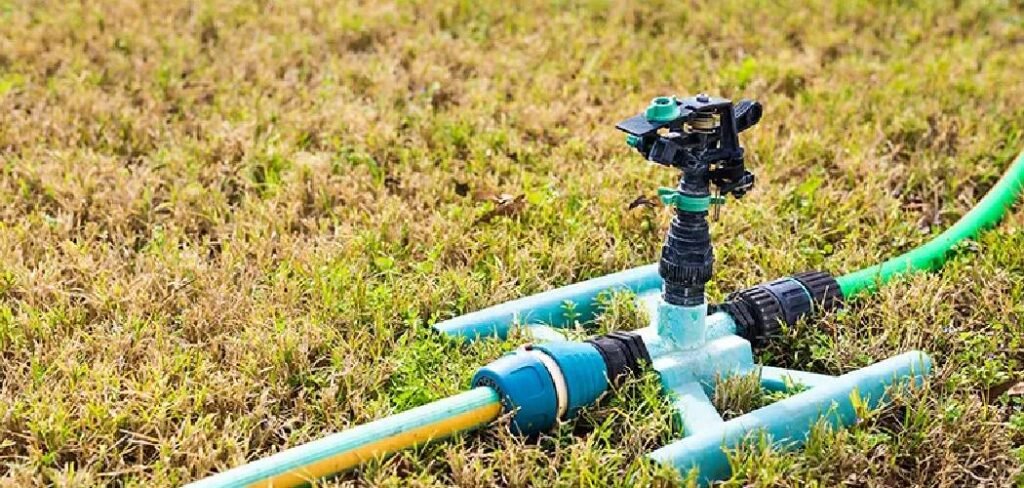
Learning how to connect multiple sprinklers to one hose can save you time and ensure every corner of your garden receives the water it needs. This guide is designed for home gardeners and beginners, providing a straightforward, step-by-step process. We will walk you through everything from gathering the right materials to setting up your new watering system for maximum efficiency, making lawn care easier than ever.
Why Connect Multiple Sprinklers to One Hose?
Connecting several sprinklers to a single hose offers numerous advantages, especially for those with expansive or oddly shaped lawns. The most significant benefit is improved coverage. Instead of manually relocating one sprinkler to cover different zones, a multi-sprinkler setup can water the entire area simultaneously. This saves a considerable amount of time and physical effort. It’s also a highly customizable solution.
You can strategically place different types of sprinklers to cater to the specific needs of various parts of your yard—an oscillating sprinkler for a large rectangular patch and a stationary one for a delicate flower bed. This method ensures more uniform water distribution, preventing dry spots and overwatered patches, leading to a healthier, more vibrant landscape. It’s an efficient and smart way to manage your home’s irrigation needs without investing in a costly in-ground system.
7 Step-by-Step Guide: How to Connect Multiple Sprinklers to One Hose
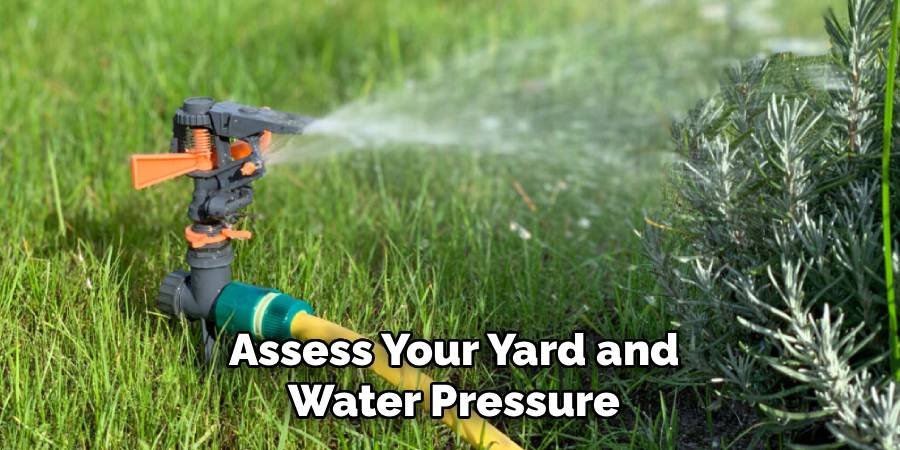
Step 1: Assess Your Yard and Water Pressure
Before you begin, take a moment to evaluate your yard’s layout and your home’s water pressure. Sketch a rough map of the area you want to water, noting its shape and size. This will help you determine how many sprinklers you need and where to place them for optimal coverage. Next, check your water pressure. You can buy a simple pressure gauge that attaches to your outdoor spigot. Most homes have a water pressure between 40 and 60 PSI. Knowing this is crucial because low pressure may struggle to power multiple sprinklers effectively. This initial assessment ensures you design a system that works efficiently with your specific conditions.
Step 2: Gather Your Materials
With your plan in hand, it’s time to collect the necessary supplies. You will need a main garden hose that is long enough to reach from your spigot to the farthest point of your watering area. You will also need several shorter “leader” hoses to connect the individual sprinklers. The key component for this project is a hose splitter or manifold, which allows you to run multiple lines from a single source. Additionally, you’ll need the sprinklers themselves—choose types that suit your yard, such as oscillating, impact, or stationary models. Finally, grab any necessary connectors, adapters, or Teflon tape to ensure all connections are watertight and secure.
Step 3: Choose the Right Sprinklers
Selecting the right sprinklers is essential for even water distribution. Consider the different needs of your lawn and garden beds. Oscillating sprinklers are great for large, rectangular areas, casting water back and forth in a fan-like pattern. Impact sprinklers, known for their distinct clicking sound, cover large circular or semi-circular areas and can be adjusted for distance. For smaller, targeted areas like flower beds or vegetable patches, stationary or pop-up sprinklers are ideal as they provide a gentle, consistent spray. You can even mix and match types to create a custom watering system perfectly tailored to your landscape’s unique requirements.
Step 4: Attach the Hose Splitter to the Spigot
The hose splitter is the heart of your new system. Begin by attaching it directly to your outdoor water spigot. Most splitters simply screw on by hand, but you can use a wrench for a little extra torque if needed. To prevent leaks, consider wrapping the spigot’s threads with Teflon tape before attaching the splitter. These devices come in various configurations, from simple two-way splitters to four-way manifolds. Choose one that accommodates the number of sprinklers you plan to use. Each outlet on the splitter will have its own valve, giving you independent control over each hose line.
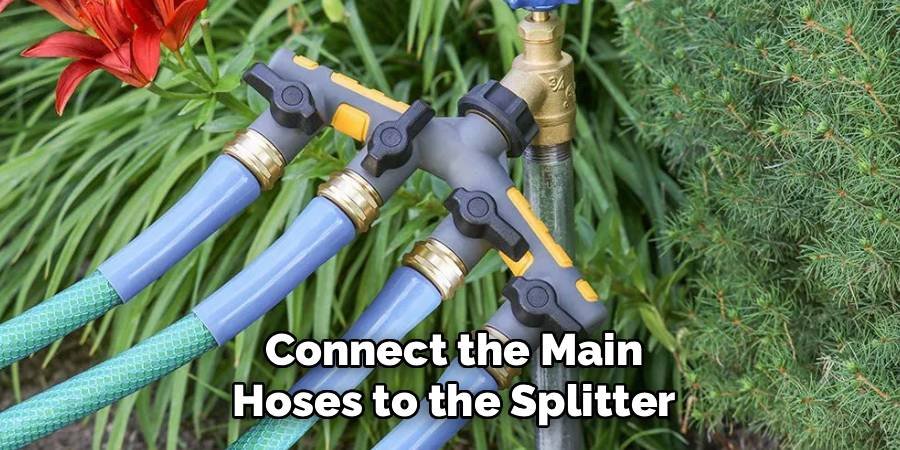
Step 5: Connect the Main Hoses to the Splitter
Once the splitter is securely attached to the spigot, you can connect your main hoses. If you are running sprinklers in different directions, attach a separate garden hose to each of the splitter’s outlets. Make sure the connections are tight to avoid leaks at the source. Turn the valve for each outlet to the “on” position for the hoses you will be using. This setup forms the primary network that will deliver water to your strategically placed sprinklers. Using a high-quality, kink-resistant hose will make this process smoother and ensure consistent water flow throughout the system.
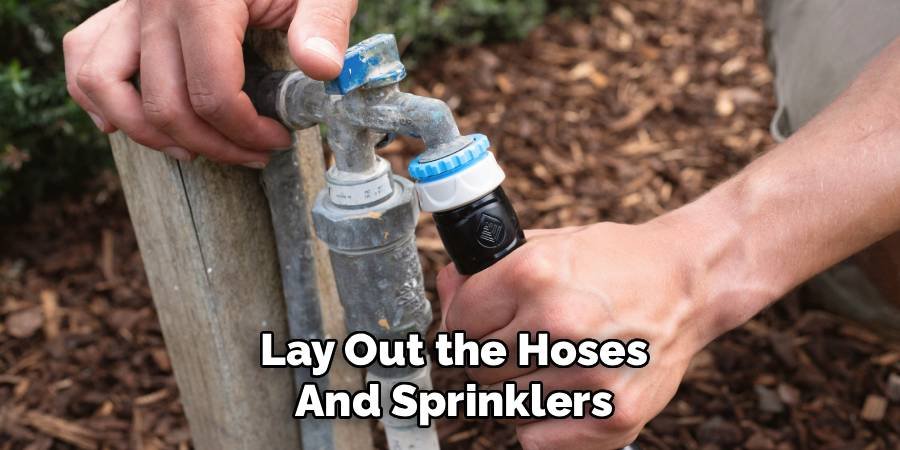
Step 6: Lay Out the Hoses and Sprinklers
Now, it’s time to arrange your hoses and sprinklers according to the plan you made earlier. Lay the main hoses from the splitter to the general areas you want to water. At the end of each main hose, you will connect your sprinklers. If you are connecting sprinklers in a series (one after another on a single line), you will use short leader hoses to link them. Place the sprinklers in their designated spots, ensuring their spray patterns will overlap slightly for complete coverage. This visual layout allows you to make adjustments before turning on the water.
Step 7: Connect Multiple Sprinklers in a Series
To connect sprinklers in a series, you’ll need sprinklers that have both a water inlet and an outlet. Start by attaching a short leader hose to the outlet of the first sprinkler. Then, connect the other end of that leader hose to the inlet of the second sprinkler. You can repeat this process to create a chain of sprinklers. This method is an effective way for how to connect multiple sprinklers to one hose for long, narrow sections of lawn. Remember that water pressure will decrease with each sprinkler added to the series, so this method is best for two to three sprinklers at most.
Test Your System for Leaks and Coverage
Before you walk away, perform a thorough test. Turn on the water at the spigot slowly and open the valves on your splitter. Watch all connection points—at the spigot, the splitter, and each sprinkler—for any drips or leaks. Tighten any connections that are leaking. A small piece of Teflon tape can often solve a stubborn drip. Next, observe the spray pattern of your sprinklers. Are they reaching all the intended areas? Is the coverage uniform? Adjust the placement and settings of each sprinkler until you are satisfied with the result.
Frequently Asked Questions
How Many Sprinklers Can I Run Off a Single Hose?
The number of sprinklers you can run depends almost entirely on your home’s water pressure (PSI) and the flow rate (GPM) from your spigot. A typical household with 40-60 PSI can usually support two to three sprinklers effectively. If you add too many, the pressure will drop significantly, and the sprinklers may not operate correctly, resulting in weak sprays that don’t cover much ground. To run more sprinklers, you may need a booster pump to increase your water pressure.
Will Connecting Multiple Sprinklers Reduce Water Pressure?
Yes, connecting multiple sprinklers will reduce the water pressure available to each one. Water pressure is distributed among all the open outlets. For example, if you run two sprinklers from a splitter, each will receive roughly half the pressure of a single sprinkler. This is why it’s crucial not to overload the system. For best results, use sprinklers with lower pressure requirements or limit the number of sprinklers you run simultaneously.
What Is the Best Type of Hose to Use?
For connecting multiple sprinklers, a durable, kink-resistant hose is your best option. A standard 5/8-inch diameter hose is suitable for most residential uses. Consider a heavy-duty or rubber hose, as they are less likely to kink and restrict water flow. For the short leader hoses that connect sprinklers in a series, a flexible, lightweight hose can be easier to manage and position. Investing in quality hoses will prevent frustration and ensure a reliable watering system.
Can I Mix Different Types of Sprinklers?
Absolutely! Mixing different types of sprinklers is a great way to create a customized watering solution for your yard’s specific needs. You could use a wide-reaching oscillating sprinkler for a large, open section of lawn while using a gentle, stationary sprinkler for a delicate flower bed. Just be mindful that different sprinkler types may have different water pressure and flow rate requirements. You can balance the system by adjusting the valves on your hose splitter.
How Can I Prevent Leaks in My Connections?
Leaks are a common but fixable issue. To prevent them, ensure all your connections are tight. You can hand-tighten them first, then use a wrench for a final quarter-turn if needed, but be careful not to overtighten and strip the threads. Adding rubber or vinyl hose washers to each connection creates a better seal. For threaded metal connections, like at the spigot, wrapping the male threads with Teflon tape before screwing on the splitter can create a watertight seal.
Conclusion
Creating a more efficient and comprehensive watering system for your lawn is an achievable goal for any homeowner. By following these steps, you now have the knowledge to effectively set up a network that caters to the unique layout of your yard. From assessing your water pressure to selecting the right equipment and fine-tuning the water flow, you are well-equipped to tackle this project. You can save time, conserve water, and promote a healthier, greener landscape. Now that you understand how to connect multiple sprinklers to one hose, you can confidently build a system that takes the chore out of lawn maintenance.
About Ravuk Barg
B.Sc. Horticulture Science | Certified Master Gardener
Ravuk Barg has spent more than a decade with his hands in the soil and his head full of questions about why some gardens thrive while others struggle. What started as a single raised bed of tomatoes and basil in a modest backyard has grown into a deep, working knowledge of everything from seed germination and soil amendment to companion planting and seasonal pruning.
Over the years, Ravuk has gardened through drought summers, waterlogged springs, and pest invasions that would make most gardeners hang up their trowels for good. Those hard seasons, he’ll tell you, taught him more than any perfect growing year ever could. He writes from that earned experience—covering vegetable growing, ornamental planting, houseplant care, composting, and garden design with equal confidence and curiosity.
Philosophy & Approach
Ravuk’s approach to gardening is rooted in practicality. He favors organic methods not out of dogma, but because they work long-term—resulting in healthier soil, fewer inputs, and stronger plants. He has a particular fondness for heirloom vegetable varieties (the kind with proper flavor), unruly cottage-style flower beds, and the stubborn houseplants that everyone else gave up on.
The Mission: Give readers the honest, experience-backed advice that helps them actually succeed in their gardens—not just the ideal version, but the real one; weeds, failures, and all.
Education & Credentials
-
B.Sc. in Horticulture Science
-
Greenfield Agricultural University
-
Focus: Plant Physiology, Soil Ecology, and Sustainable Crop Production
-
-
Master Gardener Certification
-
Cooperative Extension Service
-
Focus: 200+ hours of hands-on practical training and community garden work
-
Continuing Education
-
Organic Pest Management
-
Native Plant Landscaping
-
Sustainable Crop Production