

A lush, green lawn is the centerpiece of many beautiful homes, but achieving that perfect look requires more than just regular mowing and watering. Over time, a thick layer of dead grass, roots, and debris known as thatch can build up, suffocating your turf and preventing essential nutrients from reaching the soil.

This is where verticutting comes in. This guide will walk you through the process of how to verticut your lawn, a transformative technique that cuts through the thatch layer, aerates the soil, and encourages robust, healthy growth. It might sound technical, but with the right tools and a clear plan, any homeowner can master this crucial lawn care task.
Why Verticutting Is Important
Verticutting, or vertical mowing, is a vital maintenance practice that directly addresses the problem of thatch. Thatch is a natural part of a lawn’s life cycle, but when it becomes thicker than half an inch, it acts like a barrier. This dense mat blocks water, air, and fertilizer from penetrating the soil and reaching the grassroots. It can also harbor pests and diseases, leading to a weak, discolored, and patchy lawn.
By slicing vertically into the turf, a verticutter thins out this thatch layer. This process not only removes the unwanted debris but also creates small grooves in the soil. These grooves improve air circulation, water absorption, and nutrient delivery to the root zone. Furthermore, verticutting stimulates new growth by severing the stolons (above-ground runners) of grass plants, prompting them to produce new shoots and create a denser, more resilient turf. It’s an essential step for renovating a tired lawn and maintaining its long-term health.
7 Step Methods Guide on How to Verticut Your Lawn
Step 1: Choose the Right Time of Year

Timing is everything when it comes to effective lawn care. The best time to verticut is during your grass’s peak growing season. This ensures the turf can recover quickly from the stress of the process. For cool-season grasses like fescue, ryegrass, and Kentucky bluegrass, this means late summer or early fall. For warm-season grasses such as Bermuda, Zoysia, and St. Augustine, the ideal window is late spring or early summer, after the lawn has fully greened up. Avoid verticutting during periods of extreme heat, drought, or when the ground is waterlogged, as this can cause significant damage.
Step 2: Prepare Your Lawn
Before you start the machine, proper preparation will set you up for success. Begin by mowing your lawn one or two notches lower than your usual setting. This shorter height allows the verticutter blades to better access the thatch layer without getting bogged down by tall grass. After mowing, lightly water the lawn a day or two in advance. You want the soil to be moist but not saturated. Dry, hard soil can prevent the blades from penetrating effectively, while overly wet soil can lead to tearing and damage to the turf.
Step 3: Select and Set Up Your Verticutter
You can rent a verticutter from most local home improvement stores or garden centers. These machines, also known as vertical mowers or dethatchers, have vertically oriented blades that slice into the turf. When you get the machine, inspect the blades to ensure they are sharp and in good condition. You will need to adjust the blade depth. For a first pass, a shallow setting of about a quarter-inch is ideal. The goal is to slice through the thatch and just barely into the top layer of soil, not to till the entire lawn.
Step 4: Make Your First Pass
With your verticutter set and ready, it’s time to begin. Start at one edge of your lawn and push the machine forward in a straight line, similar to how you would mow. Walk at a steady, comfortable pace. Pushing too quickly will prevent the blades from doing their job effectively, while going too slowly can risk damaging the turf. Overlap each pass slightly to ensure you cover the entire lawn evenly. You will see a significant amount of thatch and debris being pulled up to the surface. This is a good sign that the machine is working correctly.

Step 5: Make a Second, Perpendicular Pass
For a truly thorough dethatching, a second pass is highly recommended. This time, run the verticutter in a direction perpendicular to your first set of lines. For example, if you went north to south on your first pass, you should now go east to west. This crisscross pattern ensures that you tackle the thatch from multiple angles, breaking it up more completely and effectively aerating the soil surface. Maintain the same steady pace and blade depth as you did for the first pass to achieve consistent results across your entire yard.
Step 6: Rake and Remove the Debris
After you have completed both passes, your lawn will be covered in a large volume of pulled-up thatch. It is crucial to remove this debris promptly. Use a leaf rake to gather the dead material into piles. Leaving this debris on the lawn would defeat the purpose of verticutting, as it would continue to block sunlight, water, and air. Raking thoroughly will reveal the newly opened soil surface and give your grass the clean slate it needs to thrive. Be prepared for a significant amount of cleanup; you might be surprised by how much thatch was choking your lawn.
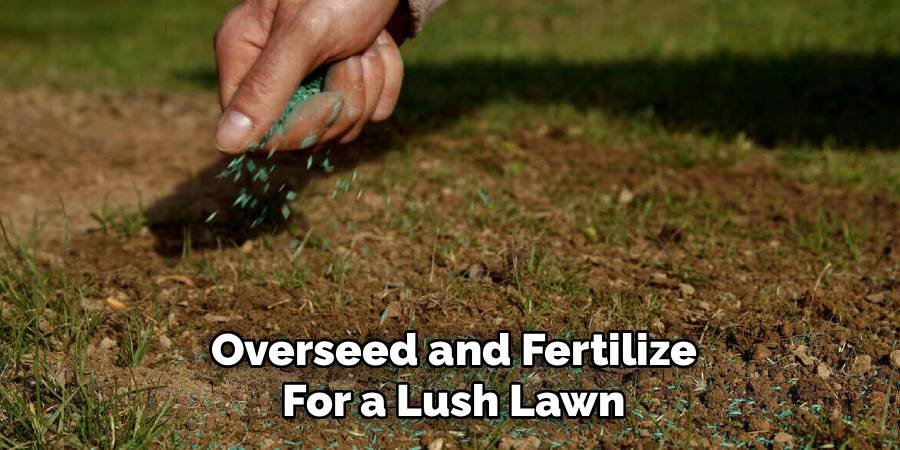
Step 7: Overseed and Fertilize for a Lush Lawn
This final step is the key to transforming your lawn. With the thatch gone and the soil exposed, conditions are perfect for overseeding. Spreading new grass seed at this stage allows for excellent seed-to-soil contact, which is essential for successful germination. Choose a high-quality seed that matches your existing grass type. After seeding, apply a starter fertilizer that is rich in phosphorus to encourage strong root development. This combination of overseeding and fertilizing will help fill in any thin areas, promote dense growth, and ensure your lawn recovers into a thicker, greener, and healthier turf.
Common Mistakes to Avoid
When caring for your lawn, avoiding common mistakes can significantly improve your results. One frequent error is applying too much seed when overseeding. Overcrowding can lead to poor germination and weaker growth as the seedlings compete for resources. Another mistake is failing to water adequately after seeding. Consistent moisture is crucial for successful germination, so ensure your lawn is kept lightly moist during this period.
Additionally, skipping soil preparation, such as aerating or dethatching, can hinder seed-to-soil contact and reduce the effectiveness of overseeding. Finally, avoid using the wrong type of fertilizer or applying it at the incorrect time, as this can stunt growth or even damage your lawn. Taking the time to plan and execute your lawn care properly will yield a healthier and more vibrant result.
Frequently Asked Questions (FAQ)
What Is The Difference Between Verticutting and Dethatching?
While often used interchangeably, there is a slight difference. Dethatching generally refers to using a power rake with spring-like tines that pull and lift thatch from the surface. Verticutting uses fixed, vertical blades that slice through the thatch and into the top layer of soil. Verticutting is considered a more aggressive and effective method for managing thick thatch and improving soil conditions.
How Often Should I Verticut My Lawn?
For most lawns, verticutting once a year is sufficient to keep thatch levels under control. However, if you have a grass type that produces thatch quickly, such as Bermuda or Zoysia grass, or if your thatch layer is exceptionally thick, you might consider doing it twice a year. Always perform this task during the active growing season to allow for proper recovery.
Can I Water My Lawn Immediately After Verticutting?
Yes, watering your lawn immediately after verticutting, overseeding, and fertilizing is highly recommended. A deep watering will help settle the new seeds into the soil, wash the fertilizer into the root zone, and provide much-needed moisture to help the existing turf recover from the stress of the process. Keep the soil consistently moist for the next few weeks to ensure the new seeds germinate successfully.
Will Verticutting Damage My Lawn?
Your lawn will look a bit rough immediately after verticutting, but this is a temporary and necessary part of the renovation process. The process is stressful for the turf, but when done correctly—at the right time of year and with the proper technique—the long-term benefits far outweigh the short-term cosmetic disruption. The lawn will recover and grow back stronger, thicker, and healthier than before.

What Should I Do If My Lawn Has an Irrigation System?
If you have an in-ground sprinkler system, it is crucial to mark the location of every sprinkler head before you begin. Use flags or another visible marker to ensure you do not run the verticutter over them. The machine’s blades can easily damage plastic sprinkler heads, leading to costly repairs. Be careful to steer the machine around these marked locations during each pass.
Conclusion
Verticutting may seem like an intensive task, but its benefits are undeniable. By cutting through the thatch, improving soil aeration, and stimulating new growth, you provide your lawn with the ideal conditions to flourish. Following the steps outlined in this guide—from timing it right to overseeding afterward—will remove the guesswork and help you achieve professional-quality results. Don’t let a thick layer of thatch stand between you and the yard of your dreams. Now that you know how to verticut your lawn, you have the power to rejuvenate your turf and cultivate a dense, vibrant, and resilient green space.
About Ravuk Barg
B.Sc. Horticulture Science | Certified Master Gardener
Ravuk Barg has spent more than a decade with his hands in the soil and his head full of questions about why some gardens thrive while others struggle. What started as a single raised bed of tomatoes and basil in a modest backyard has grown into a deep, working knowledge of everything from seed germination and soil amendment to companion planting and seasonal pruning.
Over the years, Ravuk has gardened through drought summers, waterlogged springs, and pest invasions that would make most gardeners hang up their trowels for good. Those hard seasons, he’ll tell you, taught him more than any perfect growing year ever could. He writes from that earned experience—covering vegetable growing, ornamental planting, houseplant care, composting, and garden design with equal confidence and curiosity.
Philosophy & Approach
Ravuk’s approach to gardening is rooted in practicality. He favors organic methods not out of dogma, but because they work long-term—resulting in healthier soil, fewer inputs, and stronger plants. He has a particular fondness for heirloom vegetable varieties (the kind with proper flavor), unruly cottage-style flower beds, and the stubborn houseplants that everyone else gave up on.
The Mission: Give readers the honest, experience-backed advice that helps them actually succeed in their gardens—not just the ideal version, but the real one; weeds, failures, and all.
Education & Credentials
-
B.Sc. in Horticulture Science
-
Greenfield Agricultural University
-
Focus: Plant Physiology, Soil Ecology, and Sustainable Crop Production
-
-
Master Gardener Certification
-
Cooperative Extension Service
-
Focus: 200+ hours of hands-on practical training and community garden work
-
Continuing Education
-
Organic Pest Management
-
Native Plant Landscaping
-
Sustainable Crop Production