

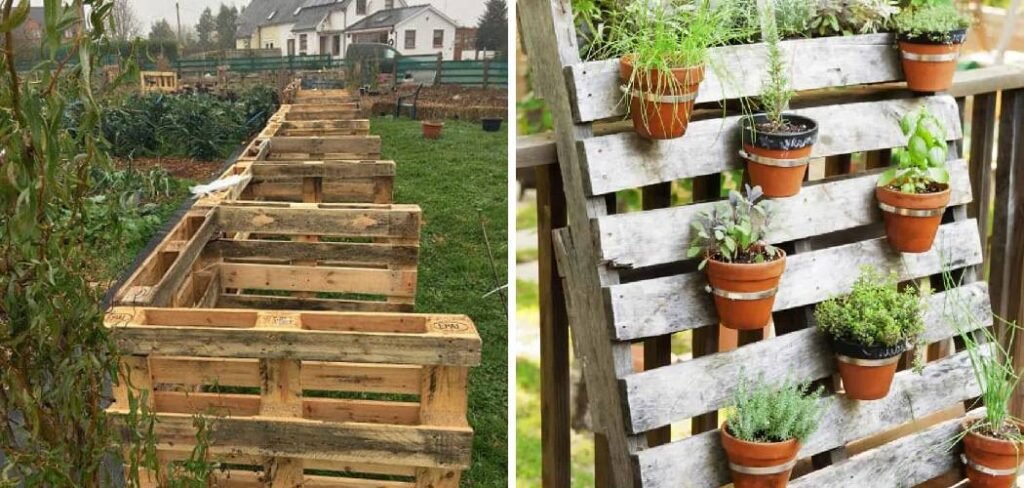
Free pallets seem like the perfect solution for budget-conscious gardeners looking to build raised beds, planters, or garden furniture. However, learning how to treat pallets for garden use safely is crucial before bringing these wooden structures into your growing space.
Not all pallets are created equal. Some undergo chemical treatments that could harm your plants or contaminate your soil. Others might harbor dangerous bacteria or toxic substances from their previous cargo.
The good news? With proper identification, cleaning, and treatment methods, you can transform safe pallets into beautiful, functional garden features. This guide will walk you through every step needed to prepare pallets for garden use, ensuring your plants stay healthy and your harvest remains safe.
Why You Need to Treat Pallets Before Garden Use
Raw pallets pose several risks to your garden ecosystem. Industrial pallets often carry chemical residues from pesticides, oils, or cleaning agents used in shipping facilities.
Many pallets also harbor harmful bacteria, mold spores, or pest eggs that survived in the wood grain. Without proper treatment, these contaminants can transfer directly into your soil and plants.
Chemical treatments like methyl bromide, once commonly used for pallet fumigation, remain toxic for years. Even heat-treated pallets may contain splinters, rough edges, or weathered wood that degrades quickly in outdoor conditions.
Proper treatment eliminates these risks while extending your pallet’s lifespan. Clean, sealed pallets resist moisture, prevent pest infestations, and create safer growing environments for your plants.
10 Step-by-Step Guide: How to Treat Pallets for Garden Use
Step 1: Identify Safe Pallet Types
Start by examining the pallet’s stamp markings, typically found on the side blocks. Look for “HT” stamps, which indicate heat treatment rather than chemical fumigation. Avoid pallets marked “MB” (methyl bromide) as these contain toxic chemicals unsuitable for gardens.
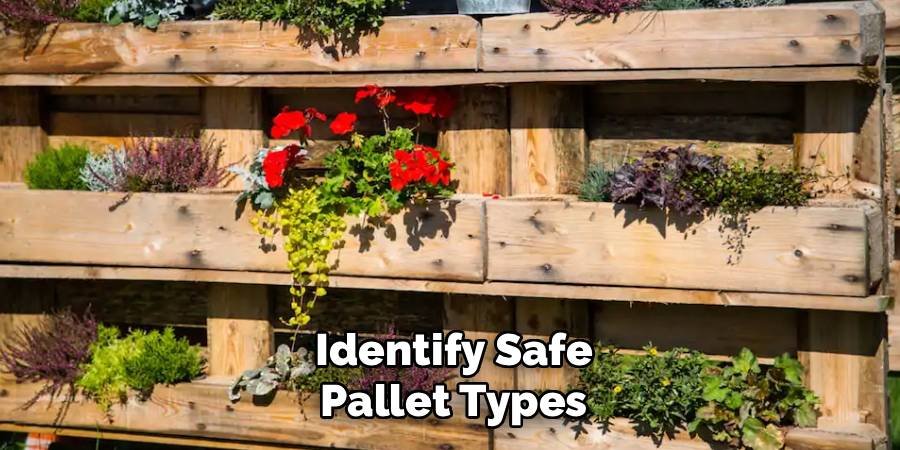
Check the pallet’s condition carefully. Reject any with dark stains, strong odors, or visible damage. Food-grade pallets from grocery stores are generally safer choices than industrial shipping pallets. When in doubt, contact the pallet’s previous owner to verify its cargo history.
Step 2: Inspect for Contamination and Damage
Examine every surface for signs of chemical spills, oil stains, or unusual discoloration. Pay special attention to corners and crevices where contaminants typically accumulate. Look for protruding nails, loose boards, or cracked wood that could injure you during treatment.
Check for pest damage like bore holes, which indicate insect infestation. Smell the wood—fresh, clean pallets should have a neutral woody scent. Any chemical, sour, or musty odors suggest contamination that makes the pallet unsuitable for garden use.
Step 3: Disassemble If Necessary
Some projects require partial disassembly to access all wood surfaces properly. Use a pry bar and hammer to carefully separate boards without causing excessive damage. Remove all nails and staples, checking for bent fasteners that might pose safety risks.
Sand any rough edges or splinters that could cause injury during handling. Keep reusable hardware sorted in containers for reassembly later. This step also allows better access for thorough cleaning and treatment of individual boards.
Step 4: Initial Cleaning and Debris Removal
Begin with dry cleaning to remove loose dirt, leaves, and debris. Use a stiff brush or compressed air to clear particles from wood grain and joint spaces. This initial cleaning prevents dirt from turning into mud during wet cleaning phases.
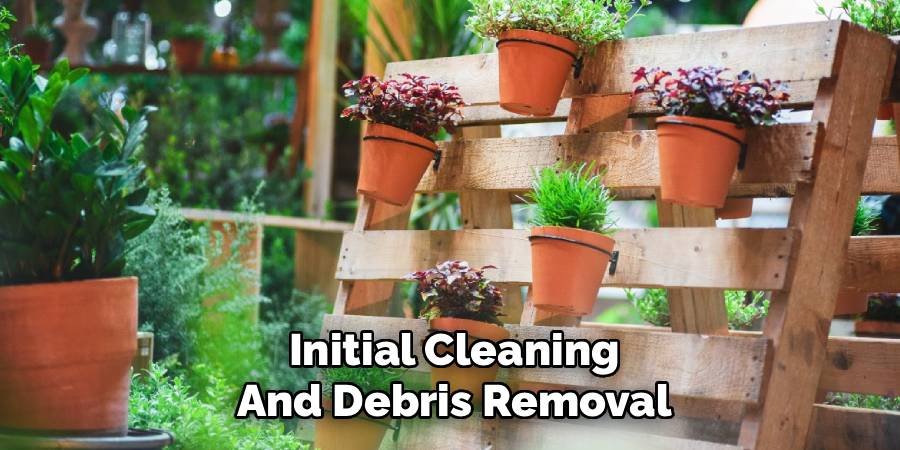
Remove any attached labels, tape residue, or plastic wrapping materials. Scrape away stubborn adhesive with a putty knife, being careful not to gouge the wood surface. This preparation ensures cleaning solutions can penetrate effectively.
Step 5: Deep Clean with Soap Solution
Mix warm water with biodegradable dish soap or wood cleaner in a bucket. Scrub all surfaces using a stiff brush, paying extra attention to stained or discolored areas. Work the cleaning solution into the wood grain to lift embedded dirt and contaminants.
Rinse thoroughly with clean water to remove soap residue. Allow the pallet to drain completely before proceeding to the next step. Proper cleaning removes surface contaminants and prepares the wood to accept protective treatments effectively.
Step 6: Disinfect with Vinegar Solution
Create a natural disinfecting solution using equal parts white vinegar and water. Spray or wipe this mixture onto all pallet surfaces, including joints and hard-to-reach areas. The acidic vinegar kills bacteria, mold spores, and many harmful microorganisms.
Let the vinegar solution sit for 10-15 minutes before wiping away excess moisture. This contact time ensures thorough disinfection without leaving harmful chemical residues. Vinegar also helps neutralize odors that might attract pests to your garden.
Step 7: Allow Complete Drying
Position the pallet in a well-ventilated area away from direct ground contact. Elevate it on blocks or sawhorses to promote air circulation around all surfaces. Complete drying typically takes 24-48 hours depending on humidity and temperature conditions.
Check moisture levels by touching different areas of the wood. Any dampness remaining could trap moisture and promote decay once the pallet is sealed. Patience during this step prevents future problems with rot or mold growth.
Step 8: Sand Smooth Surfaces
Use medium-grit sandpaper to smooth rough areas and remove weathered surface layers. Focus on areas that will contact soil or plants directly. Sanding also opens wood pores slightly, allowing better penetration of protective finishes.
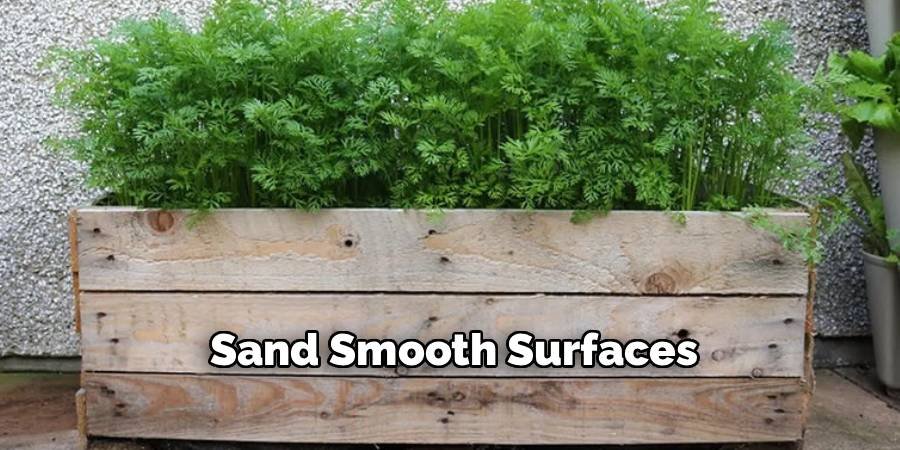
Clean away all sanding dust with a tack cloth or compressed air. Dust particles can interfere with finish adhesion and create an uneven appearance. Proper sanding creates uniform surfaces that accept stains and sealers evenly.
Step 9: Apply Food-Safe Wood Finish
Choose finishes specifically labeled as food-safe or plant-safe for garden applications. Linseed oil, beeswax, or specialized plant-based wood conditioners work well for this purpose. Apply thin, even coats using a brush or clean cloth.
Allow each coat to penetrate and cure according to manufacturer instructions. Multiple thin coats provide better protection than single heavy applications. Focus extra attention on end grain and joint areas where moisture typically penetrates first.
Step 10: Final Assembly and Curing
If you disassembled the pallet, reassemble it using galvanized or stainless steel fasteners that resist corrosion. Check that all joints fit tightly and no sharp edges remain exposed. Ensure the structure remains square and stable for garden use.
Allow the completed pallet to cure in a dry location for the time specified by your finish manufacturer. This curing period lets protective coatings reach full effectiveness before exposure to soil moisture and weather conditions.
Maintaining Your Treated Pallets
Regular maintenance extends your treated pallets’ garden lifespan significantly. Inspect them monthly for signs of wear, loose fasteners, or finish deterioration. Address small problems immediately before they become major repairs.
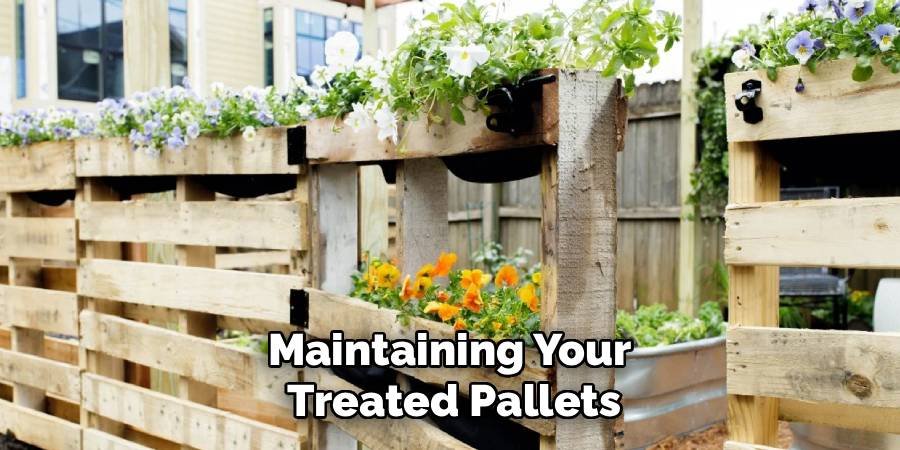
Reapply protective finishes annually or when wood begins looking dry or weathered. Clean pallets gently with mild soap solutions, avoiding harsh chemicals that might contaminate your soil.
Store unused pallets off the ground in covered areas when possible. Even treated wood benefits from protection against constant moisture exposure.
Common Mistakes to Avoid
Never skip the identification step when selecting pallets. Using chemically treated wood can contaminate your entire garden for years. Always verify pallet history and markings before beginning treatment.
Rushing the drying process leads to trapped moisture and premature decay. Sealed-in dampness creates perfect conditions for rot and pest problems that could damage your garden structures.
Using inappropriate finishes designed for indoor furniture rather than outdoor garden applications often results in coating failure and wood damage within months.
FAQ Frequently Asked Questions
What Types of Pallets Are Safe for Garden Use?
Heat-treated pallets marked “HT” are safest for gardens. Avoid chemically fumigated pallets marked “MB” or those with unknown treatment history, oil stains, or strong chemical odors.
How Often Should I Retreat Pallets Used in Gardens?
Reapply protective finishes annually or when wood appears dry and weathered. Regular maintenance prevents moisture damage and extends pallet lifespan significantly in outdoor garden conditions.
Can I Skip the Disinfection Step if Pallets Look Clean?
No, visible cleanliness doesn’t eliminate harmful bacteria, mold spores, or pest eggs embedded in wood grain. Proper disinfection ensures your garden remains healthy and contamination-free.
What’s the Best Finish for Garden Pallet Projects?
Food-safe options like linseed oil, beeswax, or plant-based wood conditioners work best. Avoid petroleum-based stains or finishes that could leach harmful chemicals into garden soil.
How Long Do Properly Treated Pallets Last in Gardens?
Well-treated pallets typically last 5-8 years in garden environments with proper maintenance. Regular inspections, cleaning, and finish renewal can extend this lifespan considerably for most projects.
Conclusion
Learning how to treat pallets for garden use properly transforms free shipping materials into valuable garden assets. The investment in time and materials pays dividends through years of safe, functional garden structures.
Your systematic approach to identification, cleaning, and treatment ensures both plant safety and structural longevity. Proper preparation prevents contamination while creating durable garden features that withstand weather and moisture.
Remember that patience during each treatment step produces far better results than rushing through the process. Quality preparation work protects your garden investment and provides peace of mind knowing your growing environment remains safe.
Regular maintenance keeps treated pallets performing optimally throughout their garden lifespan. Monitor condition changes and address issues promptly to maximize your investment.
Your garden (and plants!) will thank you for taking the time to properly prepare these versatile materials. Safe, well-treated pallets provide endless possibilities for creative, budget-friendly garden projects that serve your growing needs for years to come.
About Ravuk Barg
B.Sc. Horticulture Science | Certified Master Gardener
Ravuk Barg has spent more than a decade with his hands in the soil and his head full of questions about why some gardens thrive while others struggle. What started as a single raised bed of tomatoes and basil in a modest backyard has grown into a deep, working knowledge of everything from seed germination and soil amendment to companion planting and seasonal pruning.
Over the years, Ravuk has gardened through drought summers, waterlogged springs, and pest invasions that would make most gardeners hang up their trowels for good. Those hard seasons, he’ll tell you, taught him more than any perfect growing year ever could. He writes from that earned experience—covering vegetable growing, ornamental planting, houseplant care, composting, and garden design with equal confidence and curiosity.
Philosophy & Approach
Ravuk’s approach to gardening is rooted in practicality. He favors organic methods not out of dogma, but because they work long-term—resulting in healthier soil, fewer inputs, and stronger plants. He has a particular fondness for heirloom vegetable varieties (the kind with proper flavor), unruly cottage-style flower beds, and the stubborn houseplants that everyone else gave up on.
The Mission: Give readers the honest, experience-backed advice that helps them actually succeed in their gardens—not just the ideal version, but the real one; weeds, failures, and all.
Education & Credentials
-
B.Sc. in Horticulture Science
-
Greenfield Agricultural University
-
Focus: Plant Physiology, Soil Ecology, and Sustainable Crop Production
-
-
Master Gardener Certification
-
Cooperative Extension Service
-
Focus: 200+ hours of hands-on practical training and community garden work
-
Continuing Education
-
Organic Pest Management
-
Native Plant Landscaping
-
Sustainable Crop Production