

Do you love indoor plants but worry about watering them too much? Many plant lovers face the same problem. When soil stays too wet for too long, it can hurt your plants badly. Learning how to dry out soil indoor plants is very important for keeping them healthy and happy.
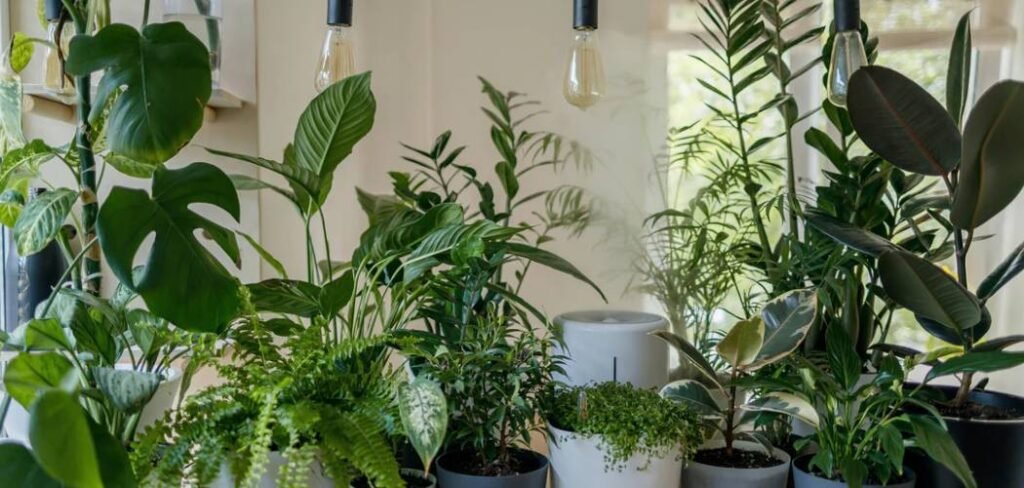
Wet soil can cause many problems for your indoor plants. The roots might start to rot, which means they get sick and can’t help the plant grow. Your plant might get yellow leaves, smell bad, or even die if the soil stays too wet. In this guide, you will learn everything about drying out wet plant soil. We will show you 10 easy steps that work every time. You will also learn how to spot wet soil problems early and fix them fast.
Why Do Indoor Plant Soils Get Too Wet?
Before we learn how to dry out soil indoor plants, let’s understand why this happens. There are several reasons why your plant soil might be too wet:
Too Much Watering: This is the most common reason. Many people think plants need water every day, but this is not true. Most indoor plants need water only when the soil feels dry.
Poor Drainage: If your plant pot doesn’t have holes at the bottom, water can’t escape. This makes the soil stay wet for a long time.
Heavy Soil Mix: Some soils hold too much water. Clay-heavy soils or soils without enough drainage materials can stay wet for weeks.
Cold Weather: During winter, plants grow slower and use less water. The same amount of water that was perfect in summer might be too much in winter.
Big Pots: If your plant is in a pot that’s too big, there’s too much soil around the roots. This extra soil holds water that the plant can’t use.
Signs Your Indoor Plant Soil Is Too Wet
Knowing how to spot wet soil problems early helps you fix them faster. Here are the main signs to watch for:
Musty Smell: Wet soil that stays wet too long starts to smell bad. It might smell like old socks or rotten eggs.
Yellow Leaves: When roots can’t breathe in wet soil, leaves turn yellow and fall off.
Mold Growth: You might see white, green, or black fuzzy stuff growing on the soil surface.
Soft, Brown Roots: Healthy roots are white and firm. Sick roots from wet soil are brown, black, and mushy.
Gnats and Bugs: Wet soil attracts small flies and other bugs that love moisture.
Slow Growth: Plants in wet soil grow very slowly or stop growing completely.
10 Step by Step How to Dry Out Soil Indoor Plants
Now let’s learn the main steps for how to dry out soil indoor plants. Follow these steps in order for the best results:
Step 1: Stop Watering Immediately
The first thing to do is stop giving your plant any more water. This might seem obvious, but many people keep watering even when they know the soil is too wet. Put away your watering can and don’t water again until the soil is much drier.
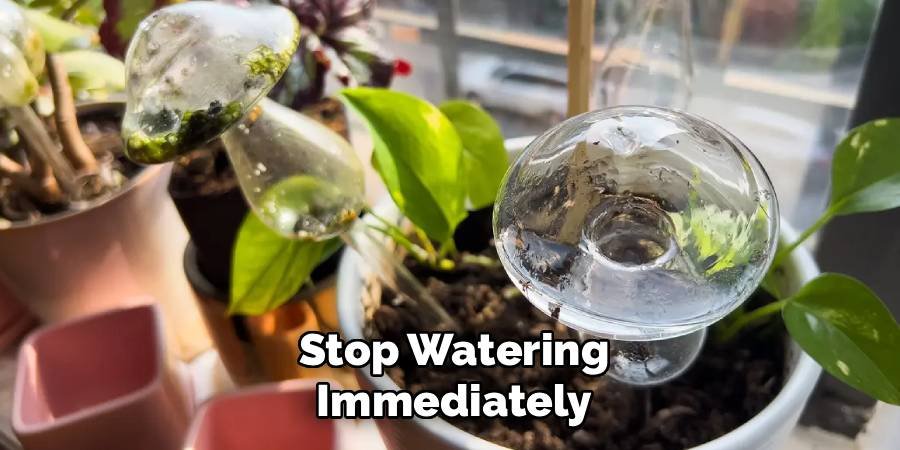
Check the soil every day by putting your finger about 2 inches deep into it. If it feels wet or even slightly damp, wait longer before watering. Most indoor plants can go without water for a week or two without any problems.
Step 2: Remove Your Plant from the Wet Soil
Carefully take your plant out of its pot. Be gentle with the roots, but don’t worry if some soil falls off. Look at the roots closely. Healthy roots should be white or light brown and feel firm when you touch them.
If you see any black, brown, or mushy roots, these are sick and need to be cut off. Use clean scissors or pruning shears to cut away all the bad roots. This helps prevent the rot from spreading to healthy parts.
Step 3: Clean and Inspect the Roots
Gently wash the roots with cool water to remove all the old, wet soil. This lets you see the roots better and removes any harmful bacteria or fungus that might be growing in the wet soil.
Look for signs of root rot like dark colors, soft spots, or bad smells. Cut away any roots that don’t look healthy. It’s better to remove too much than to leave sick roots that will make the plant worse.
Step 4: Let the Roots Air Dry
After cleaning the roots, let them dry in the air for a few hours. Put the plant in a warm, dry place with good air flow. This helps kill any remaining harmful bacteria and lets the cut root ends heal.
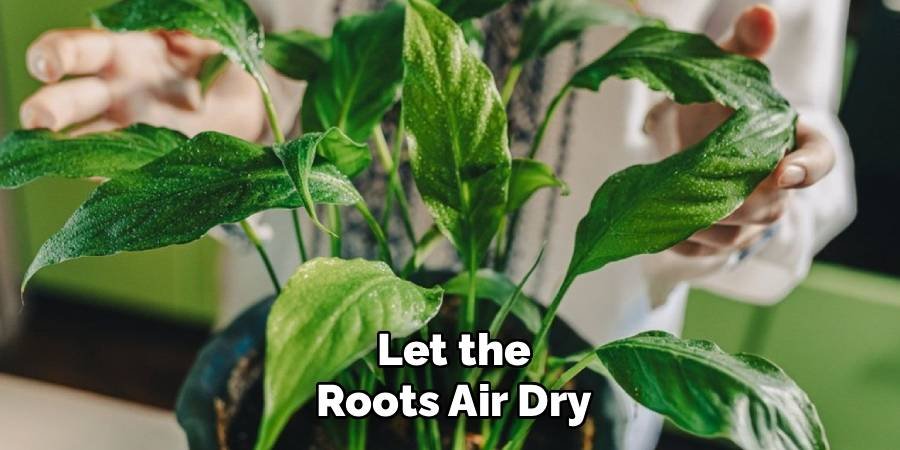
Don’t leave the roots to dry for more than 6-8 hours, as this can stress the plant too much. Just a few hours is enough to help the roots get ready for fresh soil.
Step 5: Prepare Fresh, Well-Draining Soil
While the roots are drying, get new soil ready. Don’t reuse the old wet soil, as it might still have harmful bacteria or fungus. Choose a soil mix that drains well and doesn’t hold too much water.
Good soil for most indoor plants should have ingredients like perlite, vermiculite, or bark chips that help water drain out quickly. You can buy ready-made potting soil or make your own by mixing regular potting soil with these drainage materials.
Step 6: Check and Improve Pot Drainage
Make sure your plant pot has holes in the bottom for water to escape. If your pot doesn’t have holes, you need to make some or get a new pot. Use a drill or hammer and nail to make holes if needed.
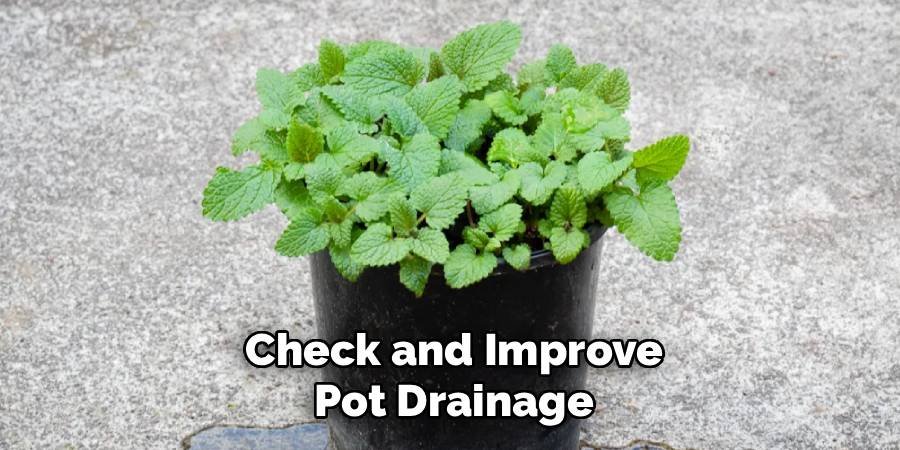
Put a layer of small stones, broken pottery pieces, or drainage balls at the bottom of the pot. This helps water flow out more easily and prevents soil from blocking the drainage holes.
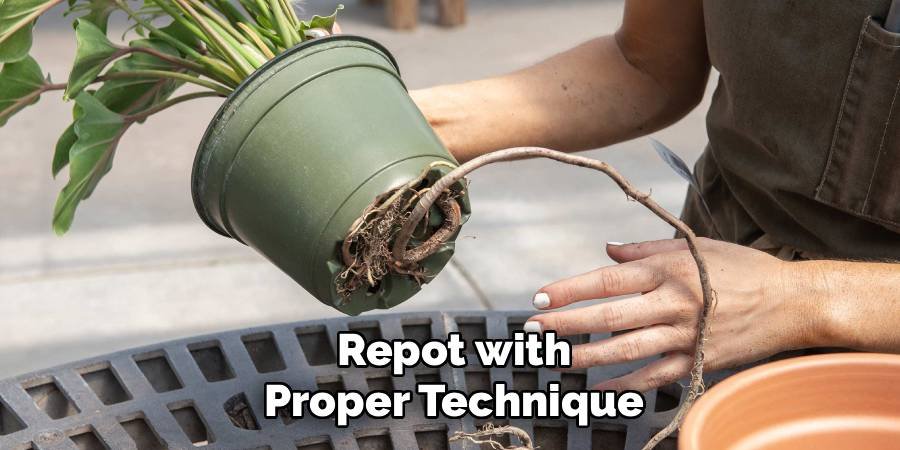
Step 7: Repot with Proper Technique
When you put the plant back in its pot, don’t pack the soil too tightly. Loose soil lets air and water move through it better. Fill the pot about halfway with new soil, place the plant in the center, then add more soil around it. Leave about an inch of space at the top of the pot so water doesn’t overflow when you water. Gently tap the pot to settle the soil, but don’t press it down hard.
Step 8: Place in a Warm, Airy Location
Put your repotted plant in a warm place with good air circulation. This helps the new soil dry out at the right speed. Avoid putting it in direct sunlight right away, as this can stress the plant while it’s recovering. A spot near a window with bright, indirect light is perfect. If you have a fan, you can run it nearby to improve air flow, but don’t point it directly at the plant.
Step 9: Monitor Soil Moisture Daily
For the next few weeks, check the soil moisture every day. Stick your finger about 2 inches into the soil to feel how wet or dry it is. The top inch should be dry before you think about watering again.
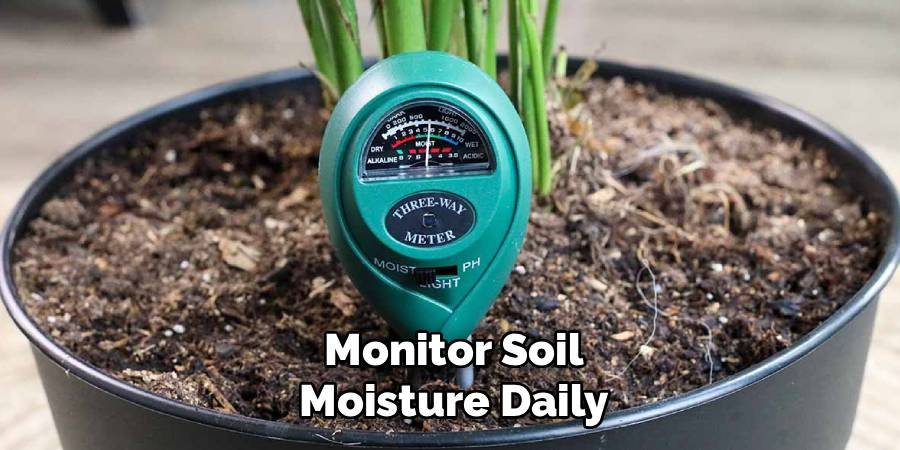
Different plants need different amounts of water, so learn what your specific plant likes. Most common houseplants like the soil to dry out a bit between waterings.
Step 10: Adjust Your Watering Schedule
Once you know how to dry out soil indoor plants, create a new watering schedule based on what you learned. Instead of watering on certain days, water only when the plant actually needs it. Keep a simple journal or calendar to track when you water each plant. This helps you see patterns and avoid overwatering in the future.
Additional Tips for Preventing Wet Soil Problems
Use the Right Pot Size: Choose pots that are only slightly bigger than your plant’s root system. Too much extra soil holds water the plant can’t use.
Improve Air Circulation: Use fans or open windows to keep air moving around your plants. Good air flow helps soil dry out naturally.
Choose the Right Soil: Different plants need different types of soil. Succulents need very fast-draining soil, while ferns like soil that holds a bit more moisture.
Water in the Morning: Watering early in the day gives plants time to use the water and lets excess moisture evaporate before evening.

Use a Moisture Meter: These simple tools tell you exactly how wet your soil is without guessing.
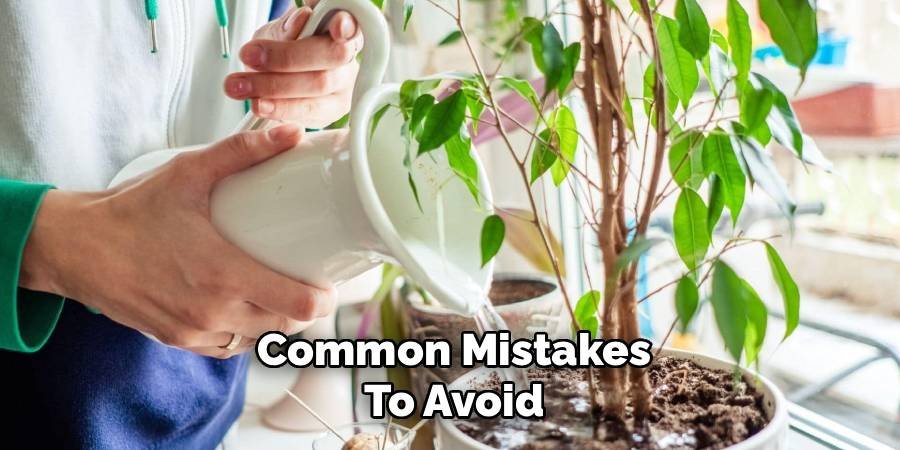
Common Mistakes to Avoid
When learning how to dry out soil indoor plants, many people make these mistakes:
Adding More Drainage Materials to Wet Soil: This doesn’t work and can make the problem worse. You need to start fresh with new soil.
Using Heat to Dry Soil Faster: Hot air or heaters can shock your plant and damage the roots. Let the soil dry naturally.
Watering Too Soon: Be patient and wait for the soil to dry properly before watering again.
Ignoring the Root System: Always check and clean the roots when dealing with wet soil problems.
FAQs
1. How long does it take to dry out wet indoor plant soil?
It usually takes 1-2 weeks for wet indoor plant soil to dry out completely, depending on the type of soil, pot size, and room conditions. Clay-heavy soils take longer to dry than sandy soils. You can speed up the process by improving air circulation and moving the plant to a warmer location.
2. Can I use a hair dryer to dry out wet plant soil faster?
No, you should never use a hair dryer or other heat sources to dry plant soil. The hot air can damage the roots and leaves of your plant. It’s better to let the soil dry naturally with good air circulation and proper drainage.
3. Should I repot my plant every time the soil gets too wet?
You don’t always need to repot when soil gets wet, but you should repot if you see signs of root rot, mold growth, or if the soil stays wet for more than 2 weeks. For minor wet soil issues, just stop watering and improve drainage.
4. What’s the best soil mix to prevent wet soil problems?
The best soil mix for most indoor plants contains perlite, vermiculite, or bark chips for drainage. A good recipe is 60% regular potting soil, 20% perlite, and 20% bark chips. Succulents need even more drainage materials.
5. How do I know if my plant has recovered from wet soil damage?
Signs of recovery include new growth, firm white roots, and leaves that return to their normal color. This process can take 4-8 weeks depending on the plant type and how damaged it was. Be patient and keep monitoring the soil moisture.
Conclusion
Learning how to dry out soil indoor plants is one of the most important skills for any plant parent. Wet soil problems can kill your plants quickly, but with the right knowledge, you can fix these issues and prevent them from happening again.
Remember the key steps: stop watering immediately, remove the plant from wet soil, clean and dry the roots, use fresh well-draining soil, and monitor moisture levels carefully. Prevention is always better than treatment, so focus on proper watering techniques and good drainage.
The 10-step method we shared works for most indoor plants, but always research your specific plant’s needs. Some plants like more moisture than others, and understanding these differences will help you become a better plant parent.
With practice and patience, you’ll develop the skills to keep your indoor plants healthy and thriving. Your plants will reward you with beautiful growth and vibrant colors when their soil moisture is just right. Start applying these techniques today, and watch your indoor garden flourish!
About Ravuk Barg
B.Sc. Horticulture Science | Certified Master Gardener
Ravuk Barg has spent more than a decade with his hands in the soil and his head full of questions about why some gardens thrive while others struggle. What started as a single raised bed of tomatoes and basil in a modest backyard has grown into a deep, working knowledge of everything from seed germination and soil amendment to companion planting and seasonal pruning.
Over the years, Ravuk has gardened through drought summers, waterlogged springs, and pest invasions that would make most gardeners hang up their trowels for good. Those hard seasons, he’ll tell you, taught him more than any perfect growing year ever could. He writes from that earned experience—covering vegetable growing, ornamental planting, houseplant care, composting, and garden design with equal confidence and curiosity.
Philosophy & Approach
Ravuk’s approach to gardening is rooted in practicality. He favors organic methods not out of dogma, but because they work long-term—resulting in healthier soil, fewer inputs, and stronger plants. He has a particular fondness for heirloom vegetable varieties (the kind with proper flavor), unruly cottage-style flower beds, and the stubborn houseplants that everyone else gave up on.
The Mission: Give readers the honest, experience-backed advice that helps them actually succeed in their gardens—not just the ideal version, but the real one; weeds, failures, and all.
Education & Credentials
-
B.Sc. in Horticulture Science
-
Greenfield Agricultural University
-
Focus: Plant Physiology, Soil Ecology, and Sustainable Crop Production
-
-
Master Gardener Certification
-
Cooperative Extension Service
-
Focus: 200+ hours of hands-on practical training and community garden work
-
Continuing Education
-
Organic Pest Management
-
Native Plant Landscaping
-
Sustainable Crop Production