

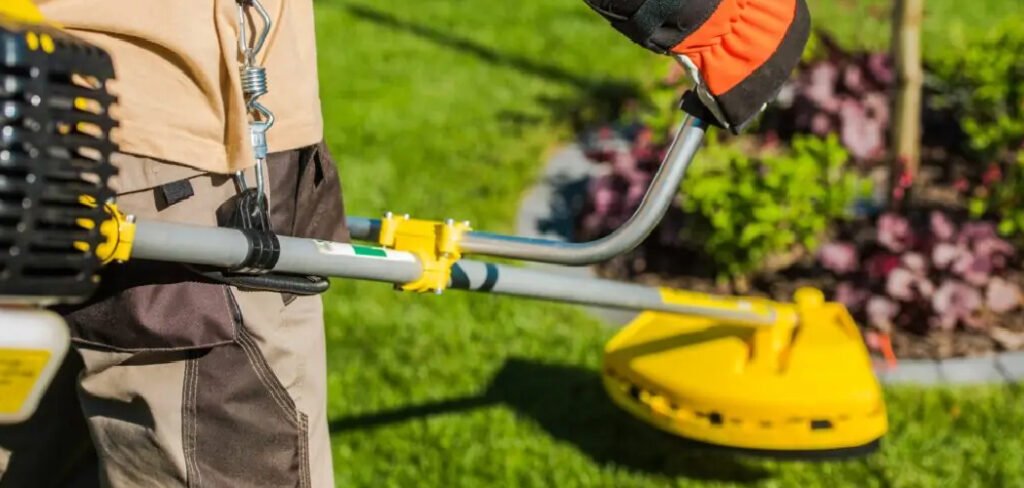
A weed eater, also known as a string trimmer, is a valuable tool for keeping your lawn edges and hard-to-reach areas looking sharp. Over time, the trimmer head can wear out, get damaged, or you might want to upgrade it. Learning how to take a weed eater head off is a fundamental maintenance skill that can save you a trip to the repair shop and extend the life of your equipment.
This guide is designed for beginners and will walk you through the entire process, making it simple and stress-free. With a few basic tools and a little patience, you can tackle this task confidently and get your weed eater back in top condition.
Why Replacing Your Trimmer Head is Essential
Maintaining your weed eater’s head is crucial for both performance and safety. A worn-out head can cause excessive vibration, poor cutting efficiency, and frequent line breakage, turning a quick yard task into a frustrating ordeal. A damaged head might not hold the trimmer line securely, which could lead to parts flying off during operation. By regularly inspecting and replacing the head when needed, you ensure your tool operates at its best. This simple maintenance task not only improves your landscaping results but also promotes safer operation, giving you peace of mind while you work on making your yard look its best.
7 Step-by-Step Guide on How to Take a Weed Eater Head Off
Step 1: Gather Your Tools and Prioritize Safety
Before you begin, safety is your top priority. Make sure your weed eater is turned off. If it’s a gas model, disconnect the spark plug wire to prevent any chance of the engine accidentally starting. For electric or battery-powered models, unplug it from the power source or remove the battery pack.
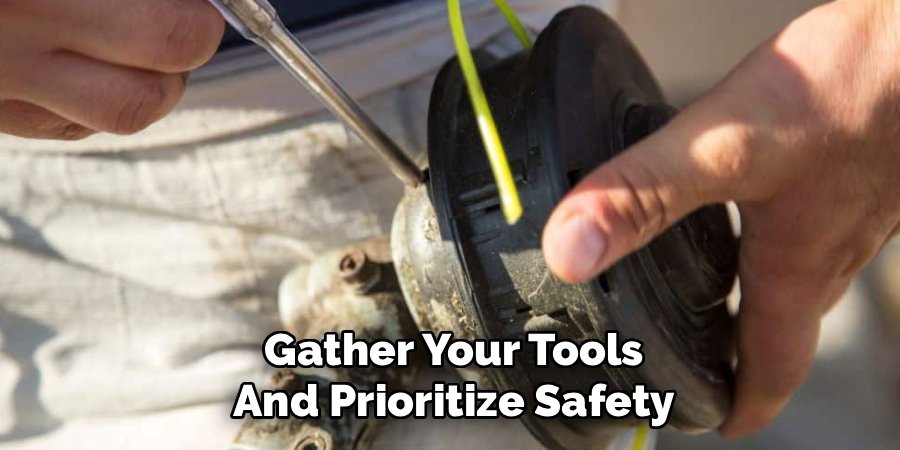
This step is non-negotiable. Next, gather the necessary tools. You will typically need a pair of work gloves to protect your hands, a screwdriver or a specialized locking pin that came with your trimmer, and potentially a wrench or pliers, depending on your model. Having everything ready makes the job smoother.
Step 2: Clean the Trimmer Head Area
The area around the trimmer head can accumulate a lot of grass, dirt, and other debris. Before you attempt to remove anything, it’s a good idea to clean this area thoroughly. Use a stiff brush or a cloth to wipe away any caked-on grime from the head and the gearbox it attaches to. A clean workspace not only makes it easier to see what you’re doing but also prevents dirt from falling into the internal components of the gearbox once the head is removed. This simple cleaning step can prevent future mechanical issues and makes the entire removal process much more pleasant.
Step 3: Locate and Align the Locking Hole
To unscrew the trimmer head, you must first stop the drive shaft from spinning. Most weed eaters have a built-in mechanism for this. Examine the area just above the trimmer head on the gearbox housing. You should find a small hole or slot. Now, slowly rotate the trimmer head by hand until you see another hole on the inner part of the head assembly line up with the hole on the outer housing. This alignment is key to locking the shaft in place. Some models may have a slot instead of a hole, but the principle of alignment remains the same.
Step 4: Insert the Locking Pin or Screwdriver
Once the holes are aligned, you can lock the shaft. Take your thin screwdriver or the manufacturer-provided locking pin and insert it firmly into the aligned holes. This pin goes through the gearbox housing and into the hub, effectively preventing the entire head assembly from rotating. You should feel it slide into place and stop.
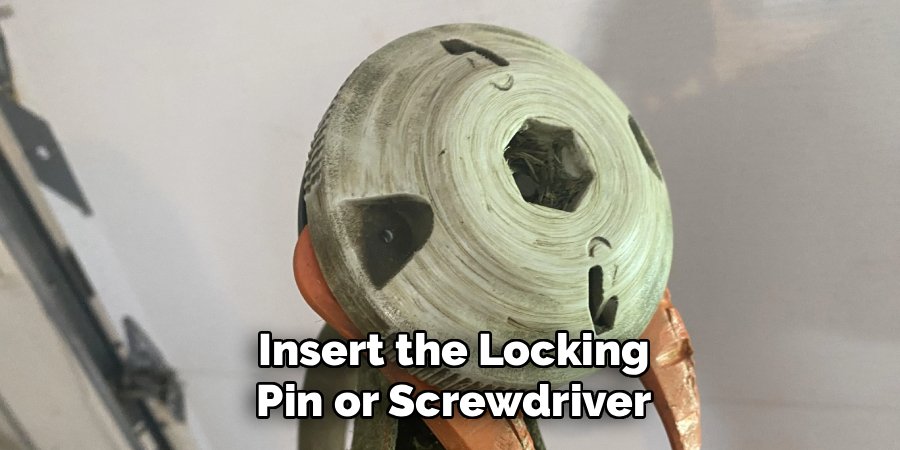
This lock is what provides the resistance you need to unscrew the head. Without this step, trying to turn the head would just spin the shaft, and you wouldn’t be able to loosen it. Make sure the tool is seated securely before moving on.
Step 5: Determine the Threading Direction
Here’s a crucial piece of information: most weed eater heads use reverse threading. This means that to loosen them, you will likely need to turn the head clockwise, which is the opposite of the standard “righty-tighty, lefty-loosey” rule. This reverse-thread design prevents the head from unscrewing itself due to the centrifugal force generated during normal operation. Check your owner’s manual if you’re unsure, as a few models might use standard threading. However, clockwise is the most common direction for removal. Knowing this will save you a lot of effort and frustration.
Step 6: How to Take a Weed Eater Head Off by Unscrewing It
With the shaft locked and your gloves on for a good grip, you can now unscrew the head. Grasp the trimmer head firmly with one hand while ensuring the locking pin stays in place with the other. Apply steady pressure and turn the head clockwise (or counter-clockwise if it’s a standard thread). It might be tight, especially if it’s the first time it’s being removed. If it’s stuck, you can use a pair of channel-lock pliers or a strap wrench for extra leverage. Apply the force carefully to avoid damaging the plastic housing of the head.
Step 7: Remove the Head and Any Remaining Parts
Once you have successfully unscrewed the trimmer head, it will come completely off the threaded drive shaft. Set it aside. Inspect the shaft and the surrounding area. Sometimes, there are additional components like washers, spacers, or adapter nuts that were underneath the head.
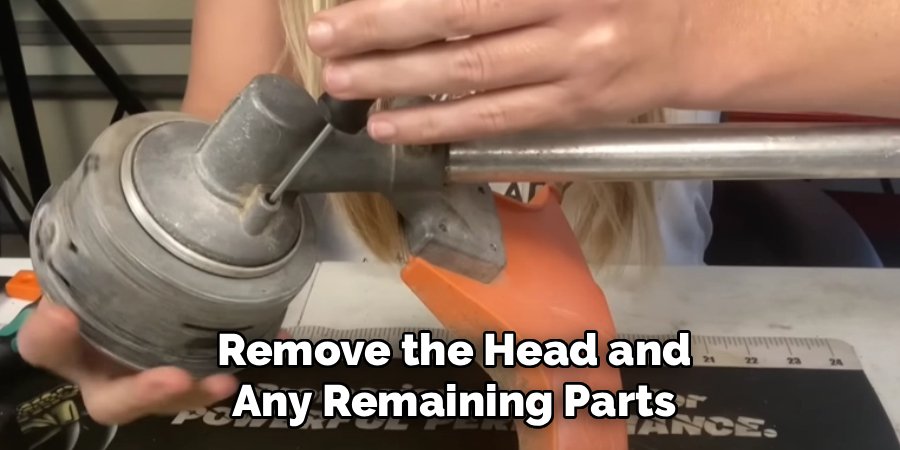
Make sure to remove these as well, and take note of their order and orientation. It’s a good idea to lay them out in the order you removed them, which will be incredibly helpful when you are ready to install the new trimmer head. A clean, clear shaft is what you need for a proper installation.
Frequently Asked Questions (FAQ)
What Tools Do I Need to Remove a Trimmer Head?
To remove a trimmer head, you will typically need a few basic tools. The most important is a thin screwdriver or a specific locking pin (often included with the trimmer) to immobilize the shaft. You will also want a pair of sturdy work gloves for a better grip and hand protection. In some cases where the head is very tight, a pair of channel-lock pliers or an adjustable wrench may be necessary to provide extra leverage for turning the head.
Why Is My Weed Eater Head So Hard to Get Off?
If your trimmer head is stuck, it’s usually due to dirt and grime building up in the threads or simply from being overtightened. The reverse threading can also confuse people, leading them to tighten it when they mean to loosen it. Try applying a penetrating oil like WD-40 to the threaded area and let it sit for about 10-15 minutes. This can help break down rust and debris, making it easier to unscrew.
Do All Weed Eaters Have Reverse Threads on the Head?
The vast majority of weed eaters, especially gas-powered models, use reverse (left-hand) threads for the trimmer head. This is a safety and design feature that uses the motor’s operational rotation to keep the head tightened. However, some electric or battery-powered models might use standard (right-hand) threads. Always check your user manual to be certain. If you don’t have the manual, remember the rule: if it doesn’t loosen one way, try the other.
How Often Should I Replace My Weed Eater Head?
You should replace your trimmer head when you notice significant wear and tear, such as cracks in the housing, or if the bump-feed mechanism no longer works correctly. If the eyelets where the line exits are worn down, it can cause the line to fray and break frequently. There is no set timeline; replacement depends entirely on usage and the conditions you work in. A regular inspection before each use is the best practice.
Can I Put Any Brand of Trimmer Head on My Weed Eater?
Many manufacturers sell universal trimmer head kits that are designed to fit a wide variety of models from different brands. These kits usually come with a set of adapters (bolts and nuts) to match the various drive shaft threads found on different trimmers. While many are compatible, it is always best to check the universal kit’s packaging or product description to confirm it will fit your specific brand and model before purchasing.
Conclusion
You now have the knowledge and confidence to tackle this essential piece of yard equipment maintenance. By following the steps outlined—from prioritizing safety to cleaning the components and understanding the reverse threading—you can successfully complete the task. Knowing how to take a weed eater head off is an empowering skill that puts you in control of your tool’s performance and longevity. Regular maintenance ensures your trimmer is always ready for action, helping you keep your yard looking pristine with less effort and more satisfaction.
About Ravuk Barg
B.Sc. Horticulture Science | Certified Master Gardener
Ravuk Barg has spent more than a decade with his hands in the soil and his head full of questions about why some gardens thrive while others struggle. What started as a single raised bed of tomatoes and basil in a modest backyard has grown into a deep, working knowledge of everything from seed germination and soil amendment to companion planting and seasonal pruning.
Over the years, Ravuk has gardened through drought summers, waterlogged springs, and pest invasions that would make most gardeners hang up their trowels for good. Those hard seasons, he’ll tell you, taught him more than any perfect growing year ever could. He writes from that earned experience—covering vegetable growing, ornamental planting, houseplant care, composting, and garden design with equal confidence and curiosity.
Philosophy & Approach
Ravuk’s approach to gardening is rooted in practicality. He favors organic methods not out of dogma, but because they work long-term—resulting in healthier soil, fewer inputs, and stronger plants. He has a particular fondness for heirloom vegetable varieties (the kind with proper flavor), unruly cottage-style flower beds, and the stubborn houseplants that everyone else gave up on.
The Mission: Give readers the honest, experience-backed advice that helps them actually succeed in their gardens—not just the ideal version, but the real one; weeds, failures, and all.
Education & Credentials
-
B.Sc. in Horticulture Science
-
Greenfield Agricultural University
-
Focus: Plant Physiology, Soil Ecology, and Sustainable Crop Production
-
-
Master Gardener Certification
-
Cooperative Extension Service
-
Focus: 200+ hours of hands-on practical training and community garden work
-
Continuing Education
-
Organic Pest Management
-
Native Plant Landscaping
-
Sustainable Crop Production