

Compost soil is one of the most valuable assets for any gardener. After spending months creating nutrient-rich compost, knowing how to properly store compost soil becomes essential to maintaining its quality and effectiveness. Whether you make your own compost or purchase it from a garden center, proper storage ensures that your compost soil retains its nutrients and is ready to use throughout the growing season.
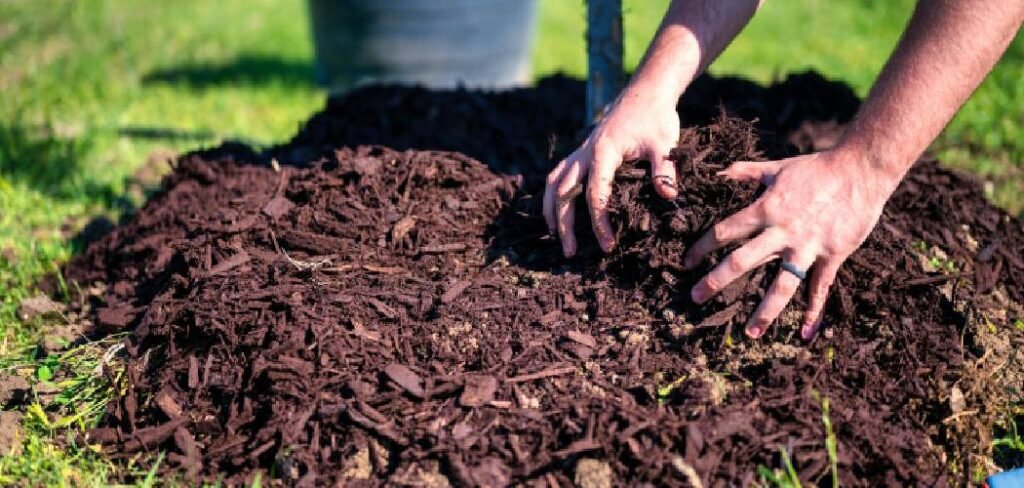
Understanding how to store compost soil correctly can save you money and guarantee that your plants receive the best possible growing medium. Poor storage can lead to nutrient loss, insect problems, and even the growth of harmful bacteria. This comprehensive guide will walk you through everything you need to know about effectively storing compost soil.
Understanding Compost Soil Storage Basics
Before discussing specific storage methods, it is important to understand how compost soil differs from regular soil. Compost soil contains living microorganisms that break down organic matter to create nutrients for plants. These beneficial bacteria and fungi need the right environment to thrive, which is why learning how to store compost soil properly is so important.
Storing compost soil requires paying attention to moisture levels, temperature, and air circulation. Unlike regular potting soil, compost soil is alive and active, meaning it needs to breathe while being protected from extreme weather conditions. The goal is to maintain the biological activity that makes compost so valuable and to prevent it from drying out or becoming waterlogged.
8 Step-by-Step Methods on How to Store Compost Soil
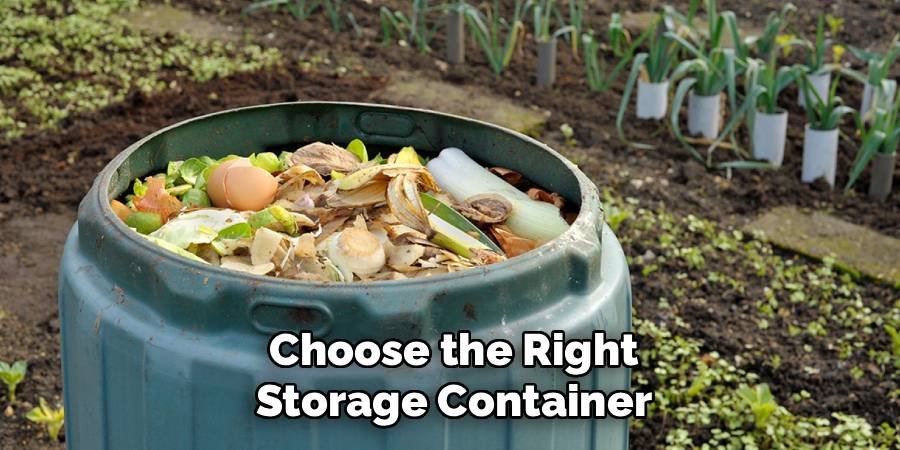
Step 1: Choose the Right Storage Container
The first important step in effectively storing compost soil is choosing the right container. The best containers for storing compost soil are breathable but secure. Plastic bins with drainage holes work well, as do wooden boxes covered with landscape fabric. Avoid completely sealed containers, as compost soil needs air circulation to maintain its beneficial microorganisms. Consider using a tarp to cover large piles of compost soil. Make sure the tarp protects the soil from rain and direct sunlight and allows some air circulation. The size of the container should match your storage needs; smaller containers are easier to handle but require more frequent refilling.
Step 2: Prepare Your Storage Location
Where you store your compost soil is as important as the container itself. Choose a location that is partially shaded and protected from strong winds. Direct sunlight can dry out compost soil quickly, while excessive shade can retain excess moisture in humid conditions.
Make sure your storage area has good drainage to prevent water from pooling around your container. Placing the container on a slightly elevated surface or pallet can help with drainage. The area should also be easily accessible when using compost soil in your garden.
Step 3: Check Moisture Content Before Storage
The right moisture content is crucial when learning how to store compost soil. The soil should feel like a wrung-out sponge – moist but not dripping wet. If your compost soil is too dry, sprinkle it lightly with water before storing. If it is too wet, mix in some dry materials such as shredded leaves or let it air dry for a day.
Testing the moisture content is easy: Take a handful of compost soil and squeeze it. It should hold together but break apart when poked. This moisture level helps maintain microbial activity and prevents anaerobic conditions that can create bad odors.
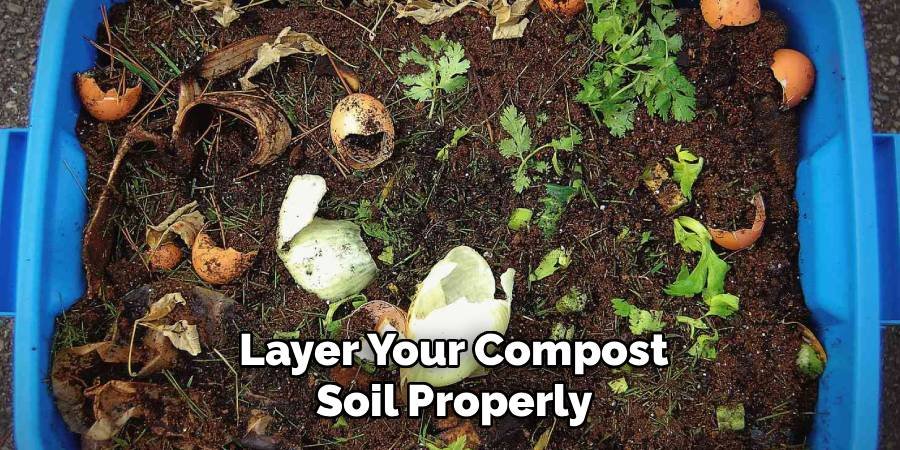
Step 4: Layer Your Compost Soil Properly
When storing large amounts of compost soil, layering can help maintain quality. Start with a layer of coarse material, such as wood chips, at the bottom for drainage. Add your compost soil in layers no more than 18 inches thick, with each layer having slightly different moisture levels if necessary. Between layers, you can add thin layers of carbon-rich material, such as dried leaves or shredded paper. This layering technique helps maintain proper air circulation throughout the stored compost soil and prevents compaction that can harm beneficial organisms.
Step 5: Maintain Proper Air Circulation
Air circulation is crucial for successful compost storage. If using a container, make sure there are adequate ventilation holes. For covered piles, leave gaps around the edges of the tarp or cover. The goal is to prevent anaerobic conditions and protect the soil from direct contact with the material.
If possible, consider turning or stirring the stored compost every month. This helps maintain air pockets and prevents the soil from compacting. Use a garden fork or shovel to gently mix the soil, being careful not to damage the container or storage area.
Step 6: Monitor Temperature Conditions
Temperature control plays an important role in compost soil storage. Extreme heat can kill beneficial microorganisms, while freezing temperatures can damage the soil structure. Ideal storage temperatures are between 40-80°F (4-27°C).
In hot climates, provide additional shade or insulation around the storage container. In colder climates, consider moving the container to a protected area such as a garage or shed during the winter months. Temperature monitoring helps ensure that your stored compost soil remains biologically active and ready to use.
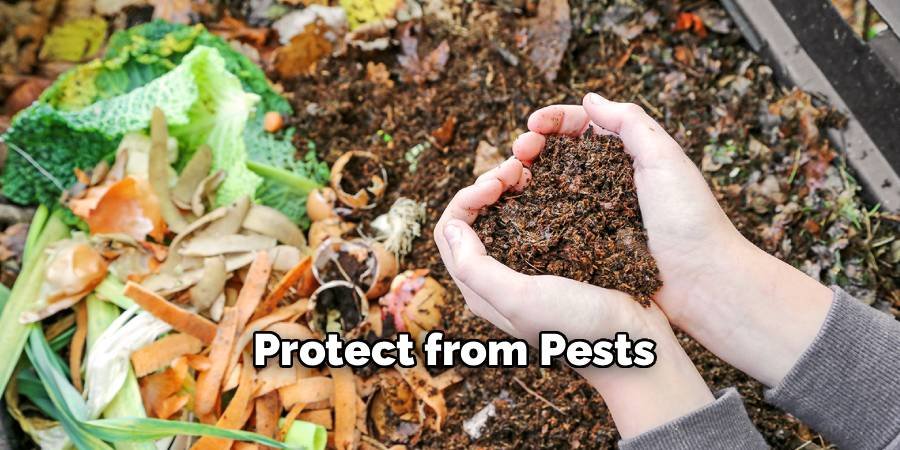
Step 7: Protect from Pests and Contamination
Proper pest management is crucial when storing compost soil. Use fine mesh or hardware cloth to cover open containers and prevent rodents from nesting in your stored soil. Keep the storage area clean and free of food scraps that could attract unwanted visitors. Regular inspections help catch pest problems early. Look for signs of rodent activity, insect infestations, or plant disease. If you notice any problems, address them immediately to prevent contamination of your entire compost soil supply.
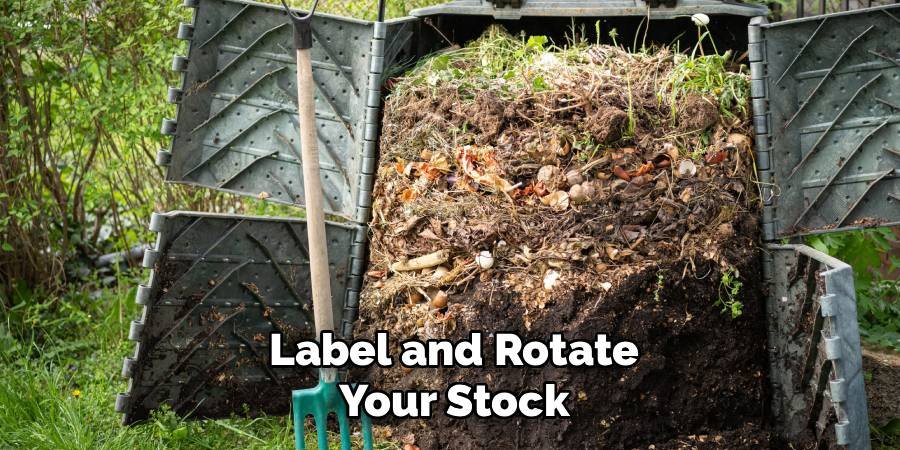
Step 8: Label and Rotate Your Stock
Systematic storage is important for successful compost soil storage. Label the container with the date of storage and the special characteristics of the soil. This helps you use up old stock first and track the age of your stored compost soil. Implement a “first in, first out” system to ensure you are always using the freshest compost soil possible. Most properly stored compost soil will last for 6-12 months, although quality may gradually decline over time.
Best Storage Containers and Materials
When considering how to store compost soil, the choice of container has a significant impact on success. Breathable fabric containers work well for short-term storage, allowing air circulation while protecting against pests. For long-term storage, wooden containers with slatted sides provide durability and proper ventilation. Plastic containers can work if they are properly ventilated and have drainage holes. Avoid metal containers in areas with high humidity, as they can rust and potentially contaminate your compost soil. Balancing protection and breathability is key to maintaining soil health.
Common Storage Mistakes to Avoid
Many gardeners make serious mistakes when learning to store compost soil. The most common mistake is to seal the compost soil in airtight containers, which kills the beneficial microorganisms. Another common mistake is to store wet compost soil, which leads to anaerobic conditions and an unpleasant odor. Storing compost soil in direct sunlight or in areas prone to flooding can also damage the quality of the soil. Neglecting to regularly monitor stored soil means that problems go unnoticed until it is too late to save the entire batch.
Seasonal Storage Considerations
Storing compost soil in different seasons requires a consistent approach. Spring storage emphasizes protecting the soil from heavy rainfall and temperature fluctuations. Summer storage emphasizes keeping the soil cool and preventing overdrying. Fall storage preparation includes ensuring adequate moisture before winter, while winter storage requires protection from freezing temperatures. Understanding seasonal needs helps maintain compost soil quality throughout the year.
Signs of Properly Stored Compost Soil
Well-stored compost soil retains its dark, rich color and earthy smell. It should feel crumbly but hold together when squeezed, indicating the correct moisture level. The presence of small beneficial insects and earthworms indicates healthy biological activity. Improperly stored compost soil may smell bad, take on an unusual color, or become too dry and dusty or too wet and slimy. Regular monitoring helps identify and correct storage problems before they become serious.
Frequently Asked Questions (FAQs)
Q1: How long can I store compost soil?
A1: Properly stored compost soil can last for 6-12 months while maintaining good quality. However, it is best to use stored compost soil within 6 months for optimal nutrient content and biological activity.
Q2: Can I store compost soil in plastic bags?
A2: While possible, plastic bags are not ideal for long-term compost soil storage because they do not provide adequate air circulation. If using plastic bags, poke holes for ventilation and use within a few weeks.
Q3: Should I store compost soil indoors or outdoors?
A3: Both options work depending on your climate and available space. Outdoor storage works best with proper protection from rain and direct sunlight. Indoor storage in a garage or shed provides better temperature control.
Q4: What’s the best moisture level for storing compost soil?
A4: Compost soil should feel like a wrung-out sponge when squeezed – moist enough to hold together but not dripping wet. This moisture level maintains beneficial microorganisms and prevents anaerobic conditions.
Q5: How do I know if my stored compost soil has gone bad?
A5: Bad compost soil may have a sour or rotten smell, be of unusual color (too pale or too dark), appear slimy when wet, or show signs of fungal growth. Fresh, healthy compost soil has an earthy smell and a rich, dark color.
Conclusion
Learning how to store compost soil properly is essential for maintaining the quality and effectiveness of this valuable gardening resource.Following the eight steps outlined in this guide – selecting a suitable container, preparing a storage location, monitoring humidity, properly leveling
Remember that compost soil is a living medium that requires attention and care during storage. Regular monitoring and maintenance of storage conditions will give you high-quality soil that will encourage healthy plant growth. Whether you are storing a small amount for a container garden or a larger amount for an extensive landscaping project, these proven methods will help you maximize the value of your compost soil investment.
With proper storage techniques, your compost soil will continue to provide nutrients and biological activity that make it an excellent growing medium, ensuring the success of your garden season after season.
About Ravuk Barg
B.Sc. Horticulture Science | Certified Master Gardener
Ravuk Barg has spent more than a decade with his hands in the soil and his head full of questions about why some gardens thrive while others struggle. What started as a single raised bed of tomatoes and basil in a modest backyard has grown into a deep, working knowledge of everything from seed germination and soil amendment to companion planting and seasonal pruning.
Over the years, Ravuk has gardened through drought summers, waterlogged springs, and pest invasions that would make most gardeners hang up their trowels for good. Those hard seasons, he’ll tell you, taught him more than any perfect growing year ever could. He writes from that earned experience—covering vegetable growing, ornamental planting, houseplant care, composting, and garden design with equal confidence and curiosity.
Philosophy & Approach
Ravuk’s approach to gardening is rooted in practicality. He favors organic methods not out of dogma, but because they work long-term—resulting in healthier soil, fewer inputs, and stronger plants. He has a particular fondness for heirloom vegetable varieties (the kind with proper flavor), unruly cottage-style flower beds, and the stubborn houseplants that everyone else gave up on.
The Mission: Give readers the honest, experience-backed advice that helps them actually succeed in their gardens—not just the ideal version, but the real one; weeds, failures, and all.
Education & Credentials
-
B.Sc. in Horticulture Science
-
Greenfield Agricultural University
-
Focus: Plant Physiology, Soil Ecology, and Sustainable Crop Production
-
-
Master Gardener Certification
-
Cooperative Extension Service
-
Focus: 200+ hours of hands-on practical training and community garden work
-
Continuing Education
-
Organic Pest Management
-
Native Plant Landscaping
-
Sustainable Crop Production