

Picture this: you’re ready to tackle your overgrown lawn, but you can’t find your mower key anywhere. Don’t panic! Learning how to start a riding lawn mower without a key is a valuable skill that can save your weekend plans.
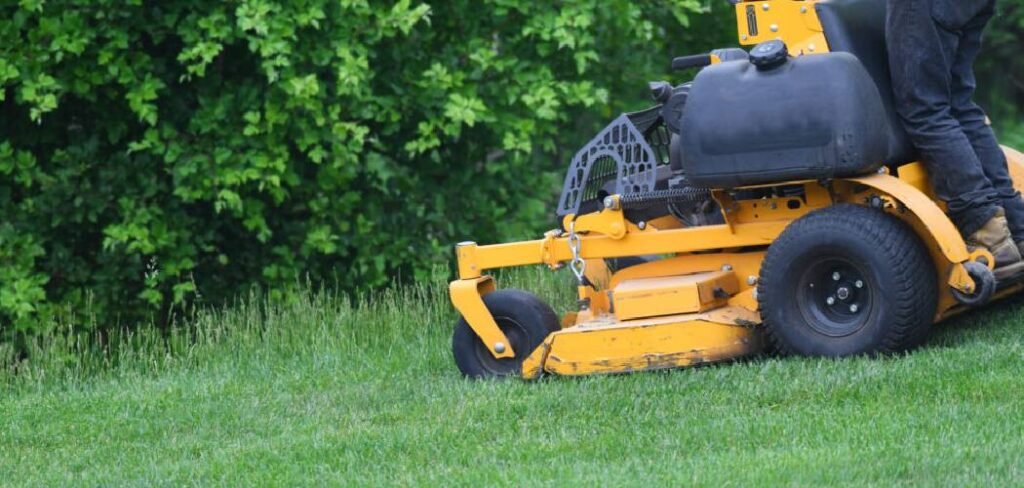
Whether you’ve lost your key, it’s broken, or you’re dealing with an emergency situation, there are several safe and effective methods to get your mower running. These techniques work on most riding mower models, from zero-turn mowers to garden tractors.
Before we dive into the solutions, it’s important to note that these methods should only be used on mowers you own. Never attempt to start someone else’s equipment without permission. Safety should always be your top priority when working with lawn mower engines and electrical systems.
Why You Need to Start Without a Key
Several common scenarios might require starting your riding mower without the original key. Lost keys are the most frequent issue, especially when multiple family members use the equipment. Keys can also break off in the ignition switch, leaving you unable to turn the mechanism. Sometimes the ignition switch itself fails, preventing normal starting procedures even with a working key.
Emergency situations, such as preparing for severe weather or helping neighbors, might also necessitate quick mower access when keys aren’t readily available.
10-Step Methods Guide on How to Start a Riding Lawn Mower Without a Key
Step 1: Locate the Ignition Switch
Begin by finding your mower’s ignition switch, typically positioned on the dashboard or steering column. Most riding mowers have a cylindrical switch with several wire connections behind it. This switch controls the electrical flow to your engine’s starting system.
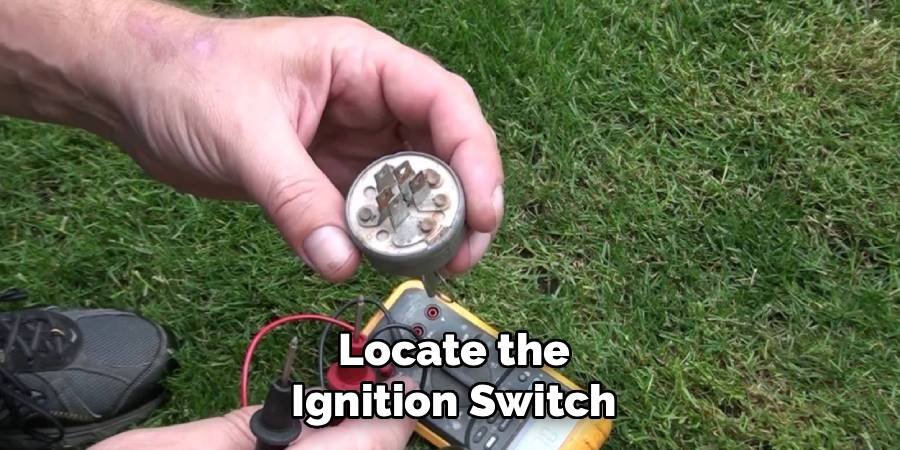
Examine the switch carefully to identify the wire configuration. You’ll usually see three to four wires connected to different terminals. The red wire typically carries power from the battery, while other colored wires control various functions like lights and safety switches. Take note of these connections before proceeding with any modifications.
Understanding your specific mower model’s wiring layout will make the process smoother. Consult your owner’s manual if available, as different manufacturers may use varying color codes and terminal arrangements.
Step 2: Gather Your Tools
Collect the necessary tools before starting the process. You’ll need a flathead screwdriver, wire strippers or pliers, and potentially electrical tape for temporary connections. A multimeter can help test electrical continuity if you’re comfortable using one.
Safety equipment is equally important. Wear safety glasses to protect your eyes from potential sparks or debris. Work gloves will protect your hands when handling wires and metal components. Ensure you have adequate lighting to see wire colors and connections clearly.
Keep a fire extinguisher nearby as a precaution when working with electrical systems. Though rare, electrical shorts can create sparks that might ignite fuel vapors or dry grass around your mower.
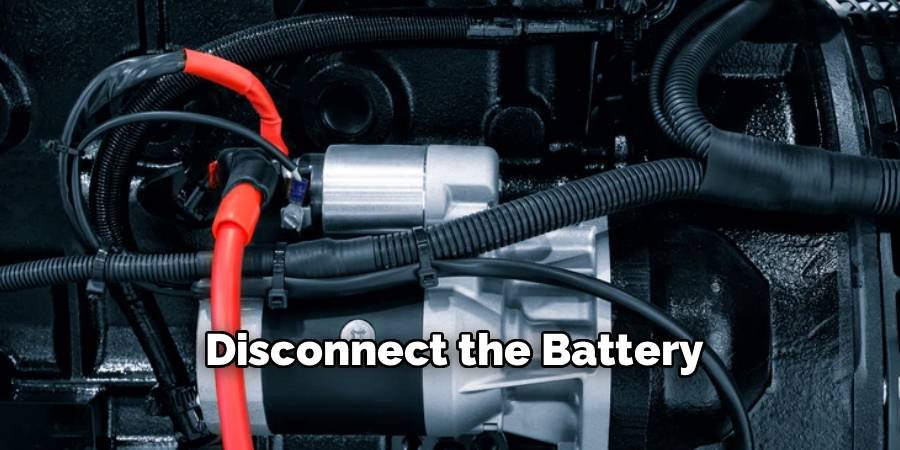
Step 3: Disconnect the Battery
Safety first! Disconnect the negative battery cable to prevent electrical shock or accidental starting while you’re working on the ignition system. This step eliminates the risk of short circuits that could damage your mower’s electrical components.
Most riding mower batteries are located under the seat or hood. The negative terminal is usually marked with a minus sign and may be color-coded black. Loosen the terminal clamp with a wrench and carefully lift the cable away from the battery post.
Store the disconnected cable where it won’t accidentally touch the battery terminal. This precaution ensures you won’t receive an unexpected shock or create sparks while handling other wires in the ignition system.
Step 4: Remove the Ignition Switch (If Necessary)
Some methods require removing the entire ignition switch assembly. Use your screwdriver to remove mounting screws or clips holding the switch in place. Gently pull the switch forward to access the wire connections on the back.
Take a photo of the wire arrangement before disconnecting anything. This reference will help you reconnect everything properly later. Different wire positions control different functions, so maintaining the correct configuration is crucial for proper operation.
If the switch is difficult to remove, check for hidden clips or mounting tabs. Forcing the switch out can damage the dashboard or steering column, creating additional repair needs beyond your original key problem.
Step 5: Identify the Starting Wires
Look for the wire that connects to the “START” or “S” terminal on your ignition switch. This wire is typically yellow or red and carries the signal to engage your starter motor. The “BATTERY” or “B” terminal wire provides constant power from your mower’s electrical system.
Common wire color codes include red for battery power, yellow for starter activation, and black for ground connections. However, some manufacturers use different color schemes, so your specific mower might vary from these standard configurations.
Test each wire with your multimeter if you’re unsure about their functions. The battery wire should show 12 volts when connected, while the starter wire only carries voltage when the key is turned to the start position.
Step 6: Create a Temporary Connection
Using wire strippers or pliers, carefully strip a small section of insulation from both the battery wire and starter wire. Avoid cutting through the entire wire, as you’ll need these connections intact for normal operation later.
Twist the exposed sections together to create a temporary electrical connection. This bypasses the ignition switch and sends power directly to your starter motor. Ensure the connection is secure but can be easily separated when you’re finished.
Wrap the twisted connection with electrical tape to prevent accidental contact with metal parts. This insulation reduces the risk of electrical shorts that could damage your mower’s starting system or create safety hazards.
Step 7: Check Safety Switches
Before reconnecting the battery, verify that all safety switches are in their proper positions. Most riding mowers have multiple safety interlocks that prevent starting under unsafe conditions. The parking brake should be engaged, and the cutting deck should be disengaged.
Ensure the operator presence switch under the seat is activated by sitting on the mower. Some models also have a neutral safety switch that requires the transmission to be in neutral or park position before starting.
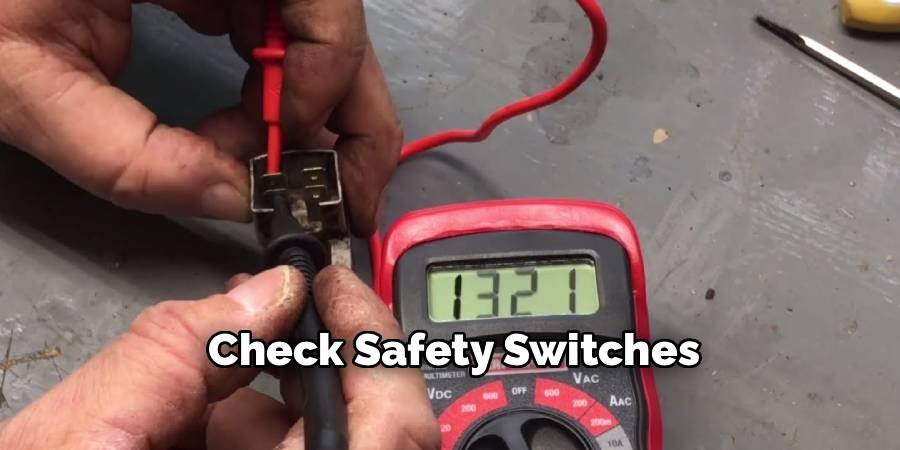
These safety features protect you and others from injury during mower operation. Bypassing them is dangerous and may void your warranty, so always ensure they’re functioning properly before attempting to start your mower.
Step 8: Reconnect the Battery
Carefully reconnect the negative battery cable to restore power to your mower’s electrical system. Ensure the terminal connection is tight to prevent voltage drops that could affect starting performance. A loose connection might prevent your temporary starting method from working effectively.
Double-check that your temporary wire connection is still secure and properly insulated. Any exposed wire ends should be covered with electrical tape to prevent accidental contact with metal surfaces or other electrical components.
Position yourself safely away from moving parts like the starter motor and flywheel. These components will engage when you create the starting circuit, and you don’t want clothing or body parts near them during operation.
Step 9: Attempt to Start the Engine
With all safety precautions in place and your temporary wiring complete, briefly touch the starter wire to the battery wire connection. This should engage the starter motor and crank your engine. Hold the connection only as long as necessary to start the engine.
If the engine doesn’t start immediately, release the connection and wait a few seconds before trying again. Continuous cranking can overheat your starter motor or drain your battery. Most engines should start within a few seconds of cranking.
Listen for normal starting sounds and watch for proper oil pressure and charging system operation once the engine starts. These indicators confirm that your mower is running properly despite the bypassed ignition switch.
Step 10: Secure Your Mower
Once your mowing task is complete, shut off the engine using the normal throttle control or engine switch if available. Disconnect your temporary wiring and separate the battery and starter wires to prevent accidental starting.
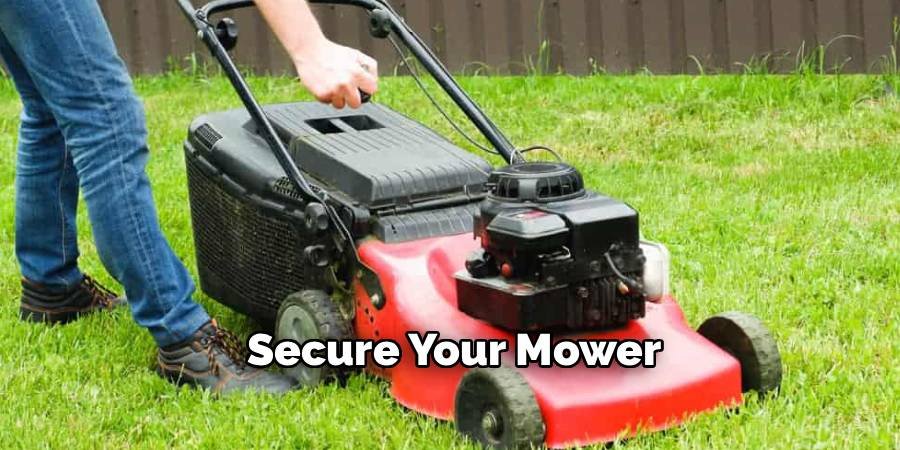
Properly insulate the exposed wire ends with electrical tape until you can install a replacement key or repair the ignition switch. Leaving exposed wires creates safety hazards and potential electrical problems during future use.
Consider this temporary solution only until you can obtain a proper replacement key or repair the ignition system. Operating without proper ignition security reduces theft protection and may create ongoing electrical issues.
Maintaining Your Riding Mower’s Ignition System
Regular maintenance prevents key and ignition problems before they occur. Clean the ignition switch periodically with electrical contact cleaner to remove dirt and corrosion that can cause starting difficulties. Keep spare keys in a secure location to avoid future lockout situations. Many dealers can cut replacement keys from your mower’s serial number or existing key code. Inspect wiring connections annually for signs of corrosion, damage, or loose connections that might affect starting reliability.
Common Mistakes to Avoid
Never attempt to start a mower that doesn’t belong to you, as this constitutes theft or vandalism. Always verify ownership before using these techniques. Avoid working on electrical systems in wet conditions or with wet hands, as this increases shock risk and potential component damage. Don’t leave temporary wiring connections in place permanently, as they bypass important safety features and security systems designed to protect your equipment.

FAQ
Can I damage my mower by starting it without a key?
When done properly with correct safety precautions, temporary starting methods shouldn’t damage your mower’s electrical or engine systems. However, improper wiring connections or bypassing safety switches can create hazards.
Will my insurance cover theft if I start without a key?
Most insurance policies require proper security measures. Starting without keys might indicate inadequate security, potentially affecting coverage. Check with your insurance provider about specific policy requirements.
How much does a replacement key cost?
Replacement keys typically cost $15-50 depending on your mower brand and dealer. Some newer models with electronic keys or transponders may cost more but offer better security features.
Can I install a push-button start instead of a key?
Yes, many aftermarket push-button start systems are available for riding mowers. These systems often include additional security features and can be more convenient than traditional key switches.
Why won’t my mower start even with these methods?
Several issues beyond ignition problems can prevent starting, including dead batteries, fuel delivery problems, safety switch malfunctions, or engine mechanical issues. Professional diagnosis may be required.
Conclusion
Knowing how to start a riding lawn mower without a key can save your day when you’re facing a lost or broken key situation. These methods provide temporary solutions that get your mower running when you need it most.
Remember that these techniques should only be used on equipment you own and only as temporary measures. The proper solution is always to obtain replacement keys or repair faulty ignition switches through authorized dealers or qualified technicians.
Safety should never be compromised for convenience. Always follow proper procedures, maintain safety switch operations, and secure your equipment properly after use. With these skills and precautions, you’ll never be completely stopped by a missing mower key again.
Consider keeping spare keys in multiple locations and maintaining your ignition system regularly to prevent future problems. Your lawn care routine will thank you for this preparation and knowledge.
About Ravuk Barg
B.Sc. Horticulture Science | Certified Master Gardener
Ravuk Barg has spent more than a decade with his hands in the soil and his head full of questions about why some gardens thrive while others struggle. What started as a single raised bed of tomatoes and basil in a modest backyard has grown into a deep, working knowledge of everything from seed germination and soil amendment to companion planting and seasonal pruning.
Over the years, Ravuk has gardened through drought summers, waterlogged springs, and pest invasions that would make most gardeners hang up their trowels for good. Those hard seasons, he’ll tell you, taught him more than any perfect growing year ever could. He writes from that earned experience—covering vegetable growing, ornamental planting, houseplant care, composting, and garden design with equal confidence and curiosity.
Philosophy & Approach
Ravuk’s approach to gardening is rooted in practicality. He favors organic methods not out of dogma, but because they work long-term—resulting in healthier soil, fewer inputs, and stronger plants. He has a particular fondness for heirloom vegetable varieties (the kind with proper flavor), unruly cottage-style flower beds, and the stubborn houseplants that everyone else gave up on.
The Mission: Give readers the honest, experience-backed advice that helps them actually succeed in their gardens—not just the ideal version, but the real one; weeds, failures, and all.
Education & Credentials
-
B.Sc. in Horticulture Science
-
Greenfield Agricultural University
-
Focus: Plant Physiology, Soil Ecology, and Sustainable Crop Production
-
-
Master Gardener Certification
-
Cooperative Extension Service
-
Focus: 200+ hours of hands-on practical training and community garden work
-
Continuing Education
-
Organic Pest Management
-
Native Plant Landscaping
-
Sustainable Crop Production