

Peace lilies are beloved for their elegant white flowers and lush, dark green leaves, bringing a touch of tranquility to any indoor space. They are also remarkably resilient, making them a favorite among both new and experienced plant parents. However, like all container-grown plants, they eventually outgrow their pots. When you notice roots circling the pot or slowed growth, it’s a clear sign your plant needs a fresh start. Learning how to repot a peace lily plant is a simple yet vital skill that ensures your plant remains healthy, vibrant, and continues to thrive for years to come.

Why Repotting Your Peace Lily Matters
Repotting is more than just giving your plant a new home; it’s a crucial part of its long-term care. Over time, the soil in the pot becomes compacted and depleted of essential nutrients. This compaction restricts airflow to the roots and hinders water absorption, leading to potential issues like root rot. Furthermore, as the plant grows, its root system expands. In a cramped pot, the roots can become “root-bound,” circling the container and choking themselves.
This stressful condition can stunt growth, cause yellowing leaves, and prevent your peace lily from producing its signature white spathes. A timely repot provides fresh, nutrient-rich soil and the space needed for healthy root development.
9 Step Methods Guide on How to Repot a Peace Lily Plant
Step 1: Know When It’s Time to Repot
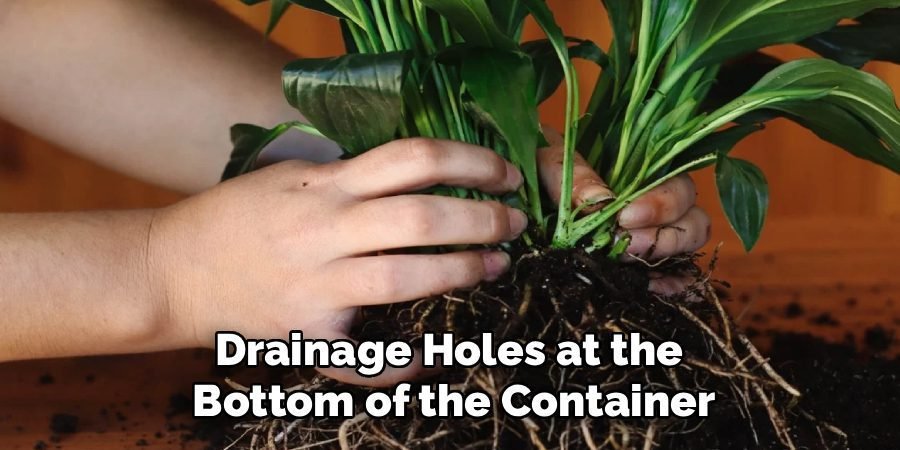
The first step is recognizing the signs that your peace lily is ready for a new pot. A key indicator is seeing roots emerging from the drainage holes at the bottom of the container. You might also notice the plant’s growth has slowed significantly, or it requires watering much more frequently than it used to. If you gently slide the plant out of its pot and see a dense, tangled mass of roots with very little visible soil, your plant is root-bound. Ideally, you should aim to repot your peace lily every 18 to 24 months during its growing season in the spring or summer.
Step 2: Gather Your Supplies
Before you begin, it’s best to have all your materials ready to ensure a smooth and efficient process. You will need a new pot that is only one to two inches wider in diameter than the current one. It’s also crucial that the new pot has adequate drainage holes. You’ll need a fresh, high-quality potting mix suitable for houseplants; a peat-based mix with perlite or vermiculite is an excellent choice as it retains moisture while allowing for good drainage. Other helpful tools include gardening gloves to keep your hands clean and a small trowel or knife for loosening the root ball.
Step 3: Choose the Right Pot
Selecting the proper pot is critical for the future health of your peace lily. Avoid the temptation to move your plant into a container that is too large, as this can lead to problems. A pot that is excessively big will hold too much moisture, creating a soggy environment that can cause root rot, a fatal condition for peace lilies. Stick to a pot that is just one or two inches larger in diameter than the previous one. This provides enough room for new growth without overwhelming the plant. Ensure the pot has at least one drainage hole at the bottom to let excess water escape.
Step 4: Prepare the New Pot
Once you have your new pot, you can prepare it for its new resident. If you are reusing an old pot, make sure to clean it thoroughly with soap and hot water to remove any potential pathogens or salt buildup from previous use. To prevent soil from washing out of the drainage holes, you can place a small piece of mesh screen or a coffee filter over them. Next, fill the bottom third of the new pot with your fresh, well-draining potting mix. This creates a supportive base for the plant’s root ball to rest on.
Step 5: Carefully Remove the Peace Lily from Its Old Pot
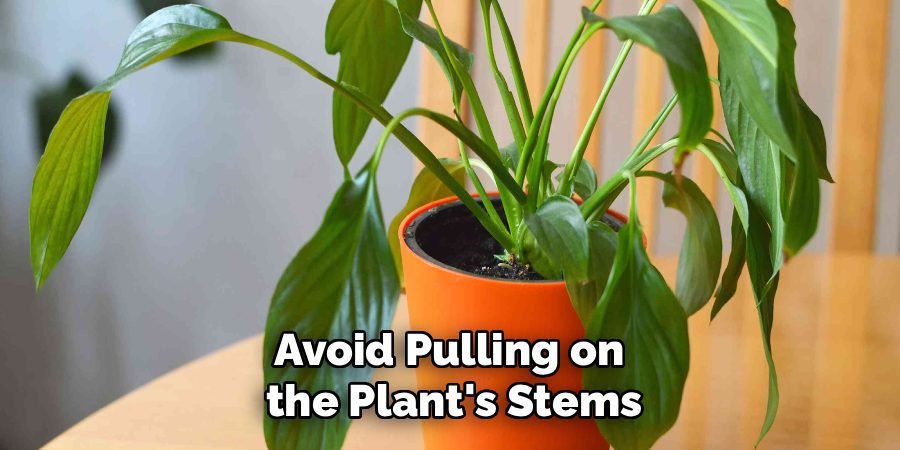
Now it’s time to gently extract your peace lily from its current home. To do this, turn the pot on its side and tap it firmly around the rim to loosen the soil and roots. Place one hand over the soil with the plant’s stem between your fingers, and use your other hand to carefully slide the pot away. If the plant is stuck, you can run a knife or trowel around the inner edge of the pot to help free it. Avoid pulling on the plant’s stems, as this can cause damage. The goal is to remove the entire root ball in one piece.
Step 6: Inspect and Prune the Roots
With the plant out of its pot, take a moment to inspect the root system. Healthy roots should be firm and light-colored. If you see any roots that are dark, mushy, or have a foul smell, this is a sign of root rot, and they must be removed. Using a clean pair of scissors or pruning shears, carefully trim away any dead or decaying roots. If the plant is heavily root-bound, with roots circling in a tight mass, gently tease them apart with your fingers to encourage them to grow outward into the new soil.
Step 7: Position the Plant in Its New Home
Now you can place the peace lily into its prepared new pot. Center the root ball on top of the fresh layer of soil you added earlier. Adjust the soil level at the bottom so that the top of the root ball sits about an inch below the rim of the new pot. This gap prevents water and soil from spilling over the edge when you water the plant. Holding the plant steady with one hand, begin adding fresh potting mix around the sides of the root ball, filling in any gaps.
Step 8: How to Repot a Peace Lily Plant by Adding Soil and Watering
Continue filling the pot with soil until it is level with the top of the root ball, gently patting it down to eliminate any large air pockets. Be careful not to compact the soil too tightly, as this can hinder drainage and root growth. Once the plant is securely in place, give it a thorough watering until you see water flowing out of the drainage holes. This helps settle the new soil around the roots and provides much-needed hydration after the stress of repotting. Let the pot drain completely before moving it.
Post-Repotting Care
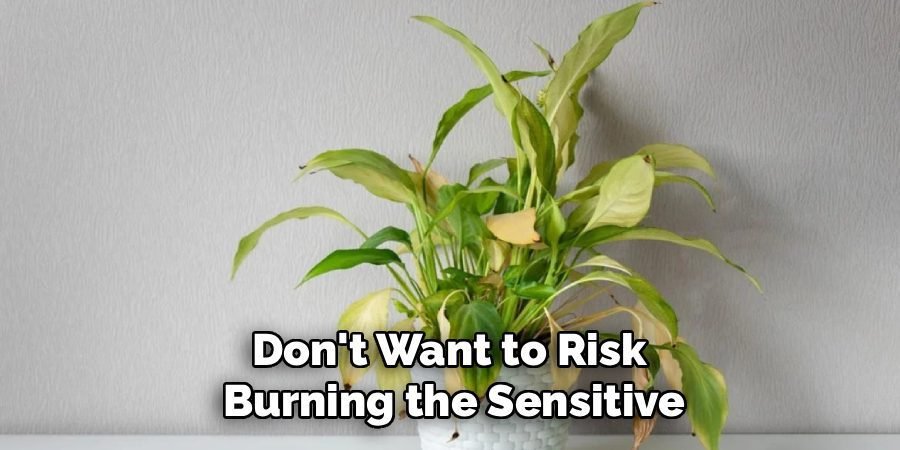
After repotting, your peace lily will need some time to adjust to its new environment. Place it back in its usual spot, which should offer bright, indirect light. Avoid exposing it to direct sunlight, which can scorch the leaves. It’s normal for the plant to look a little droopy for a few days; this is a sign of transplant shock. Hold off on fertilizing for at least one to two months, as the fresh potting mix contains plenty of nutrients and you don’t want to risk burning the sensitive, newly disturbed roots.
Frequently Asked Questions (FAQ)
What Is the Best Time of Year to Repot a Peace Lily?
The ideal time to repot your peace lily is during its active growing season, which is typically in the spring or early summer. Repotting during this period allows the plant to recover more quickly from the stress of being moved. The warmer temperatures and longer daylight hours encourage faster root growth, helping the plant establish itself in the new pot more efficiently. Avoid repotting in the fall or winter when the plant’s growth naturally slows down, as it will take much longer to recover.
How Do I Know if My Peace Lily Needs Repotting?
There are several clear signs that your peace lily has outgrown its pot. The most obvious is seeing roots growing out of the drainage holes. You may also notice that the plant dries out very quickly and requires more frequent watering. Another common indicator is slowed or stunted growth, even during the growing season. If you can easily lift the plant and see a dense web of roots with little soil, it is “root-bound” and definitely ready for a new, slightly larger home.
Can I Use Garden Soil to Repot My Peace Lily?
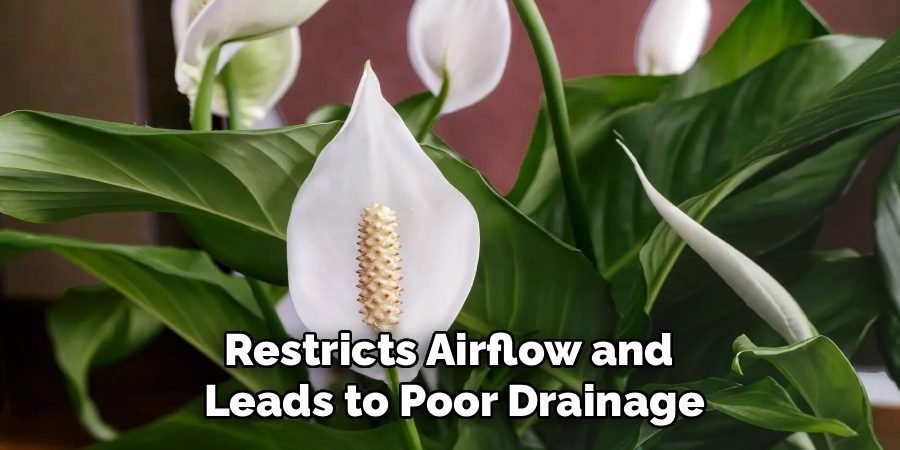
It is not recommended to use soil directly from your garden for potting a peace lily. Garden soil is too dense and heavy for container plants. It compacts easily, which restricts airflow and leads to poor drainage. This waterlogged environment is the perfect breeding ground for root rot. Instead, always use a high-quality, well-draining potting mix specifically formulated for houseplants. These mixes typically contain peat moss, perlite, and other amendments that provide the ideal balance of moisture retention and aeration for healthy root growth.
Should I Water My Peace Lily Immediately After Repotting?
Yes, you should give your peace lily a thorough watering immediately after repotting. This is an essential step that helps settle the new soil around the roots, eliminating any air pockets that may have formed. Water the plant until you see excess moisture draining from the bottom of the pot, then allow it to drain completely. This initial watering also helps reduce transplant shock by providing immediate hydration to the disturbed root system. After this, you can return to a normal watering schedule.
My Peace Lily Is Drooping After Repotting. Is This Normal?
A bit of drooping or wilting is completely normal after repotting a peace lily. This condition is known as transplant shock. The plant’s roots have been disturbed, and it needs some time to recover and acclimate to its new soil and pot. As long as you have provided it with the proper care—placing it in indirect light and watering it correctly—it should bounce back within a week or two. Avoid the urge to overwater it during this time, as that can lead to more serious issues like root rot.
Conclusion
Repotting may seem like a daunting task, but it is one of the most rewarding things you can do for your peace lily. By providing your plant with fresh soil and more room to grow, you are setting it up for a long and healthy life. Following these steps will help you approach the process with confidence, ensuring your plant not only survives but thrives. Now that you know how to repot a peace lily plant, you can enjoy its beautiful foliage and elegant blooms for many years to come.
About Ravuk Barg
B.Sc. Horticulture Science | Certified Master Gardener
Ravuk Barg has spent more than a decade with his hands in the soil and his head full of questions about why some gardens thrive while others struggle. What started as a single raised bed of tomatoes and basil in a modest backyard has grown into a deep, working knowledge of everything from seed germination and soil amendment to companion planting and seasonal pruning.
Over the years, Ravuk has gardened through drought summers, waterlogged springs, and pest invasions that would make most gardeners hang up their trowels for good. Those hard seasons, he’ll tell you, taught him more than any perfect growing year ever could. He writes from that earned experience—covering vegetable growing, ornamental planting, houseplant care, composting, and garden design with equal confidence and curiosity.
Philosophy & Approach
Ravuk’s approach to gardening is rooted in practicality. He favors organic methods not out of dogma, but because they work long-term—resulting in healthier soil, fewer inputs, and stronger plants. He has a particular fondness for heirloom vegetable varieties (the kind with proper flavor), unruly cottage-style flower beds, and the stubborn houseplants that everyone else gave up on.
The Mission: Give readers the honest, experience-backed advice that helps them actually succeed in their gardens—not just the ideal version, but the real one; weeds, failures, and all.
Education & Credentials
-
B.Sc. in Horticulture Science
-
Greenfield Agricultural University
-
Focus: Plant Physiology, Soil Ecology, and Sustainable Crop Production
-
-
Master Gardener Certification
-
Cooperative Extension Service
-
Focus: 200+ hours of hands-on practical training and community garden work
-
Continuing Education
-
Organic Pest Management
-
Native Plant Landscaping
-
Sustainable Crop Production