

Discovering tunnels and runways crisscrossing your once-pristine lawn can be frustrating. Voles, small rodents often mistaken for mice, create extensive networks of surface trails and underground burrows that leave unsightly damage across grass areas. These prolific creatures feed on grass roots, shoots, and bulbs, creating brown patches and raised pathways that compromise your lawn’s health and appearance.
The good news is that knowing how to repair lawn damaged by voles doesn’t require professional expertise or expensive treatments. Most homeowners can restore their grass to its former glory with the right approach and patience. The key lies in understanding the extent of damage, addressing the root causes, and implementing a systematic restoration process.
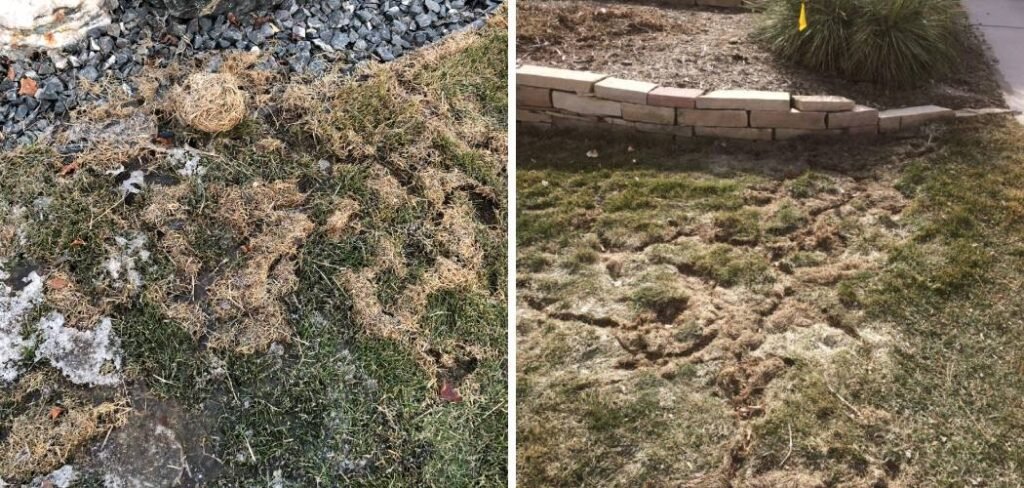
Time plays a crucial role in successful recovery. Vole damage often becomes more apparent in spring when snow melts reveal the full scope of their winter activities. Acting quickly prevents further deterioration and gives grass the best chance to recover naturally. Some areas may bounce back with minimal intervention, while others require complete restoration.
Weather conditions, grass type, and damage severity all influence recovery timelines. Cool-season grasses typically show better resilience than warm-season varieties. Understanding these factors helps set realistic expectations and ensures your repair efforts align with optimal growing conditions.
Why You Need to Repair Lawn Damage
Repairing lawn damage is essential to maintaining a healthy and visually appealing landscape. Damaged areas not only detract from the overall appearance of your yard but can also lead to long-term problems if left untreated. Bare patches provide an opportunity for weeds to take root and spread, further deteriorating the health of your lawn. Additionally, compromised grass can impact soil stability, increasing the risk of erosion and water runoff in your yard. By addressing lawn damage promptly, you help restore its natural beauty, promote a stronger root system, and create a more durable and resilient lawn for years to come.
8 Step-by-Step Guide on How to Repair Lawn Damaged by Voles
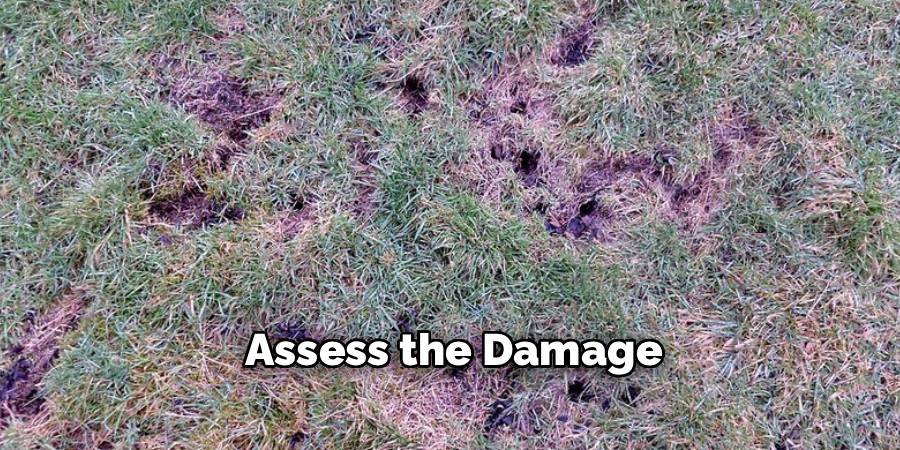
Step 1: Assess the Damage
Begin by carefully inspecting your lawn to understand the extent of the damage caused by voles. Look for telltale signs such as surface tunnels, bare patches, or chewed grass and plants. Pay close attention to areas around trees, shrubs, and flower beds, as voles often create burrows near these locations. Identifying the affected zones will help you determine the scope of repair efforts and allow you to prioritize which areas need the most attention. Thorough assessment ensures that you address all problem spots and create a plan tailored to your lawn’s specific needs.
Step 2: Clear Debris and Dead Grass
Once you’ve identified the affected areas, the next step is to remove any debris and dead grass from your lawn. Use a rake to gently clear away loose plant material, ensuring you do not disturb any healthy grass or soil unnecessarily. Removing the debris will make it easier to assess the extent of the damage and prepare the area for repair. Additionally, clearing away dead grass allows more sunlight and nutrients to reach the soil, promoting healthier regrowth. Be thorough in this step, as it creates a clean foundation for the restoration process.
Step 3: Level and Prepare the Soil
Once the damaged grass and debris have been removed, focus on leveling and preparing the soil. Use a garden rake to break up compacted soil and smooth out uneven areas, ensuring a consistent surface for new growth. This step helps promote proper water absorption and root development. If necessary, add a layer of topsoil to fill in any depressions and improve soil quality. Mix the new soil with the existing one to create a uniform structure, which aids in nutrient distribution. Finally, lightly tamp the ground to firm it up without compacting it too much, creating the ideal base for reseeding or laying new sod.
Step 4: Apply Starter Fertilizer
Broadcast a high-quality starter fertilizer across all prepared areas according to package directions. Starter fertilizers contain higher phosphorus levels that promote root development, crucial for establishing new grass and helping damaged areas recover quickly. Choose slow-release formulations that provide sustained nutrition over several weeks without causing excessive top growth.
Apply fertilizer evenly using a broadcast spreader or by hand in smaller areas, then rake lightly to incorporate granules into the soil surface. Water thoroughly after application to activate nutrients and begin the feeding process. Avoid over-fertilizing, which can burn tender new growth and delay establishment. Proper fertilization provides the nutritional foundation grass needs to outcompete weeds and establish dense coverage.
Step 5: Select and Plant Appropriate Grass Seed
Choosing the right grass seed is critical to achieving a healthy and thriving lawn. Begin by considering your region’s climate, soil type, and the amount of sunlight your lawn receives. Cool-season grasses, like Kentucky bluegrass and fescues, perform well in northern climates, while warm-season grasses, such as Bermuda grass and Zoysia, thrive in southern regions.
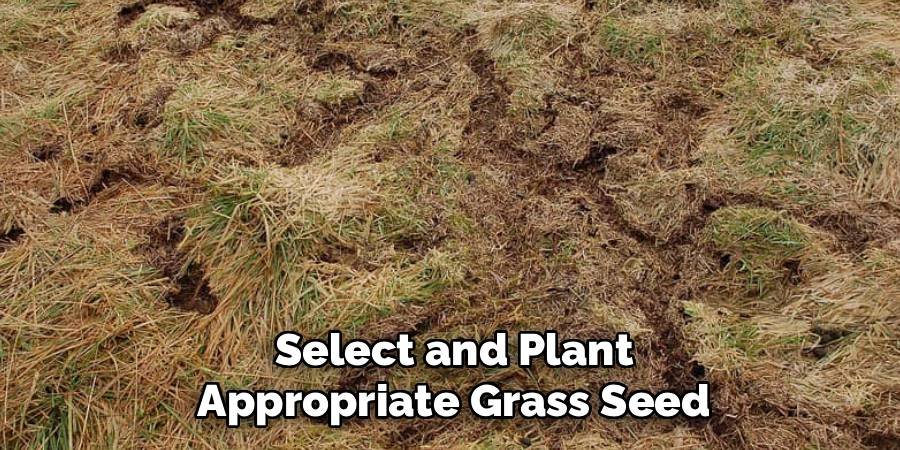
Once you’ve selected the appropriate seed variety, prepare the soil by loosening the top 1-2 inches to ensure good seed-to-soil contact. Spread the seeds evenly using a broadcast spreader or by hand, following the recommended seeding rate on the packaging. Lightly rake the surface to incorporate the seeds without burying them too deep. Finally, water gently and consistently to maintain moisture in the topsoil, encouraging germination and growth.
Step 6: Cover with Straw or Mulch
After seeding, apply a thin layer of straw or mulch to protect the seeds and help retain moisture. This covering shields the seeds from direct sunlight, reduces drying from wind, and minimizes erosion caused by water runoff. Ensure the coverage is light enough to allow sunlight and air to reach the soil, as thick layers can inhibit germination. Biodegradable straw or mulch materials can also decompose over time, adding organic matter to the soil.
Step 7: Water Consistently and Appropriately
Watering is a critical step in ensuring successful grass establishment. Begin by lightly watering the area immediately after seeding and mulching to moisten the soil without causing runoff. During the germination period, keep the soil consistently damp by watering lightly once or twice a day, depending on weather conditions.

Avoid overwatering, which can lead to pooling or washing away of seeds, as well as fostering fungal growth. Once the grass begins to sprout and establish roots, reduce the frequency of watering but increase the depth to encourage deeper root growth. Gradually transition to a regular watering schedule, typically two to three times a week, ensuring the grass receives about an inch of water per week, including rainfall. Proper watering strengthens your new lawn and ensures its long-term health.
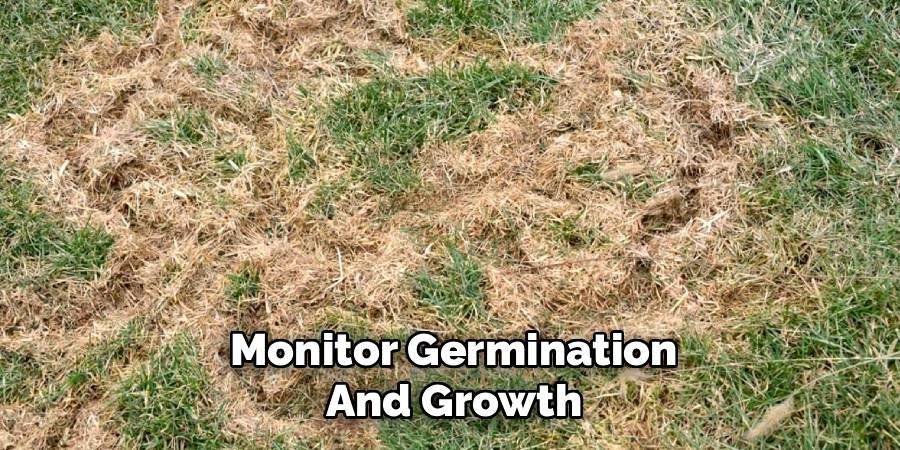
Step 8: Monitor Germination and Growth
Watch for the first signs of grass emergence, typically occurring 7-21 days after planting depending on grass type and weather conditions. Early germination appears as tiny green shoots breaking through the soil surface. Document germination progress with photos to track establishment patterns and identify areas needing additional attention.
Keep foot traffic and lawn equipment off newly seeded areas until grass reaches at least three inches tall and shows strong root development. Test root strength by gently tugging on grass blades—well-established grass should resist pulling. Monitor for signs of disease, pest problems, or washout that may require corrective action. Consistent monitoring allows for timely interventions that improve establishment success.
Maintaining Your Repaired Lawn
Once your lawn has been repaired and the grass has established itself, proper maintenance is essential to ensure long-term health and vitality. Begin with a consistent mowing schedule, making sure not to cut more than one-third of the grass height at a time to avoid stressing the plants. Keep your mower blades sharp to ensure clean cuts that reduce the risk of disease.
Regular watering remains crucial, especially during dry periods. Aim for deep, infrequent watering to encourage deep root growth, rather than frequent shallow watering. Fertilize the lawn with a balanced fertilizer according to seasonal needs, and address any emerging weeds promptly to prevent them from competing with the grass. By investing time and care into maintenance, your lawn will stay lush, resilient, and beautiful for years to come.
Common Mistakes to Avoid
Maintaining a healthy lawn comes with its fair share of challenges, and certain common mistakes can hinder your progress. Overwatering is a frequent issue, as it can lead to shallow root systems and promote fungal diseases. Conversely, underwatering can leave the grass dry and brittle, making it more susceptible to damage. Another common mistake is mowing the grass too short, which can weaken the turf and allow weeds to take hold.
Using the wrong type of fertilizer or overapplying it can also cause damage, leading to nutrient imbalances or chemical burns. Additionally, neglecting to aerate the soil can result in compaction, restricting root growth and limiting water and nutrient absorption. By staying mindful of these pitfalls, you can avoid setbacks and keep your lawn thriving.
FAQ Frequently Asked Questions
How long does it take for grass to fill in vole-damaged areas?
Most grass varieties show visible growth within 2-3 weeks, with complete establishment taking 6-10 weeks depending on conditions, grass type, and damage severity.
Can I use sod instead of seed to repair vole damage?
Sod provides faster results but costs significantly more than seed. It works well for small areas or when immediate coverage is essential for special events.
When is the best time to repair vole damage?
Early spring or fall offer optimal conditions for cool-season grasses, while late spring through summer works best for warm-season varieties in southern climates.
Will voles return to previously damaged areas?
Voles may return if habitat conditions remain favorable. Remove shelter areas, maintain dense turf, and consider exclusion barriers around vulnerable landscape features.
Should I treat for grubs when repairing vole damage?
Grub treatment isn’t typically necessary unless soil inspection reveals significant infestations. Focus on grass establishment first, then address secondary pest problems if they develop.
Conclusion
Learning how to repair lawn damaged by voles empowers homeowners to restore their outdoor spaces effectively and economically. The systematic approach outlined here addresses both immediate damage and long-term prevention, ensuring lasting results that withstand future challenges. Success requires patience, attention to detail, and consistent follow-through on maintenance practices.
Remember that grass establishment takes time, and visible results may not appear for several weeks. Weather conditions, soil quality, and grass variety all influence recovery timelines, so adjust expectations accordingly. Most homeowners see significant improvement within 2-3 months when following proper repair techniques.
The investment in lawn restoration pays dividends through increased property value, improved outdoor enjoyment, and personal satisfaction. A healthy, dense lawn naturally resists future vole invasions while providing the aesthetic appeal most homeowners desire. The skills learned through this process apply to other lawn care challenges, building confidence in tackling landscape maintenance tasks.
Don’t let vole damage discourage you from enjoying your outdoor space. With proper techniques and consistent care, even severely damaged areas can recover completely. Your patience and effort will be rewarded with a beautiful lawn that serves your family for years to come. Take action now while growing conditions favor grass establishment, and soon you’ll have the lush, healthy lawn you’ve always wanted.
About Ravuk Barg
B.Sc. Horticulture Science | Certified Master Gardener
Ravuk Barg has spent more than a decade with his hands in the soil and his head full of questions about why some gardens thrive while others struggle. What started as a single raised bed of tomatoes and basil in a modest backyard has grown into a deep, working knowledge of everything from seed germination and soil amendment to companion planting and seasonal pruning.
Over the years, Ravuk has gardened through drought summers, waterlogged springs, and pest invasions that would make most gardeners hang up their trowels for good. Those hard seasons, he’ll tell you, taught him more than any perfect growing year ever could. He writes from that earned experience—covering vegetable growing, ornamental planting, houseplant care, composting, and garden design with equal confidence and curiosity.
Philosophy & Approach
Ravuk’s approach to gardening is rooted in practicality. He favors organic methods not out of dogma, but because they work long-term—resulting in healthier soil, fewer inputs, and stronger plants. He has a particular fondness for heirloom vegetable varieties (the kind with proper flavor), unruly cottage-style flower beds, and the stubborn houseplants that everyone else gave up on.
The Mission: Give readers the honest, experience-backed advice that helps them actually succeed in their gardens—not just the ideal version, but the real one; weeds, failures, and all.
Education & Credentials
-
B.Sc. in Horticulture Science
-
Greenfield Agricultural University
-
Focus: Plant Physiology, Soil Ecology, and Sustainable Crop Production
-
-
Master Gardener Certification
-
Cooperative Extension Service
-
Focus: 200+ hours of hands-on practical training and community garden work
-
Continuing Education
-
Organic Pest Management
-
Native Plant Landscaping
-
Sustainable Crop Production