

Trenching work can leave your once-pristine lawn looking like a construction zone. Whether you’ve had utilities installed, irrigation lines run, or drainage systems put in place, the aftermath often includes disturbed soil, bare patches, and unsightly trenches cutting across your yard. Many homeowners wonder how Do I repair my lawn after trenching and restore their outdoor space to its former beauty.
The good news is that with the right approach and a bit of patience, your lawn can bounce back better than ever. Grass is remarkably resilient, and proper repair techniques can often result in a healthier, more robust lawn than you had before. The key lies in understanding soil preparation, choosing appropriate grass types, and following proven restoration methods.
This comprehensive guide will walk you through every step needed to transform those muddy scars into lush, green grass that seamlessly blends with your existing lawn.
Why You Need to Act Quickly
Time is crucial when it comes to lawn repair after trenching. Exposed soil is vulnerable to erosion, especially during heavy rains or strong winds. Without grass roots to hold everything in place, you risk losing valuable topsoil that took years to develop naturally.
Weeds also move quickly to colonize bare ground. These opportunistic plants can establish deep root systems within weeks, making future grass establishment much more challenging. The longer you wait, the more established these unwanted plants become.
Quick action also prevents soil compaction. Heavy foot traffic or equipment on exposed soil creates hard-packed earth that grass roots struggle to penetrate. Acting promptly while soil is still loose gives your new grass the best chance for strong root development.
10 Step-by-Step Guide: How Do I Repair My Lawn After Trenching
Step 1: Clear and Clean the Trenched Area
Begin by removing all debris from the trenched area, including rocks, construction materials, and any remaining root fragments from damaged grass. Use a rake to gather loose soil and organic matter that may have scattered during the trenching process.
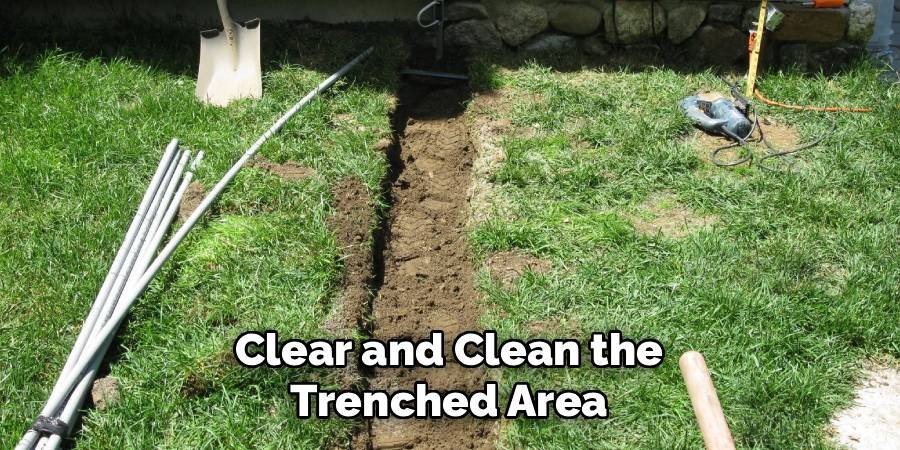
Pay special attention to any compacted soil along the trench edges where heavy equipment may have traveled. Break up these compacted areas with a garden fork or small rototiller, working the soil to a depth of 4-6 inches to restore proper aeration and drainage.
Step 2: Test and Amend Your Soil
Conduct a soil test to determine pH levels and nutrient content in both the trenched area and surrounding healthy lawn. Most grass varieties thrive in slightly acidic to neutral soil with a pH between 6.0 and 7.0.
Add appropriate soil amendments based on your test results. Common amendments include lime to raise pH, sulfur to lower pH, and compost to improve soil structure and fertility. Work these amendments into the top 4 inches of soil using a rake or small cultivator.
Step 3: Level and Grade the Surface
Proper grading ensures water drainage and creates a smooth surface for grass establishment. Fill low spots with quality topsoil, creating a gentle slope away from buildings and toward appropriate drainage areas.
Use a landscape rake to create a uniform surface that matches the elevation of surrounding lawn areas. The soil should be firm but not compacted, allowing water penetration while providing stable support for new grass roots.
Step 4: Choose the Right Grass Type
Select grass varieties that match your existing lawn and local growing conditions. Cool-season grasses like fescue and bluegrass work best in northern climates, while warm-season varieties like Bermuda and Zoysia thrive in southern regions.

Consider factors like sun exposure, soil type, and intended use when making your selection. High-traffic areas benefit from durable varieties, while shaded spots require shade-tolerant grass types for successful establishment.
Step 5: Prepare for Seeding or Sodding
Create optimal conditions for grass establishment by ensuring soil moisture is adequate but not waterlogged. The soil should feel slightly damp when squeezed but not muddy or sticky to the touch.
Apply a starter fertilizer specifically formulated for new grass establishment. These fertilizers typically contain higher phosphorus levels to promote strong root development and faster establishment than standard lawn fertilizers.
Step 6: Plant Your Grass
For seeded areas, distribute grass seed evenly at the recommended rate, typically 2-4 pounds per 1,000 square feet depending on grass type. Use a broadcast spreader for uniform coverage and rake lightly to ensure good seed-to-soil contact.
If using sod, lay pieces tightly together without overlapping, staggering joints like brickwork. Press sod firmly against the soil surface to eliminate air pockets that could prevent proper root establishment.
Step 7: Water Properly
Establish a consistent watering schedule that keeps soil consistently moist but not saturated. New grass seeds require light, frequent watering 2-3 times daily until germination occurs, typically within 7-14 days.
Gradually reduce watering frequency while increasing duration as grass becomes established. Mature grass benefits from deep, infrequent watering that encourages deep root development and drought tolerance.
Mulching can be an effective way to retain soil moisture and provide additional nutrients to your lawn. A thin layer of straw or other biodegradable mulch can help protect grass seeds from being washed away by rain or eaten by birds. Make sure the mulch is spread evenly and does not completely cover the seeds, allowing sunlight to reach them and promote growth. Once the grass begins to grow and establish itself, the mulch will naturally decompose, enriching the soil.
Step 8: Protect the Growing Area
Install temporary barriers or signage to prevent foot traffic on newly seeded or sodded areas. Even light foot traffic can displace seeds, damage tender shoots, or create soil compaction that impedes growth.
Consider using erosion control blankets or straw mulch on sloped areas to prevent seed washout during heavy rains. These materials also help retain soil moisture and moderate soil temperature for better germination.
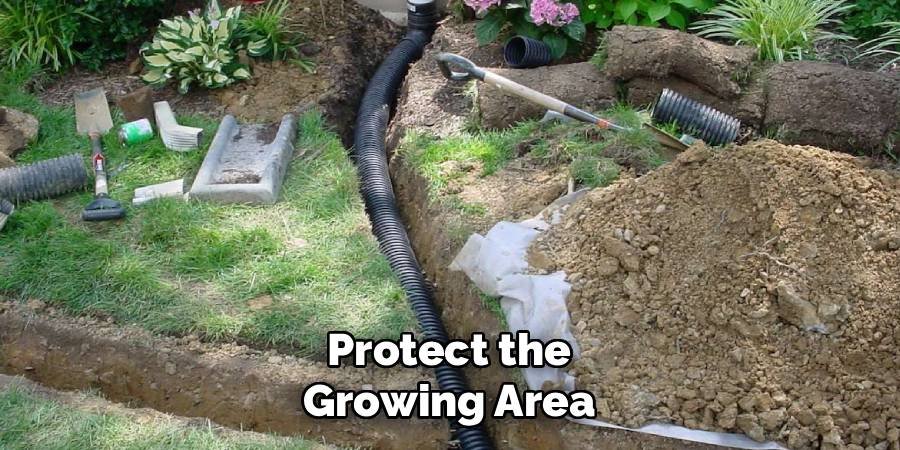
Regularly monitor the growing area to ensure conditions remain optimal for healthy development. Water the area consistently, keeping the soil moist but not waterlogged, as excess water can lead to root rot or fungal issues. Inspect for signs of pests or diseases and take appropriate action early to prevent widespread damage. Additionally, avoid mowing until the grass or plants have established strong roots and reached a suitable height. Patience and care during this period will contribute significantly to achieving a thriving and resilient landscape.
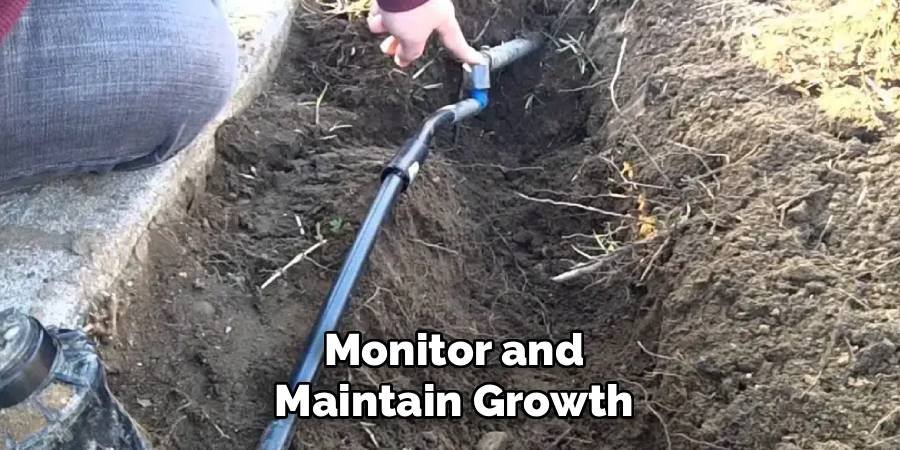
Step 9: Monitor and Maintain Growth
Watch for signs of successful germination and establishment, including new green shoots emerging from soil surface. Thin or patchy areas may require additional seeding to achieve uniform coverage.
Apply gentle, organic fertilizer once grass reaches 2-3 inches in height to support continued growth. Avoid high-nitrogen fertilizers during initial establishment as they can burn tender young grass.
Keep the soil consistently moist but not overly saturated to help the grass establish strong roots. Water lightly and frequently during the early stages, gradually transitioning to deeper, less frequent watering as the grass matures. Regularly inspect for weeds or pests and address any issues promptly to prevent them from hindering growth. Maintain a careful mowing schedule, only trimming the grass when it reaches about 4 inches in height, and ensure the mower blades are sharp to avoid damaging the grass. With proper care and attention, your lawn will thrive and provide a lush, healthy turf.
Step 10: Integrate with Existing Lawn
Gradually blend repair areas with your existing lawn through careful mowing and maintenance practices. Begin mowing when new grass reaches 3-4 inches in height, removing only the top third of grass blades.
Adjust your overall lawn care routine to accommodate the newly repaired areas, including fertilization schedules and watering patterns that support both established and new grass areas.
This approach ensures a consistent and uniform lawn appearance over time. Be patient, as newly repaired areas will take some time to blend seamlessly with the established turf. Regular monitoring for weeds or pests is essential during this process, as the new grass may be more vulnerable. Maintain proper irrigation and avoid overwatering, which can lead to root rot or fungal issues. With diligent care and attention, your lawn will gradually transform into a cohesive, vibrant green space.

Maintaining Your Restored Lawn
Proper ongoing maintenance ensures your repaired lawn areas remain healthy and continue integrating with existing grass. Regular watering during dry periods helps prevent stress that could cause newly established grass to fail.
Monitor for signs of disease or pest problems that commonly affect young grass. Early intervention with appropriate treatments prevents small issues from becoming major lawn problems.
Continue following appropriate fertilization schedules based on your grass type and local growing season. Newly established grass areas may need slightly more frequent feeding during their first full growing season.
Common Mistakes to Avoid
Rushing the repair process often leads to poor results and wasted effort. Taking time for proper soil preparation and choosing quality materials pays dividends in long-term lawn health and appearance.
Over-watering ranks among the most frequent mistakes homeowners make during lawn repair. Soggy soil prevents proper root development and can lead to fungal diseases that damage or kill new grass.
Ignoring soil quality in favor of quick cosmetic fixes creates problems that persist for years. Invest in proper soil amendments and preparation for lasting results that improve your entire lawn’s health.
FAQ Frequently Asked Questions
How Long Does It Take for Grass To Grow Back After Trenching?
Grass seed typically germinates within 1-2 weeks under proper conditions, but full establishment and integration with existing lawn takes 6-8 weeks. Sod establishes faster, usually within 2-3 weeks.
Can I Use Regular Potting Soil To Fill Trenches?
Regular potting soil isn’t ideal for lawn repair as it’s often too light and may contain materials unsuitable for permanent outdoor use. Use quality topsoil mixed with compost for best results.
What’s the Best Time of Year To Repair Trenched Lawn Areas?
Early fall provides ideal conditions in most regions, offering warm soil and cooler air temperatures. Spring is the second-best option, but avoid peak summer heat and winter dormancy periods.
Should I Remove Old Grass Before Repairing Trenched Areas?
Remove only damaged or dead grass from trench edges. Healthy surrounding grass helps stabilize soil and provides a template for matching new grass varieties and density levels.
How Often Should I Water Newly Seeded Trench Repairs?
Water lightly 2-3 times daily until germination occurs, then gradually reduce frequency while increasing duration. Soil should remain consistently moist but never waterlogged during establishment.
Conclusion
Learning how Do I repair my lawn after trenching doesn’t have to be overwhelming when you follow proven methods and take time for proper preparation. The key lies in understanding that successful lawn repair combines good soil preparation, appropriate grass selection, and consistent maintenance practices.
Your newly repaired lawn areas will gradually blend with existing grass, often becoming stronger and healthier than the original lawn due to improved soil conditions and proper establishment techniques. The initial investment in quality materials and careful attention to detail pays dividends for years to come.
Remember that patience plays a crucial role in successful lawn repair. While it may take several weeks or even months to achieve perfect integration, the end result will be a beautiful, uniform lawn that shows no signs of its trenching history. Your garden and your property value will thank you for taking the time to do the job right.
About Ravuk Barg
B.Sc. Horticulture Science | Certified Master Gardener
Ravuk Barg has spent more than a decade with his hands in the soil and his head full of questions about why some gardens thrive while others struggle. What started as a single raised bed of tomatoes and basil in a modest backyard has grown into a deep, working knowledge of everything from seed germination and soil amendment to companion planting and seasonal pruning.
Over the years, Ravuk has gardened through drought summers, waterlogged springs, and pest invasions that would make most gardeners hang up their trowels for good. Those hard seasons, he’ll tell you, taught him more than any perfect growing year ever could. He writes from that earned experience—covering vegetable growing, ornamental planting, houseplant care, composting, and garden design with equal confidence and curiosity.
Philosophy & Approach
Ravuk’s approach to gardening is rooted in practicality. He favors organic methods not out of dogma, but because they work long-term—resulting in healthier soil, fewer inputs, and stronger plants. He has a particular fondness for heirloom vegetable varieties (the kind with proper flavor), unruly cottage-style flower beds, and the stubborn houseplants that everyone else gave up on.
The Mission: Give readers the honest, experience-backed advice that helps them actually succeed in their gardens—not just the ideal version, but the real one; weeds, failures, and all.
Education & Credentials
-
B.Sc. in Horticulture Science
-
Greenfield Agricultural University
-
Focus: Plant Physiology, Soil Ecology, and Sustainable Crop Production
-
-
Master Gardener Certification
-
Cooperative Extension Service
-
Focus: 200+ hours of hands-on practical training and community garden work
-
Continuing Education
-
Organic Pest Management
-
Native Plant Landscaping
-
Sustainable Crop Production