

Discovering unsightly mold and mildew on your favorite patio set can be disheartening. That green or black film not only looks bad but can also pose health risks and damage your furniture over time. Many homeowners assume the cleaning process is complicated, but with the right approach, it’s a manageable task.
This guide will walk you through an effective method for how to remove mold from lawn furniture, ensuring your outdoor space is clean, safe, and ready for relaxation. We’ll cover everything from preparing your workspace to applying the final protective touches, making the process simple even for complete beginners. Get ready to restore your furniture’s beauty and enjoy your outdoor oasis once again.
Why Mold Forms on Lawn Furniture
Mold is a type of fungus that thrives in damp, humid, and shady environments. Your lawn furniture, constantly exposed to the elements, provides the perfect breeding ground. The primary cause is moisture. Rain, morning dew, or even high humidity can keep furniture surfaces wet long enough for mold spores, which are always present in the air, to land and multiply.
Additionally, organic materials on the furniture’s surface act as a food source. This includes dirt, pollen, tree sap, and bird droppings. When these materials accumulate and combine with moisture, mold growth accelerates. Furniture made from porous materials like wood or wicker is particularly vulnerable because it can trap moisture deep within its fibers. Even plastic, metal, and fabric cushions can develop mold if they remain damp and dirty for extended periods. Lack of direct sunlight and poor air circulation further contribute to the problem, creating the ideal conditions for mold to flourish.
8 Step-by-Step Guide: How to Remove Mold From Lawn Furniture
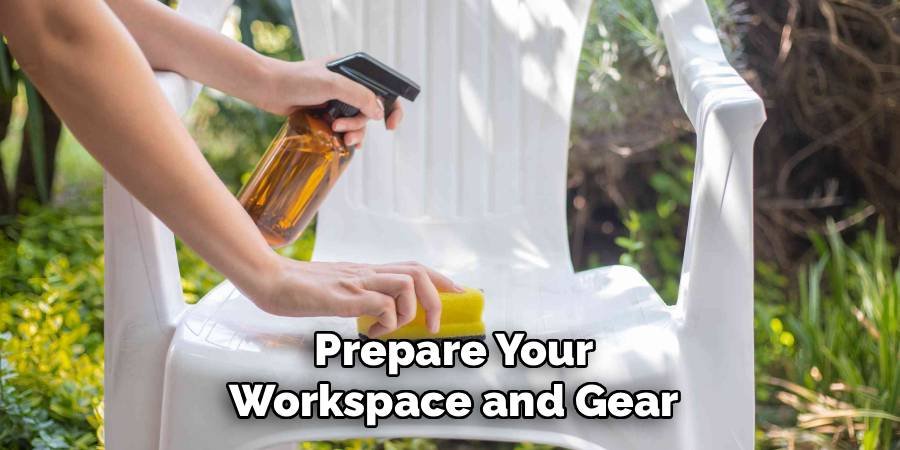
Step 1: Prepare Your Workspace and Gear
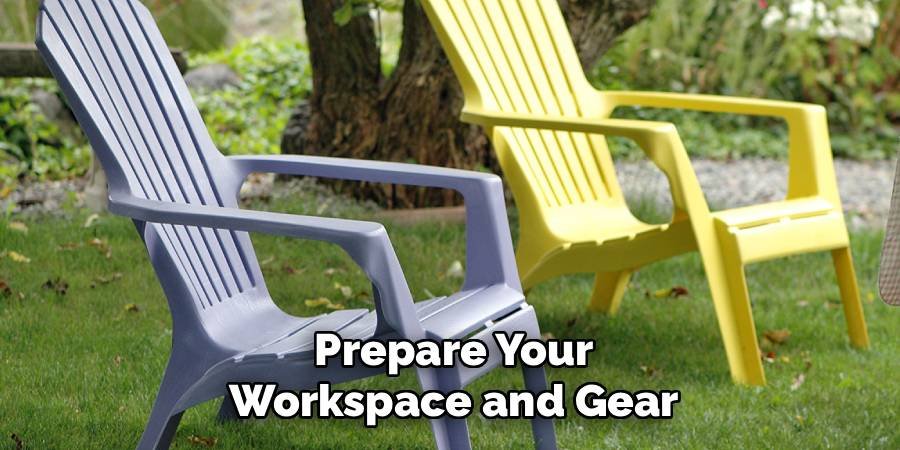
Before you begin the cleaning process, it is essential to set up your workspace and gather the necessary protective gear. Choose a well-ventilated outdoor area, preferably on a lawn or driveway where runoff from cleaning solutions won’t harm delicate plants. Lay down a tarp to protect the surface underneath your furniture if needed. Most importantly, protect yourself. Mold spores can be harmful if inhaled, so wear a dust mask or an N95 respirator. You should also wear rubber gloves to protect your hands from the cleaning solutions and safety goggles to prevent any splashes from getting into your eyes.
Step 2: Brush Away Loose Debris
With your protective gear on, the next step is to remove any loose mold and surface debris. Use a stiff-bristled brush to vigorously scrub the affected areas of the furniture. This initial brushing will dislodge the outermost layer of mold, dirt, and any other grime that has accumulated. For wooden furniture, brush in the direction of the grain to avoid causing scratches. For plastic or metal, a circular motion works well. This step is crucial because it allows your cleaning solution to penetrate deeper into the more stubborn mold patches, making the subsequent steps much more effective.
Step 3: Mix Your Cleaning Solution
Now it’s time to create a powerful cleaning solution to kill the remaining mold. A simple and effective mixture can be made using common household items. In a bucket, combine one gallon of warm water with one cup of white vinegar. Vinegar is a natural disinfectant that is excellent at killing mold. For more stubborn stains, especially on non-porous surfaces like plastic or metal, you can create a stronger solution by mixing one part bleach with ten parts water. However, always test the bleach solution on a small, inconspicuous area first, as it can discolor certain materials, including some fabrics and woods.
Step 4: How to Remove Mold From Lawn Furniture by Applying the Solution
Generously apply your chosen cleaning solution to all moldy areas of the furniture. A spray bottle is ideal for this task, as it allows you to evenly coat all surfaces, including hard-to-reach crevices and joints. If you don’t have a spray bottle, you can use a sponge or a cloth to apply the liquid. Be sure to completely saturate the moldy patches. Let the solution sit on the furniture for at least 15 to 20 minutes. This dwell time is critical, as it gives the vinegar or bleach time to work its magic, killing the mold spores at their roots.
Step 5: Scrub the Surfaces Thoroughly
After letting the solution soak in, it’s time for another round of scrubbing. Using your stiff-bristled brush, scrub the treated areas again. This time, the goal is to agitate and lift the now-dead mold from the furniture’s surface. You should see the mold and mildew stains begin to disappear as you work. Apply firm pressure, but be mindful of the material you are cleaning to avoid causing damage. For intricate details or tight corners, an old toothbrush can be a very useful tool. Continue scrubbing until all visible signs of mold have been removed from the furniture.
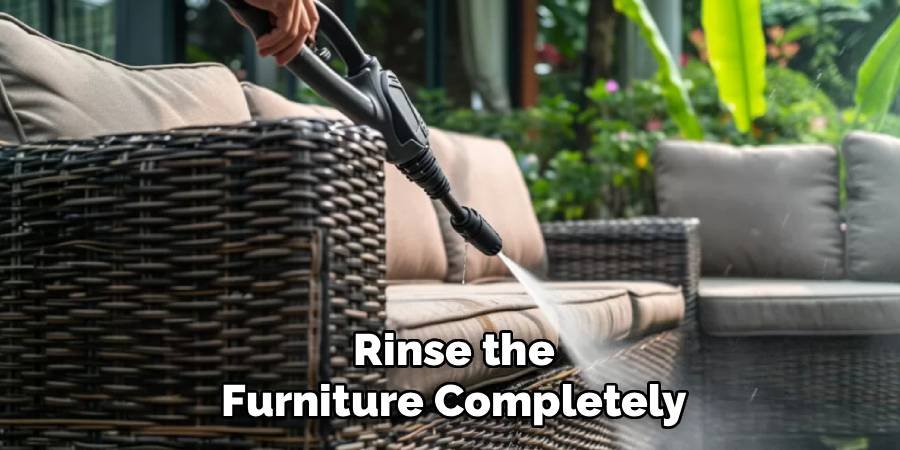
Step 6: Rinse the Furniture Completely
Once you are satisfied that all the mold has been scrubbed away, the next step is to rinse the furniture thoroughly. Using a garden hose with a spray nozzle, wash down every surface of the furniture to remove all traces of the cleaning solution and dislodged mold. Rinsing is an important part of knowing how to remove mold from lawn furniture properly, as any leftover cleaning residue, especially bleach, can damage the material over time. Ensure you rinse from the top down, letting gravity help you wash everything away. Continue rinsing until the water running off the furniture is completely clear.
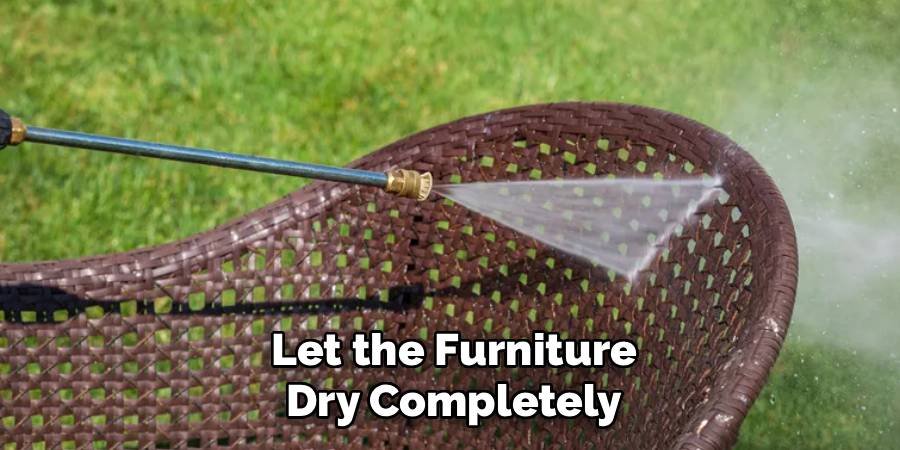
Step 7: Let the Furniture Dry Completely
After a thorough rinsing, you must allow the furniture to dry completely in direct sunlight. Sunlight is a natural mold inhibitor and will help ensure any lingering spores are eliminated. Place the furniture in a sunny, open area with good air circulation. Depending on the material and the weather, this could take several hours. Do not be tempted to use the furniture or cover it before it is bone dry. Trapping even a small amount of moisture can create the perfect environment for mold to quickly return, undoing all of your hard work. Patience is key in this final drying stage.
Step 8: Apply a Protective Sealant (Optional)
For an extra layer of protection, consider applying a sealant once the furniture is completely dry. This is particularly beneficial for wooden furniture. A quality outdoor sealant or varnish will create a waterproof barrier that prevents moisture from seeping into the wood, which is the primary cause of mold growth. For plastic or metal furniture, a coat of car wax can serve a similar purpose, helping water bead up and roll off the surface. This proactive step can significantly extend the time between cleanings and keep your lawn furniture looking its best for longer.
Frequently Asked Questions
How Can I Prevent Mold From Growing on My Patio Furniture?
Prevention is key. To keep mold at bay, regularly clean your furniture with a mild soap and water solution to remove dirt and pollen. Ensure it dries completely. When not in use, store cushions in a dry, indoor space. If possible, place your furniture in an area that receives ample sunlight and airflow. Using waterproof furniture covers during rainy seasons or overnight can also provide a significant barrier against the moisture that mold needs to thrive.
Is It Safe to Use Bleach on All Types of Lawn Furniture?
No, bleach is not safe for all materials. While it is very effective on hard, non-porous surfaces like plastic and coated metal, it can be damaging to others. Bleach can discolor or weaken wood fibers and certain fabrics. Always perform a spot test on a hidden area of the furniture before applying a bleach solution to the entire piece. For wood, fabric, and wicker, a gentler solution of white vinegar and water is a much safer and still effective alternative.
Can I Use a Pressure Washer to Remove Mold?
You can, but with caution. A pressure washer can be a quick way to blast away mold and grime, but the high-pressure stream can damage certain materials. It can splinter wood, tear fabric, and strip paint or sealant from surfaces. If you choose to use one, start with the lowest pressure setting and use a wide-angle nozzle. Keep the nozzle at a safe distance from the surface and always test it on an inconspicuous spot first to ensure it won’t cause harm.
What’s the Difference Between Mold and Mildew?
Mold and mildew are both types of fungi, but they have distinct differences. Mildew is typically a surface fungus that appears as a powdery patch of gray or white. It is easier to clean off. Mold, on the other hand, is often fuzzy or slimy in texture and can be black, green, or other colors. Mold tends to penetrate deeper into materials, making it more difficult to remove and more likely to cause structural damage over time.
How Often Should I Clean My Lawn Furniture to Avoid Mold?
The frequency depends on your climate and the furniture’s exposure to the elements. In humid, rainy regions, you may need to perform a deep clean two to three times a year. In drier climates, once a year might be sufficient. As a general rule, it’s a good practice to give your furniture a quick wipe-down with a damp cloth every few weeks to remove surface dirt and pollen before they can feed mold growth.
Conclusion
Restoring your outdoor furniture doesn’t have to be an overwhelming chore. By following these simple steps, you can effectively eliminate mold and bring your patio set back to life. From preparing your materials and mixing the right solution to scrubbing, rinsing, and drying, each stage plays a vital role in achieving a clean, mold-free finish. Taking the time to do it right will not only improve the appearance of your furniture but also help protect it for seasons to come. Now that you know how to remove mold from lawn furniture, you can confidently tackle this project and get back to enjoying your beautiful outdoor space.
About Ravuk Barg
B.Sc. Horticulture Science | Certified Master Gardener
Ravuk Barg has spent more than a decade with his hands in the soil and his head full of questions about why some gardens thrive while others struggle. What started as a single raised bed of tomatoes and basil in a modest backyard has grown into a deep, working knowledge of everything from seed germination and soil amendment to companion planting and seasonal pruning.
Over the years, Ravuk has gardened through drought summers, waterlogged springs, and pest invasions that would make most gardeners hang up their trowels for good. Those hard seasons, he’ll tell you, taught him more than any perfect growing year ever could. He writes from that earned experience—covering vegetable growing, ornamental planting, houseplant care, composting, and garden design with equal confidence and curiosity.
Philosophy & Approach
Ravuk’s approach to gardening is rooted in practicality. He favors organic methods not out of dogma, but because they work long-term—resulting in healthier soil, fewer inputs, and stronger plants. He has a particular fondness for heirloom vegetable varieties (the kind with proper flavor), unruly cottage-style flower beds, and the stubborn houseplants that everyone else gave up on.
The Mission: Give readers the honest, experience-backed advice that helps them actually succeed in their gardens—not just the ideal version, but the real one; weeds, failures, and all.
Education & Credentials
-
B.Sc. in Horticulture Science
-
Greenfield Agricultural University
-
Focus: Plant Physiology, Soil Ecology, and Sustainable Crop Production
-
-
Master Gardener Certification
-
Cooperative Extension Service
-
Focus: 200+ hours of hands-on practical training and community garden work
-
Continuing Education
-
Organic Pest Management
-
Native Plant Landscaping
-
Sustainable Crop Production