

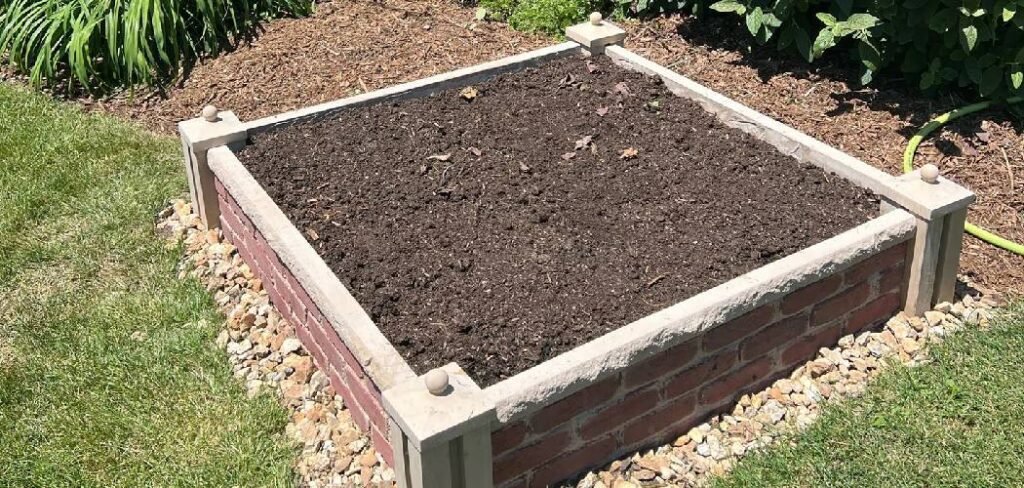
Raised bed gardening is one of the best ways to grow healthy plants. But over time, the soil in your raised bed can become tired and worn out. Plants take up nutrients, and the soil becomes hard and compacted. That’s why you need to know how to refresh raised bed soil every year. When you refresh your raised bed soil, you’re restoring the nutrients your plants need. You’re making the soil softer and easier for roots to grow. Fresh soil makes plants bigger, stronger, and gives you more vegetables and flowers.
Many gardeners think they have to throw out their old soil and buy new. But that’s not true! With a few simple steps, you can make your old soil better again. It saves money and helps the environment too.
Why You Need to Refresh Raised Bed Soil
Raised bed soil requires regular care, just like any garden. Here are the main reasons why refreshing your soil is so important:
Nutrients Get Used Up: Plants take nutrients from the soil as they grow. After the growing season, the soil is low in the good things plants need to stay healthy.
Soil Gets Compressed: Moving around the bed and watering it can cause the soil to compact. When the soil is compacted, it is difficult for the roots of the plants to spread out and grow.
Organic Matter Breaks Down: Good soil contains lots of organic matter, such as manure and old leaves. Over time, this material breaks down and disappears. You need to add more organic matter to keep the soil healthy.
pH Levels Change: Soil pH can be too high or too low for plants. Most vegetables prefer slightly acidic to neutral (pH 6.0-7.0) soil.
Disease and Pest Problems: Old soil may contain plant diseases and pests that will harm your new plants. New amendments help prevent these problems.
Better Water Drainage: Fresh soil drains well and retains the right amount of moisture for plant roots.
When to Refresh Your Raised Bed Soil
The best time to aerate your raised beds is in late fall or early spring. Here’s when to do this important gardening task:
Fall Refreshing: In most areas, October and November are the best months. The weather is cold and there is time before winter. The freshness of autumn makes the new materials stable in the winter.
Spring Refreshing: If you missed the fall season, March and April will work well. Freshen the soil at least 2-3 weeks before planting.
Signs Your Soil Needs Help: Look for these warning signs that mean it’s time to freshen up your raised bed soil:
- Plants grew poorly last season
- Water runs off instead of soaking in
- Soil feels hard when you poke it with a finger
- You can see more soil than organic matter
- Plants had lots of disease problems
How Often to Refresh: Most raised beds need to be refreshed once a year. If the bed has a lot of plants that are actively feeding, it may need to be refreshed twice a year.
10 Steps by Steps on How to Refresh Raised Bed Soil
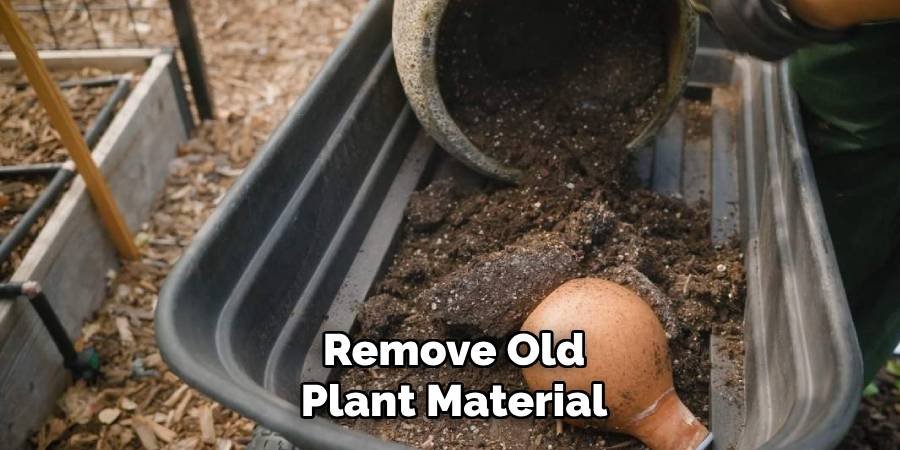
Step 1: Remove Old Plant Material
Start by thoroughly cleaning your raised bed. Remove any dead plants, weeds, and old roots. Remove any diseased plant material and throw it in the trash, not your compost pile. Healthy plant debris can go in your compost bin. Use a garden fork or spade to dig out any stubborn roots. Check for any insects or pests, such as larvae, that may be hiding in the soil. This cleaning step will prevent problems from spreading to the next season.
Step 2: Test Your Soil pH and Nutrients
Testing helps you understand what your soil needs. You can buy simple soil testing kits at garden stores or online. These tests show the pH level and key nutrients like nitrogen, phosphorus, and potassium. Take soil samples from different areas of your bed. Mix them and follow the test kit’s instructions. Most vegetables grow best when the soil pH is between 6.0 and 7.0. If your pH is too high or too low, you will need to adjust it.
Step 3: Loosen Compacted Soil
Use a garden fork to gently break up hard, packed soil. Push the fork down about 6-8 inches and rock it back and forth. Do not turn the soil completely over – just loosen it.
This step helps air and water move through the soil better. Loose soil allows plants to grow deep and strong roots. Work when the soil is slightly moist but not muddy.
Step 4: Add Organic Compost
Compost is the best thing you can add to improve topsoil. Spread 2-4 inches of good compost over the entire bed. Compost adds nutrients, improves soil structure, and feeds helpful soil microbes. You can make your own compost or buy it from a garden center. Look for compost that is dark, crumbly, and has an earthy smell. Avoid compost that smells sour or has lots of wood chips.
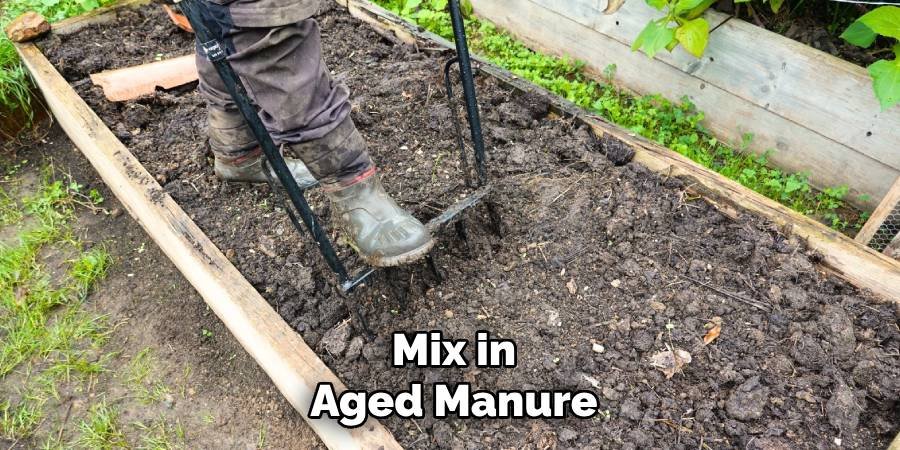
Step 5: Mix in Aged Manure
Well-aged animal manure adds extra nutrients and organic matter. Cow, horse, or chicken manure works best if it is at least 6 months old. Fresh manure can burn plants, so only use aged products. Add about 1-2 inches of aged manure and gently mix it in with the fertilizer. Manure provides nitrogen, which helps plants grow green and healthy.
Step 6: Incorporate Organic Fertilizers
Organic fertilizers release nutrients slowly and feed your plants throughout the season. Good options include:
- Bone meal for phosphorus
- Blood meal for nitrogen
- Kelp meal for trace minerals
- Rock phosphate for long-term phosphorus
Follow the package directions for how much to add. Typically, you will use 1-2 pounds for every 100 square feet of bedding.
Step 7: Add Soil Amendments Based on pH
If your soil test shows pH problems, now is the time to correct them. For soil that is too acidic (low pH), add lime or wood ash. For soil that is too acidic (high pH), add sulfur or pine needles.
These amendments work slowly, so be patient. It can take several months to see a change in pH. Always follow package directions and don’t add too much at once.
Step 8: Include Beneficial Microorganisms
Healthy soil is full of tiny beneficial microbes that help plants grow. You can add these helpers with mycorrhizal inoculants or effective microbes (EM).
These products come in powder or liquid form, which you mix into the soil. The good microbes help plant roots absorb nutrients better and protect them from disease.
Step 9: Create Proper Soil Depth
Most vegetables need at least 6-8 inches of good soil to grow well. Root vegetables like carrots need deeper soil, about 12 inches. If your bed isn’t deep enough, add more soil mix.
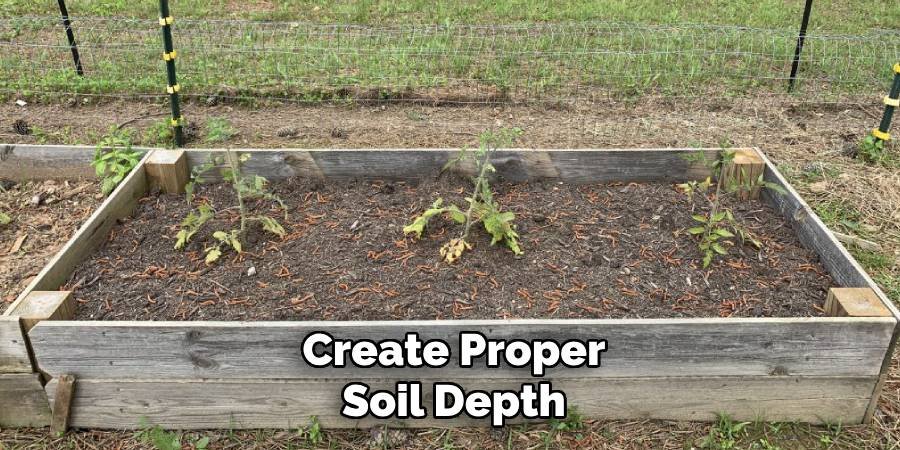
Create the perfect growing medium by mixing equal parts of your existing soil, compost, and a good quality potting mix. This mixture drains well but retains enough moisture for the plants.
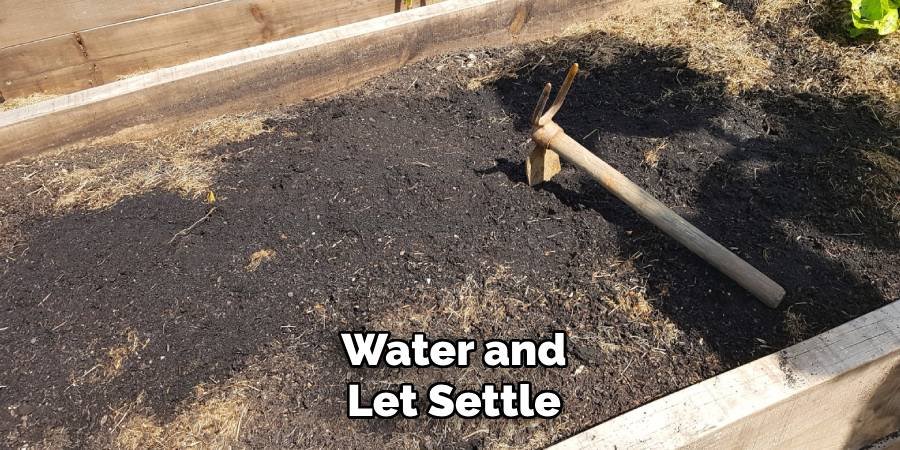
Step 10: Water and Let Settle
After adding all your amendments, water the bed gently but thoroughly; this helps everything settle together and begins the process of providing nutrients to the plants.
Leave the fresh soil for 2-3 weeks before planting. This takes time for the pH to stabilize and the organic matter to begin to break down. Cover with a tarp if you expect heavy rain.
Additional Tips for Long-Term Soil Health
Rotate Your Crops: Don’t plant the same vegetables in the same place every year. Crop rotation prevents nutrient loss and reduces disease problems.
Use Cover Crops: Plant cover crops like clover or winter rye in bare soil. These plants add organic matter and nutrients when dug up.
Mulch Regularly: Cover the soil with organic mulch, such as straw or shredded leaves. Mulch prevents weeds, retains moisture, and slowly breaks down to provide nutrients to the soil.
Avoid walking on Beds: Keep paths separate from the planting area. Walking on the soil compacts the soil and ruins your hard work.
Test Soil Annually: Make soil testing an annual habit. It helps you track improvements and catch problems early.
Common Mistakes to Avoid
Do not apply fresh manure directly to the area where you will soon be planting. Fresh manure can burn the roots of the plant and may contain harmful bacteria.
Avoid adding or mixing excess soil into the soil. This can destroy the soil structure and harm beneficial organisms. Do not add sand to clay soil, thinking that it will improve drainage. Mixing sand with clay creates a concrete-like mixture that is worse than before.
Never work with soil that is too wet. Wet soil compacts easily and forms hard clumps that are difficult to break up later.
Conclusion
Learning how to refresh raised bed soil is one of the most important skills for successful gardening. By following these 10 steps each year, your plants will grow stronger and produce more food and flowers. Good soil is the foundation of any healthy garden.
Remember, improving your raised bed is an investment in your garden’s future. The time and effort you put in now will produce better crops and healthier plants all season long. Start with a soil test to understand what your bed needs, then add the right combination of compost, organic matter, and amendments.
The key to success is to be consistent with your soil care and make gradual improvements over time. Don’t expect perfect results overnight – healthy soil develops over several growing seasons. With patience and regular attention, your raised bed will become rich, productive soil that supports amazing plant growth year after year.
About Ravuk Barg
B.Sc. Horticulture Science | Certified Master Gardener
Ravuk Barg has spent more than a decade with his hands in the soil and his head full of questions about why some gardens thrive while others struggle. What started as a single raised bed of tomatoes and basil in a modest backyard has grown into a deep, working knowledge of everything from seed germination and soil amendment to companion planting and seasonal pruning.
Over the years, Ravuk has gardened through drought summers, waterlogged springs, and pest invasions that would make most gardeners hang up their trowels for good. Those hard seasons, he’ll tell you, taught him more than any perfect growing year ever could. He writes from that earned experience—covering vegetable growing, ornamental planting, houseplant care, composting, and garden design with equal confidence and curiosity.
Philosophy & Approach
Ravuk’s approach to gardening is rooted in practicality. He favors organic methods not out of dogma, but because they work long-term—resulting in healthier soil, fewer inputs, and stronger plants. He has a particular fondness for heirloom vegetable varieties (the kind with proper flavor), unruly cottage-style flower beds, and the stubborn houseplants that everyone else gave up on.
The Mission: Give readers the honest, experience-backed advice that helps them actually succeed in their gardens—not just the ideal version, but the real one; weeds, failures, and all.
Education & Credentials
-
B.Sc. in Horticulture Science
-
Greenfield Agricultural University
-
Focus: Plant Physiology, Soil Ecology, and Sustainable Crop Production
-
-
Master Gardener Certification
-
Cooperative Extension Service
-
Focus: 200+ hours of hands-on practical training and community garden work
-
Continuing Education
-
Organic Pest Management
-
Native Plant Landscaping
-
Sustainable Crop Production