

A lush, green lawn is the pride of many homeowners, but sometimes, despite your best efforts, you might notice thinning grass, puddles after rain, or poor growth. The culprit is often something happening beneath the surface: soil compaction. When soil particles are pressed together, it restricts the movement of air, water, and nutrients, effectively choking your grassroots. Learning how to loosen compacted soil lawn is a game-changing skill for any gardener. This guide will walk you through the essential steps to breathe new life into your lawn by tackling compaction head-on, ensuring your grass can thrive from the roots up.
Why Compacted Soil is a Problem
Compacted soil is a significant barrier to a healthy, vibrant lawn. Think of your lawn’s root system as its lifeline. In healthy, loose soil, there are ample pore spaces that allow roots to grow deep and wide. These spaces are also crucial for holding and transporting air and water, two essential elements for grass survival. When soil becomes compacted, these pores are squeezed shut. This physical barrier makes it difficult for roots to penetrate the ground, leading to a shallow and weak root system that is less resilient to drought, heat, and foot traffic.
Furthermore, compaction prevents proper water infiltration. Instead of soaking into the ground to hydrate the grassroots, water tends to pool on the surface or run off, taking valuable topsoil and nutrients with it. This creates a stressful environment where the grass is simultaneously waterlogged at the surface and thirsty at the roots. The lack of oxygen in the dense soil also harms beneficial microorganisms that help break down organic matter and release nutrients. Ultimately, compacted soil creates a hostile environment that leads to weak, patchy, and unhealthy turf.
7 Step-by-Step Guide: How to Loosen Compacted Soil Lawn
Step 1: Assess Your Soil’s Condition
Before you begin, you need to confirm that compaction is indeed the problem. A simple way to test this is the “screwdriver test.” Try to push a long screwdriver or a sturdy garden stake into the soil. If you meet significant resistance and can only push it in an inch or two, your soil is likely compacted. You can also dig up a small, 6-inch-deep section of turf. Examine the soil profile and the root depth. If the roots are very shallow, growing sideways rather than down, and the soil is dense and hard to break apart, compaction is the issue. This initial assessment helps you understand the severity of the problem.

Step 2: Water the Lawn Thoroughly
Working with dry, hard soil is nearly impossible and can damage your tools and your back. To make the process easier, water your lawn deeply one to two days before you plan to aerate. The goal is to moisten the soil to a depth of at least a few inches, making it more pliable and receptive to aeration tools. However, be careful not to overwater. You want the soil to be damp, not muddy or saturated. If water is pooling on the surface, you have added too much. Properly moistened soil will allow aeration tines or spikes to penetrate easily, maximizing the effectiveness of your efforts to de-compact the turf.
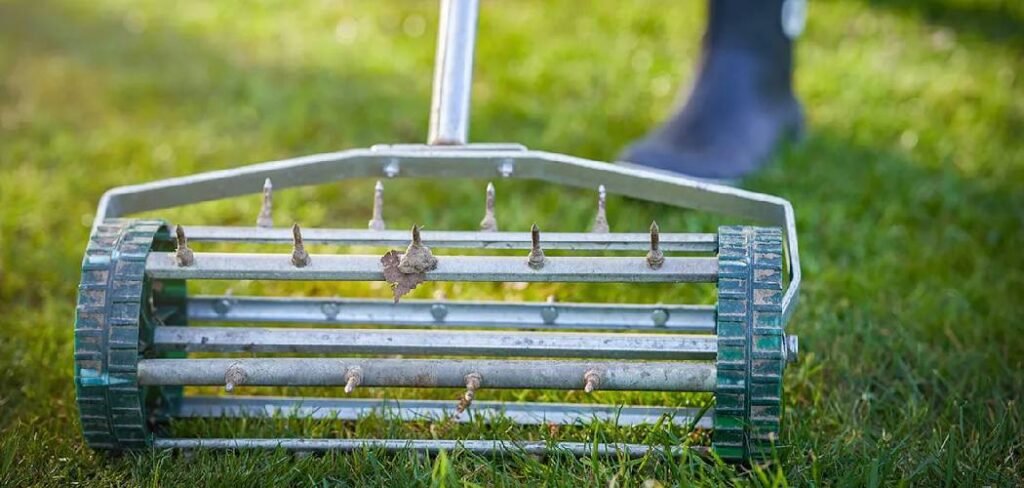
Step 3: Choose the Right Aeration Tool
There are several tools available for loosening compacted soil, and your choice will depend on the size of your lawn and the severity of the compaction. For small areas or minor compaction, a manual spike aerator or even a sturdy pitchfork can work. You simply push the tines into the ground every few inches. For a more effective and thorough solution, especially on larger lawns, a core aerator is the best option. This machine pulls out small plugs, or “cores,” of soil, which actively removes the compacted material and creates more space. You can rent a power core aerator from most home improvement or garden supply stores.
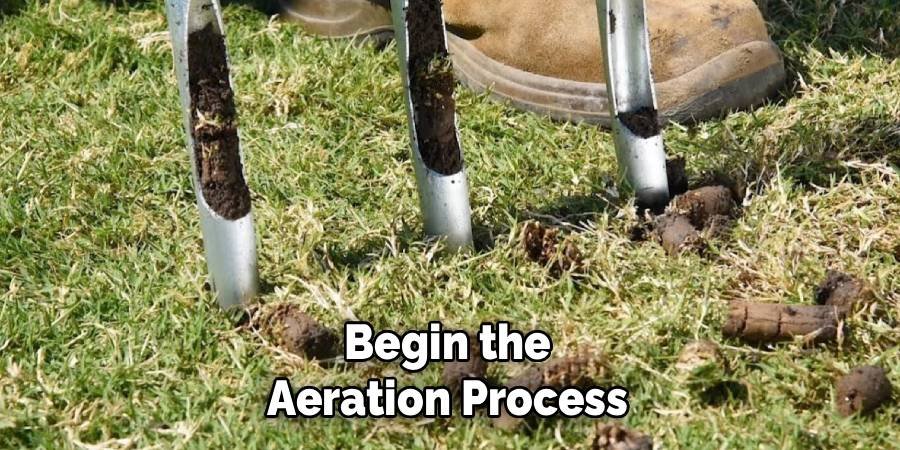
Step 4: Begin the Aeration Process
Once your soil is moist and you have your tool, it’s time to start aerating. If you are using a manual tool, work in a consistent pattern across the lawn, inserting the spikes or tines every 4-6 inches. If you are using a power core aerator, follow the manufacturer’s instructions for safe operation. Move across the lawn in a methodical pattern, similar to how you would mow it. For heavily compacted areas, such as pathways or play areas, it is beneficial to make a second pass in a perpendicular direction to the first. This ensures comprehensive coverage and provides maximum relief for the constricted soil.
Step 5: Leave the Soil Cores on the Lawn
If you used a core aerator, your lawn will be covered in small plugs of soil. It might look a little messy, but it is best to leave them right where they are. These cores contain valuable microorganisms and organic matter. Over the next week or two, they will naturally break down with rainfall and mowing, returning nutrients to the soil surface. This process acts as a form of topdressing, contributing to the overall health of your lawn’s ecosystem. Raking them up would be removing valuable organic material that can benefit your turf as it recovers.
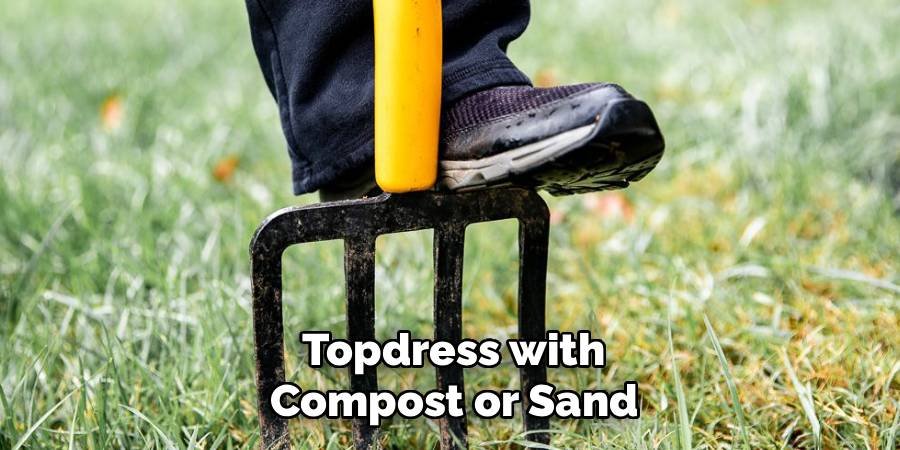
Step 6: Topdress with Compost or Sand
After aeration, the new holes in your lawn present a perfect opportunity to improve your soil structure for the long term. This is a key part of how to loosen compacted soil lawn effectively. Spreading a thin layer (about a quarter-inch) of high-quality compost over the entire lawn is highly recommended. The organic matter will fall into the aeration holes and mix with the existing soil, improving its texture, fertility, and water-holding capacity. For very heavy clay soils, mixing coarse sand with the compost can further enhance drainage and prevent future compaction. Use a rake to spread the topdressing material evenly across the surface.
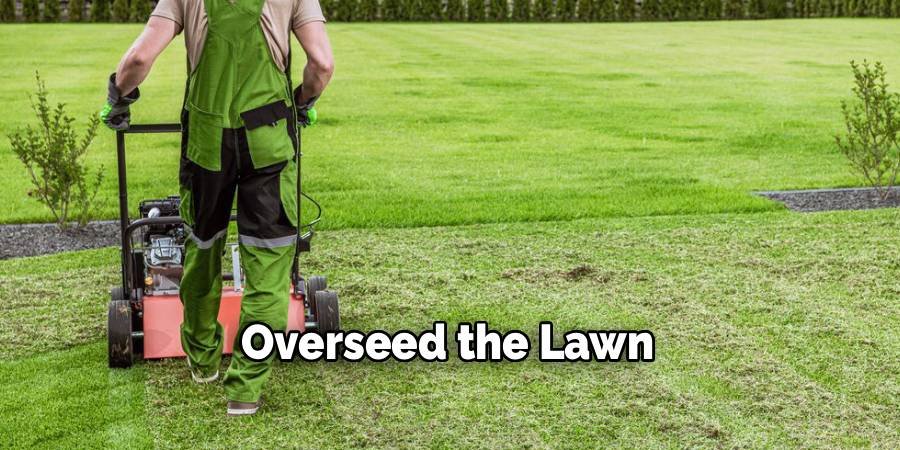
Step 7: Overseed the Lawn
Aeration creates the ideal seedbed for new growth. Immediately after topdressing is a great time to overseed your lawn, especially if it has become thin or patchy. The new seeds will fall into the aeration holes, where they have excellent seed-to-soil contact and are protected from being washed away or eaten by birds. This gives them a much better chance of germination. Choose a grass seed blend that is appropriate for your climate and sun exposure. A thicker, denser lawn is one of your best defenses against future soil compaction and weed invasion.
Water and Fertilize Your Recovering Lawn
Your lawn will need consistent care to recover and take full advantage of the aeration. Water the lawn lightly but frequently for the first couple of weeks, especially if you have overseeded. This keeps the new seeds and the topdressing material moist. Once the new grass begins to establish, you can return to a less frequent, deeper watering schedule. About a week after aerating, you can apply a slow-release nitrogen fertilizer. This will provide the necessary nutrients to encourage strong root development and vigorous top growth, helping your lawn become healthier and more resilient than ever.
Frequently Asked Questions Section
How Often Should I Aerate My Lawn?
For most lawns, aerating once a year is sufficient to prevent soil compaction, especially in high-traffic areas. However, if your soil is predominantly heavy clay or the lawn sees intense use from children, pets, or outdoor activities, you may benefit from aerating twice a year—once in the spring and once in the fall. Fall is generally considered the best time for cool-season grasses, while spring is ideal for warm-season grasses.
Can I Loosen Compacted Soil Without A Machine?
Yes, you can loosen compacted soil without a machine, though it requires more physical effort. For small areas, you can use a pitchfork or a manual spike aerator. Simply insert the tines into the ground every few inches and gently rock the tool back and forth to create fractures in the soil. While not as effective as core aeration for removing soil, this method still helps introduce air and improve water penetration in a targeted way.
What Is The Difference Between Spike and Core Aeration?
Spike aeration involves poking solid tines into the ground, which creates holes but can sometimes increase compaction along the sides of the holes. Core aeration, on the other hand, uses hollow tines to physically pull out plugs of soil from the lawn. This method is generally considered superior because it actively reduces density by creating more space for air, water, and roots. For seriously compacted lawns, core aeration is the recommended choice.
What Should I Do After Aerating My Lawn?
After aerating, you should:
- Leave the soil plugs on the lawn to break down naturally.
- Topdress with a thin layer of compost to introduce organic matter into the soil.
- Overseed to fill in thin patches and thicken the turf.
- Apply a suitable fertilizer to provide nutrients for new growth.
- Water regularly to help the new seed germinate and the lawn recover.
Can Gypsum Help Loosen Compacted Clay Soil?
Gypsum can be a helpful amendment for improving the structure of heavy clay soils. It is a soil conditioner that causes fine clay particles to clump together, creating larger pore spaces. This process, called flocculation, improves drainage and aeration. However, gypsum is most effective when combined with mechanical aeration. Applying gypsum after core aerating allows the material to work its way deeper into the soil profile for more significant and lasting results.
Conclusion
Restoring a lawn suffering from compacted soil is a manageable and highly rewarding project. By following these steps—from assessing the problem and aerating correctly to topdressing and overseeding—you are not just treating the symptoms but fixing the root cause of an unhealthy lawn. This process improves the fundamental structure of your soil, allowing air, water, and nutrients to support robust root growth. Now that you know how to loosen compacted soil lawn, you have the power to transform your turf into a thriving, resilient, and beautiful green space.
About Ravuk Barg
B.Sc. Horticulture Science | Certified Master Gardener
Ravuk Barg has spent more than a decade with his hands in the soil and his head full of questions about why some gardens thrive while others struggle. What started as a single raised bed of tomatoes and basil in a modest backyard has grown into a deep, working knowledge of everything from seed germination and soil amendment to companion planting and seasonal pruning.
Over the years, Ravuk has gardened through drought summers, waterlogged springs, and pest invasions that would make most gardeners hang up their trowels for good. Those hard seasons, he’ll tell you, taught him more than any perfect growing year ever could. He writes from that earned experience—covering vegetable growing, ornamental planting, houseplant care, composting, and garden design with equal confidence and curiosity.
Philosophy & Approach
Ravuk’s approach to gardening is rooted in practicality. He favors organic methods not out of dogma, but because they work long-term—resulting in healthier soil, fewer inputs, and stronger plants. He has a particular fondness for heirloom vegetable varieties (the kind with proper flavor), unruly cottage-style flower beds, and the stubborn houseplants that everyone else gave up on.
The Mission: Give readers the honest, experience-backed advice that helps them actually succeed in their gardens—not just the ideal version, but the real one; weeds, failures, and all.
Education & Credentials
-
B.Sc. in Horticulture Science
-
Greenfield Agricultural University
-
Focus: Plant Physiology, Soil Ecology, and Sustainable Crop Production
-
-
Master Gardener Certification
-
Cooperative Extension Service
-
Focus: 200+ hours of hands-on practical training and community garden work
-
Continuing Education
-
Organic Pest Management
-
Native Plant Landscaping
-
Sustainable Crop Production