

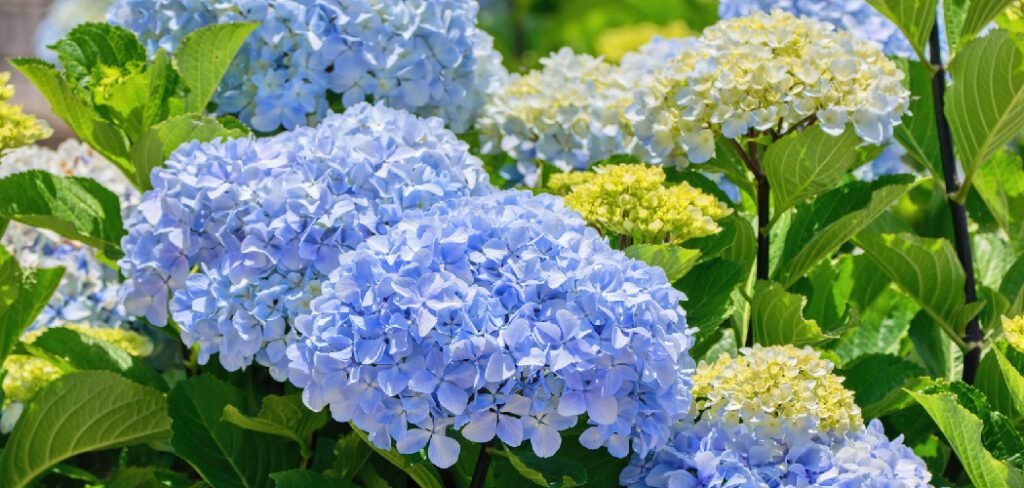
Hydrangeas are beloved for their stunning, cloud-like blooms that can transform any garden into a vibrant oasis. These shrubs are relatively easy to care for, but the secret to truly spectacular flowers lies in the ground they grow in. Understanding how to prepare soil for hydrangeas is the most crucial first step you can take. Proper soil preparation ensures your plants have the right foundation for healthy root development, robust growth, and the breathtaking blooms you envision. This guide will walk you through everything you need to know, from testing your soil to amending it perfectly for these beautiful plants.
Why Soil Preparation Matters for Hydrangeas
The health, color, and size of your hydrangea blooms are directly linked to the quality of your soil. Hydrangeas are particular about their growing medium. They require well-draining soil that remains consistently moist but not waterlogged. Poorly prepared soil can lead to root rot, nutrient deficiencies, and lackluster flowers. Furthermore, the soil’s pH level famously influences the color of certain hydrangea varieties, like Bigleaf hydrangeas. Acidic soil typically produces blue flowers, while alkaline soil results in pink or red blooms. By taking the time to prepare your soil, you set the stage for a thriving plant that will reward you with years of beauty.
10 Step-by-Step Guide on How to Prepare Soil for Hydrangeas
Step 1: Choose the Right Planting Location
Before you even think about digging, select the perfect spot for your hydrangeas. Most varieties thrive in a location that receives morning sun and afternoon shade, especially in warmer climates. The intense afternoon sun can scorch their leaves and cause the flowers to wilt. Also, consider the mature size of your specific hydrangea variety to ensure it has ample space to grow without crowding other plants. Good air circulation is also beneficial, as it helps prevent fungal diseases like powdery mildew. Choosing the right spot is the foundational step for a happy plant.

Step 2: Clear and Weed the Area
Once you have chosen your location, it’s time to clear the ground. Remove any existing weeds, grass, rocks, or other debris from the planting area. This step is vital because it eliminates competition for water, nutrients, and sunlight, giving your new hydrangea a clear advantage. Dig out the roots of any perennial weeds to prevent them from growing back and interfering with your hydrangea’s root system. A clean slate ensures that all the resources in the soil are available exclusively for your new plant to establish itself and flourish.
Step 3: Test Your Soil’s pH and Drainage
Understanding your soil’s current state is essential. You can purchase a simple DIY soil testing kit from a garden center or send a sample to your local cooperative extension service for a more detailed analysis. The test will reveal your soil’s pH level and nutrient composition. To check for drainage, dig a hole about 12 inches deep and 12 inches wide, fill it with water, and let it drain completely. Refill it with water and time how long it takes to drain. Ideal soil will drain at a rate of about one inch per hour.
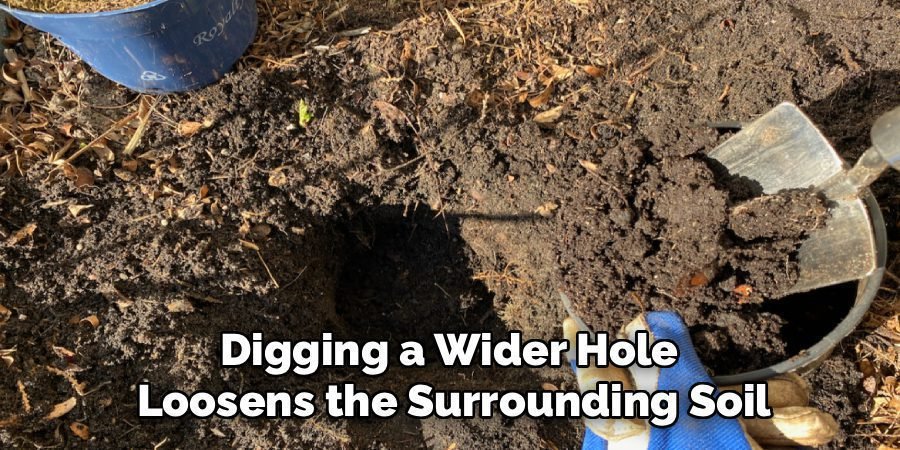
Step 4: Dig the Planting Hole
Proper hole size is critical for root establishment. Dig a hole that is at least twice as wide as the hydrangea’s root ball but only as deep as the root ball itself. Digging a wider hole loosens the surrounding soil, making it easier for the roots to spread out and anchor the plant. Avoid digging the hole deeper than the root ball, as this can cause the plant to settle too low over time, which may lead to water collecting around the base and causing root rot.
Step 5: Amend Clay or Sandy Soil
Most garden soils are not perfect and will need amendments. If you have heavy clay soil, which retains too much water, you need to improve its drainage. Mix in organic matter like compost, aged pine bark, or peat moss to break up the dense clay particles. For sandy soil, which drains too quickly, the goal is to improve water retention. Adding the same organic materials—compost is excellent—will help the soil hold onto moisture and nutrients, making them available to the plant’s roots for a longer period.
Step 6: Adjust the Soil pH for Desired Bloom Color
Here’s where the magic happens for Bigleaf hydrangeas (Hydrangea macrophylla). If you want blue blooms, you need acidic soil with a pH between 5.2 and 5.5. You can lower the soil’s pH by adding soil acidifiers like aluminum sulfate or elemental sulfur. For pink or red flowers, you need alkaline soil with a pH of 6.0 to 6.2. To raise the soil’s pH, you can incorporate garden lime or wood ash. This step in how to prepare soil for hydrangeas is key for color control.
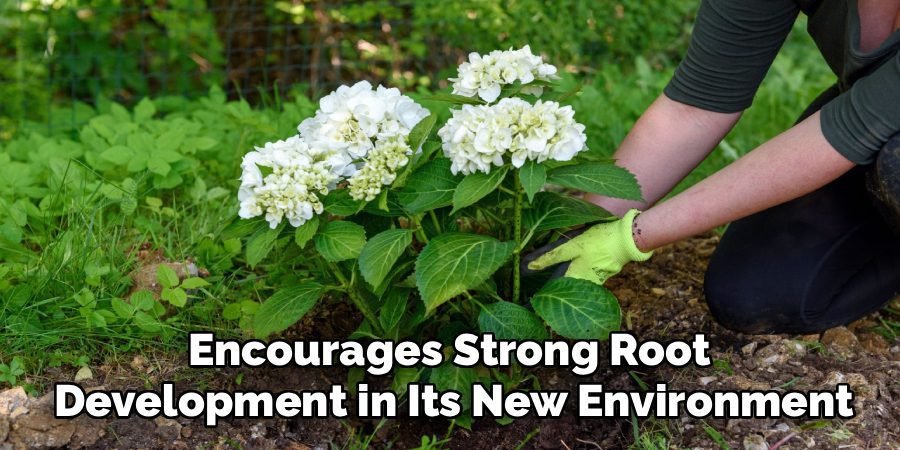
Step 7: Incorporate a Starter Fertilizer
Before placing your hydrangea in the hole, it’s a good idea to mix a balanced, slow-release fertilizer into the amended soil at the bottom of the hole. Choose a fertilizer formulated for shrubs and trees. This initial nutrient boost helps the plant overcome transplant shock and encourages strong root development in its new environment. Be sure to follow the package instructions carefully to avoid over-fertilizing, which can burn the young, delicate roots of your new hydrangea plant. This step provides essential food for early growth.
Step 8: Mix All Amendments and Backfill the Hole
Now, combine the soil you removed from the hole with your chosen amendments, such as compost, peat moss, and any pH adjusters. A good ratio is about one-third amendment to two-thirds native soil. Use this enriched mixture to backfill the hole around the hydrangea’s root ball. Gently tamp down the soil as you go to eliminate any large air pockets, which can dry out the roots. Ensure the top of the root ball is level with or slightly above the surrounding ground to promote proper drainage away from the plant’s crown.
Step 9: Water Thoroughly After Planting
Immediately after planting, give your hydrangea a deep and thorough watering. This helps settle the soil around the root ball, removing any remaining air pockets and ensuring good contact between the roots and the soil. A slow, deep soak is much more effective than a quick spray. Water until the entire root zone is saturated. Consistent moisture is crucial during the first few weeks as the plant establishes itself in its new home. This initial watering is one of the most important actions for a successful transplant.
Step 10: Apply a Layer of Mulch
The final step is to apply a 2- to 3-inch layer of organic mulch around the base of the plant. Use materials like shredded bark, pine straw, or compost. Mulch is incredibly beneficial; it helps the soil retain moisture, suppresses weed growth, and regulates soil temperature, keeping the roots cool in summer and insulated in winter. Be sure to leave a small gap around the stem of the hydrangea to prevent moisture buildup, which can lead to rot and disease.
Common Mistakes to Avoid
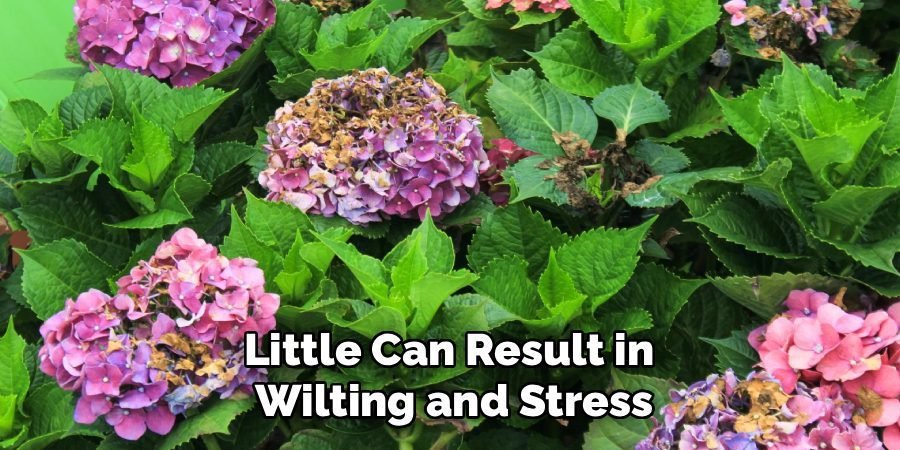
When caring for hydrangeas, there are several common mistakes gardeners should watch out for. One frequent error is improper pruning. Cutting back hydrangeas at the wrong time of year can remove flower buds, leading to a lack of blooms during the growing season. Ensure you know whether your hydrangea variety blooms on old wood, new wood, or both before pruning. Another mistake is overwatering or underwatering. While hydrangeas need consistent moisture, too much water can lead to root rot, and too little can result in wilting and stress.
Additionally, planting hydrangeas in full sun without sufficient afternoon shade can cause leaf scorch, especially in hotter climates. Finally, neglecting proper soil preparation or testing can lead to poor growth or undesirable flower colors. Be mindful of these common pitfalls to ensure your hydrangeas thrive and bloom beautifully.
Frequently Asked Questions (FAQ)
What Is the Best Soil Mix for Hydrangeas in Pots?
For potted hydrangeas, use a high-quality, well-draining potting mix rather than garden soil, which is too dense and can become compacted. Look for a mix containing peat moss, perlite, and compost. This combination provides the ideal balance of moisture retention and aeration needed for container-grown plants. Ensure the pot has adequate drainage holes to prevent water from pooling at the bottom, which is a common cause of root rot.
Can I Use Coffee Grounds to Make My Hydrangea Soil More Acidic?
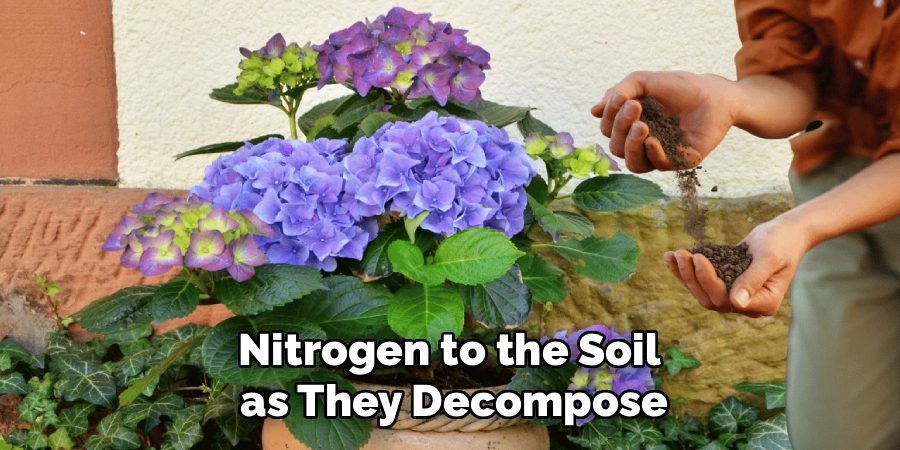
Yes, you can use coffee grounds to help make your soil more acidic, which can encourage blue blooms in certain hydrangea varieties. Used coffee grounds have a slightly acidic pH and add nitrogen to the soil as they decompose. Sprinkle a thin layer of used grounds around the base of your hydrangeas and work them lightly into the top inch of soil. However, use them in moderation, as they are not a substitute for a dedicated soil acidifier like aluminum sulfate for significant pH changes.
How Often Should I Test My Soil’s pH?
It is a good practice to test your soil’s pH every one to two years, especially if you are actively trying to control your hydrangea’s bloom color. Soil pH can change over time due to factors like rainfall, fertilization, and the breakdown of organic matter. Regular testing allows you to make timely adjustments with soil amendments like lime or sulfur, ensuring your hydrangeas continue to have the optimal conditions for their health and desired flower color.
What Are the Signs of Poor Soil for Hydrangeas?
Signs of poor soil often manifest in the plant’s appearance. Yellowing leaves (chlorosis) can indicate a nutrient deficiency or an incorrect pH level that prevents nutrient uptake. Wilting leaves, even when the soil is wet, might signal compacted soil and root rot due to poor drainage. Stunted growth and a lack of flowers are also clear indicators that the soil is not providing the necessary support for your hydrangea to thrive.
Is It Necessary to Amend Soil if My Hydrangeas Are Already Growing?
If your existing hydrangeas are healthy and blooming well, you may not need to make major changes. However, if they show signs of stress or you want to change their flower color, you can still amend the soil. Carefully work compost and other amendments into the top few inches of soil around the plant’s drip line, being cautious not to disturb the roots. For pH adjustments, apply products like garden lime or aluminum sulfate to the soil surface and water them in.
Conclusion
Creating the perfect soil environment is the foundation of growing beautiful, healthy hydrangeas. By following these steps, you can ensure your plants get the best possible start. From selecting the right spot and testing your soil to making targeted amendments, each action contributes to a robust root system and, ultimately, more vibrant and abundant blooms. Taking the time to learn how to prepare soil for hydrangeas is an investment that will pay off with season after season of stunning floral displays in your garden. Happy planting
About Ravuk Barg
B.Sc. Horticulture Science | Certified Master Gardener
Ravuk Barg has spent more than a decade with his hands in the soil and his head full of questions about why some gardens thrive while others struggle. What started as a single raised bed of tomatoes and basil in a modest backyard has grown into a deep, working knowledge of everything from seed germination and soil amendment to companion planting and seasonal pruning.
Over the years, Ravuk has gardened through drought summers, waterlogged springs, and pest invasions that would make most gardeners hang up their trowels for good. Those hard seasons, he’ll tell you, taught him more than any perfect growing year ever could. He writes from that earned experience—covering vegetable growing, ornamental planting, houseplant care, composting, and garden design with equal confidence and curiosity.
Philosophy & Approach
Ravuk’s approach to gardening is rooted in practicality. He favors organic methods not out of dogma, but because they work long-term—resulting in healthier soil, fewer inputs, and stronger plants. He has a particular fondness for heirloom vegetable varieties (the kind with proper flavor), unruly cottage-style flower beds, and the stubborn houseplants that everyone else gave up on.
The Mission: Give readers the honest, experience-backed advice that helps them actually succeed in their gardens—not just the ideal version, but the real one; weeds, failures, and all.
Education & Credentials
-
B.Sc. in Horticulture Science
-
Greenfield Agricultural University
-
Focus: Plant Physiology, Soil Ecology, and Sustainable Crop Production
-
-
Master Gardener Certification
-
Cooperative Extension Service
-
Focus: 200+ hours of hands-on practical training and community garden work
-
Continuing Education
-
Organic Pest Management
-
Native Plant Landscaping
-
Sustainable Crop Production