

Welcome to the world of enriching your garden or growing mushrooms at home! A key step many enthusiasts encounter is preparing the right growing medium. Using manure as a substrate can provide incredible nutrients, but it needs proper treatment first. This guide will walk you through the process of how to pasteurize manure substrate, a crucial technique to ensure a healthy and successful harvest.
Pasteurization isn’t about sterilizing; it’s about selectively eliminating harmful competitors while preserving the beneficial microorganisms your plants or mycelium need to thrive. By following these steps, you can create a clean, nutrient-rich foundation for your next growing project.
Why Pasteurizing Manure Substrate is Important
Pasteurizing your manure substrate is a vital step that significantly increases your chances of success, whether you’re cultivating gourmet mushrooms or enriching garden soil. Manure is naturally full of life, but not all of it is beneficial. It often contains competitor molds, harmful bacteria, and other unwanted microorganisms that can outcompete your desired culture or introduce diseases to your plants.
The goal of pasteurization is not to create a sterile, lifeless medium. Instead, it’s a gentle heating process designed to kill off the “bad guys”—like trichoderma (green mold)—while leaving many of the beneficial, heat-resistant bacteria alive. These good microbes help protect your substrate from future contamination and can even aid in nutrient breakdown, making them more accessible to your mycelium or plant roots.
Skipping this step is a gamble that often leads to contaminated batches, wasted materials, and disappointment. By taking the time to pasteurize, you create a selective and advantageous environment for whatever you intend to grow.
7 Step-by-Step Guide: How to Pasteurize Manure Substrate
Step 1: Gather Your Materials
Before you begin, gather all the necessary equipment and ingredients. You will need your manure source (like aged horse or cow manure), a bulking agent such as coco coir or vermiculite, and gypsum to balance the pH. For the process itself, you’ll need a large pot with a lid, a thermometer, a large bucket or heat-resistant container, and something to insulate it, like towels or blankets. Having everything organized and within reach will make the entire process smoother and more efficient, preventing any last-minute scrambling.

Step 2: Prepare the Substrate Mixture
Now it’s time to mix your ingredients. The ideal ratio can vary, but a common starting point is to combine one part manure with one part coco coir or vermiculite. This bulking agent helps with water retention and aeration, creating a better structure for root or mycelium growth. Add a small amount of gypsum, about 2-5% of the total dry weight, to help stabilize the pH and provide essential minerals. Mix these dry components thoroughly in your bucket to ensure an even distribution of all ingredients.
Step 3: Add Water to Field Capacity
Achieving the correct moisture level, known as “field capacity,” is crucial. This is the point where the substrate holds the maximum amount of water without being oversaturated. Slowly add hot water to your dry mix, stirring continuously until everything is evenly dampened. To test for field capacity, grab a handful of the substrate and squeeze it firmly. A few steady drops of water should emerge. If more than a stream comes out, it’s too wet; if nothing comes out, it’s too dry. Adjust as needed.
Step 4: Transfer to Your Pasteurization Vessel
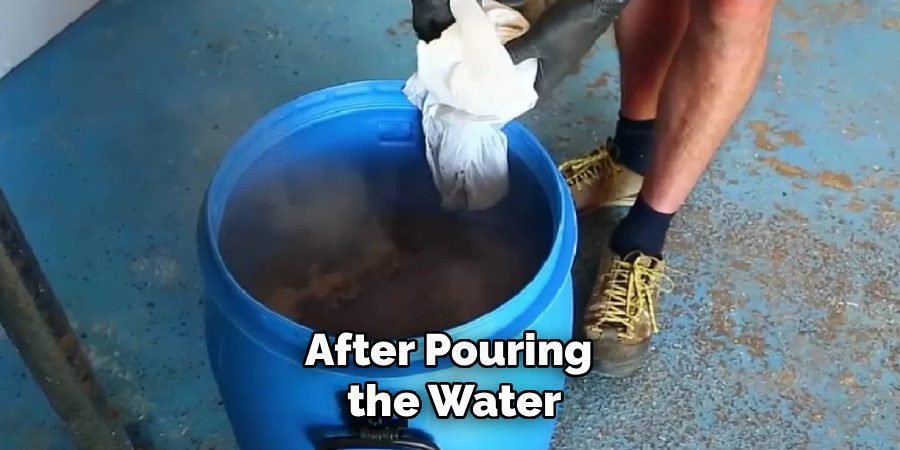
Once your substrate is at field capacity, it’s time to prepare for the heating process. If you are using the bucket method, ensure your mixture is already inside a heat-resistant bucket. Pour boiling water over the substrate until it is fully submerged. The amount of water needed will depend on the size of your bucket and the volume of your substrate. After pouring the water, immediately place the lid on the bucket tightly to trap the steam and heat inside. This is a critical step in the low-tech method of how to pasteurize manure substrate.
Step 5: Begin the Pasteurization Process
Now, the waiting begins. The trapped heat and steam will work to pasteurize the substrate. To maintain the temperature for as long as possible, wrap the entire bucket in thick towels or blankets. This insulation is key to ensuring the substrate stays within the effective pasteurization temperature range (between 140-160°F or 60-70°C) for an extended period. Let the bucket sit, completely undisturbed, for at least 8 to 12 hours. This duration allows the heat to penetrate the entire mixture and eliminate unwanted contaminants.
Step 6: Monitor the Temperature
For a more controlled approach using a large pot, you’ll need to monitor the temperature closely. Place your substrate in pillowcases or filter bags and submerge them in the pot of water. Heat the water slowly until it reaches 140°F (60°C). Use a thermometer to ensure the temperature does not exceed 160°F (70°C), as higher temperatures can lead to sterilization, killing beneficial microbes. Maintain this temperature range for at least 90 minutes to two hours to complete the process effectively.
Step 7: Cool the Substrate
After the pasteurization period is over, the substrate must cool down completely before you can use it. For the bucket method, simply leave the insulated bucket to sit at room temperature for several hours, or even overnight, until it is cool to the touch. If you used the pot method, carefully remove the bags from the hot water and place them on a clean surface or rack to drain and cool. Do not open the bags or expose the substrate to open air until it has reached room temperature to prevent re-contamination.
Use Your Pasteurized Substrate
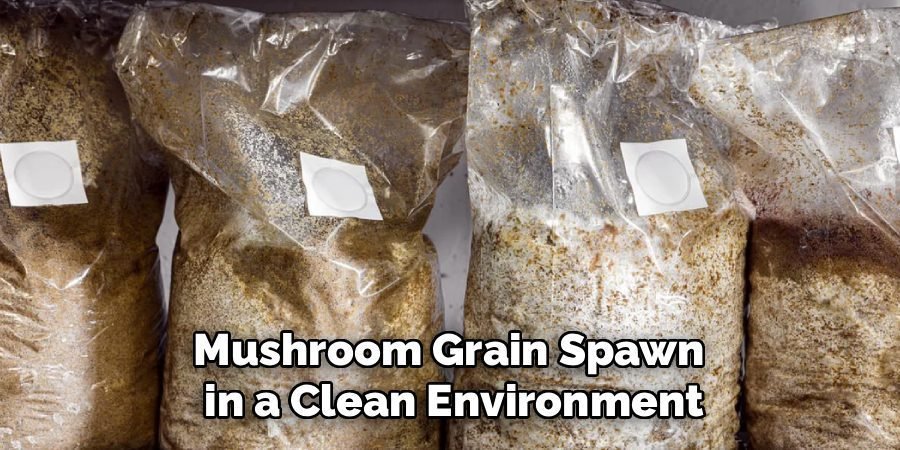
Once your substrate has completely cooled to below 80°F (27°C), it is ready for use. At this point, you can add it to your garden bed or mix it with your mushroom grain spawn in a clean environment. Work quickly and efficiently to minimize the substrate’s exposure to airborne contaminants. Properly pasteurized substrate gives your mushroom mycelium or plant roots a significant head start, free from the competition of molds and other aggressive microorganisms. This is the final step in learning how to pasteurize manure substrate successfully.
Frequently Asked Questions
What Is The Difference Between Pasteurization and Sterilization?
Pasteurization involves heating a substrate to a temperature range of 140-160°F (60-70°C) to kill most harmful contaminants while leaving beneficial, heat-resistant microbes alive. Sterilization, on the other hand, uses higher temperatures (above 250°F or 121°C) under pressure to eliminate all living organisms, both good and bad. For nutrient-rich substrates like manure, pasteurization is preferred because it leaves a microbial barrier that helps prevent re-contamination.
Can I Use an Oven to Pasteurize Manure Substrate?
Yes, you can use an oven, but it requires careful monitoring to avoid drying out or sterilizing the substrate. To do this, place your hydrated substrate in an oven-safe bag or covered pan. Set the oven to a low temperature, around 170°F (77°C), and use a meat thermometer to check that the internal temperature of the substrate reaches and holds between 140-160°F for at least 90 minutes. This method can be effective but is often less consistent than water bath or steam methods.
How Long Does Pasteurized Substrate Stay Good For?
Once pasteurized and cooled, the substrate should be used as soon as possible, ideally within 24 to 48 hours. The longer it sits, the higher the risk of re-contamination from airborne spores. Always keep your pasteurized substrate in a sealed container or bag in a clean space until you are ready to use it. If you need to store it for a longer period, keeping it in a cool, dark place may help, but prompt use is always the best practice for optimal results.
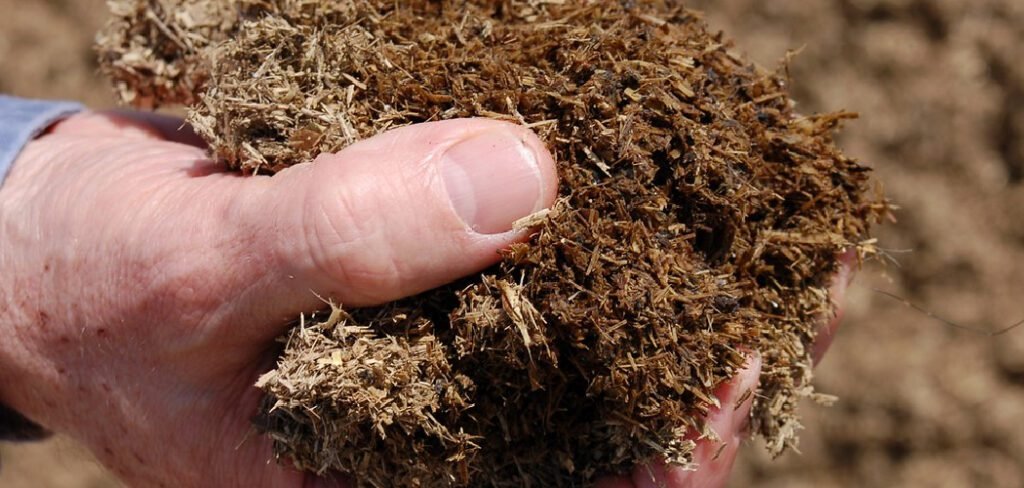
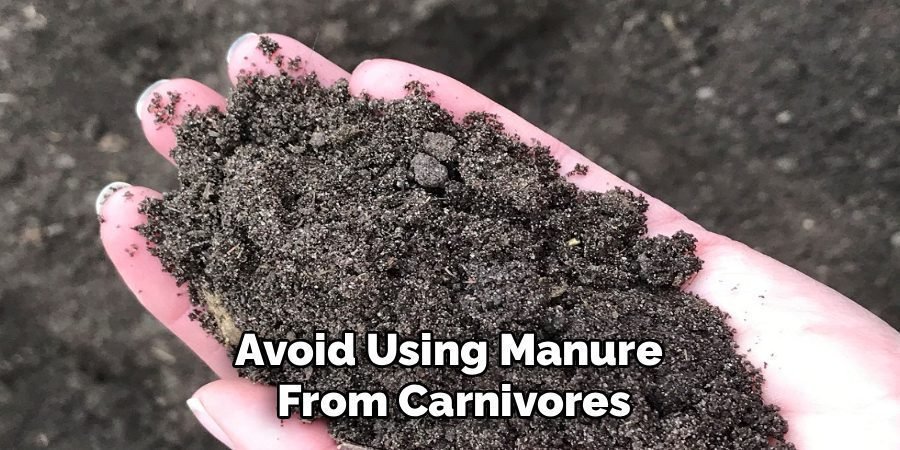
What Kind of Manure Is Best for Substrate?
Herbivore manures are generally the best choice for creating a substrate. Aged horse, cow, and goat manure are popular options because they are rich in the nutrients needed for mushroom cultivation and gardening. It is crucial to use well-composted or aged manure rather than fresh manure, as the composting process breaks down ammonia and other compounds that can be harmful to mycelium and plants. Avoid using manure from carnivores, as it can contain dangerous pathogens.
What Happens if My Substrate Gets Contaminated?
Contamination usually appears as discoloration, often in shades of green, black, or orange, and may have a sour or unpleasant smell. The most common contaminant is Trichoderma, or green mold, which competes aggressively with mushroom mycelium. If you spot contamination in a mushroom grow, it is best to dispose of the entire batch immediately and far away from your growing area to prevent spores from spreading. Starting over with a properly pasteurized substrate is the only solution.
Conclusion
Preparing your growing medium correctly is one of the most important factors for a thriving garden or a successful mushroom harvest. It sets the stage for healthy growth by removing harmful competitors while retaining beneficial organisms. This guide has provided you with a clear, step-by-step method to create a clean and nutrient-rich base for your projects. Don’t be intimidated by the process; with a little practice, it becomes a simple and rewarding routine. Now that you know how to pasteurize manure substrate, you are well-equipped to take your cultivation efforts to the next level.
About Ravuk Barg
B.Sc. Horticulture Science | Certified Master Gardener
Ravuk Barg has spent more than a decade with his hands in the soil and his head full of questions about why some gardens thrive while others struggle. What started as a single raised bed of tomatoes and basil in a modest backyard has grown into a deep, working knowledge of everything from seed germination and soil amendment to companion planting and seasonal pruning.
Over the years, Ravuk has gardened through drought summers, waterlogged springs, and pest invasions that would make most gardeners hang up their trowels for good. Those hard seasons, he’ll tell you, taught him more than any perfect growing year ever could. He writes from that earned experience—covering vegetable growing, ornamental planting, houseplant care, composting, and garden design with equal confidence and curiosity.
Philosophy & Approach
Ravuk’s approach to gardening is rooted in practicality. He favors organic methods not out of dogma, but because they work long-term—resulting in healthier soil, fewer inputs, and stronger plants. He has a particular fondness for heirloom vegetable varieties (the kind with proper flavor), unruly cottage-style flower beds, and the stubborn houseplants that everyone else gave up on.
The Mission: Give readers the honest, experience-backed advice that helps them actually succeed in their gardens—not just the ideal version, but the real one; weeds, failures, and all.
Education & Credentials
-
B.Sc. in Horticulture Science
-
Greenfield Agricultural University
-
Focus: Plant Physiology, Soil Ecology, and Sustainable Crop Production
-
-
Master Gardener Certification
-
Cooperative Extension Service
-
Focus: 200+ hours of hands-on practical training and community garden work
-
Continuing Education
-
Organic Pest Management
-
Native Plant Landscaping
-
Sustainable Crop Production