

Welcome to the wonderful world of orchids! These elegant plants might seem intimidating, but caring for them is a deeply rewarding experience. A common mistake many new orchid owners make is using standard potting soil, which can harm their delicate roots. Orchids are epiphytes, meaning they grow on other plants, not in the ground.
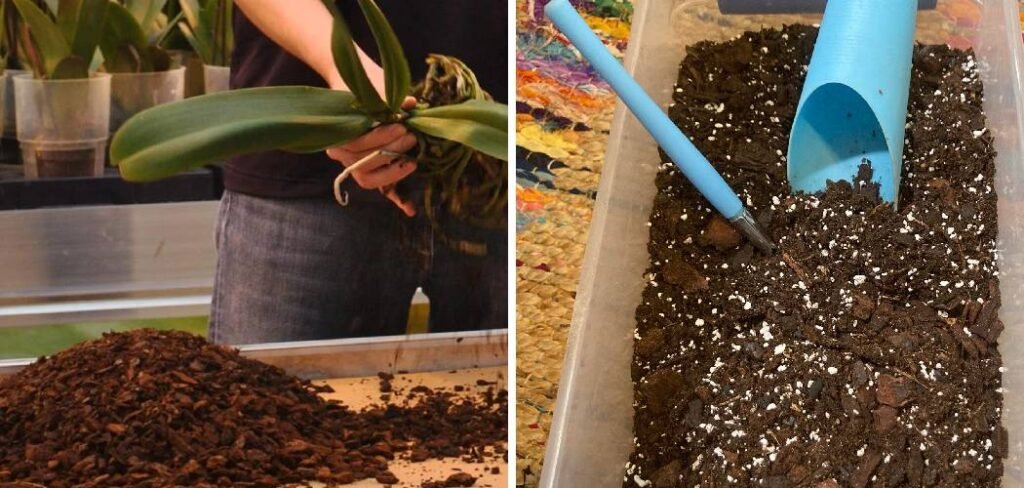
Their roots need excellent air circulation and quick drainage, which typical soil doesn’t provide. Learning how to make orchid soil yourself puts you in complete control of your plant’s environment. This guide will walk you through creating the perfect custom blend to ensure your orchids don’t just survive, but truly thrive.
Why Your Orchid Needs a Special Soil Mix
Unlike most houseplants that grow in dense, nutrient-rich dirt, orchids have unique needs. In their natural habitats, they cling to trees and rocks, with their roots exposed to the air. These roots are specially adapted to absorb moisture and nutrients from the rain and humid atmosphere. Planting an orchid in traditional potting soil is one of the quickest ways to cause problems.
The dense, water-retentive nature of regular soil suffocates the roots, preventing air from circulating and leading to root rot, a common and often fatal issue for these plants. A proper orchid mix, therefore, isn’t “soil” at all. It’s a coarse, chunky blend of materials that mimics their natural environment, providing the superior drainage and aeration essential for a healthy root system.
7 Step Methods Guide on How to Make Orchid Soil
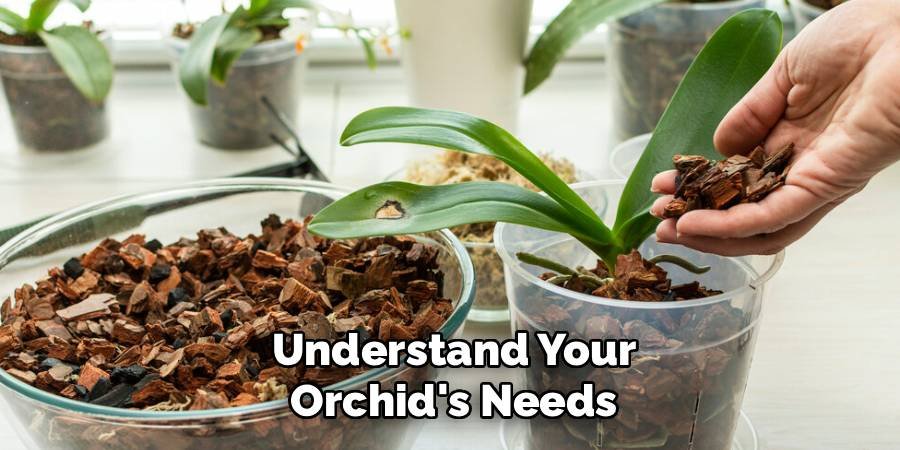
Step 1: Understand Your Orchid’s Needs
Before you start mixing, it’s crucial to identify the type of orchid you have. Different orchids have slightly different requirements. For example, Phalaenopsis (Moth Orchids), which are very common for beginners, thrive in a mix that retains a bit of moisture. On the other hand, Cattleyas and Vandas prefer a much coarser, more open mix that dries out very quickly between waterings. A quick search for your specific orchid species will tell you whether it prefers a finer or chunkier blend. This initial research ensures you select the right ingredients for a successful mix.
Step 2: Gather Your Primary Ingredients
The foundation of any good orchid mix is a combination of materials that provide structure, aeration, and some moisture retention. The most common primary ingredients are fir bark, coconut husk chips, and sphagnum moss. Fir bark is the most popular base, offering excellent aeration and slow decomposition. Coconut husk chips are a great alternative as they retain more moisture than bark, making them ideal for drier climates. Sphagnum moss is a fantastic moisture-retentive component, but it should be used thoughtfully to avoid keeping the roots too wet.
Step 3: Select Your Secondary Additives
Secondary additives help you fine-tune your mix for optimal performance. Horticultural charcoal is a wonderful addition, as it helps to purify the mix, absorb impurities, and keep it “sweet.” It also improves drainage. Perlite, a lightweight volcanic glass, is another excellent choice for increasing aeration and preventing the mix from compacting over time. For orchids that prefer a slightly more water-retentive blend, you might add a small amount of peat moss, but use it sparingly as it can hold too much water if overused. These additives give you greater control over the final texture and properties of your mix.

Step 4: Determine Your Ratios for a Basic Mix
For a great all-purpose orchid mix, especially suitable for Phalaenopsis, a good starting ratio is four parts fir bark or coconut husk chips, one part horticultural charcoal, and one part perlite. This blend provides a balanced environment with excellent drainage and airflow while retaining just enough moisture to keep the roots happy. You can measure your “parts” using a scoop, a cup, or even your hands. The key is to be consistent with your measurement tool to maintain the desired ratio for your blend.
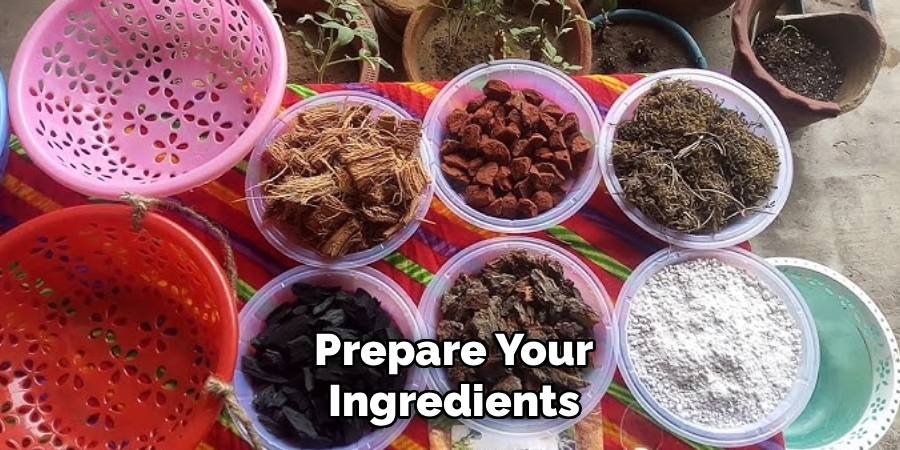
Step 5: Prepare Your Ingredients
Before you begin mixing, some ingredients may need preparation. It’s a good practice to soak your fir bark or coconut husk chips in water for several hours, or even overnight. This pre-soaking helps them absorb initial moisture, preventing them from wicking water away from the orchid’s roots immediately after repotting. If you are using sphagnum moss, you should also soak it in a bowl of water until it is fully rehydrated and pliable, then gently squeeze out the excess water before adding it to your mix. This step ensures your components are ready to create a hospitable environment from the start.
Step 6: How to Make Orchid Soil by Mixing the Components
Now for the fun part! In a large bucket or on a tarp, combine your measured ingredients. Start by adding your primary components—the fir bark or coconut husk chips. Then, add your secondary additives like charcoal and perlite. Use your hands or a garden trowel to toss everything together thoroughly. Your goal is to achieve a consistent, homogenous mixture where all the elements are evenly distributed. Ensure there are no large clumps of any single ingredient. Continue mixing until you have a loose, chunky, and uniform blend ready for your orchid.
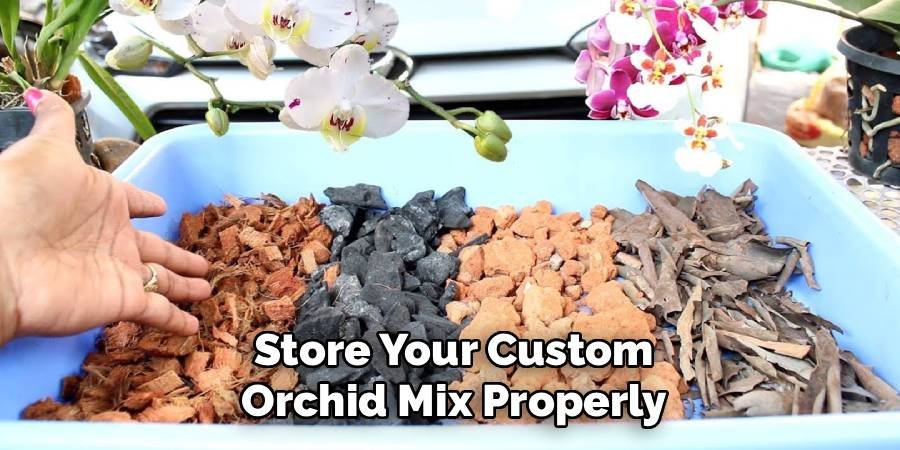
Step 7: Store Your Custom Orchid Mix Properly
If you make a larger batch than you need for one plant, you can easily store the extra. Place the unused orchid mix in a bag or container with some holes punched in it to allow for air circulation. Storing it in a sealed, airtight container can promote mold or fungal growth, especially if the components have any residual moisture. Keep the bag in a cool, dry place like a garage or shed. A well-stored custom mix can last for many months, making it convenient for future repotting projects.
Common Mistakes to Avoid
When preparing an orchid mix, there are a few common pitfalls to watch out for. One frequent mistake is using garden soil or regular potting mix, which can retain too much water and suffocate the orchid’s roots. Additionally, failing to rinse bark or other materials before use can introduce contaminants or dust that may hinder plant growth. Another error is not matching the mix to the specific needs of your orchid species, as some may require different moisture or airflow levels. Lastly, neglecting to replace the orchid mix periodically can lead to root rot or a decline in plant health. By avoiding these mistakes, you can ensure your orchids thrive in their optimal growing environment.
Frequently Asked Questions (FAQ)
Can I Use Regular Potting Soil for My Orchid?
No, you should never use regular potting soil for an orchid. Standard soil is too dense, retains too much water, and lacks the aeration orchids need. This environment will suffocate the roots, leading to root rot and ultimately killing the plant. Orchid roots are designed for air exposure, and they require a coarse, fast-draining medium like the one described in this guide.
How Often Should I Repot My Orchid With New Soil?
Generally, you should repot your orchid every one to two years. There are a few key signs that it’s time for a change:
- The potting mix has started to break down and looks like fine soil.
- The orchid’s roots are tightly crowded or are growing far out of the pot.
- The plant is unstable in its current pot.
Repotting with a fresh mix provides new nutrients and a better structure for healthy root growth.
What Is the Best Pot to Use for Orchids?
The best pots for orchids are those that promote excellent drainage and airflow. Clear plastic pots with plenty of slits or holes on the sides and bottom are a fantastic choice. They allow you to easily monitor the health of the roots and the moisture level of the mix. Terracotta pots are also a good option, as their porous nature helps the mix dry out more quickly, reducing the risk of overwatering.
My Orchid Mix Seems to Dry Out Very Fast. What Should I Do?
If your mix is drying out too quickly for your environment or watering schedule, you can adjust the recipe. The easiest way to increase water retention is by adding a bit more sphagnum moss or coconut husk chips to your blend. These materials hold more moisture than fir bark. Start by adding a small amount, repotting, and observing. You can always add more during the next repotting cycle if needed.
Is It Cheaper to Make My Own Orchid Soil?
Yes, in most cases, it is significantly cheaper to make your own orchid soil, especially if you have multiple plants. While the initial purchase of individual ingredients might seem like an investment, a single bag of each component can produce a large volume of high-quality mix. This is far more cost-effective than buying small, pre-packaged bags of orchid mix from a store, and it gives you the added benefit of customization.
Conclusion
Creating your own orchid mix is a simple, satisfying, and highly beneficial skill for any plant enthusiast. By taking the time to understand your orchid’s needs and select the right ingredients, you provide it with the perfect foundation for vigorous growth and beautiful blooms. You no longer have to wonder about the quality of store-bought mixes or worry about the dreaded effects of improper soil. Now that you know how to make orchid soil, you are well-equipped to give your orchids the specialized care they deserve.
About Ravuk Barg
B.Sc. Horticulture Science | Certified Master Gardener
Ravuk Barg has spent more than a decade with his hands in the soil and his head full of questions about why some gardens thrive while others struggle. What started as a single raised bed of tomatoes and basil in a modest backyard has grown into a deep, working knowledge of everything from seed germination and soil amendment to companion planting and seasonal pruning.
Over the years, Ravuk has gardened through drought summers, waterlogged springs, and pest invasions that would make most gardeners hang up their trowels for good. Those hard seasons, he’ll tell you, taught him more than any perfect growing year ever could. He writes from that earned experience—covering vegetable growing, ornamental planting, houseplant care, composting, and garden design with equal confidence and curiosity.
Philosophy & Approach
Ravuk’s approach to gardening is rooted in practicality. He favors organic methods not out of dogma, but because they work long-term—resulting in healthier soil, fewer inputs, and stronger plants. He has a particular fondness for heirloom vegetable varieties (the kind with proper flavor), unruly cottage-style flower beds, and the stubborn houseplants that everyone else gave up on.
The Mission: Give readers the honest, experience-backed advice that helps them actually succeed in their gardens—not just the ideal version, but the real one; weeds, failures, and all.
Education & Credentials
-
B.Sc. in Horticulture Science
-
Greenfield Agricultural University
-
Focus: Plant Physiology, Soil Ecology, and Sustainable Crop Production
-
-
Master Gardener Certification
-
Cooperative Extension Service
-
Focus: 200+ hours of hands-on practical training and community garden work
-
Continuing Education
-
Organic Pest Management
-
Native Plant Landscaping
-
Sustainable Crop Production