

It’s a disheartening sight for any plant owner: a once-vibrant houseplant now has yellowing leaves, drooping stems, or brown spots. You might feel like you’ve failed your leafy friend, but don’t give up just yet. Many common plant ailments are reversible with a little detective work and the right care. Learning how to heal sick plants is a key skill for any home gardener, turning potential plant tragedies into success stories. This guide will walk you through the essential steps to diagnose your plant’s problem, nurse it back to health, and prevent future issues. With patience and attention, you can revive your plant and enjoy its beauty for years to come.

Why Reviving Your Plants Matters
Caring for plants is more than just a hobby; it’s a rewarding relationship that adds life and color to your home. When a plant falls ill, it’s not just about a wilting leaf. It’s an opportunity to learn and connect more deeply with the natural world. Understanding the needs of your plants—whether it’s light, water, or nutrients—builds your confidence as a gardener. Successfully nursing a plant back from the brink is incredibly satisfying and empowers you to grow your indoor jungle without fear. Plus, healthy plants are better at purifying the air and boosting your mood, making the effort to save them a direct investment in your own well-being.
9 Step-by-Step Guide on How to Heal Sick Plants
Step 1: Isolate the Sick Plant
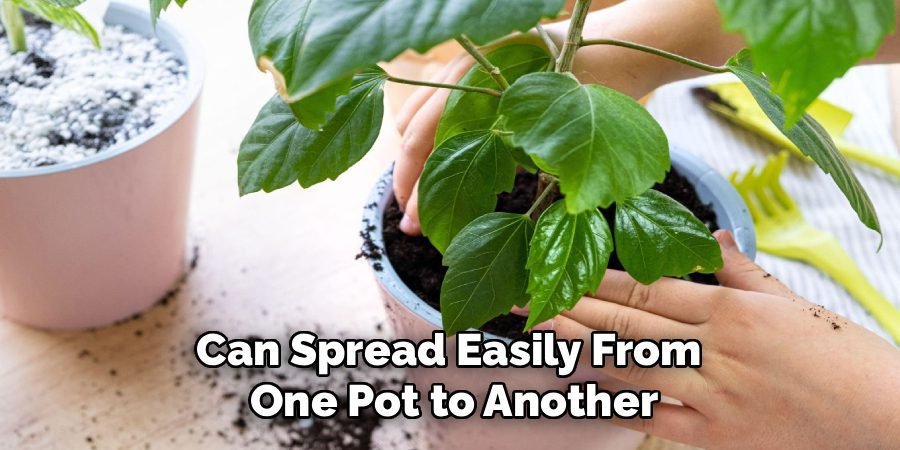
The first move is to quarantine your ailing plant. Immediately move it away from your other healthy houseplants. Many plant diseases, such as fungal infections and bacterial blights, can spread easily from one pot to another. Pests like spider mites and mealybugs are also highly mobile and will quickly infest neighboring plants. By creating a separate “recovery room” for your sick plant, you contain the problem and protect the rest of your collection. This simple action is a critical preventative measure that saves you from a much larger outbreak later.
Step 2: Carefully Inspect for Pests
Look closely at your plant for any signs of unwanted visitors. Check the undersides of leaves, along the stems, and in the soil. Common pests include spider mites, which create fine webbing; mealybugs, which look like tiny white cottony spots; and scale insects, which appear as small brown bumps. If you find pests, you must act fast. You can often treat minor infestations by wiping the insects off with a cotton swab dipped in rubbing alcohol or by spraying the plant with a gentle insecticidal soap solution.
Step 3: Assess the Watering Situation
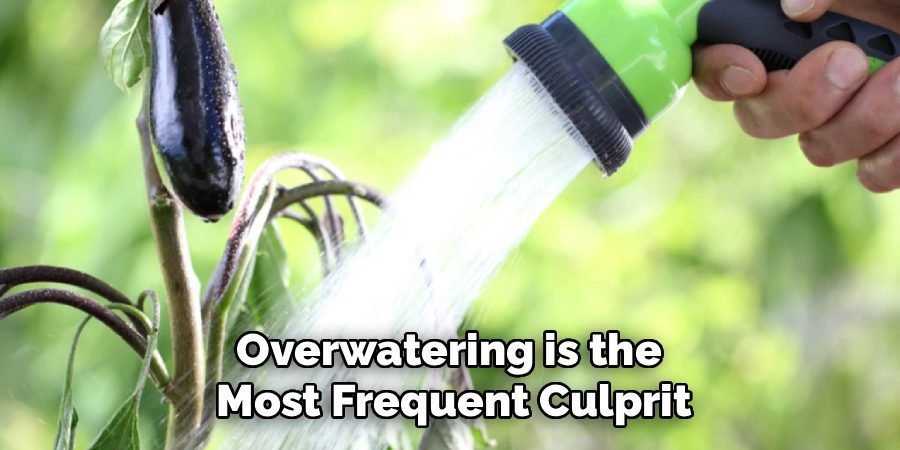
Improper watering is one of the leading causes of plant sickness. Both overwatering and underwatering can cause similar symptoms, such as yellowing or wilting leaves. To check, stick your finger about two inches into the soil. If it feels soggy and wet, you are likely overwatering. This can lead to root rot, a serious condition where roots suffocate and die. If the soil is bone-dry and pulling away from the pot’s edges, your plant is thirsty. Adjust your watering schedule based on your findings to give the roots the right amount of moisture.
Step 4: Examine the Leaves and Stems
Your plant’s leaves are like a billboard for its health. Yellow leaves can signal overwatering or a nutrient deficiency. Brown, crispy edges often point to underwatering or low humidity. Brown or black mushy spots may indicate a fungal infection or root rot. Take note of where the damage is occurring. Problems on older, lower leaves might be natural aging, but if new growth is affected, it points to a more immediate issue. Prune away any dead or heavily damaged leaves with clean scissors to redirect the plant’s energy toward healthy growth.

Step 5: Check the Roots for Rot
If you suspect overwatering, you may need to check the roots. Gently slide the plant out of its pot to inspect them. Healthy roots are typically firm and white or light-colored. Unhealthy roots suffering from root rot will be brown, mushy, and may have a foul smell. If you find rot, it’s time for surgery. Use clean, sharp shears to trim away all the affected, slimy roots. This is a crucial step in learning how to heal sick plants, as leaving rotted roots will only let the decay spread further.
Step 6: Repot with Fresh Soil
After treating for root rot or if the soil is old and compacted, repotting is a great way to give your plant a fresh start. Choose a new pot that is only slightly larger than the root ball and has excellent drainage holes. Use a fresh, high-quality potting mix appropriate for your specific plant type. This new soil will provide necessary nutrients and better aeration for the recovering roots. Gently place the plant in its new home, fill in with soil, and water lightly to help it settle in.
Step 7: Adjust Light and Humidity Levels
The wrong light exposure can stress a plant and make it more vulnerable to disease. A plant that needs bright, indirect light will scorch in direct sun, while a shade-lover will become weak and leggy in a dim corner. Research your plant’s specific light requirements and move it to a more suitable location. Likewise, many tropical houseplants suffer in dry indoor air. You can increase humidity by grouping plants together, placing them on a pebble tray with water, or using a small humidifier.
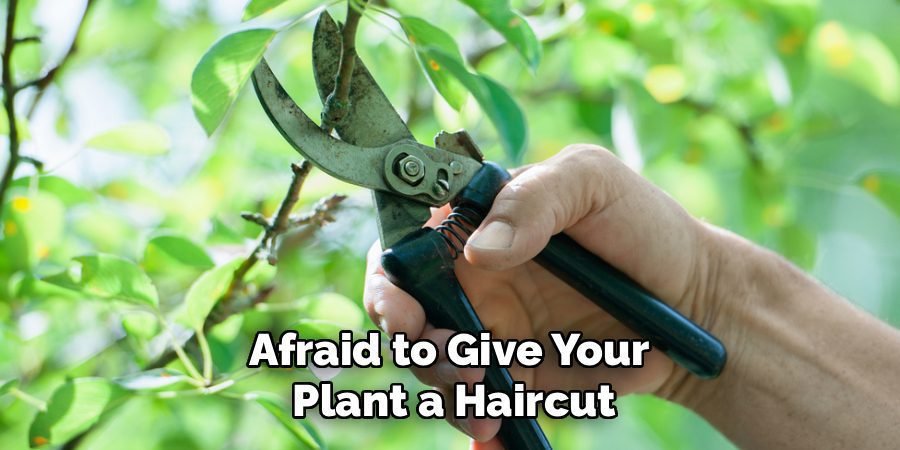
Step 8: Prune Damaged Growth
Don’t be afraid to give your plant a haircut. Trimming away dead, yellowed, or diseased leaves and stems is essential. This not only improves the plant’s appearance but also allows it to focus its energy on producing new, healthy growth instead of trying to support dying parts. Use clean, sharp pruning shears or scissors to make precise cuts. This step also increases air circulation around the plant, which helps to prevent fungal diseases from taking hold in the first place.
Step 9: How to Heal Sick Plants with Proper Nutrients
Once your plant shows signs of recovery, you can think about feeding it. A lack of nutrients can cause stunted growth and discolored leaves. However, you should never fertilize a severely stressed or sick plant, as it can burn the delicate roots. Wait until you see new growth, then apply a balanced, diluted liquid fertilizer according to the package directions. For many houseplants, feeding once a month during the growing season (spring and summer) is sufficient to keep them nourished and thriving.
Frequently Asked Questions (FAQ)
Can a Plant Recover from Root Rot?
Yes, a plant can recover from root rot if you catch it early enough. The key is to act quickly. You’ll need to remove the plant from its pot, trim away all the brown, mushy roots with sterilized scissors, and rinse the healthy roots. Repot the plant in fresh, well-draining soil and a clean pot. Afterward, be very careful with watering, allowing the soil to dry out more between sessions to prevent the problem from recurring. With prompt action, many plants can regrow their root systems.
Why Are My Plant’s Leaves Turning Yellow?
Yellowing leaves are a common symptom with several potential causes. Overwatering is the most frequent culprit, as it suffocates the roots. However, underwatering can also cause leaves to yellow and drop. Other possibilities include a nutrient deficiency (especially nitrogen), pests, or simply the natural aging process where older leaves die off. To diagnose the problem, check the soil moisture first, then inspect for pests and consider your fertilizing schedule. Context is everything when diagnosing the cause.
What Are the White Spots on My Houseplant?
Those little white spots are likely one of two common pests: mealybugs or powdery mildew. Mealybugs are tiny insects that look like fuzzy white cotton and suck the sap from your plant. Powdery mildew is a fungal disease that appears as a dusty white or gray coating on leaves. To treat mealybugs, you can wipe them off with a cotton swab soaked in rubbing alcohol. For powdery mildew, improve air circulation and try spraying the leaves with a solution of neem oil or a commercial fungicide.
How Can I Tell if My Plant Is Overwatered or Under watered?
The symptoms can look surprisingly similar, often involving wilting and yellowing leaves. The best way to tell the difference is by feeling the soil. Stick your finger two inches deep. If the soil is soggy or wet, your plant is overwatered. The leaves may feel soft and limp. If the soil is dry and crumbly, and the pot feels light, it is underwatered. Underwatered leaves often feel dry and crispy. Checking the soil moisture is the most reliable method for determining your plant’s water needs.
Should I Remove Dead Leaves from My Plant?
Absolutely. Removing dead or dying leaves (a process called deadheading or pruning) is beneficial for your plant. These leaves can no longer photosynthesize and are just draining energy from the plant that could be used for new growth. Dead foliage can also attract pests and encourage fungal diseases. Use a clean pair of scissors or pruning shears to snip them off close to the main stem. This will keep your plant looking tidy and direct its resources toward staying healthy and producing fresh leaves.
Conclusion
Reviving a sick plant might seem like a daunting task, but it is often simpler than you think. By following a methodical approach—isolating the plant, diagnosing the problem, and providing the right treatment—you can give your leafy friend a fighting chance. From checking for pests to correcting your watering habits and ensuring proper light, each step brings you closer to a solution. Don’t be discouraged by a few yellow leaves. Embrace the challenge as a learning experience, and you’ll become a more confident and capable plant parent. Now you have the knowledge of how to heal sick plants and can turn your brown thumb green.
About Ravuk Barg
B.Sc. Horticulture Science | Certified Master Gardener
Ravuk Barg has spent more than a decade with his hands in the soil and his head full of questions about why some gardens thrive while others struggle. What started as a single raised bed of tomatoes and basil in a modest backyard has grown into a deep, working knowledge of everything from seed germination and soil amendment to companion planting and seasonal pruning.
Over the years, Ravuk has gardened through drought summers, waterlogged springs, and pest invasions that would make most gardeners hang up their trowels for good. Those hard seasons, he’ll tell you, taught him more than any perfect growing year ever could. He writes from that earned experience—covering vegetable growing, ornamental planting, houseplant care, composting, and garden design with equal confidence and curiosity.
Philosophy & Approach
Ravuk’s approach to gardening is rooted in practicality. He favors organic methods not out of dogma, but because they work long-term—resulting in healthier soil, fewer inputs, and stronger plants. He has a particular fondness for heirloom vegetable varieties (the kind with proper flavor), unruly cottage-style flower beds, and the stubborn houseplants that everyone else gave up on.
The Mission: Give readers the honest, experience-backed advice that helps them actually succeed in their gardens—not just the ideal version, but the real one; weeds, failures, and all.
Education & Credentials
-
B.Sc. in Horticulture Science
-
Greenfield Agricultural University
-
Focus: Plant Physiology, Soil Ecology, and Sustainable Crop Production
-
-
Master Gardener Certification
-
Cooperative Extension Service
-
Focus: 200+ hours of hands-on practical training and community garden work
-
Continuing Education
-
Organic Pest Management
-
Native Plant Landscaping
-
Sustainable Crop Production