

A lush, green lawn is the pride of many homeowners, but a hidden layer of dead organic matter can silently sabotage its health. This layer, known as thatch, is a mix of dead and living grass stems, roots, and runners that accumulates between the soil surface and the green grass blades.
While a thin layer (less than half an inch) can be beneficial, providing insulation and retaining moisture, excessive thatch can be a major problem. It can block water, air, and nutrients from reaching the soil, creating a breeding ground for pests and diseases. This guide will provide a comprehensive look at how to get rid of thatch in your lawn, restoring its health and vibrant appearance.
Why Does Thatch Build Up in a Lawn?
Understanding why thatch accumulates is the first step toward preventing it. Thatch forms when the rate of organic matter production exceeds the rate of its decomposition. Several factors contribute to this imbalance. Certain grass types, like Kentucky bluegrass and Bermuda grass, are aggressive growers and naturally produce more thatch.
Over-fertilizing, especially with high-nitrogen fertilizers, can stimulate rapid growth that outpaces the natural breakdown process. Similarly, frequent, shallow watering encourages shallow root growth, which adds to the thatch layer instead of promoting deep, healthy roots. Compacted soil and a low population of beneficial microbes and earthworms, which help decompose organic material, can also significantly slow down the breakdown of thatch.
8 Step Methods Guide on How to Get Rid of Thatch in Your Lawn
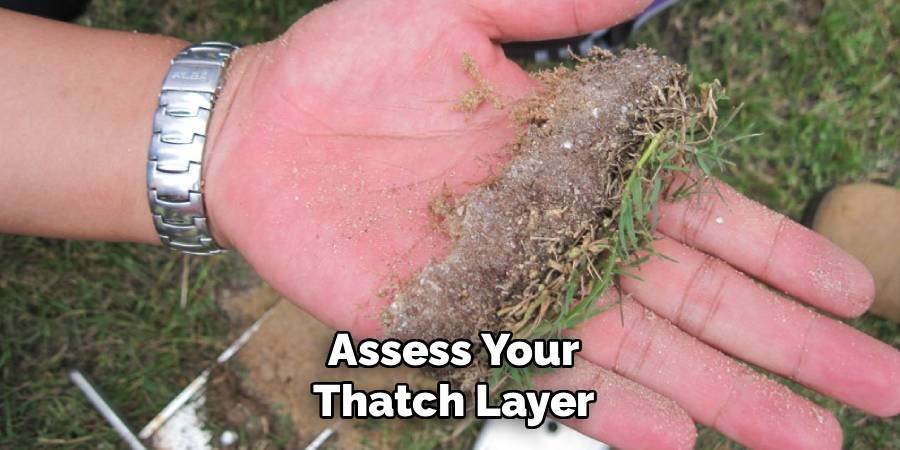
Step 1: Assess Your Thatch Layer
Before you begin any removal process, you need to determine if your lawn actually has a thatch problem. Take a spade or a sharp trowel and cut out a small, wedge-shaped sample of turf a few inches deep. Look at the cross-section you’ve created. You will see the green grass on top, the soil at the bottom, and a spongy, brown layer in between. This middle layer is the thatch. Measure its thickness. If the layer is half an inch thick or less, it’s generally considered healthy. However, if it exceeds half an inch, it’s time to take action.
Step 2: Choose the Right Time of Year
Timing is crucial for successful dethatching. The best time to dethatch is during your lawn’s peak growing season, which allows it to recover quickly from the stress of the process. For cool-season grasses like fescue, Kentucky bluegrass, and ryegrass, this is typically in the early fall or late spring. For warm-season grasses such as Bermuda, Zoysia, and St. Augustine, the ideal time is late spring to early summer, after they have fully greened up. Avoid dethatching when the lawn is dormant or stressed from drought or extreme heat, as this can cause significant damage.
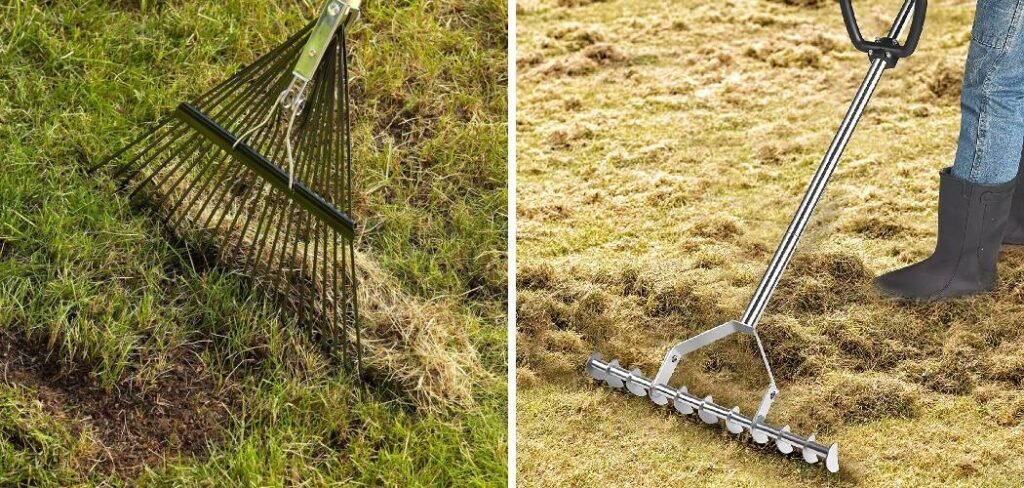
Step 3: Select Your Dethatching Tool
You have several options for removing thatch, depending on the size of your lawn and the severity of the problem. For small areas with a minor thatch issue, a stiff-tined dethatching rake is a good, budget-friendly choice. It requires manual labor but gives you precise control. For medium to large lawns, a power rake or a vertical mower (also called a verticutter) is more efficient. These machines have rotating blades that slice through the thatch and pull it to the surface. You can often rent these from a local garden or home improvement center for a day.
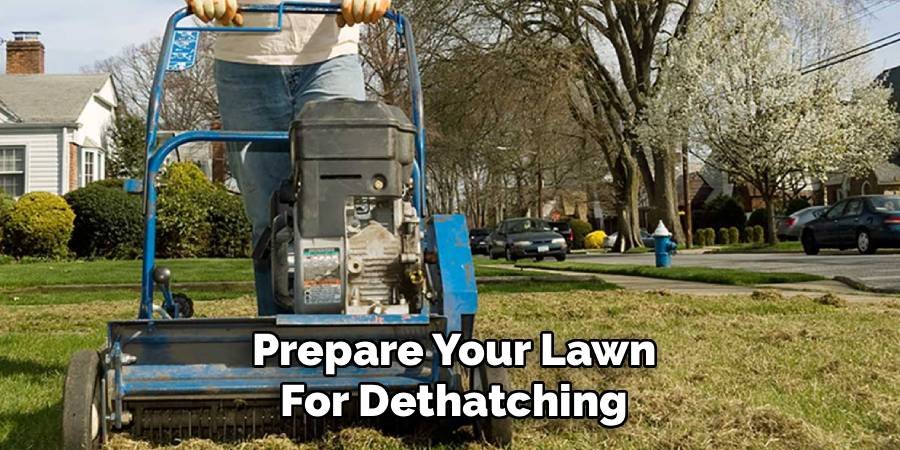
Step 4: Prepare Your Lawn for Dethatching
Proper preparation will make the dethatching process smoother and more effective. A few days before you plan to dethatch, mow your lawn slightly shorter than usual, to about half its normal height. This makes it easier for the rake or machine to reach the thatch layer. It is also beneficial to lightly water the lawn a day or two before you begin. You want the soil to be moist but not waterlogged. Dry, hard soil makes it difficult for the dethatching blades to penetrate, while overly wet soil can lead to the grass being torn out by the roots.
Step 5: Begin the Dethatching Process
If you are using a dethatching rake, use short, strong pulling motions to comb through the grass and pull up the thatch. Work in one direction across the entire lawn, then go over it a second time at a 90-degree angle to the first pass for maximum effectiveness. If using a power rake or verticutter, set the blades so they just skim the top of the soil. You want them to slice through the thatch without digging too deeply into the soil itself. Make overlapping passes across the lawn to ensure you cover the entire area thoroughly.
Step 6: Clean Up the Debris
Dethatching will pull up a surprising amount of dead material. Once you have finished raking or running the machine over your lawn, you will need to clean up all the debris. Use a leaf rake to gather the dislodged thatch into piles. You can then bag this material for disposal or add it to your compost pile. Leaving this debris on the lawn will defeat the purpose of dethatching, as it will continue to block sunlight, water, and air from reaching the soil. A thorough cleanup is a critical part of learning how to get rid of thatch in your lawn.

Step 7: Overseed and Fertilize Your Lawn
After dethatching, your lawn will likely look a bit sparse and ragged. This is normal and provides the perfect opportunity to improve its density and health. This is an excellent time to overseed the lawn, as the seeds will have direct contact with the soil. Choose a high-quality grass seed that matches your existing lawn type. After seeding, apply a slow-release starter fertilizer to provide the necessary nutrients for new growth and help the existing grass recover. Proper post-dethatching care is essential for a quick and robust recovery.
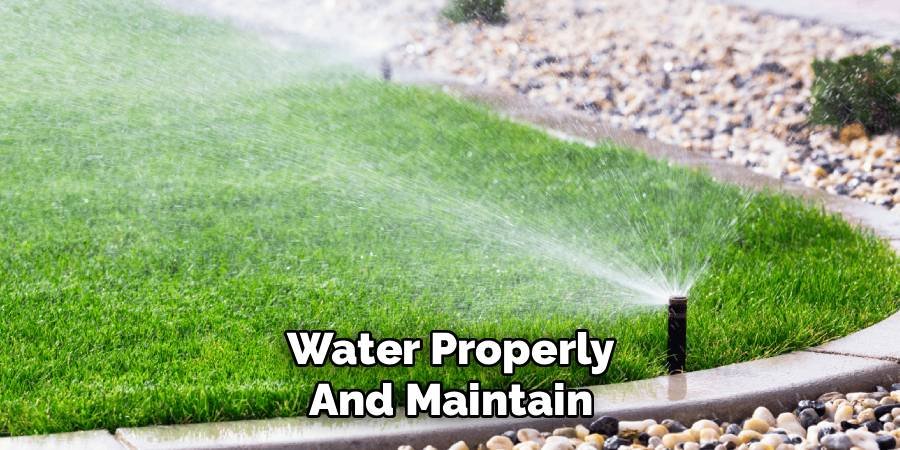
Step 8: Water Properly and Maintain
Water the lawn lightly but frequently for the first couple of weeks after overseeding to keep the seeds moist and encourage germination. Once the new grass is established, you can return to a normal watering schedule, which should involve deep, infrequent watering to encourage strong root growth. Continue to mow as needed, but wait until the new grass seedlings have reached a height of at least three inches before the first mow. Consistent, proper maintenance is the key to preventing a future thatch problem and keeping your lawn healthy year-round.
Common Mistakes to Avoid
When overseeding your lawn, there are several common mistakes that can hinder your success. One frequent error is neglecting to properly prepare the soil before seeding. Failing to aerate or dethatch can prevent the seeds from making good contact with the soil, reducing germination rates. Another issue is over-watering or under-watering during the early stages of seed growth.
Keeping the soil consistently moist without over-saturating it is crucial. Additionally, using the wrong type of grass seed for your climate or lawn conditions can lead to poor results. Avoid applying too much seed or fertilizer, as this can lead to overcrowding or nutrient burn. Lastly, mowing too soon or at the wrong height can damage delicate new grass seedlings. By being mindful of these mistakes, you can help ensure your overseeding efforts are successful.
Frequently Asked Questions (FAQ)
What Is the Difference Between Dethatching and Aerating?
Dethatching and aerating are both important lawn care practices, but they address different problems. Dethatching involves removing the thick layer of dead organic matter (thatch) that sits on top of the soil. Aerating, on the other hand, focuses on relieving soil compaction. This is done by pulling small plugs of soil out of the lawn or creating holes with spikes, which allows air, water, and nutrients to penetrate deeper into the root zone. While dethatching cleans the surface, aerating improves the soil structure underneath.
Can I Dethatch a New Lawn?
It is generally not recommended to dethatch a new lawn. A newly seeded or sodded lawn needs time to establish a strong root system, which can take a full year or more. The process of dethatching is aggressive and can easily pull up or damage the immature grass plants before they are fully rooted. It’s best to wait until the lawn is at least two to three years old and has a thatch layer thicker than half an inch before considering dethatching.
How Often Should I Dethatch My Lawn?
The frequency of dethatching depends on your grass type, soil conditions, and maintenance routine. For many lawns, dethatching is only necessary every few years. However, lawns with fast-growing grass types like Kentucky bluegrass, or those that are heavily fertilized, may need it annually. The best approach is to check your thatch level each year. If the spongy layer is over half an inch thick, it’s time to dethatch. Otherwise, you can wait another year.
What Are the Signs of Excessive Thatch?
There are several visual cues that your lawn has too much thatch. You might notice:
- A spongy or bouncy feel when you walk on the grass.
- Poor water penetration, where water runs off instead of soaking in.
- Shallow-rooted grass that is less tolerant to drought and heat.
- Increased presence of lawn diseases or insect pests.
- A noticeable brown, dead layer when you part the grass blades.
Can Thatch Be Prevented?
Yes, you can take steps to prevent excessive thatch buildup. Practice deep and infrequent watering to encourage deep root growth. Avoid over-fertilizing with high-nitrogen products. Core aerate your lawn annually to improve air and water flow and stimulate microbial activity that breaks down thatch. Finally, when you mow, leave the clippings on the lawn (grasscycling), as these short clippings decompose quickly and add nutrients back to the soil, which can help manage thatch levels naturally.
Conclusion
A healthy lawn requires more than just mowing and watering. Managing thatch is a vital task that directly impacts the long-term vitality of your grass. By understanding what causes thatch, assessing your lawn correctly, and following the right removal techniques, you can effectively rejuvenate your turf. Don’t be discouraged by the lawn’s appearance immediately after dethatching; this temporary disruption is a necessary step toward a much healthier, greener, and more resilient yard. Following this guide on how to get rid of thatch in your lawn will empower you to take control and cultivate the beautiful outdoor space you desire.
About Ravuk Barg
B.Sc. Horticulture Science | Certified Master Gardener
Ravuk Barg has spent more than a decade with his hands in the soil and his head full of questions about why some gardens thrive while others struggle. What started as a single raised bed of tomatoes and basil in a modest backyard has grown into a deep, working knowledge of everything from seed germination and soil amendment to companion planting and seasonal pruning.
Over the years, Ravuk has gardened through drought summers, waterlogged springs, and pest invasions that would make most gardeners hang up their trowels for good. Those hard seasons, he’ll tell you, taught him more than any perfect growing year ever could. He writes from that earned experience—covering vegetable growing, ornamental planting, houseplant care, composting, and garden design with equal confidence and curiosity.
Philosophy & Approach
Ravuk’s approach to gardening is rooted in practicality. He favors organic methods not out of dogma, but because they work long-term—resulting in healthier soil, fewer inputs, and stronger plants. He has a particular fondness for heirloom vegetable varieties (the kind with proper flavor), unruly cottage-style flower beds, and the stubborn houseplants that everyone else gave up on.
The Mission: Give readers the honest, experience-backed advice that helps them actually succeed in their gardens—not just the ideal version, but the real one; weeds, failures, and all.
Education & Credentials
-
B.Sc. in Horticulture Science
-
Greenfield Agricultural University
-
Focus: Plant Physiology, Soil Ecology, and Sustainable Crop Production
-
-
Master Gardener Certification
-
Cooperative Extension Service
-
Focus: 200+ hours of hands-on practical training and community garden work
-
Continuing Education
-
Organic Pest Management
-
Native Plant Landscaping
-
Sustainable Crop Production