

Are there annoying holes and potholes in your beautiful lawn? Sunken spots in the grass can make your yard look untidy and can cause problems when mowing. These low spots collect water, kill the grass, and make it difficult to walk on. The good news is that fixing sunken spots in your lawn is easier than you think.

Sunken spots can happen for many reasons. Tree roots can rot and create holes. Underground pipes can leak and wash away soil. Heavy machinery can compact the soil. Sometimes, potholes form over time as a result of soil compaction. Whatever the cause of your sunken spots, you can fix them with the right tools and techniques.
This complete guide will show you exactly How to Fix Sunken Spots in Lawn using 8 proven step guidelines. You’ll learn what materials to use, when to do the job, and how to prevent future problems. Whether you have small holes or large holes, these methods will help you create a smooth, level lawn that will look amazing.
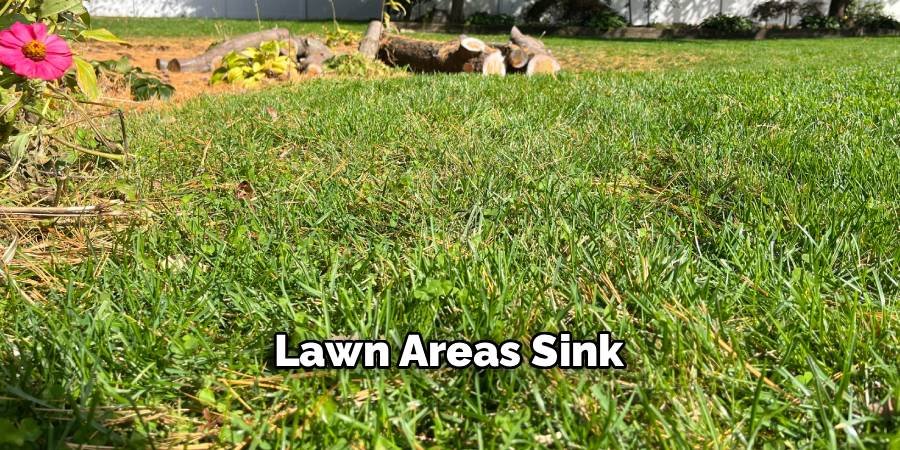
Understanding Why Lawn Areas Sink
Before you learn how to fix sunken spots, it’s important to understand why they occur. Knowing the cause will help you choose the best repair method and prevent future problems. Soil compaction is the most common cause of sunken areas. When builders build a home, they often bring in fill dirt to level the yard. This new soil hasn’t naturally compacted over the years like the original soil. Rain and irrigation water gradually compact this loose soil, creating a low spot.
Groundwater problems also cause sunken areas. Broken water pipes, sprinkler lines, or drainage problems wash away soil from below the surface. As the supporting soil disappears, the top grass gradually sinks. These water-related problems must be addressed before repairing the lawn’s surface.
Another type of sinking is caused by the decomposition of organic matter. Tree stumps, buried construction debris, or large amounts of organic matter break down over time. As these materials decompose, they leave empty spaces that cause the topsoil to sink. Heavy vehicles and equipment can compact the soil and create low pressure. Repeatedly driving vehicles over grass, placing heavy objects in one place, or having construction work done can cause the soil to sag. Compacted soil holds less air and water, making it difficult for grass to grow well in the area.
Tools and Materials You’ll Need
Gathering the right tools and materials before you start will make the job much easier and faster. Most items can be found at a home improvement store or garden center. For basic repairs, you will need a spade or shovel for digging, a rake for leveling the soil, and a wheelbarrow for moving materials. A garden hose with a spray nozzle helps with watering. A tamper or your feet can help compact the soil if needed. The main materials include topsoil, compost, and grass seed or sod. Choose a high-quality topsoil that matches your existing yard. Compost improves soil structure and adds nutrients. Choose grass seed that matches your current lawn type, or purchase sod for immediate results.
For larger repairs, consider renting a small tiller to thoroughly mix the materials. A lawn roller helps to level and compact the repaired areas. String lines and stakes help you check that the repaired areas are level with the surrounding grass. Additional supplies may include landscape fabric for weed control, starter fertilizer for new grass, and mulch to protect seedbed areas. Having everything ready before you start ensures that you can complete the repair without delay.
8 Step Guidelines to Fix Sunken Spots in Lawn
Step 1: Assess the Damage and Plan Your Repair
Go over your entire yard and identify any sunken areas that need attention. To make sure you don’t miss any spots during the repair, mark each spot with spray paint or a flag. Mark each spot with spray paint or a flag to determine how much material you need. Check for underlying problems that could be causing the sinking. Look for signs of water damage, such as wet soil or unusual grass growth patterns. If you suspect you have a broken pipe or drainage problem, contact a professional to fix these issues first.

Decide whether to repair the spots individually or tackle multiple areas at once. Small, scattered areas can be repaired all at once. Large, connected areas can be easier to repair as one large project. Planning your approach saves time and produces better results. Consider the timing of your repair work. Spring and fall are the best seasons for lawn repairs because grass is actively growing during these times. Avoid major repairs in the heat of summer or the cold of winter when grass is having trouble establishing.
Step 2: Remove Dead or Damaged Grass
Start by removing dead, diseased, or severely damaged grass from the sunken area. Use a spade to cut around the edge of the ditch and remove the dead grass. Healthy grass at the edge can usually be saved and will help the repaired area blend in naturally. If the existing grass is mostly healthy but only grows in low spots, you may be able to save it. Carefully lift the clay sections with a thin layer of soil attached. Set these pieces aside in a shaded area and keep them moist while you work on the repair.
Remove any debris, rocks, or organic matter from the bottom of the ditch. Remove tree roots, old mulch, or construction materials that may prevent proper compaction of the soil. A clean work area ensures that your repair materials are properly bonded to the existing soil. Take this opportunity to check the quality of the soil in the sunken area. Hard, compacted soil should be loosened with a garden fork. Very sandy or clay-heavy soil may require amendment to adjust to surrounding yard conditions.
Step 3: Prepare the Sunken Area Foundation

Proper foundation preparation is crucial for long-lasting repairs. If the fill soil is loose, the existing soil should be compacted before adding new material. Use a tamper to compact the loose soil or walk the area firmly. For areas that have sunken due to water problems, improve drainage before filling. If water continues to pool in the depression, add a layer of coarse sand or small gravel. This drainage layer prevents future water damage and soil washout.
Loosen the surface of the compacted soil with a garden fork or small tiller. This helps to bond the new soil materials to the existing soil. Scratch the surface in a crosshatch pattern about 2-3 inches deep across the entire repair area. If the depression is very deep, plan to fill it in layers rather than all at once. Thick layers of new soil do not compact evenly and may settle unevenly later. Plan to add 2-4 inches of material at a time for best results.
Step 4: Add and Mix Quality Fill Materials
Choose the right combination of materials for your sunken area fill. A mixture of topsoil, compost, and sand creates the ideal growing environment for grass. In most cases, use about 60% soil, 30% compost, and 10% sand. Pour the first layer of fill material into the depression and spread it evenly with a rake. Do not dump all the material in one place as this will create uneven settlement later. Work methodically across the entire area to ensure consistent coverage.
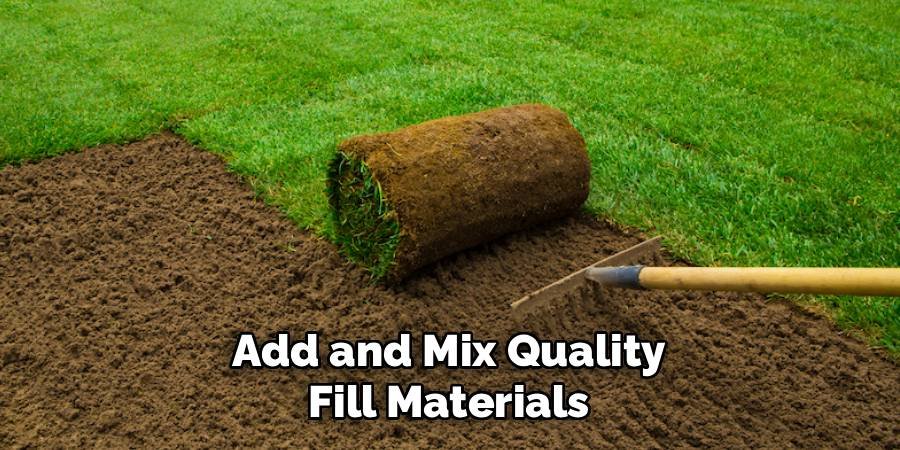
Mix the new materials with the existing soil at the bottom of the depression. Use a garden fork or small tiller to mix the materials thoroughly. This mixture prevents individual layers that can cause water and root infiltration problems. Lightly compact each layer before adding the next layer. Walk across the area or use a tamper by hand to settle the soil mixture. Proper compaction prevents future settling and keeps the soil loose enough for grass roots to grow.
Step 5: Level and Grade the Repaired Area
Achieving the correct grade and level is essential for a professional-looking repair. The repaired area should be slightly higher than the surrounding grass to allow for natural settling over the next few months. Use a rake to create a smooth, even surface across the repaired area. Work in different directions to remove high and low spots. A landscape rake with closely spaced tines works better than a leaf rake for fine leveling work.
Check your work by looking at the area from different angles. Low spots will be obvious when viewed from the side. Fill in any holes and remove excess soil from high spots until the surface flows smoothly into the surrounding grass. Consider the natural drainage pattern of your yard when grading repaired areas. Slope the surface gently away from buildings and toward natural drainage areas. Even small slopes help prevent water from pooling in the repaired area.
Step 6: Install New Grass Coverage
You have two main options for planting grass in a repaired area: seeding or sodding. Seeding is cheaper but takes longer to establish. Sod provides immediate coverage but is more expensive and requires careful installation. If using grass seed, choose varieties that match your existing lawn. Apply seed at the recommended rate on the package, usually 2-4 pounds per 1,000 square feet for most grass types. Rake lightly to cover the seeds with a thin layer of soil.
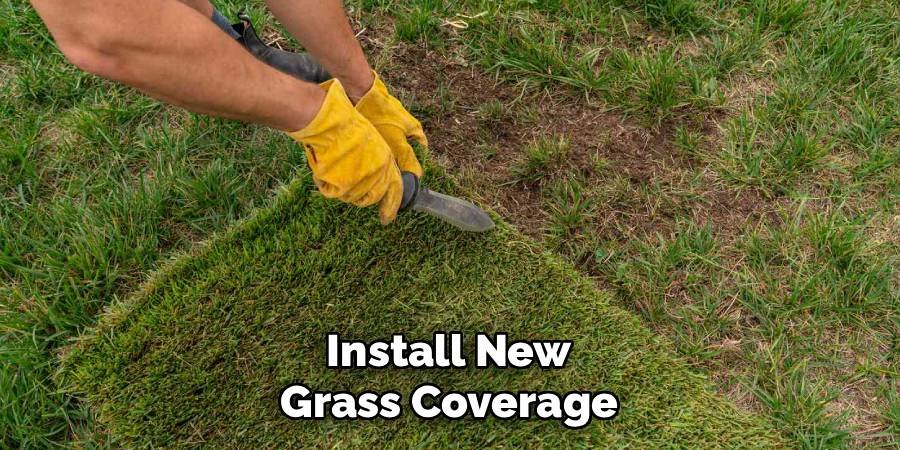
To install sod, purchase pieces that match your grass type and are freshly cut. Place the pieces of sod tightly together without overlapping the edges. Press each piece firmly into the soil and roll with a lawn roller to eliminate air pockets. Whether you use seed or sod, apply a starter fertilizer according to package directions. New grass needs extra nutrients as it establishes. Water thoroughly after planting but do not create muddy conditions that will wash away the seeds or disturb the sod.
Step 7: Water and Protect the Repair
Proper watering is crucial for successful grass growth in a patch. New seeds need regular moisture to germinate, while grass needs deep water to establish roots underground. Water the patch lightly but frequently for the first two weeks. Apply enough water to moisten the soil without creating puddles or waterlogging. Use a sprinkler with a fine mist rather than a heavy stream that can wash away the seeds.
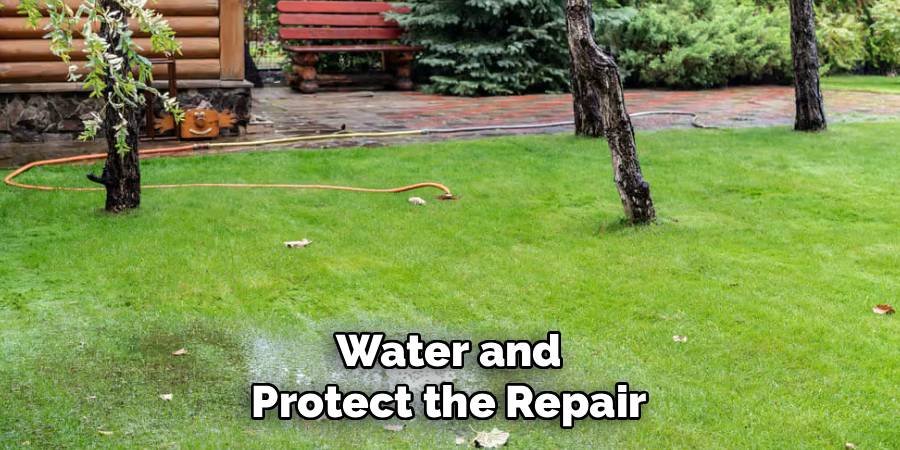
Protect the patch areas from foot traffic, pets, and mowing until the grass is well established. Consider erecting temporary barriers or signs to remind family members to avoid walking on the patch. New grass is fragile and easily damaged during its initial growth. Monitor soil moisture daily in hot or windy weather. Patches dry out more quickly than established lawns because the soil is loose and the grass roots are not fully developed. Adjust watering frequency based on weather conditions and soil moisture levels.
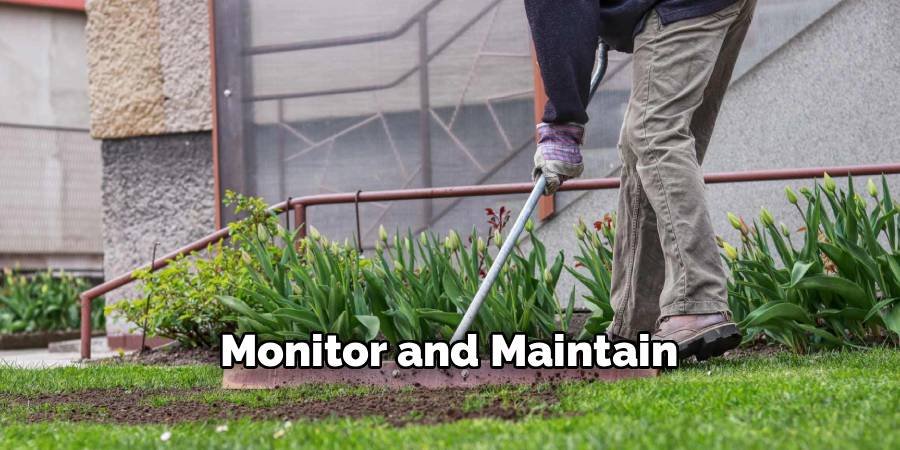
Step 8: Monitor and Maintain Long-term Success
Continue to monitor the repaired areas for several months after installation. Some settling is normal, but significant sinking indicates problems that need attention. If there is little settling, thin the topsoil. Begin mowing regularly when the new grass is about 3 inches tall. Set the mower blade higher than normal for the first few cuts to avoid stressing the young grass. A sharp mower blade is essential to prevent tearing the tender new grass shoots.
Apply regular lawn fertilizer to the repaired area once the grass is fully established, usually 6-8 weeks after seeding or 4 weeks after. Follow the same fertilization schedule you use for the rest of your lawn. Watch for signs of insect problems or disease in the protected area. New grass is sometimes more susceptible to problems than established lawns. Treat problems promptly to prevent damage from spreading to surrounding healthy grass.
Common Mistakes to Avoid
Many homeowners make mistakes that cause their lawn repairs to fail or require resurfacing. Knowing about these mistakes can help you avoid problems and achieve better results. Don’t skip the step of fixing the underlying issues before repairing a surface depression. If a broken pipe or drainage problem is causing the subsidence, these will likely cause the problem again if not repaired properly. Address the root cause for a permanent solution. Avoid using inferior fill materials to save money. Cheaper soils often contain too much clay or sand, which can make it difficult for grass to grow. Inferior materials can also contain weed seeds or contaminants that can damage your lawn.
When filling deep depressions, don’t add too much material at once. Thick layers of new soil don’t compact properly and often settle unevenly. For best results, build up deeper areas gradually with multiple thin layers. Resist the urge to walk or mow over repaired areas too quickly. New grass needs time to develop a strong root system before it can handle traffic. Be patient and protect the repaired areas until the grass is fully established.
FAQs
How long does it take for repaired lawn areas to look normal?
Depending on the type of grass and weather, it usually takes 4-8 weeks for the seedbed to be sufficiently established for light use. The grass will look normal immediately but will take 2-4 weeks to fully establish. Both the seedbed and grass methods take 2-3 months to fully integrate with the surrounding lawn.
Can I fix sunken spots during any season?
Spring and fall are the best times for lawn maintenance because the grass is actively growing during these seasons. Summer maintenance is possible but requires more watering and care. Winter maintenance is not recommended in cold climates because the grass grows very slowly or goes completely dormant.
What causes lawn areas to sink after I’ve already repaired them?
Re-subsidence usually occurs because the underlying problems were not fixed or the soil was not properly compacted during the repair. Water leakage, inadequate compaction, or the use of too much loose organic material can cause subsidence. Always address the root causes and properly compact the materials to prevent re-subsidence.
Should I use topsoil or potting soil for filling sunken areas?
Instead of using potting soil for lawn repairs, use a high-quality potting soil. Potting soil is made for containers and often drains too quickly for lawn use. Good potting soil mixed with compost provides the right structure and nutrients for grass growth, in harmony with your existing yard conditions.
How deep can sunken spots be before professional help is needed?
Most homeowners can successfully repair holes up to 6-8 inches deep using the methods provided in this guide. Deeper areas or areas that cover a large area may benefit from professional help, especially if heavy equipment is required to move and compact the soil.
Conclusion
Repairing sunken spots in your lawn doesn’t have to be complicated or expensive if you follow the right steps. The 8-step guidelines in this article provide a proven system for repairing holes and creating a smooth, beautiful lawn surface. Success depends on correctly diagnosing the underlying cause, using quality materials, and following each step carefully.
Remember that patience is the key to achieving lasting results. Rushing through steps or skipping important prep work often results in repairs failing or needing to be redone. Take the time to do the job right the first time, and your repaired areas will blend seamlessly with the rest of your lawn. Regular maintenance and monitoring help prevent future sunken spots from forming. Address small problems quickly before they become major repair projects. With the right techniques and ongoing care, you can maintain a level, healthy lawn that will enhance the appearance and value of your home for years to come.
About Ravuk Barg
B.Sc. Horticulture Science | Certified Master Gardener
Ravuk Barg has spent more than a decade with his hands in the soil and his head full of questions about why some gardens thrive while others struggle. What started as a single raised bed of tomatoes and basil in a modest backyard has grown into a deep, working knowledge of everything from seed germination and soil amendment to companion planting and seasonal pruning.
Over the years, Ravuk has gardened through drought summers, waterlogged springs, and pest invasions that would make most gardeners hang up their trowels for good. Those hard seasons, he’ll tell you, taught him more than any perfect growing year ever could. He writes from that earned experience—covering vegetable growing, ornamental planting, houseplant care, composting, and garden design with equal confidence and curiosity.
Philosophy & Approach
Ravuk’s approach to gardening is rooted in practicality. He favors organic methods not out of dogma, but because they work long-term—resulting in healthier soil, fewer inputs, and stronger plants. He has a particular fondness for heirloom vegetable varieties (the kind with proper flavor), unruly cottage-style flower beds, and the stubborn houseplants that everyone else gave up on.
The Mission: Give readers the honest, experience-backed advice that helps them actually succeed in their gardens—not just the ideal version, but the real one; weeds, failures, and all.
Education & Credentials
-
B.Sc. in Horticulture Science
-
Greenfield Agricultural University
-
Focus: Plant Physiology, Soil Ecology, and Sustainable Crop Production
-
-
Master Gardener Certification
-
Cooperative Extension Service
-
Focus: 200+ hours of hands-on practical training and community garden work
-
Continuing Education
-
Organic Pest Management
-
Native Plant Landscaping
-
Sustainable Crop Production