

A construction project at home can be exciting, but the aftermath often leaves your beautiful lawn looking like a disaster zone. Heavy machinery, constant foot traffic, and piles of materials can create deep, unsightly ruts in the soil. These depressions are not just an eyesore; they can also lead to drainage problems, trip hazards, and unhealthy grass. Fortunately, you don’t have to live with a damaged yard.
Learning how to fix lawn ruts after construction is a straightforward process that can restore your green space to its former glory. With a bit of patience and some manual labor, you can repair the damage and help your lawn recover, making it healthy and level once again. This guide will walk you through every step, ensuring you have the knowledge to tackle the project with confidence.
Why Repairing Ruts is Essential for a Healthy Lawn
Leaving lawn ruts unattended can cause more problems than just a bumpy appearance. These compacted trenches disrupt the natural flow of water, leading to pooling in some areas and dry patches in others. This uneven moisture distribution suffocates grass roots and creates a breeding ground for fungal diseases and pests. Furthermore, the compacted soil in and around the ruts prevents air, water, and essential nutrients from reaching the grassroots, stunting growth and weakening the overall turf. Over time, these ruts can worsen, becoming deeper and more difficult to repair. By addressing them promptly, you not only improve your lawn’s aesthetics but also promote a healthier, more resilient ecosystem for your grass to thrive.
7 Step Methods Guide on How to Fix Lawn Ruts After Construction
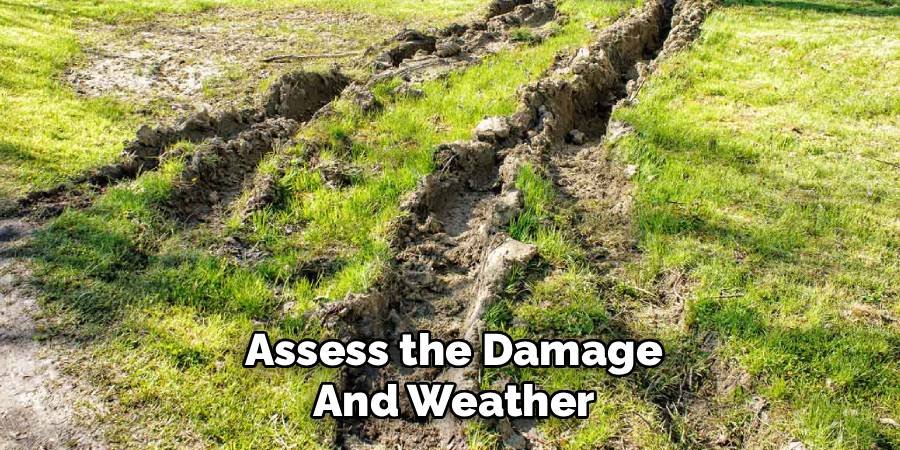
Step 1: Assess the Damage and Weather
Before you begin any work, take a thorough walk around your property to evaluate the extent of the damage. Note the depth and length of the ruts. Shallow ruts, less than a couple of inches deep, will require a different approach than deep ones. This initial assessment helps you gather the right tools and materials. It’s also crucial to check the weather forecast. The ideal time to work is when the soil is moist but not waterlogged, as this makes it easier to manipulate. Avoid working on extremely dry, hard soil or immediately after a heavy downpour, which can create a muddy mess.
Step 2: Gather Your Tools and Materials
Having everything you need on hand will make the repair process much smoother. For most lawn rut repairs, you will need a few basic tools. A sturdy wheelbarrow is essential for moving soil and compost. You’ll also want a shovel or spade for digging and a garden rake for leveling. A hand tamper can be useful for firming up the soil, but you can also use your feet. Depending on the repair method you choose, your materials will include a high-quality topsoil and compost blend, along with grass seed or sod that matches your existing lawn type.
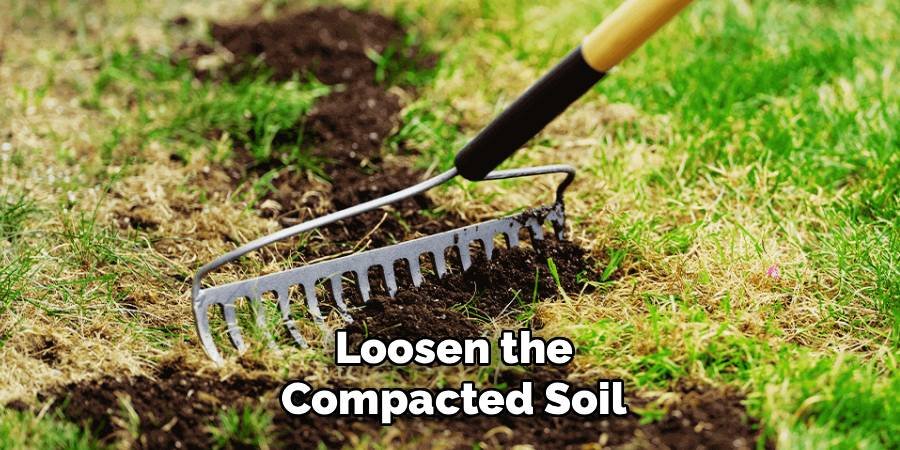
Step 3: Loosen the Compacted Soil
The first hands-on step is to alleviate the compaction within the ruts. The weight of machinery and materials presses the soil particles tightly together, squeezing out air and water channels. Use a spade, garden fork, or tiller to break up the hardened soil at the bottom and sides of each rut. Dig down several inches to ensure you are thoroughly loosening the compacted earth. This process is critical because it reintroduces air into the soil, creating a better environment for new grass roots to establish themselves and access the nutrients they need to grow strong and healthy.
Step 4: Add and Level New Topsoil
Once the ground is loosened, it’s time to fill the ruts. For shallow ruts (1-2 inches deep), a simple mix of topsoil and compost is sufficient. For deeper ruts, you may need to lift the existing turf first. Carefully slice the sod with a spade and roll it back. Then, fill the rut with a 50/50 mixture of topsoil and compost until it is slightly above the surrounding ground level. This overfilling is important because the new soil will settle over time. If you lifted sod, simply roll it back over the newly filled area.
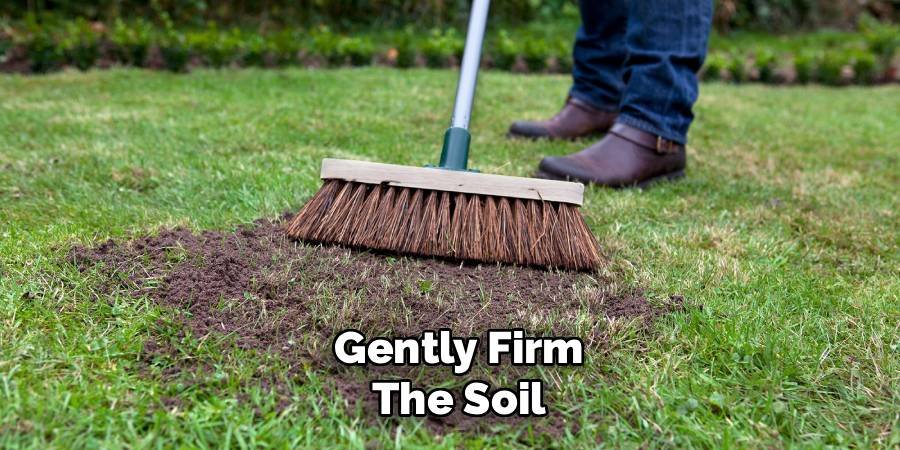
Step 5: Gently Firm the Soil
After filling the ruts, you need to gently firm the soil to remove large air pockets, which can cause the ground to sink later. Avoid aggressive compaction, as this will undo your efforts to aerate the soil. You can walk over the area or use a hand tamper to lightly press down on the new soil. The goal is to create a stable base that is level with the rest of your lawn. The soil should feel firm but not rock-hard. For areas where you relaid sod, this step also helps the sod make good contact with the soil beneath it.
Step 6: Water the Repaired Area
Water is crucial for helping the new soil settle and for preparing the area for seeding. Using a garden hose with a gentle spray nozzle, lightly water the repaired patches. Be careful not to use a strong jet of water, as this can wash away the new topsoil and seed. The moisture will help the soil settle naturally into its final position. You may notice some slight sinking, which is normal. If significant depressions appear, you can add a bit more topsoil and rake it level before moving on to the next step.
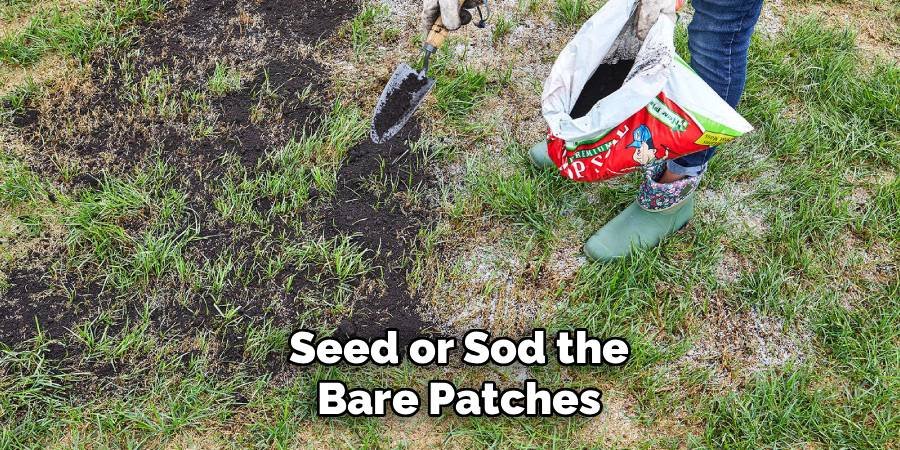
Step 7: Seed or Sod the Bare Patches
Now you can introduce new grass. The best choice between seeding and sodding depends on your budget and timeline. Seeding is more economical but takes longer to establish. Evenly spread a grass seed blend that matches your current lawn over the repaired areas. Rake it in lightly to ensure good seed-to-soil contact. Sod, on the other hand, provides instant results. Cut a piece of sod to fit the patch, lay it down, and press it firmly to connect the roots with the soil below. This is an important part of how to fix lawn ruts after construction successfully.
Apply Mulch and Provide Ongoing Care
To protect your newly planted seeds, apply a thin layer of straw mulch or a commercial seed accelerator over the area. This helps retain moisture, protects the seeds from birds, and prevents them from washing away during watering. For the next few weeks, keep the soil consistently moist but not soggy. This may mean watering lightly once or twice a day, especially in warm weather. Avoid mowing the new grass until it has reached a height of at least 3-4 inches. Proper aftercare is the final key to ensuring your lawn repairs are successful and long-lasting.
Frequently Asked Questions
How Long Does It Take for a Lawn to Recover After Construction?
The recovery time depends on the severity of the damage, the season, and the repair method used. If you re-sod the damaged areas, your lawn can look fully repaired almost instantly. If you use grass seed, it can take anywhere from 4 to 8 weeks to see significant growth and for the lawn to start blending in. Full recovery, where the new grass is mature and resilient, can take an entire growing season.
Can I Fix Lawn Ruts Without Digging?
For very shallow ruts (less than an inch deep), you might have some success without digging. You can apply a thin layer of a topsoil and compost mix directly into the depression and rake it smooth. This is called “topdressing.” However, this method does not address the underlying soil compaction, which is often the main problem. For most ruts caused by heavy equipment, digging to loosen the compacted soil is necessary for a lasting repair.
What Is the Best Time of Year to Repair Lawn Ruts?
The best time to repair lawn ruts is during the primary growing season for your grass type.
- Cool-season grasses (like Kentucky bluegrass, fescue, and ryegrass): Early fall or spring are ideal. The cooler temperatures and consistent rainfall help new seeds germinate and establish without the stress of summer heat.
- Warm-season grasses (like Bermuda, Zoysia, and St. Augustine): Late spring through early summer is the best time, as these grasses thrive in warmer temperatures.
Should I Use Sand to Fill Lawn Ruts?
It is generally not recommended to use pure sand to fill lawn ruts. While sand can improve drainage, it does not contain the organic matter and nutrients necessary for healthy grass growth. A better solution is to use a high-quality topsoil or a mix of topsoil and compost. This provides a nutrient-rich environment for the new grass roots to thrive. If your soil has heavy clay content, mixing a small amount of sand into your topsoil can help improve its structure.
How Can I Prevent Lawn Ruts During Future Construction?
Prevention is always better than repair. If you have another project planned, establish designated pathways for foot traffic and machinery. You can protect the lawn by laying down thick plywood sheets or construction mats along these paths to distribute the weight and prevent deep ruts from forming. Communicate clearly with your contractors about protecting the lawn and designate specific areas for material storage away from sensitive turf areas.
Conclusion
Repairing a lawn damaged by construction might seem like a daunting task, but it is entirely manageable with the right approach. By following these steps—from assessing the damage and loosening compacted soil to seeding and providing proper care—you can systematically restore your yard. The key is to address not just the visible depression but also the underlying soil compaction to ensure a healthy, long-term recovery. Don’t be discouraged by the initial state of your yard. Taking the time to learn how to fix lawn ruts after construction will reward you with a smooth, lush, and beautiful lawn that you can enjoy for years to come.
About Ravuk Barg
B.Sc. Horticulture Science | Certified Master Gardener
Ravuk Barg has spent more than a decade with his hands in the soil and his head full of questions about why some gardens thrive while others struggle. What started as a single raised bed of tomatoes and basil in a modest backyard has grown into a deep, working knowledge of everything from seed germination and soil amendment to companion planting and seasonal pruning.
Over the years, Ravuk has gardened through drought summers, waterlogged springs, and pest invasions that would make most gardeners hang up their trowels for good. Those hard seasons, he’ll tell you, taught him more than any perfect growing year ever could. He writes from that earned experience—covering vegetable growing, ornamental planting, houseplant care, composting, and garden design with equal confidence and curiosity.
Philosophy & Approach
Ravuk’s approach to gardening is rooted in practicality. He favors organic methods not out of dogma, but because they work long-term—resulting in healthier soil, fewer inputs, and stronger plants. He has a particular fondness for heirloom vegetable varieties (the kind with proper flavor), unruly cottage-style flower beds, and the stubborn houseplants that everyone else gave up on.
The Mission: Give readers the honest, experience-backed advice that helps them actually succeed in their gardens—not just the ideal version, but the real one; weeds, failures, and all.
Education & Credentials
-
B.Sc. in Horticulture Science
-
Greenfield Agricultural University
-
Focus: Plant Physiology, Soil Ecology, and Sustainable Crop Production
-
-
Master Gardener Certification
-
Cooperative Extension Service
-
Focus: 200+ hours of hands-on practical training and community garden work
-
Continuing Education
-
Organic Pest Management
-
Native Plant Landscaping
-
Sustainable Crop Production