

A beautiful, level lawn is a source of pride for any homeowner. However, over time, you might notice annoying dips and low spots appearing. These depressions can be more than just an eyesore; they can collect water, creating soggy patches, and pose a tripping hazard for family and guests.
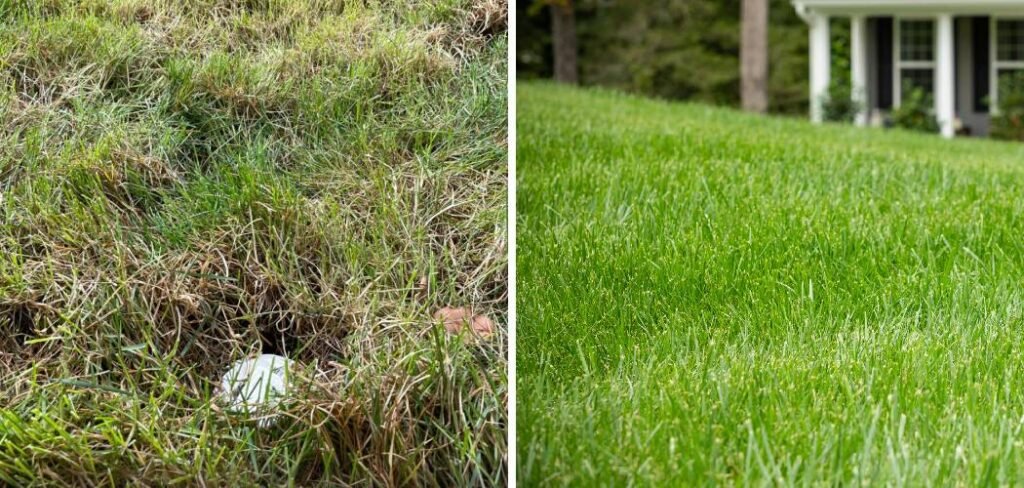
Fortunately, learning how to fix a dip in your lawn is a straightforward project that most homeowners can tackle themselves with a few simple tools and a bit of effort. This guide will walk you through the process step-by-step, helping you restore your lawn to a smooth, even surface you can enjoy.
Why Fixing Lawn Depressions Matters
A dip in your lawn might seem like a minor cosmetic issue, but it can lead to several bigger problems. First and foremost, low spots disrupt the uniform appearance of your turf, creating an uneven, bumpy landscape. More importantly, these areas collect water after rainfall or irrigation, leading to oversaturated soil and root rot, which can kill the grass in that patch. A waterlogged dip can also become a breeding ground for mosquitos and other pests.
Furthermore, uneven ground is a significant safety concern. Dips, especially deeper ones, are easy to trip over, posing a risk to children playing, guests, or anyone walking across the yard. Addressing these low spots promptly not only improves your lawn’s health and appearance but also makes it a safer space for everyone.
7 Step Methods Guide on How to Fix a Dip in Your Lawn
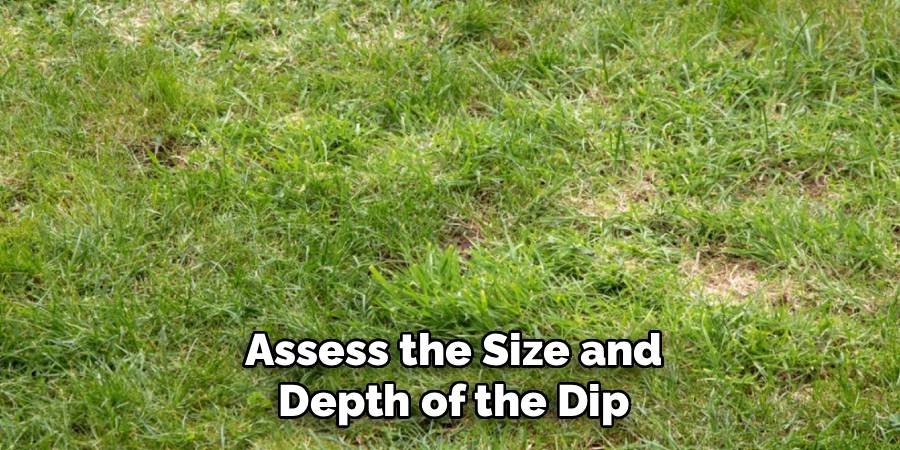
Step 1: Assess the Size and Depth of the Dip
Before you begin, walk around your lawn to identify all the low spots. Pay close attention to their depth and diameter. For very shallow depressions (less than an inch deep), you can often fix them with a simple topdressing. However, for deeper dips of an inch or more, you will need to lift the existing turf to add soil underneath. This initial assessment is crucial because it determines which repair method is most appropriate. Take note of each area so you can gather the right amount of materials and plan your work accordingly.
Step 2: Gather Your Tools and Materials
Having everything you need on hand will make the process much smoother. For shallow dips, you will need a quality topsoil mix, compost, and sand. For deeper dips, your tool list will expand. You’ll need a flat spade or lawn edger to cut and lift the sod, a wheelbarrow for mixing and transporting soil, a garden rake to spread the material evenly, and a tamper or a small piece of plywood to gently firm the soil. You will also need grass seed that matches your existing lawn type and some water to help the new or replaced grass establish itself.
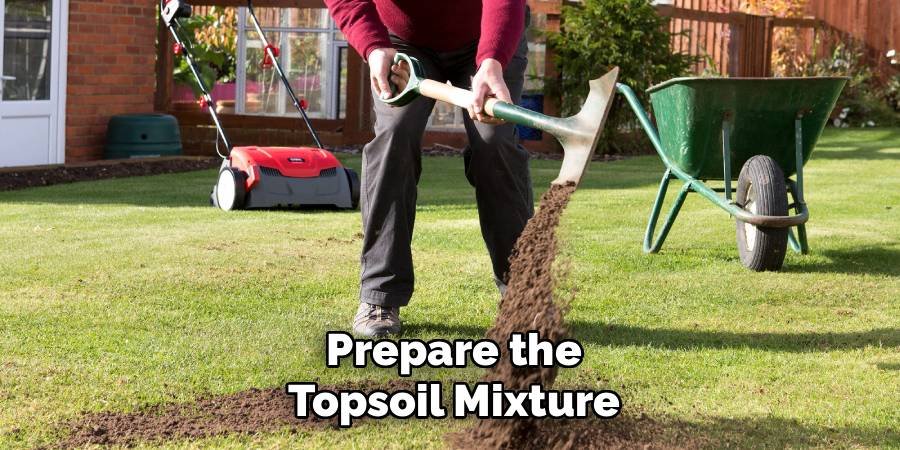
Step 3: Prepare the Topsoil Mixture
The key to a successful repair is using the right soil mixture to fill the depression. A heavy, clay-based soil will compact easily and prevent proper drainage, recreating the problem you’re trying to solve. Instead, create a light, nutrient-rich blend. A good recipe is to mix two parts topsoil, two parts sand, and one part compost in your wheelbarrow. The topsoil provides bulk, the sand improves drainage and prevents compaction, and the compost adds vital nutrients that will help the grass re-establish itself quickly. Mix these components thoroughly until you have a consistent, uniform material.
Step 4: Cut and Lift the Existing Sod (For Deeper Dips)
For dips deeper than an inch, you need to work underneath the existing grass. Using a flat spade or edger, cut into the sod around the perimeter of the dip. Try to make the cuts clean and straight to form a patch you can easily lift. Carefully slide the spade under the sod, keeping it as level as possible to preserve the root system. You want to peel back the turf in one or a few large pieces, like rolling back a rug. Place the removed sod gently to the side in a shady spot to keep it from drying out while you work.
Step 5: Fill the Low Spot with Your Soil Mix
Now it’s time to fill the depression. Add your prepared topsoil mixture to the sunken area. It’s important to add the soil in thin layers, about an inch at a time, rather than all at once. This prevents air pockets from forming, which could cause the area to sink again later. Use your garden rake to spread each layer evenly across the entire depression. As you build up the soil, ensure the level is slightly higher than the surrounding lawn. The new soil will settle over time, and this extra height compensates for that natural compaction.
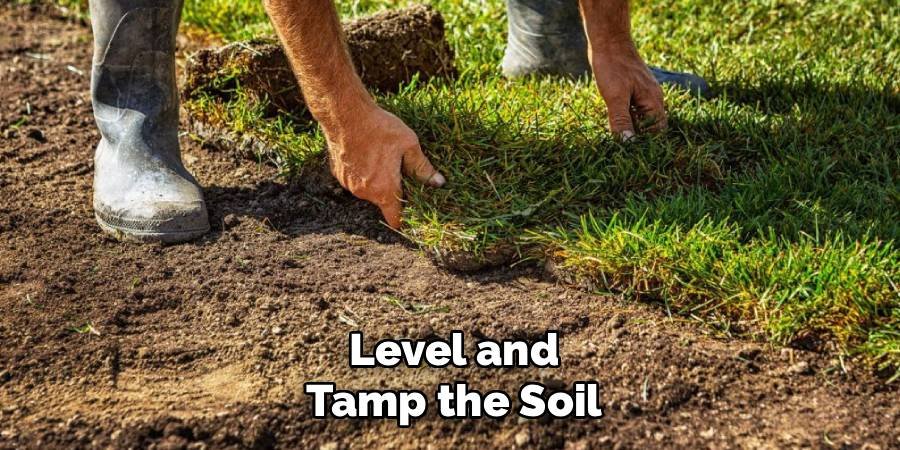
Step 6: Level and Tamp the Soil
Once you have filled the dip to the correct height, use the back of your rake to smooth the surface. For a more compact and stable base, gently tamp down the soil. You can use a hand tamper or simply place a piece of plywood over the area and walk on it. This step is crucial for ensuring the repaired patch remains level with the rest of your lawn and doesn’t sink again after the first heavy rain. The goal is to create a firm but not overly compacted base for the grass.
Step 7: Replace the Sod or Reseed the Area
If you were able to lift the original sod, carefully place it back over the newly filled and leveled area. Press it down firmly to ensure good contact between the grassroots and the new soil underneath. If the original sod was damaged or you are fixing a shallow dip with topdressing, you will need to reseed. Spread your chosen grass seed evenly over the repaired patch, following the coverage recommendations on the packaging. A light dusting of your soil mix over the seeds can help protect them from birds and keep them moist. This is a key step in learning how to fix a dip in your lawn for a seamless look.
Water the Repaired Patch Thoroughly
Whether you replaced the sod or planted new seed, water is essential for recovery and growth. Water the area gently but deeply immediately after you finish. For the next two to three weeks, keep the soil consistently moist but not waterlogged. This encourages the roots of the replaced sod to grow into the new soil or helps the grass seeds to germinate successfully. A light, frequent watering schedule is better than an occasional deep soaking, as it prevents the seeds from being washed away.
Frequently Asked Questions
What Is the Best Time of Year to Fix a Dip in a Lawn?
The best time to repair dips in your lawn is during the active growing season for your grass type. For cool-season grasses like fescue and bluegrass, early spring and early fall are ideal. For warm-season grasses such as Bermuda and Zoysia, late spring and early summer are the best times. Repairing during these periods ensures the grass can recover and establish itself quickly with less stress.
Can I Use Just Sand to Fill a Low Spot in My Lawn?
Using only sand is not recommended. While sand improves drainage, it contains no nutrients and can create a sterile layer that grass roots struggle to penetrate. This can lead to a weak, unhealthy patch of lawn. A balanced mix of topsoil, sand, and compost provides the structure, drainage, and nutrients needed for the grass to thrive and blend seamlessly with the rest of your yard.
How Long Will It Take for the Repaired Area to Blend in?
The time it takes for the patch to blend in depends on several factors, including your grass type, the time of year, and how well you care for it. If you replaced the original sod, you might see it blend in within two to four weeks. If you reseeded the area, it could take four to eight weeks for the new grass to germinate, mature, and match the surrounding lawn’s density and color.
What Causes Dips and Low Spots in a Lawn?
Dips can form for various reasons. Often, they are caused by the settling of soil over time, especially in newly built homes where the ground was disturbed. Other common causes include:
- Buried organic matter (like old tree stumps or construction debris) decomposing underground.
- Poor drainage leading to soil erosion and compaction.
- Broken or leaking water or sewer lines washing away soil.
- Heavy foot traffic or equipment compacting the soil in specific areas.
Do I Need to Aerate My Lawn Before Fixing Dips?
Aerating your entire lawn before fixing dips isn’t strictly necessary, but it can be beneficial. If the dip was caused by heavy soil compaction, aerating the area before adding new soil can improve drainage and help the new grassroots establish themselves more easily. For the rest of your lawn, regular aeration promotes overall health by allowing air, water, and nutrients to reach the root zone more effectively.
Conclusion
Fixing a low spot in your yard is a rewarding project that significantly enhances your lawn’s health, safety, and appearance. With a bit of planning and the right materials, you can easily smooth out those troublesome depressions and create an even, beautiful turf. The process involves assessing the dip, preparing the right soil mix, and either lifting the sod or reseeding the area. By following these straightforward methods, you can take control of your landscape’s quality. Don’t let those sunken spots detract from your yard any longer; now that you know how to fix a dip in your lawn, you can achieve that perfect, level green space you’ve always wanted.
About Ravuk Barg
B.Sc. Horticulture Science | Certified Master Gardener
Ravuk Barg has spent more than a decade with his hands in the soil and his head full of questions about why some gardens thrive while others struggle. What started as a single raised bed of tomatoes and basil in a modest backyard has grown into a deep, working knowledge of everything from seed germination and soil amendment to companion planting and seasonal pruning.
Over the years, Ravuk has gardened through drought summers, waterlogged springs, and pest invasions that would make most gardeners hang up their trowels for good. Those hard seasons, he’ll tell you, taught him more than any perfect growing year ever could. He writes from that earned experience—covering vegetable growing, ornamental planting, houseplant care, composting, and garden design with equal confidence and curiosity.
Philosophy & Approach
Ravuk’s approach to gardening is rooted in practicality. He favors organic methods not out of dogma, but because they work long-term—resulting in healthier soil, fewer inputs, and stronger plants. He has a particular fondness for heirloom vegetable varieties (the kind with proper flavor), unruly cottage-style flower beds, and the stubborn houseplants that everyone else gave up on.
The Mission: Give readers the honest, experience-backed advice that helps them actually succeed in their gardens—not just the ideal version, but the real one; weeds, failures, and all.
Education & Credentials
-
B.Sc. in Horticulture Science
-
Greenfield Agricultural University
-
Focus: Plant Physiology, Soil Ecology, and Sustainable Crop Production
-
-
Master Gardener Certification
-
Cooperative Extension Service
-
Focus: 200+ hours of hands-on practical training and community garden work
-
Continuing Education
-
Organic Pest Management
-
Native Plant Landscaping
-
Sustainable Crop Production