

Discovering a bent tomato plant in your garden can be disheartening. Whether it’s from strong winds, heavy fruit, or an accidental bump, a damaged stem feels like a major setback. The good news is that tomatoes are surprisingly resilient plants. With a little care and the right technique, you can often save them and encourage them to continue producing delicious fruit. This guide will walk you through everything you need to know about how to fix a bent tomato plant, helping you turn a potential garden disaster into a success story. You’ll learn how to assess the damage, provide support, and nurse your plant back to full health.
Why Tomato Stems Bend and Break
Tomato plants are vigorous growers, but their stems can be surprisingly vulnerable. One of the main reasons for bending is rapid growth. When a plant shoots up quickly, its stems may not have enough time to develop the structural strength needed to support its own weight, let alone the weight of heavy fruit clusters. Strong winds, heavy rain, or even the weight of a perched bird can easily push a plant beyond its limit. Accidental damage from garden tools, pets, or children is another common cause. Understanding these factors helps you anticipate problems and take preventive measures, like providing early support.
8 Step-by-Step Guide on How to Fix a Bent Tomato Plant
Step 1: Assess the Damage Immediately
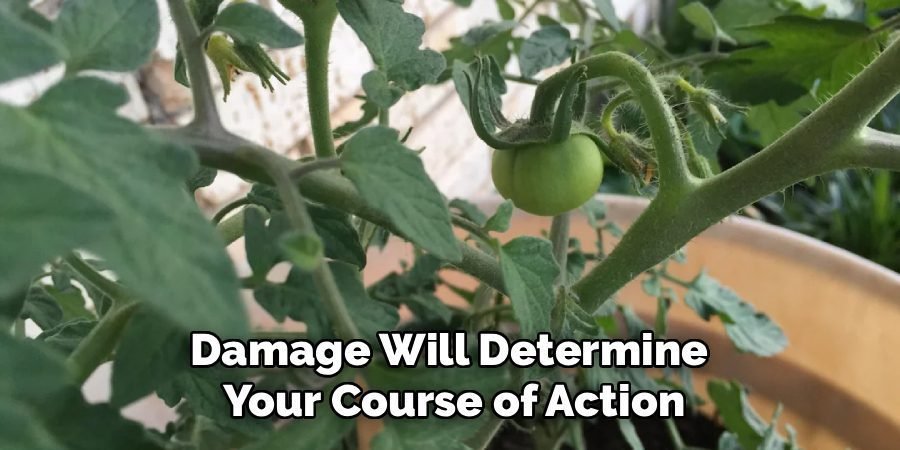
Your first action is to carefully examine the bent stem. Is it merely kinked, or is it partially or fully broken? A simple bend or a small crack is much easier to repair than a stem that is hanging by a thread. Look for signs of wilting on the leaves above the bend, as this indicates a disruption in water flow. The extent of the damage will determine your course of action. If the stem is still mostly connected, there is a very high chance of saving it. Quick assessment is key.
Step 2: Gather Your Supplies
Before you begin the repair, gather the necessary materials to avoid leaving the plant unsupported for long. You will need soft garden twine or cloth strips, a splint (like a small stick, pencil, or bamboo stake), and some gardening tape or waterproof medical tape. Having these items ready ensures you can work efficiently and minimize stress on the plant. A clean, sharp pair of pruning shears may also be useful if you need to trim any damaged leaves away from the break, creating a clean working area.
Step 3: Gently Straighten the Stem
Handle the plant with extreme care as you gently guide the bent stem back into its upright position. Do not force it. If you meet resistance, stop and re-evaluate. The goal is to align the two sides of the bend or break as closely as possible to their natural position. This realignment is crucial for allowing the plant’s vascular system—the channels that transport water and nutrients—to reconnect and begin healing. Support the stem with one hand while you work to prevent causing any further damage during this delicate process.
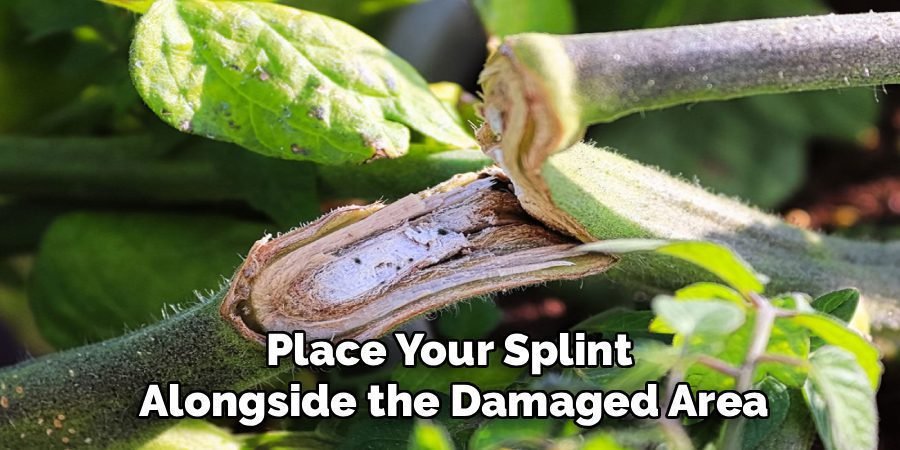
Step 4: Apply a Supportive Splint
Once the stem is straightened, you need to immobilize it. Place your splint alongside the damaged area, extending a few inches above and below the bend for stability. A popsicle stick, a short piece of bamboo, or even a sturdy twig can work perfectly as a splint. This external support acts like a cast, holding the stem in place and protecting it from wind or other disturbances while it mends. Ensure the splint is snug against the stem but not so tight that it could constrict future growth.
Step 5: Secure the Splint and Stem
Using your soft garden twine or cloth strips, gently wrap the splint to the stem. Start wrapping below the bend and work your way up past it. The wrap should be firm enough to hold the splint securely but not so tight that it cuts into the plant’s tissue. After securing the splint with twine, you can add a layer of waterproof tape over the immediate break for extra support and to help seal the wound. This step is a critical part of how to fix a bent tomato plant successfully.
Step 6: Provide Additional Plant Support
A splint alone may not be enough, especially for a larger plant. Secure the entire plant to a sturdy stake, trellis, or tomato cage. This provides overall stability and takes the weight off the mending stem. Use soft ties to loosely attach the main stem to the support structure in a few places. This ensures that the plant remains upright and reduces the risk of the same stem—or others—bending under pressure in the future. Proper staking is a great preventive measure for all your tomato plants.
Step 7: How to Fix a Bent Tomato Plant by Pruning Damaged Parts
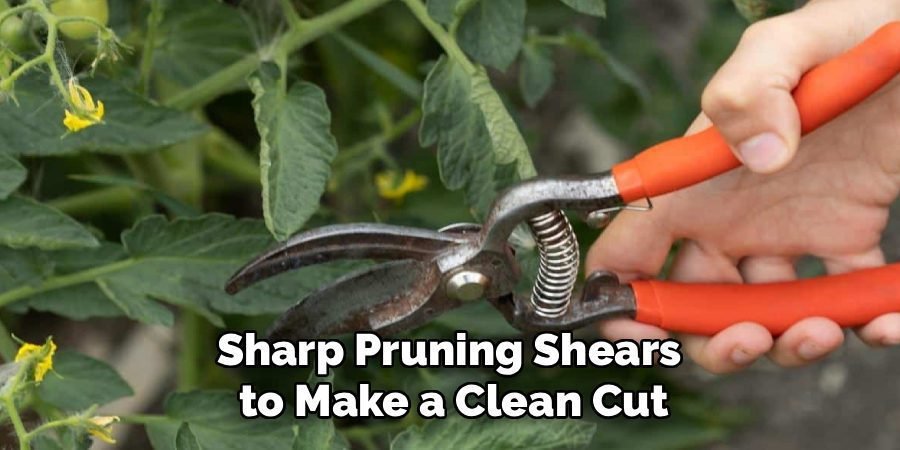
If there are any leaves or small side shoots directly at the break point that are crushed or dying, it is best to remove them. Use clean, sharp pruning shears to make a clean cut. Removing this damaged foliage allows the plant to direct all its energy toward healing the main stem instead of trying to sustain dying leaves. This also improves air circulation around the wound, which can help prevent fungal diseases from taking hold while the plant is in a vulnerable state.
Step 8: Water and Monitor the Plant
After you have splinted and supported the plant, give it a good watering at the base to help reduce transplant shock and stress. Over the next few weeks, monitor the plant closely. Look for signs of recovery, such as the leaves above the break perking up and new growth appearing. Avoid over-fertilizing during this healing period, as it can push growth too quickly. With proper care, the plant should form a tough knuckle at the break point, and the splint can eventually be removed.
Prevent Future Damage
To ensure the long-term health of your plant, take steps to prevent future damage. If the plant is in a windy location, consider staking it or providing a windbreak to reduce stress on the stems. Regularly prune your plant to maintain its shape and remove any weak or damaged branches that could be prone to breaking. Additionally, inspect your plant regularly for signs of pests or diseases, as these can weaken the overall structure. By providing ongoing care and protection, you can help your plant thrive and avoid similar issues in the future.
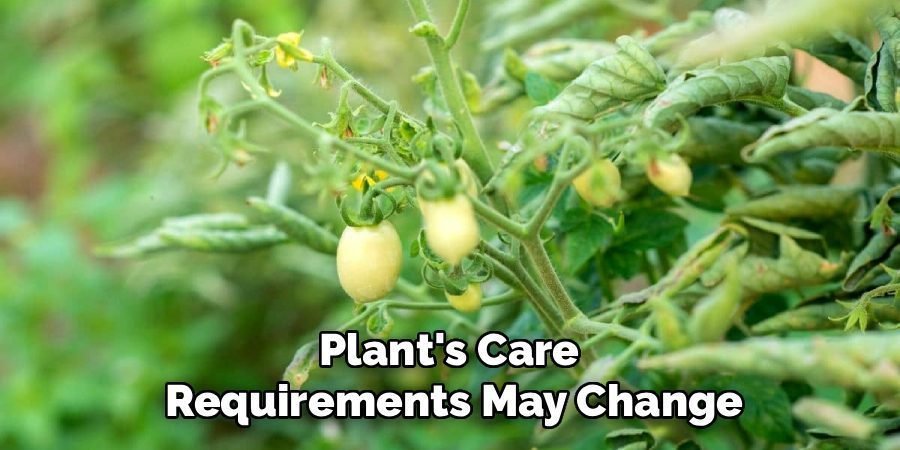
Monitor Growth and Adjust Care
Consistently monitoring your plant’s growth is essential to ensure its continued health and vitality. Pay close attention to how it responds to factors like sunlight, watering, and soil quality, and make adjustments as needed. Over time, a plant’s care requirements may change, so it’s important to remain attentive. If you notice any unusual growth patterns or signs of stress, address the issue promptly by evaluating environmental conditions or consulting a gardening expert. Regular observation and a proactive approach will help your plant reach its full potential.
Frequently Asked Questions (FAQ)
How Long Does It Take for a Bent Tomato Stem to Heal?
A bent tomato stem can start to heal surprisingly quickly. You may see the leaves above the break perk up within a few days as water flow is restored. The plant will form a hardened “knuckle” or callus over the break, which can take two to four weeks to become strong and self-supporting. It’s best to leave the splint in place for at least a month to ensure the union is completely stable before considering its removal.
Can a Completely Broken Tomato Stem Reattach?
If the tomato stem is completely severed, it cannot be reattached to the main plant. However, all is not lost. You can treat the broken-off piece as a cutting. Simply remove the lower leaves and place the stem in a jar of water. It will likely root within one to two weeks, and you can then plant it as a new tomato plant. This is a great way to clone your favorite plant and turn an accident into an opportunity.
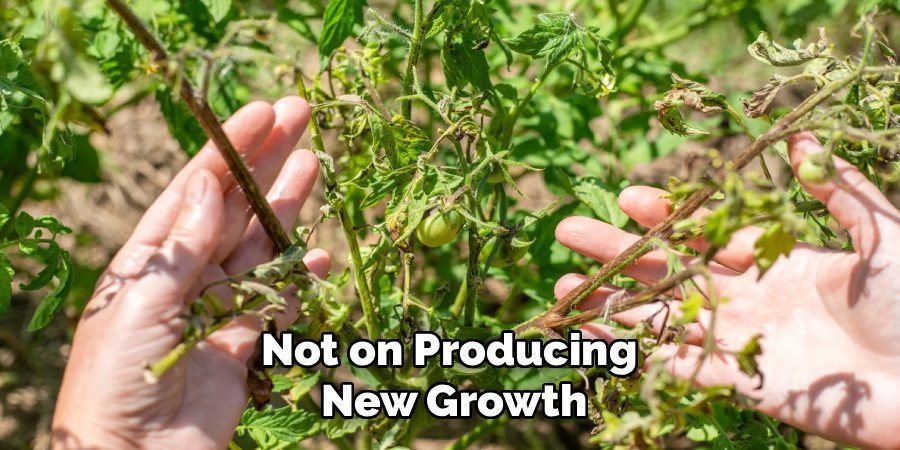
Should I Fertilize a Tomato Plant with a Bent Stem?
It is best to hold off on fertilizing for a week or two after you repair a bent stem. The plant is under stress and its primary focus should be on healing the wound, not on producing new growth. Applying fertilizer can encourage a growth spurt that the compromised stem may not be able to support. Once you see clear signs of recovery, like healthy, upright leaves and new shoots, you can resume your regular, balanced feeding schedule to support its continued growth.
Will a Bent Stem Affect Fruit Production?
A minor bend that is repaired quickly should not have a significant long-term impact on fruit production. Once the stem heals, it should be able to transport water and nutrients effectively again. However, a severe break might temporarily slow down the plant’s growth and delay the development of fruit on that specific branch. By providing proper care and allowing the plant to heal, you give it the best chance to resume its normal fruiting cycle and provide a bountiful harvest.
How Can I Prevent My Tomato Stems from Bending in the Future?
Prevention is always the best strategy. Provide strong support for your tomato plants early in the season using stakes, cages, or trellises. As the plant grows, continue to tie the main stems loosely to the support. Prune suckers—the small shoots that grow between the main stem and a branch—to manage the plant’s size and improve airflow. This prevents the plant from becoming too top-heavy and bushy, which makes it more susceptible to wind and weight damage.
Conclusion
A bent tomato plant doesn’t have to spell the end of your harvest. As you’ve learned, tomatoes are tough survivors. By quickly assessing the damage, providing a splint, and securing the plant to a larger support, you can give it a fantastic chance at a full recovery. The key is to act fast and handle the plant with care. Don’t be afraid to try these repair techniques. Learning how to fix a bent tomato plant is a valuable skill for any gardener and will give you the confidence to handle future garden mishaps with ease.
About Ravuk Barg
B.Sc. Horticulture Science | Certified Master Gardener
Ravuk Barg has spent more than a decade with his hands in the soil and his head full of questions about why some gardens thrive while others struggle. What started as a single raised bed of tomatoes and basil in a modest backyard has grown into a deep, working knowledge of everything from seed germination and soil amendment to companion planting and seasonal pruning.
Over the years, Ravuk has gardened through drought summers, waterlogged springs, and pest invasions that would make most gardeners hang up their trowels for good. Those hard seasons, he’ll tell you, taught him more than any perfect growing year ever could. He writes from that earned experience—covering vegetable growing, ornamental planting, houseplant care, composting, and garden design with equal confidence and curiosity.
Philosophy & Approach
Ravuk’s approach to gardening is rooted in practicality. He favors organic methods not out of dogma, but because they work long-term—resulting in healthier soil, fewer inputs, and stronger plants. He has a particular fondness for heirloom vegetable varieties (the kind with proper flavor), unruly cottage-style flower beds, and the stubborn houseplants that everyone else gave up on.
The Mission: Give readers the honest, experience-backed advice that helps them actually succeed in their gardens—not just the ideal version, but the real one; weeds, failures, and all.
Education & Credentials
-
B.Sc. in Horticulture Science
-
Greenfield Agricultural University
-
Focus: Plant Physiology, Soil Ecology, and Sustainable Crop Production
-
-
Master Gardener Certification
-
Cooperative Extension Service
-
Focus: 200+ hours of hands-on practical training and community garden work
-
Continuing Education
-
Organic Pest Management
-
Native Plant Landscaping
-
Sustainable Crop Production