

Welcome to the wonderful world of gardening! Whether you have a sprawling backyard plot or a few pots on your balcony, keeping track of your plants is key to success. It’s easy to forget what you planted where, especially as seedlings start to sprout. That’s where a good system comes in. This guide will walk you through everything you need to know about how to label plants in garden spaces of all sizes.
From choosing the right materials to making your markers last, we’ll cover simple and effective methods that will help you create an organized, beautiful, and thriving garden. Get ready to say goodbye to the guessing game and hello to a perfectly organized green space.
Why Labeling Your Plants Matters
A well-labeled garden is more than just an organized space; it’s a smart one. When you know exactly what is growing and where, you can provide tailored care. Different plants have unique needs for water, sunlight, and fertilizer. Proper identification helps you meet these specific requirements, leading to healthier, more productive plants.
Labeling also prevents confusion, especially when you’re growing multiple varieties of the same vegetable, like tomatoes or peppers. It allows you to track which varieties perform best in your soil and climate. Furthermore, clear markers help you remember planting dates, which is essential for knowing when to harvest. For perennial gardeners, labels are crucial for identifying plants that die back in winter, ensuring you don’t accidentally dig them up in the spring.
6 Step Method Guide on How to Label Plants in Garden
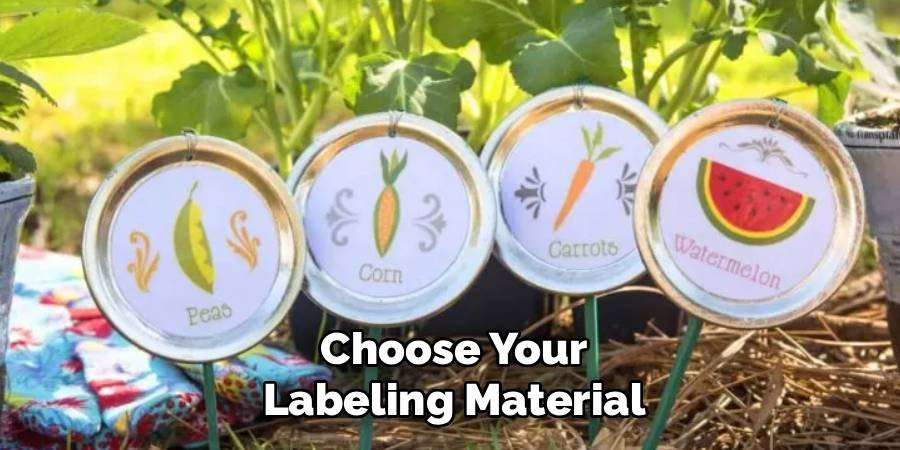
Step 1: Choose Your Labeling Material
The first step in creating durable plant markers is selecting the right material. Your choice will depend on your budget, your garden’s aesthetic, and how long you need the labels to last. Plastic stakes are affordable and widely available, but they can become brittle in the sun over time. Wooden markers, like popsicle sticks or bamboo stakes, offer a natural look but may rot after a season or two. For a more permanent solution, consider metal, slate, or stone labels. These materials stand up to harsh weather conditions and can be reused year after year, making them a great long-term investment for your garden’s organization.
Step 2: Select the Right Writing Tool
Once you have your labels, you need a writing tool that won’t fade or wash away. A standard permanent marker might seem like a good idea, but many are not UV-resistant and will fade to illegibility after a few weeks in direct sunlight. Instead, opt for a garden marker or a paint pen specifically designed for outdoor use. These are formulated to be waterproof and resistant to sun damage. Another excellent option is a grease pencil, also known as a china marker, which adheres well to various surfaces and holds up against the elements. For an even more lasting impression, you can use an engraving tool on metal or stone labels.
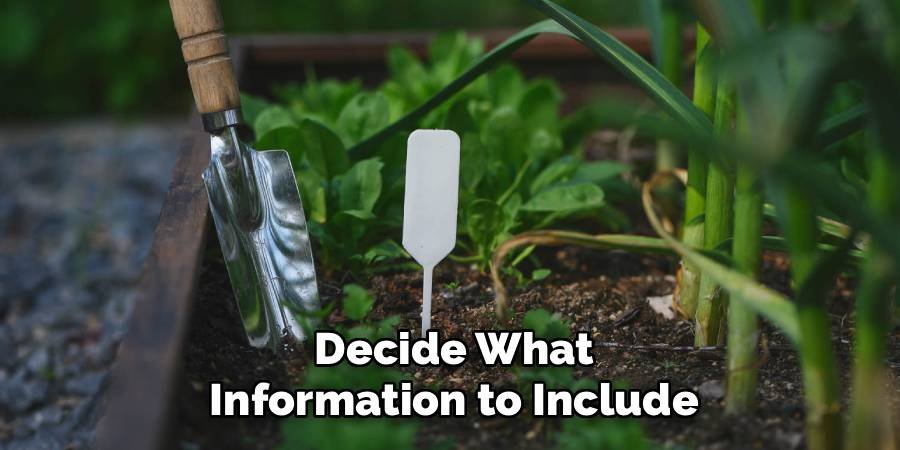
Step 3: Decide What Information to Include
Effective plant labels do more than just name the plant. To make your labels truly useful, include key details that will help you throughout the growing season. At a minimum, write the plant’s common name and variety. For example, instead of just “Tomato,” write “Tomato – Cherokee Purple.” It’s also incredibly helpful to add the date you planted the seeds or transplanted the seedling. This information is vital for calculating the days to maturity and knowing when to expect a harvest. If you have space, consider adding a note about its sun or water needs, which can be a great reminder for daily care.
Step 4: How to Label Plants in Garden Rows with Style
Your plant markers can be functional and beautiful. Think about how your labels can complement your garden’s overall design. You can paint wooden stakes in colors that match your flowers or use elegant copper tags that will develop a lovely patina over time. Stamping letters into clay or metal tags adds a rustic, handmade touch. You could also write on smooth, flat river stones with a paint pen for a natural and durable marker. The key is to find a style that you enjoy looking at and that fits seamlessly into your outdoor space, turning a practical task into a creative project.
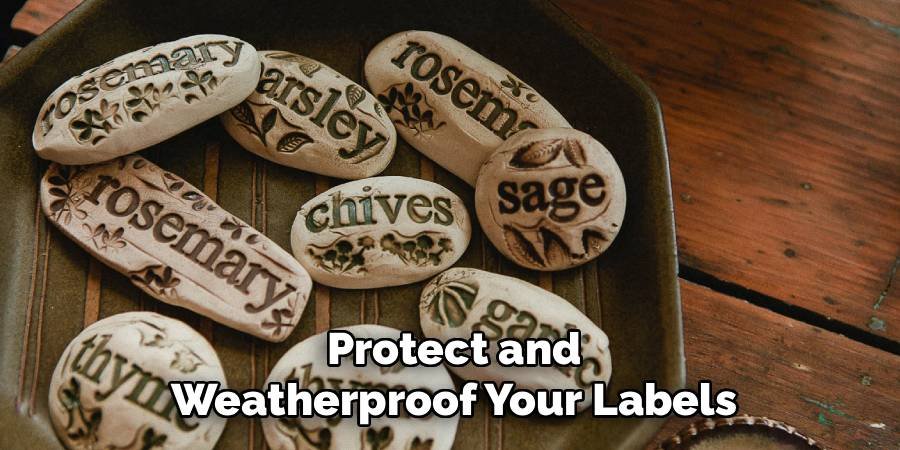
Step 5: Protect and Weatherproof Your Labels
To ensure your hard work lasts, take an extra step to protect your labels from the weather. Even with a durable marker, adding a protective layer can extend the life of your text. A clear coat of waterproof sealant or outdoor-grade varnish can be sprayed or brushed over your completed labels. This is especially important for wooden markers to prevent rot and for any label written with a standard marker to prevent fading. This simple step only takes a few minutes but can save you the hassle of rewriting all your labels mid-season when the sun and rain have taken their toll.
Step 6: Position Your Labels Correctly
Where you place your labels is just as important as what you write on them. The marker should be placed close to the plant it identifies without interfering with its growth. For single plants like a tomato or pepper, place the stake a few inches from the base of the stem. When labeling rows of seeds or small seedlings, place a marker at the beginning and end of each row. Make sure the label is pushed firmly into the soil so it won’t be dislodged by wind, rain, or watering. The writing should face outward for easy reading as you walk through your garden.
Create a Garden Map as a Backup
Even the best labels can sometimes get lost, moved by curious critters, or pulled up by accident. To avoid any confusion, creating a garden map is a brilliant backup strategy. On a piece of paper or in a digital document, draw a simple layout of your garden beds. In each section, write down what you planted and the date. This map serves as a master record of your garden. It’s also a valuable tool for planning crop rotation in future seasons. Keep your map in a safe, accessible place, like a gardening journal or a folder, so you can refer to it whenever you need.
Frequently Asked Questions (FAQ)
What Is the Best Way to Make DIY Plant Labels?
Making your own plant labels can be a fun and cost-effective project. One of the best methods is using wooden craft sticks or old wooden spoons.
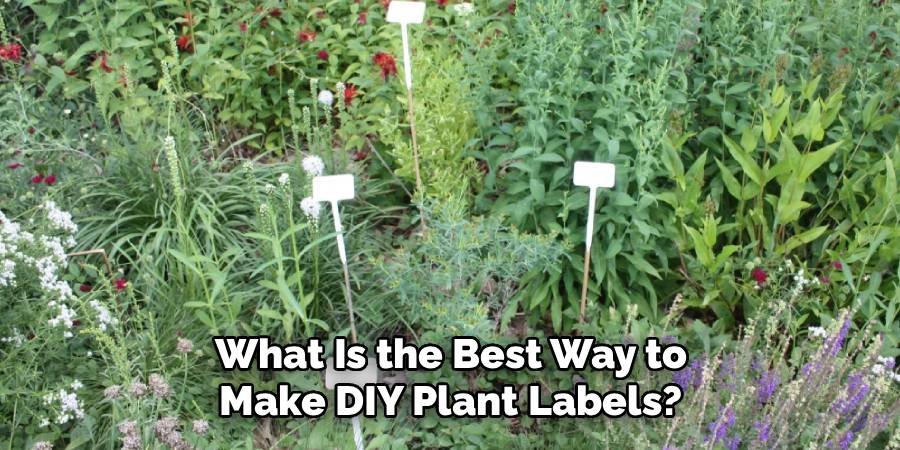
- Lightly sand the surface to make it smooth for writing.
- Use a paint pen or an industrial permanent marker to write the plant names.
- To make them weatherproof, coat the entire label with a layer of clear outdoor sealant or polyurethane.
This protects the wood from moisture and the ink from fading in the sun, ensuring your labels last the whole season.
How Do You Make Plant Labels That Don’t Fade?
The key to preventing fading is using the right materials. The most reliable option is a paint pen, as its oil-based ink is designed to be UV-resistant and waterproof. Another great choice is a grease pencil, which creates a waxy, durable mark. For a truly permanent solution, consider engraving your labels. You can use a simple engraving tool to carve plant names into metal, slate, or even thick plastic tags. This method ensures the name will never wash away or fade, no matter the weather conditions.
Can You Use Popsicle Sticks for Plant Labels?
Yes, you can absolutely use popsicle sticks for plant labels, and they are a great budget-friendly option, especially for starting seeds indoors. However, untreated wood will rot quickly when exposed to moisture in the garden. To make them last longer outdoors, you should weatherproof them. Before writing, you can dip the sticks in melted wax or coat them with a clear waterproof sealant. This creates a barrier against moisture and helps them last for at least one full growing season.
What Information Should Go on a Plant Tag?
A truly helpful plant tag should include more than just the name. For maximum benefit, consider adding the following information:
- Plant Name and Variety: e.g., “Bell Pepper – California Wonder.”
- Planting Date: The date seeds were sown or the plant was transplanted.
- Days to Harvest: This helps you know when to expect your crop.
- Basic Care Notes: A quick reminder like “Full Sun” or “Water Daily.”
This level of detail turns your label from a simple marker into a mini care guide right in your garden.
How Can I Label Plants Without Using Plastic?
There are many excellent plastic-free alternatives for labeling plants. Natural materials work wonderfully and add a rustic charm to your garden. You can write on smooth, flat stones or broken terracotta pot shards with a paint pen. Wooden stakes, bamboo markers, and old wooden clothespins are also great options. For a very durable and stylish choice, consider metal tags made from copper or zinc, which can be stamped or engraved and will last for many years.
Conclusion
An organized garden is a happy and productive one. By taking the time to create clear, durable labels, you set yourself up for a successful growing season. You’ll know exactly what’s growing where, understand its specific needs, and anticipate the perfect time for harvest. From choosing weatherproof materials like stone and metal to including essential details like planting dates, every step contributes to a more manageable and enjoyable gardening experience. We hope this guide has given you the confidence and ideas you need for how to label plants in garden spaces. Now, you can get outside and start creating a labeling system that works for you.
About Ravuk Barg
B.Sc. Horticulture Science | Certified Master Gardener
Ravuk Barg has spent more than a decade with his hands in the soil and his head full of questions about why some gardens thrive while others struggle. What started as a single raised bed of tomatoes and basil in a modest backyard has grown into a deep, working knowledge of everything from seed germination and soil amendment to companion planting and seasonal pruning.
Over the years, Ravuk has gardened through drought summers, waterlogged springs, and pest invasions that would make most gardeners hang up their trowels for good. Those hard seasons, he’ll tell you, taught him more than any perfect growing year ever could. He writes from that earned experience—covering vegetable growing, ornamental planting, houseplant care, composting, and garden design with equal confidence and curiosity.
Philosophy & Approach
Ravuk’s approach to gardening is rooted in practicality. He favors organic methods not out of dogma, but because they work long-term—resulting in healthier soil, fewer inputs, and stronger plants. He has a particular fondness for heirloom vegetable varieties (the kind with proper flavor), unruly cottage-style flower beds, and the stubborn houseplants that everyone else gave up on.
The Mission: Give readers the honest, experience-backed advice that helps them actually succeed in their gardens—not just the ideal version, but the real one; weeds, failures, and all.
Education & Credentials
-
B.Sc. in Horticulture Science
-
Greenfield Agricultural University
-
Focus: Plant Physiology, Soil Ecology, and Sustainable Crop Production
-
-
Master Gardener Certification
-
Cooperative Extension Service
-
Focus: 200+ hours of hands-on practical training and community garden work
-
Continuing Education
-
Organic Pest Management
-
Native Plant Landscaping
-
Sustainable Crop Production