

A well-designed garden bed can transform your outdoor space, adding color, texture, and life to your landscape. One of the most effective ways to ensure your plants thrive while keeping your garden looking neat and tidy is by learning how to create mulch bed. Mulch is a protective layer of material spread on top of the soil that offers numerous benefits, from conserving soil moisture to suppressing weeds and improving soil health.

For a beginner gardener, creating a mulch bed might seem like a daunting task, but it’s a straightforward project that yields incredible results. This guide will walk you through the process step-by-step, helping you build a beautiful and functional foundation for your plants to flourish.
The Purpose of a Mulch Bed
Before diving into the steps, it’s helpful to understand why a mulch bed is a cornerstone of successful gardening. Mulch acts as a barrier, shielding your soil from the harsh effects of sun and wind, which helps reduce water evaporation. This means you’ll need to water your plants less frequently, saving both time and resources. Additionally, a thick layer of mulch blocks sunlight from reaching weed seeds, preventing them from germinating and competing with your plants for nutrients. As organic mulches like wood chips or shredded leaves break down, they enrich the soil with valuable organic matter, creating a healthier environment for plant roots. A clean, defined mulch bed also provides a polished, professional look to your garden design.
8 Step-by-Step Guide on How to Create Mulch Bed
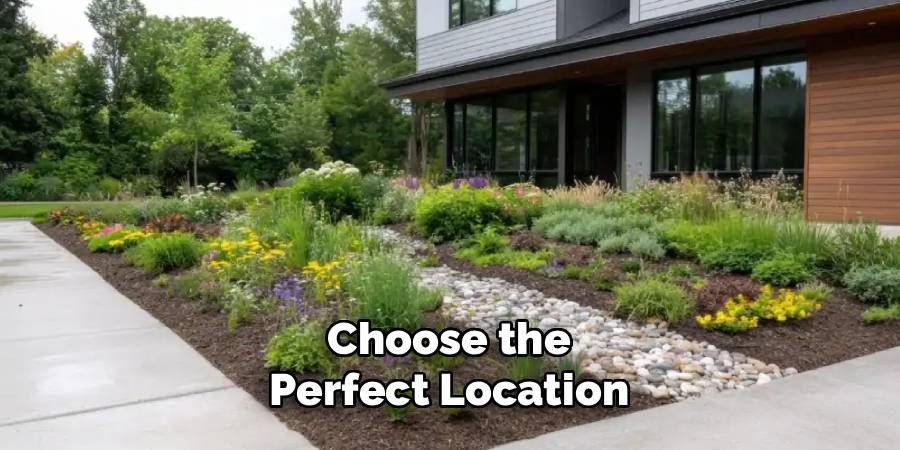
Step 1: Choose the Perfect Location
The first step is deciding where you want your new garden bed. Consider the amount of sunlight the area receives throughout the day. Does it get full sun, partial shade, or full shade? Your choice of location will determine which plants will thrive there. Observe the spot for a few days to understand its light conditions. Also, think about visibility from your home’s windows or patio and how the new bed will fit into your overall landscape design. Use a garden hose or spray paint to outline the shape of your new bed, allowing you to visualize its size and form before you start digging.
Step 2: Clear the Area of Grass and Weeds
Once you have your outline, you need to remove the existing sod and any weeds within the designated area. For smaller beds, a spade or garden fork can be used to manually dig out the grass. Be sure to remove the roots to prevent regrowth. For larger areas, you might consider renting a sod cutter, which makes the job much faster and easier. Another effective, chemical-free method is sheet mulching or “lasagna gardening,” where you cover the grass with cardboard or several layers of newspaper. This blocks sunlight, causing the grass and weeds to decompose and enrich the soil beneath.
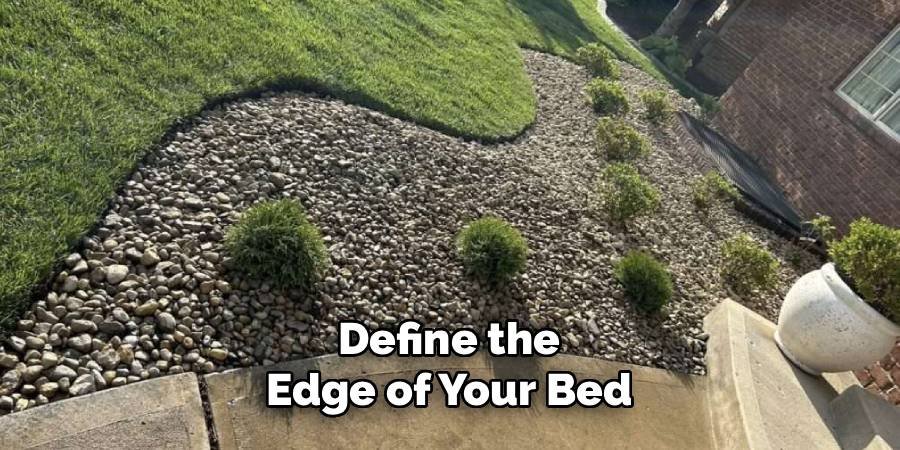
Step 3: Define the Edge of Your Bed
Creating a clean, defined edge is key to giving your mulch bed a professional look and preventing grass from creeping back in. Use a half-moon edger or a sharp spade to cut a crisp trench, about 4-6 inches deep, along the outline you created. This trench acts as a barrier. For a more permanent solution, you can install edging material like steel, plastic, or stone pavers. This not only keeps the mulch contained but also adds a decorative element to your garden design. A well-defined edge makes mowing easier and keeps your landscape looking sharp.
Step 4: Improve the Soil
Healthy plants start with healthy soil. Before adding your plants or mulch, it’s wise to amend the soil in your new bed. Most garden soils can benefit from the addition of organic matter. Spread a 2- to 4-inch layer of compost, aged manure, or leaf mold over the entire bed. Use a garden fork or tiller to work these amendments into the top 6-8 inches of the existing soil. This process improves soil structure, aeration, and drainage, while also providing essential nutrients for your plants. Taking the time to improve the soil now will pay off with healthier, more vibrant plants later.
Step 5: Select Your Plants
Now comes the fun part: choosing your plants! Based on the sunlight conditions of your location, select a variety of plants that will thrive there. Consider a mix of perennials, annuals, shrubs, and perhaps a small ornamental tree to create interest throughout the seasons. Think about the mature size of each plant to ensure they have enough space to grow without overcrowding. Arrange the plants in the bed (while still in their pots) to finalize your design before you start digging. Place taller plants in the back and shorter ones in the front for a layered look.

Step 6: Install the Plants
Carefully remove each plant from its container, gently loosening any circling roots at the bottom of the root ball. Dig a hole that is twice as wide as the root ball and just as deep. Place the plant in the hole, ensuring the top of the root ball is level with the surrounding soil. Planting too deep can lead to root rot. Backfill the hole with soil, gently tamping it down to remove any air pockets. Once all your plants are in the ground, water them thoroughly to help them settle into their new home.
Step 7: How to Create Mulch Bed by Applying Mulch
With your plants in place, it’s time to apply the mulch. There are many types of mulch, including shredded bark, wood chips, pine straw, and cocoa hulls. Choose one that complements your garden’s aesthetic. Spread a 2- to 3-inch layer of mulch evenly over the entire soil surface, being careful to leave a small gap around the base of each plant stem. Piling mulch directly against the stems can trap moisture and lead to rot and disease. This final layer is the key to mastering how to create mulch bed effectively, as it will lock in moisture and suppress weeds.

Step 8: Water and Maintain
After applying the mulch, give the entire bed another good watering. This helps the mulch settle and ensures the soil beneath is moist. Moving forward, your maintenance tasks will be greatly reduced. Check the soil moisture every few days by pulling back a small section of mulch and feeling the soil. Water deeply but infrequently to encourage deep root growth. You will also need to replenish the mulch layer annually, as organic mulches decompose over time, continuing to enrich your soil.
Frequently Asked Questions
What Is the Best Type of Mulch for a Beginner?
For beginners, shredded bark or wood chips are excellent choices. They are widely available, relatively inexpensive, and easy to spread. These organic mulches are effective at suppressing weeds and retaining soil moisture. As they decompose, they gradually add organic matter to the soil, improving its health. They also stay in place well and provide a classic, neat appearance to garden beds.
How Deep Should a Mulch Bed Be?
A mulch layer of 2 to 3 inches is ideal for most situations. This depth is sufficient to:
- Block sunlight and prevent weed growth.
- Conserve soil moisture by reducing evaporation.
- Insulate the soil from extreme temperature fluctuations.
A layer thicker than 4 inches can sometimes be detrimental, as it may prevent water and oxygen from reaching the plant roots.
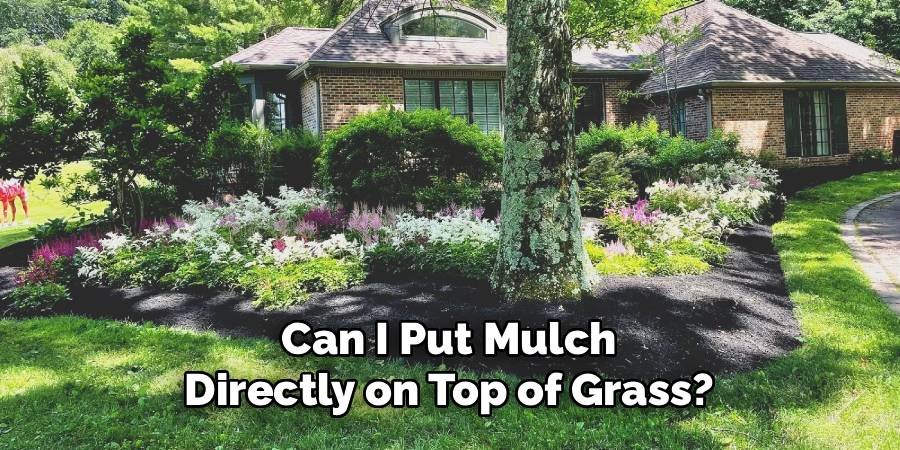
Can I Put Mulch Directly on Top of Grass?
While you can put mulch directly on grass, it is not the most effective method for creating a long-lasting bed. The grass will eventually die from lack of sunlight, but tough perennial weeds may still push through. For best results, it’s recommended to remove the sod first or lay down a layer of cardboard or newspaper as a weed barrier before adding your mulch. This creates a cleaner, more durable garden bed.
When Is the Best Time of Year to Create a Mulch Bed?
Spring and fall are the best times to create a new mulch bed. In spring, the soil is workable and plants have the entire growing season to establish themselves. Creating a bed in the fall allows winter rains and snow to help settle the soil and mulch. Fall planting also gives cool-season plants a great head start. Avoid creating beds during the peak heat of summer, as it can be stressful for new plants.
How Do I Keep Weeds Out of My Mulch Bed?
The 2- to 3-inch mulch layer is your primary defense against weeds. However, some persistent weeds may still find their way through. Hand-pull any weeds as soon as you see them, before they have a chance to set seed. For extra protection in new beds, you can lay down a layer of landscape fabric or cardboard under the mulch. Regularly refreshing your mulch layer each year also helps keep weed growth under control.
Conclusion
Creating a beautiful, thriving garden is an achievable goal for any homeowner, and it all starts with a solid foundation. By following these straightforward steps, you now have the knowledge to build a functional and attractive garden bed from scratch. From selecting the right location and preparing the soil to planting and applying that final, protective layer, you are well-equipped for success. The process of learning how to create mulch bed is a rewarding investment in your home’s landscape, leading to healthier plants, fewer weeds, and less time spent on maintenance. Now, you can enjoy the beauty and satisfaction of a well-tended garden.
About Ravuk Barg
B.Sc. Horticulture Science | Certified Master Gardener
Ravuk Barg has spent more than a decade with his hands in the soil and his head full of questions about why some gardens thrive while others struggle. What started as a single raised bed of tomatoes and basil in a modest backyard has grown into a deep, working knowledge of everything from seed germination and soil amendment to companion planting and seasonal pruning.
Over the years, Ravuk has gardened through drought summers, waterlogged springs, and pest invasions that would make most gardeners hang up their trowels for good. Those hard seasons, he’ll tell you, taught him more than any perfect growing year ever could. He writes from that earned experience—covering vegetable growing, ornamental planting, houseplant care, composting, and garden design with equal confidence and curiosity.
Philosophy & Approach
Ravuk’s approach to gardening is rooted in practicality. He favors organic methods not out of dogma, but because they work long-term—resulting in healthier soil, fewer inputs, and stronger plants. He has a particular fondness for heirloom vegetable varieties (the kind with proper flavor), unruly cottage-style flower beds, and the stubborn houseplants that everyone else gave up on.
The Mission: Give readers the honest, experience-backed advice that helps them actually succeed in their gardens—not just the ideal version, but the real one; weeds, failures, and all.
Education & Credentials
-
B.Sc. in Horticulture Science
-
Greenfield Agricultural University
-
Focus: Plant Physiology, Soil Ecology, and Sustainable Crop Production
-
-
Master Gardener Certification
-
Cooperative Extension Service
-
Focus: 200+ hours of hands-on practical training and community garden work
-
Continuing Education
-
Organic Pest Management
-
Native Plant Landscaping
-
Sustainable Crop Production