

Growing houseplants directly in water, a practice known as hydroponics or hydroculture, is a beautiful and low-maintenance way to enjoy greenery in your home. It eliminates the mess of soil, reduces the risk of soil-borne pests, and offers a unique view of the plant’s developing root system. For beginners, it can seem like a complex science, but with a few simple guidelines, anyone can succeed. This guide will walk you through everything you need to know about how to care for houseplants growing in water, transforming your home into a vibrant, soil-free oasis.
Why Grow Houseplants in Water?
Growing plants in water is more than just a trending aesthetic; it offers practical benefits that appeal to both new and experienced plant owners. This method provides a clear window into your plant’s health, allowing you to monitor root growth and spot potential issues early. It also significantly reduces the chances of attracting common pests like fungus gnats, which thrive in damp soil. For those who travel or have a busy schedule, water-based plants are often more forgiving and require less frequent attention than their soil-bound counterparts, making plant ownership more accessible and enjoyable.
8 Step-by-Step Guide on How to Care for Houseplants Growing in Water
Step 1: Choose the Right Plant
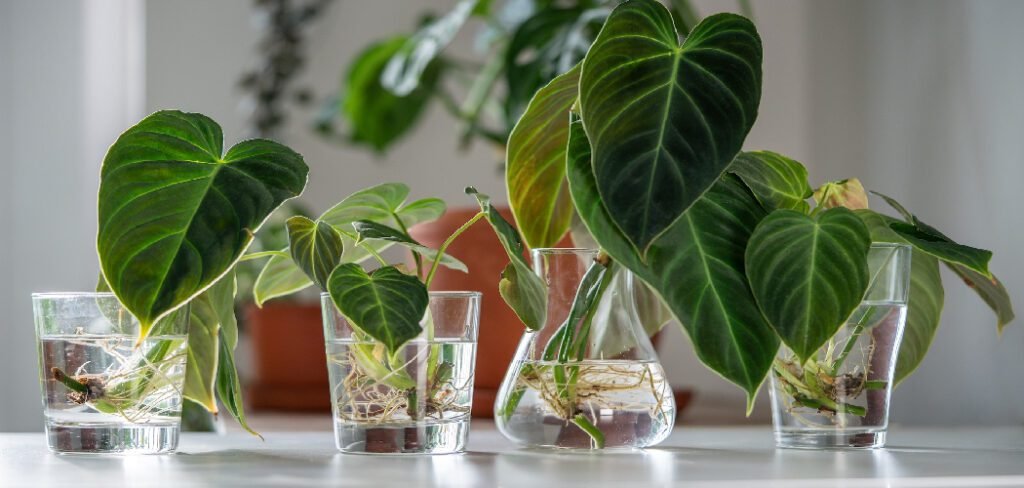
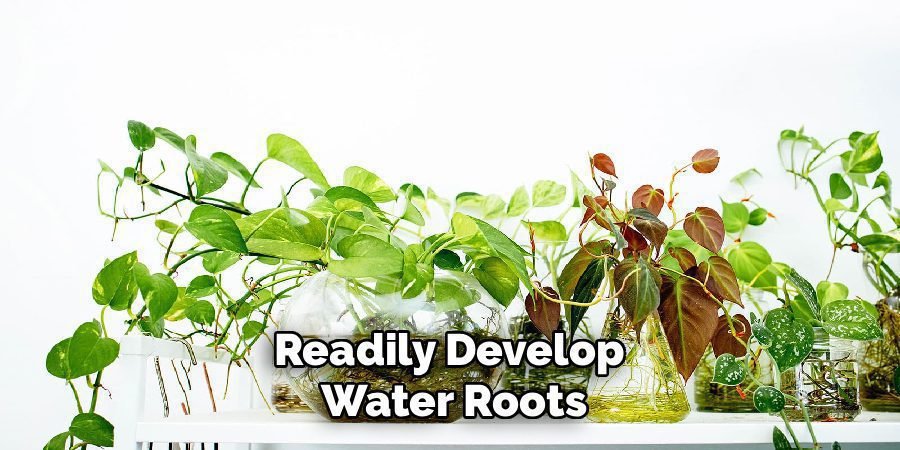
Your journey begins with selecting a plant that adapts well to living in water. While many plants can be propagated in water, not all will thrive there long-term. Excellent choices for beginners include Pothos, Philodendron, Spider Plants, and Snake Plants. These species are resilient and readily develop water roots. When selecting your plant, look for a healthy specimen with strong stems and lush foliage. A healthy parent plant will produce a robust cutting, giving you a much better chance of success from the very start.
Step 2: Take a Proper Cutting
Once you have your plant, the next step is to take a cutting. Using a clean, sharp pair of scissors or a knife, locate a healthy stem. You will want to make your cut just below a node, which is the small bump on the stem where new leaves and roots emerge. Your cutting should be about four to six inches long and have at least two or three leaves. Removing the lower leaves is crucial, as any foliage left submerged in water will rot and introduce harmful bacteria that can kill your new plant.
Step 3: Select the Perfect Container
The container you choose is both a home for your plant and a piece of décor. A clear glass vessel, such as a vase, jar, or bottle, is an ideal choice because it allows you to watch the roots grow and monitor the water quality easily. A narrow-necked container can provide excellent support for the stem, holding the cutting upright. Before use, ensure the container is thoroughly cleaned with soap and warm water to remove any dust or residue that could contaminate the environment for your new plant cutting.
Step 4: Add Filtered or Distilled Water
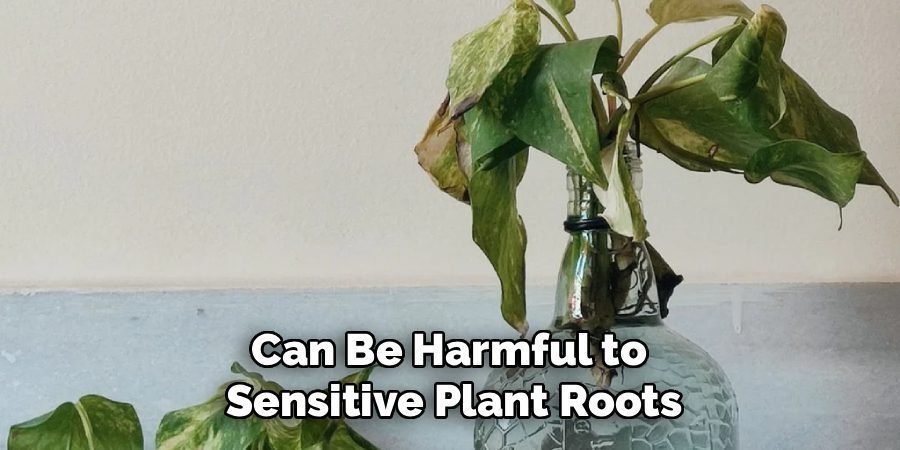
The type of water you use plays a significant role in your plant’s health. Tap water often contains chlorine and other minerals that can be harmful to sensitive plant roots. To give your cutting the best possible start, use filtered, distilled, or even rainwater. If you must use tap water, let it sit out for at least 24 hours to allow the chlorine to evaporate. Fill your chosen container with enough room-temperature water to submerge the node or nodes on the cutting, but keep the remaining leaves well above the waterline.
Step 5: Place Your Cutting in Bright, Indirect Light
Light is the food that fuels your plant’s growth. Place your container in a location that receives plenty of bright, indirect sunlight. A spot near an east-facing window is often perfect, as it provides gentle morning sun without the harsh intensity of direct afternoon rays. Too much direct sunlight can scorch the leaves and encourage algae to grow in the water. Rotate the container every few days to ensure all sides of the plant receive equal light, promoting even growth and a well-rounded appearance.
Step 6: Change the Water Regularly
Maintaining fresh, clean water is one of the most critical aspects of caring for plants in this way. Stagnant water quickly becomes depleted of oxygen and can harbor bacteria that lead to root rot. To prevent this, change the water every one to two weeks, or sooner if you notice it becoming cloudy. During each water change, it is a good idea to gently rinse the roots and the container to wash away any slippery buildup. This simple routine keeps the environment healthy and provides your plant with the oxygen it needs to flourish.
Step 7: Introduce Nutrients Sparingly
Unlike soil, water does not contain the essential nutrients plants need for long-term growth. Once your cutting has developed a healthy root system (typically after a month or two), you will need to provide food. Use a balanced liquid fertilizer formulated for hydroponics or indoor plants. Be extremely careful with the dosage; a little goes a long way. Dilute the fertilizer to about one-quarter of the recommended strength and add it to the water once every four to six weeks during the growing season (spring and summer).

Step 8: Monitor for Pests and Problems
While water culture minimizes many common plant problems, it is still important to keep a watchful eye. Check for issues like root rot, which appears as dark, mushy roots, or algae growth in the water. If you spot root rot, trim away the affected parts with clean scissors and place the cutting in fresh water. To manage algae, clean the container thoroughly and move the plant to a spot with slightly less light. Keeping the leaves and stems clean will also help prevent pests like spider mites or mealybugs from taking hold.
Frequently Asked Questions (FAQ)
What Are the Best Plants to Grow in Water?
Many common houseplants adapt beautifully to living in water. Vining plants like Pothos, Philodendron, and English Ivy are classic choices because they root so easily. Other excellent options include Snake Plants, Spider Plants, Lucky Bamboo, and some varieties of Dracaena. These species are known for their resilience and low-maintenance nature, making them perfect for beginners who want to try hydroculture without the risk of failure. It is best to start with these reliable growers before experimenting with more challenging plants.
How Often Should I Add Fertilizer to the Water?
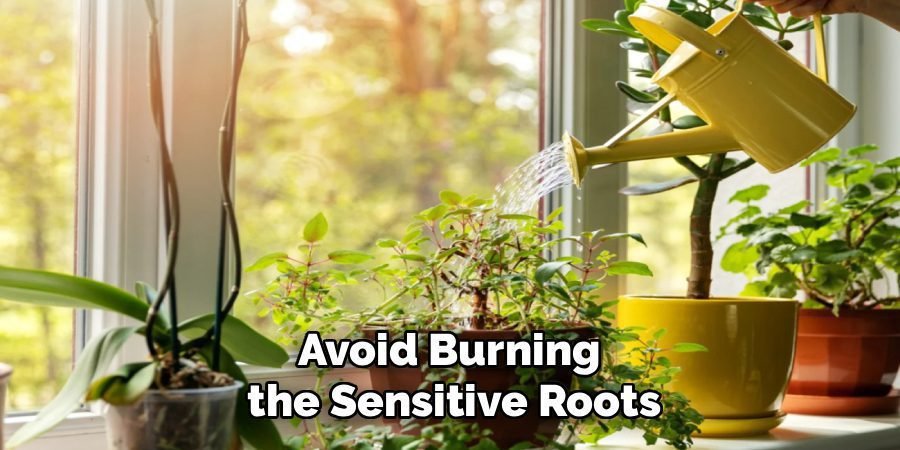
Once your plant has a well-established root system, you should begin adding nutrients. A balanced liquid fertilizer is essential for long-term health. During the active growing seasons of spring and summer, feed your plant once every four to six weeks. It is crucial to dilute the fertilizer to one-quarter of the recommended strength to avoid burning the sensitive roots. In the fall and winter, when the plant’s growth naturally slows, you can reduce feedings to once every two months or stop altogether until spring returns.
Can I Move a Plant From Soil to Water?
Yes, you can transition a soil-grown plant to water, but it requires care. First, gently remove the plant from its pot and carefully wash all the soil from its roots. Be thorough, as any remaining soil can rot and foul the water. You may notice some of the soil roots die back as the plant adjusts and grows new “water roots,” which are better adapted to absorbing oxygen from water. This transition can be a shock, so be patient and monitor the plant closely for the first few weeks.
Why Is the Water in My Plant Jar Turning Green?
Green water is caused by algae, a microscopic plant that thrives in the presence of water, light, and nutrients. While a small amount of algae is generally harmless, it competes with your plant for nutrients and can look unsightly. To manage it, reduce the amount of direct sunlight the container receives. You can also clean the jar and roots thoroughly during your regular water changes. Using an opaque container instead of a clear one will also block the light that algae need to grow, effectively solving the problem.
What Should I Do if My Plant’s Roots Start to Rot?
Root rot is the most common issue for plants growing in water and typically appears as dark brown, mushy, and foul-smelling roots. It is usually caused by a lack of oxygen from infrequent water changes. If you spot rot, act quickly. Remove the plant from the water and use sterile scissors to trim away all affected roots. Rinse the healthy remaining roots and the container thoroughly before adding fresh, clean water. Improving your water-changing frequency will help prevent it from happening again.
Conclusion
Caring for houseplants in water is a rewarding and elegant way to incorporate nature into your home. By selecting the right plant, providing clean water, offering adequate light, and adding nutrients, you create a thriving, soil-free garden. This method demystifies plant care and provides a unique educational experience as you watch the roots develop. We hope this guide has given you the confidence to explore how to care for houseplants growing in water. With these simple steps, you are well on your way to enjoying beautiful, low-maintenance greenery that brightens any space.
About Ravuk Barg
B.Sc. Horticulture Science | Certified Master Gardener
Ravuk Barg has spent more than a decade with his hands in the soil and his head full of questions about why some gardens thrive while others struggle. What started as a single raised bed of tomatoes and basil in a modest backyard has grown into a deep, working knowledge of everything from seed germination and soil amendment to companion planting and seasonal pruning.
Over the years, Ravuk has gardened through drought summers, waterlogged springs, and pest invasions that would make most gardeners hang up their trowels for good. Those hard seasons, he’ll tell you, taught him more than any perfect growing year ever could. He writes from that earned experience—covering vegetable growing, ornamental planting, houseplant care, composting, and garden design with equal confidence and curiosity.
Philosophy & Approach
Ravuk’s approach to gardening is rooted in practicality. He favors organic methods not out of dogma, but because they work long-term—resulting in healthier soil, fewer inputs, and stronger plants. He has a particular fondness for heirloom vegetable varieties (the kind with proper flavor), unruly cottage-style flower beds, and the stubborn houseplants that everyone else gave up on.
The Mission: Give readers the honest, experience-backed advice that helps them actually succeed in their gardens—not just the ideal version, but the real one; weeds, failures, and all.
Education & Credentials
-
B.Sc. in Horticulture Science
-
Greenfield Agricultural University
-
Focus: Plant Physiology, Soil Ecology, and Sustainable Crop Production
-
-
Master Gardener Certification
-
Cooperative Extension Service
-
Focus: 200+ hours of hands-on practical training and community garden work
-
Continuing Education
-
Organic Pest Management
-
Native Plant Landscaping
-
Sustainable Crop Production