

Imagine a thriving garden that waters itself, giving you healthier plants and more free time. A self-watering raised garden bed, also known as a wicking bed, makes this possible. This system uses a hidden water reservoir at the bottom of the bed, allowing plant roots to draw up moisture as needed through capillary action.
It’s an efficient, water-wise solution that reduces your daily gardening chores and protects your plants from both overwatering and underwatering. If you’re a beginner gardener or just looking for a more sustainable way to grow, learning how to build a self watering raised garden bed is a game-changing project that promises a more resilient and productive garden. This guide will walk you through every step, making the process simple and achievable for anyone.
Why a Self-Watering System Is a Game-Changer for Gardeners
A self-watering raised garden bed isn’t just a convenience; it’s a strategic advantage for any home gardener. The primary benefit is water conservation. Traditional top-down watering leads to significant moisture loss through evaporation, especially on hot, sunny days. A self-watering system delivers water directly to the root zone from below, minimizing evaporation and reducing your overall water usage by as much as 50%. This efficiency also creates healthier plants.
Consistent moisture prevents the stress cycle of drying out and then becoming waterlogged, leading to stronger root development and more robust growth. Furthermore, this setup reduces weed growth on the surface and decreases the risk of fungal diseases that thrive on wet foliage. For busy individuals or those in drought-prone areas, it’s the smartest way to garden.
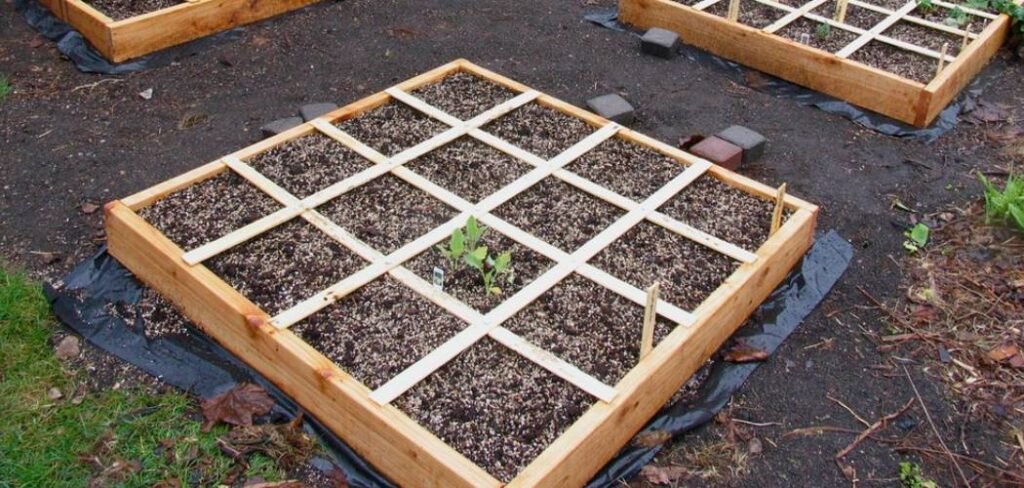
8 Step-by-Step Guide on How to Build a Self Watering Raised Garden Bed
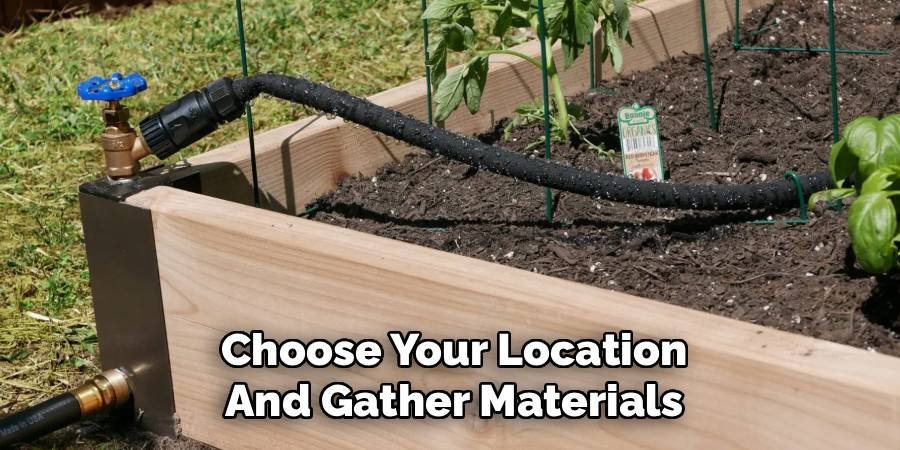
Step 1: Choose Your Location and Gather Materials
First, select a spot for your raised bed that receives at least six to eight hours of direct sunlight per day, as this is ideal for most vegetables and flowers. Ensure the ground is level. Once you have your location, gather all your necessary materials. You will need a raised garden bed frame, a durable waterproof liner like a pond liner, a perforated drainage pipe, a fill pipe (a wider PVC pipe), landscape fabric, and your growing medium. For the wicking material, you can use gravel, scoria, or perlite. Having everything on hand before you begin will make the construction process smooth and efficient.
Step 2: Assemble the Raised Bed Frame
Begin by assembling your raised garden bed frame according to the manufacturer’s instructions. Frames are commonly made from wood, metal, or composite materials. If you are building a wooden frame from scratch, use untreated, rot-resistant wood such as cedar or redwood to avoid chemicals leaching into your soil. Ensure the frame is sturdy and all corners are securely joined. Place the assembled frame in its final, chosen location. Double-check that the ground beneath it is as level as possible to ensure the water reservoir functions correctly and distributes moisture evenly across the entire bed.
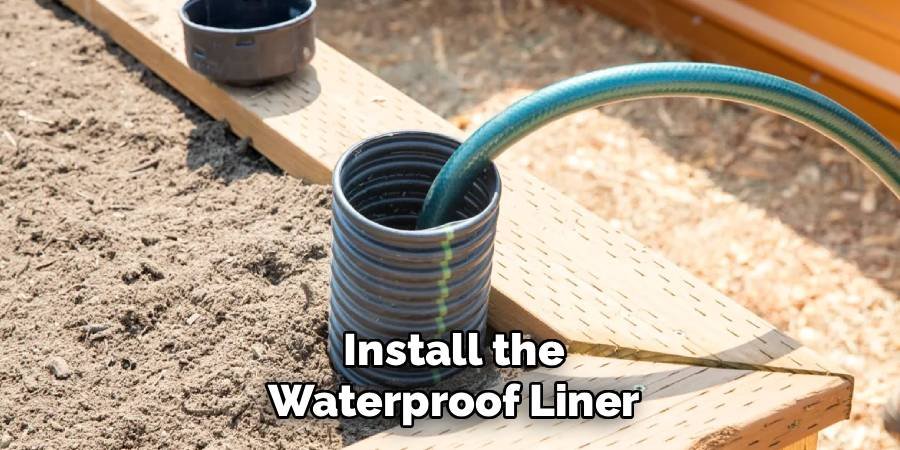
Step 3: Install the Waterproof Liner
Carefully line the inside of the raised bed frame with your waterproof pond liner. Press the liner firmly into the corners and along the bottom, extending it up all four sides. The goal is to create a watertight basin that will hold your reservoir. Make sure there are no punctures or tears in the material. Leave a few extra inches of liner draping over the top edges of the frame for now; you will trim this later. This liner is the most critical component for creating the water reservoir, so take your time to ensure it is installed correctly and without any damage.
Step 4: Create the Water Reservoir System
Now it’s time to install the plumbing for your self-watering system. Place the perforated drainage pipe on the bottom of the lined bed, arranging it in a coil or snaking pattern to cover most of the base area. This pipe will distribute water throughout the reservoir. Next, place your vertical fill pipe in one corner, making sure it extends from the bottom of the bed to a few inches above the final soil level. This pipe allows you to easily add water to the reservoir. Finally, drill a small overflow hole through the side of the bed frame and the liner, positioned just above the intended height of your reservoir layer.
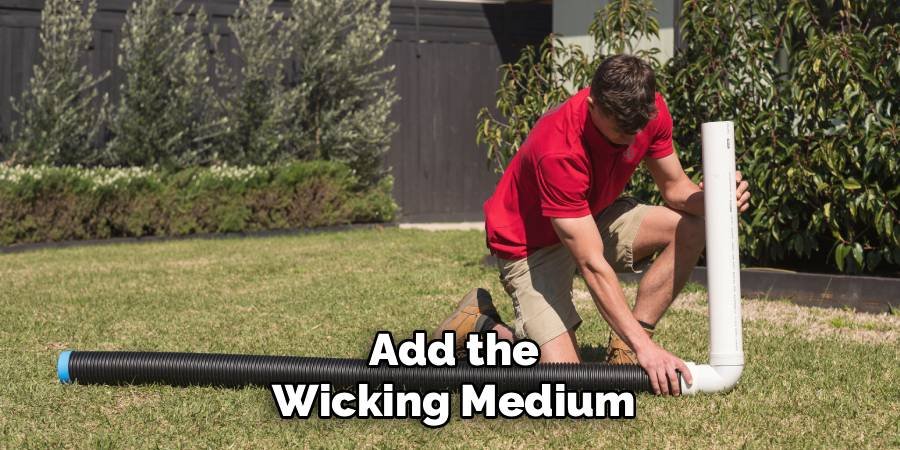
Step 5: Add the Wicking Medium
The wicking medium is what will hold the water and allow it to move upward into the soil. Fill the bottom of the bed with your chosen material—such as gravel, perlite, or scoria—until it completely covers the perforated pipes. This layer should be about 4-6 inches deep, ending just below the overflow hole you created. This porous material creates the water reservoir. When you add water through the fill pipe, it will fill this layer, and the overflow hole will prevent the bed from becoming waterlogged. This is a key step in learning how to build a self watering raised garden bed correctly.
Step 6: Separate the Layers with Landscape Fabric
To prevent soil from falling into the water reservoir and clogging the system, you must place a barrier between the wicking medium and the soil. Lay a sheet of permeable landscape fabric over the entire surface of the gravel or perlite layer. Be sure to cut a hole in the fabric for the fill pipe to pass through. The fabric should extend up the sides of the bed slightly. This barrier allows water to wick upward into the soil through capillary action but keeps the soil from mixing with your reservoir material, ensuring the long-term functionality of your wicking bed.
Step 7: Fill the Bed with High-Quality Soil Mix
With the reservoir system in place, you can now fill the remainder of your raised bed with a high-quality soil mixture. A good mix for a wicking bed is one that is light and absorbent. You can create your own by combining equal parts compost, peat moss or coco coir, and vermiculite. This combination provides excellent moisture retention and aeration, which complements the wicking action of the bed. As you add the soil, lightly moisten it to help activate the capillary action. Fill the bed to just below the top of the frame, leaving room for mulch.
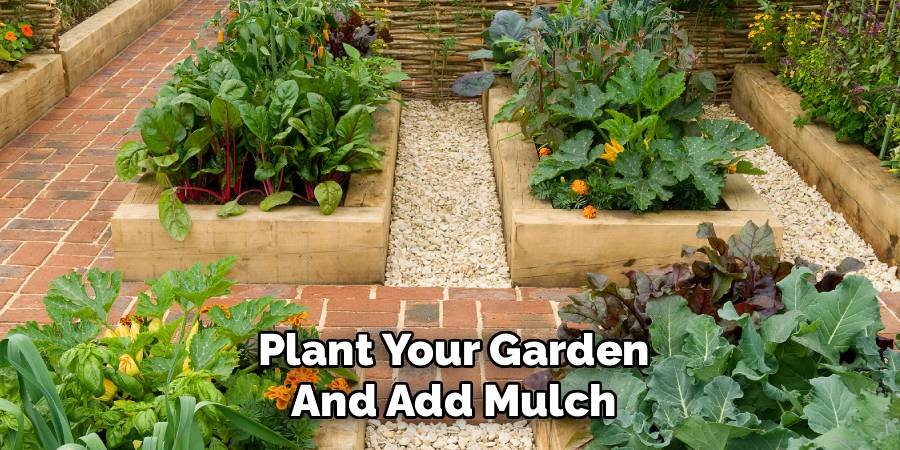
Step 8: Plant Your Garden and Add Mulch
Your self-watering raised garden bed is now ready for planting. Choose your favorite vegetables, herbs, or flowers and plant them as you normally would. Once your plants are in the ground, add a 2-3 inch layer of mulch, such as straw, wood chips, or shredded leaves, on top of the soil. Mulch is especially beneficial in a self-watering system because it helps retain soil moisture, suppresses weeds, and regulates soil temperature. It works in tandem with the wicking system to create the most efficient and low-maintenance gardening environment possible. This final touch completes the project of how to build a self watering raised garden bed.
Frequently Asked Questions (FAQ)
What Is the Best Soil for a Self-Watering Raised Bed?
The best soil is a light, absorbent mix that encourages capillary action. Avoid heavy clay soils, which can become compacted and prevent water from wicking upward. An ideal blend includes:
- One-third compost for nutrients.
- One-third peat moss or coco coir for moisture retention.
- One-third vermiculite or perlite for aeration and lightness.
This mixture stays fluffy, allowing roots to breathe and easily draw moisture from the reservoir below, ensuring your plants stay consistently hydrated without being waterlogged.
How Often Do I Need to Refill the Water Reservoir?
The frequency of refilling depends on your climate, the size of your bed, and the types of plants you are growing. In moderate weather, you might only need to fill the reservoir every one to two weeks. During hot, dry spells or when your plants are large and thirsty, you may need to refill it every few days. The best way to know is to check the water level through the fill pipe. You can use a dipstick to see how much water remains in the reservoir.
Can I Convert an Existing Raised Bed into a Self-Watering One?
Yes, you can absolutely convert an existing raised bed. You will need to empty the bed of all its current soil. Once empty, you can follow the steps outlined in this guide: install a waterproof liner, add the reservoir pipes and wicking medium, place a landscape fabric separator, and then refill the bed with an appropriate soil mix. It requires some initial labor to empty the bed, but it’s a great way to upgrade your current garden setup for better water efficiency and healthier plants.
What Plants Grow Best in a Self-Watering Raised Garden Bed?
Most vegetables, herbs, and flowers thrive in self-watering raised beds due to the consistent moisture. Thirsty plants like tomatoes, cucumbers, peppers, and squash do exceptionally well. Leafy greens such as lettuce and spinach also benefit greatly, as they are less likely to bolt from drought stress. Root vegetables like carrots and radishes grow well, provided the soil is loose and deep enough. Avoid planting drought-tolerant plants like lavender or rosemary, which prefer drier conditions.
How Do I Prevent Algae Growth in the Fill Pipe?
The fill pipe can sometimes develop algae since it is exposed to light and contains water. To prevent this, simply place a cap on top of the pipe. You can use a standard PVC cap, a fitted plastic lid, or even a tennis ball. Covering the pipe blocks the sunlight that algae need to grow. This simple step keeps your system clean and ensures that water can flow freely into the reservoir without any blockages or contamination from algae buildup over time.
Conclusion
Building a self-watering raised garden bed is a rewarding project that pays dividends in water savings, time, and plant health. By creating a system with a built-in reservoir, you provide your plants with consistent moisture, fostering strong roots and vibrant growth with minimal daily effort. You’ve learned how to select a location, assemble the bed, install the crucial reservoir system, and choose the right soil mix. This setup not only conserves a precious resource but also helps you become a more successful and efficient gardener. Now that you have the knowledge, we encourage you to try your hand at how to build a self watering raised garden bed and enjoy the benefits of a smarter, more sustainable garden.
About Ravuk Barg
B.Sc. Horticulture Science | Certified Master Gardener
Ravuk Barg has spent more than a decade with his hands in the soil and his head full of questions about why some gardens thrive while others struggle. What started as a single raised bed of tomatoes and basil in a modest backyard has grown into a deep, working knowledge of everything from seed germination and soil amendment to companion planting and seasonal pruning.
Over the years, Ravuk has gardened through drought summers, waterlogged springs, and pest invasions that would make most gardeners hang up their trowels for good. Those hard seasons, he’ll tell you, taught him more than any perfect growing year ever could. He writes from that earned experience—covering vegetable growing, ornamental planting, houseplant care, composting, and garden design with equal confidence and curiosity.
Philosophy & Approach
Ravuk’s approach to gardening is rooted in practicality. He favors organic methods not out of dogma, but because they work long-term—resulting in healthier soil, fewer inputs, and stronger plants. He has a particular fondness for heirloom vegetable varieties (the kind with proper flavor), unruly cottage-style flower beds, and the stubborn houseplants that everyone else gave up on.
The Mission: Give readers the honest, experience-backed advice that helps them actually succeed in their gardens—not just the ideal version, but the real one; weeds, failures, and all.
Education & Credentials
-
B.Sc. in Horticulture Science
-
Greenfield Agricultural University
-
Focus: Plant Physiology, Soil Ecology, and Sustainable Crop Production
-
-
Master Gardener Certification
-
Cooperative Extension Service
-
Focus: 200+ hours of hands-on practical training and community garden work
-
Continuing Education
-
Organic Pest Management
-
Native Plant Landscaping
-
Sustainable Crop Production