

A greenhouse can be a garden’s best friend, offering a perfect environment to grow plants all year long. But for your greenhouse to stand strong, you need a solid foundation. A foundation is like the bedrock for your greenhouse—it holds everything in place and keeps the structure steady through wind, rain, or snow. Without it, your greenhouse might shift, leak, or even collapse. This guide will show you how to build a greenhouse foundation, step by step, to ensure your greenhouse stays stable and functional for years to come.
Before starting, it’s important to choose the right location for your greenhouse foundation. Look for a spot that gets plenty of sunlight throughout the day and has good drainage to avoid water pooling around the structure. Once the location is decided, clear the area of any plants, rocks, or debris to create a level surface. Taking the time to prepare the site properly will make the foundation building process smoother and ensure long-term stability for your greenhouse.
Why a Strong Foundation Matters
Imagine setting up a greenhouse without a solid base. The doors might not close properly, the walls could warp over time, and rainwater might seep in, damaging your plants. A sturdy foundation solves these problems by offering stability, ensuring proper drainage, and locking the structure securely to the ground. Plus, it makes assembly much easier because all the pieces fit together properly when the base is level. Whether you’re building a small greenhouse or a larger one, the right foundation is the key to success.
7 Step-by-Step Guide on How to Build a Greenhouse Foundation
Step 1: Choose the Right Location
The first and most important step is picking the perfect spot for your greenhouse. Where you place your greenhouse will affect how well your plants grow and how long your structure lasts.
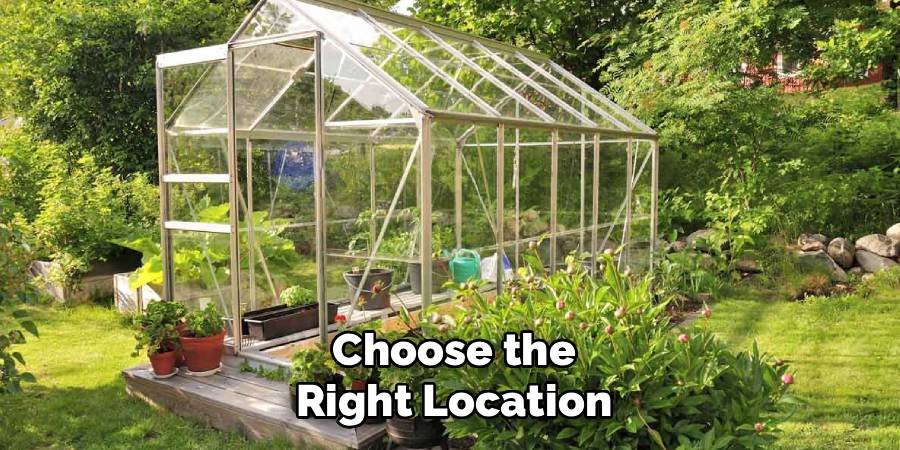
Start by looking for a spot that gets at least six hours of sunlight each day. A south-facing location is best in the Northern Hemisphere. Avoid shady areas like near trees or tall buildings because they block sunlight and could drop debris onto your greenhouse. Also, make sure the ground is naturally flat, or as flat as possible, to avoid drainage issues. Stay clear of low-lying spots where water tends to collect. If your greenhouse floods, it could ruin your foundation and harm your plants.
Finally, consider nearby utilities like water and electricity. If you’re running a heater or irrigation system, you’ll want easy access to these resources. Having everything within reach will save time and effort in the long run.
Step 2: Decide on the Type of Foundation
Not all foundations are the same, and what you choose will depend on your needs, budget, and the size of your greenhouse. Here are the three most popular types you can consider:
- Wooden Frame
A wooden perimeter base is a good choice for hobby or smaller greenhouses. It’s cost-effective, easy to build, and can be relocated if needed. However, wood does require periodic maintenance to prevent rotting, especially in damp environments.
- Concrete Foundation
If you’re after durability and strength, concrete is the way to go. This type is ideal for larger greenhouses or those in areas prone to strong winds or heavy snow. A concrete foundation is permanent and will last for decades, though it has a higher upfront cost.
- Gravel and Pavers Combination
For those who want something budget-friendly yet still reliable, consider combining gravel with pavers. The gravel ensures good drainage, and the pavers create a sturdy and level surface. This type is simple to set up and offers a nice balance between cost and functionality.
Each type of foundation has pros and cons, so think about your greenhouse’s size, your local weather conditions, and your long-term gardening goals.
Step 3: Prepare the Site
Once you’ve decided on the location and type of foundation, it’s time to get the site ready. This step is crucial because skipping it could cause problems down the line. Start by clearing the area of grass, weeds, rocks, and debris. You want a clean slate to work with. Next, check if the ground is level. Use a gardening rake to even out small uneven spots. For larger dips or slopes, you may need to fill in soil or dig a little to make the surface flat.
After leveling, mark out the dimensions of your greenhouse using stakes and string. Drive the stakes into each corner and run the string between them to outline the perimeter. Double-check the measurements to ensure they’re accurate. To confirm the space is square, measure diagonally from corner to corner. If the two diagonals are equal, your rectangle is perfect.
Step 4: Build the Foundation
Now it’s time to roll up your sleeves and start building your foundation. Follow the specific instructions for the type of foundation you’ve chosen.

For a Wooden Frame:
Lay pressure-treated 6×6 timber beams along the marked edges of your greenhouse. Drill holes at the corners and connect the beams with lag screws for a secure fit. Hammer stakes into the ground every couple of feet inside the perimeter, then drill the stakes into the timber to anchor the frame.
For a Concrete Foundation:
Create a wooden form using 2×4 boards to shape the perimeter. Place the boards along the marked outline of the greenhouse and secure them with stakes. Inside the form, lay about two inches of gravel for drainage. Next, pour the concrete mix evenly into the form, making sure it fills the entire area. Use a long board (called a screed) to smooth the surface. Allow the concrete to cure for at least 48 hours before removing the form.
For Gravel and Pavers:
Lay landscape fabric over the cleared area to prevent weeds. Spread four to six inches of gravel evenly across the space and tamp it down firmly using a hand tamper. Then, place pavers neatly on top of the gravel to create a solid, level surface. Use a spirit level to check that all the pavers are even. Adjust as needed to prevent wobbling.
Step 5: Secure the Greenhouse to the Foundation
The final step is attaching your greenhouse to the base to keep it secure in all weather conditions. Most commercial greenhouse kits come with anchoring brackets or pre-drilled holes for this purpose.
For wooden bases, you can screw the greenhouse frame directly into the timber using galvanized screws. For a concrete foundation, use concrete anchors to drill through the base and into the concrete. If you’re using a gravel and pavers foundation, anchor brackets can be attached to each corner of the pavers to hold the greenhouse in place.
This step ensures your greenhouse won’t shift or move, even during strong winds or heavy rain.
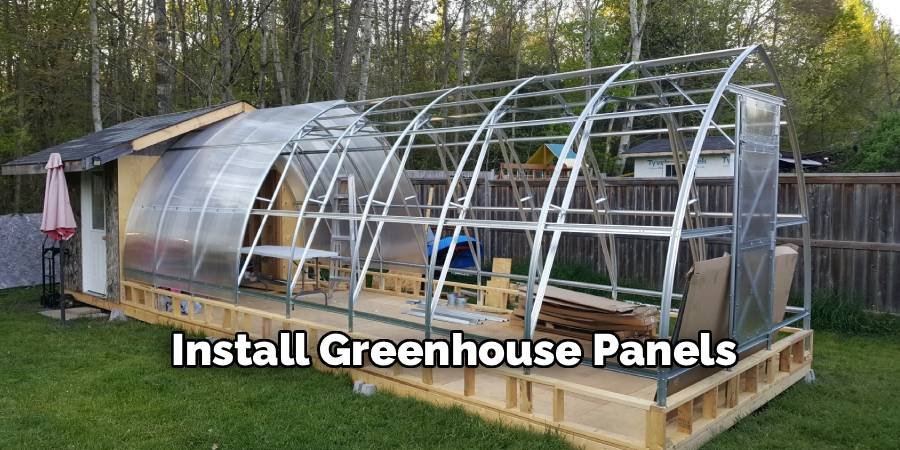
Step 6: Install Greenhouse Panels
Once the frame is securely anchored, you can begin installing the greenhouse panels. Carefully fit each panel into the designated slots or grooves of the frame, ensuring they align properly and are flush with the structure. Depending on the design of your greenhouse, you may need to use clips, screws, or other fastening hardware to secure the panels in place. Always handle the panels gently to avoid cracks or damage, especially if using polycarbonate or glass materials. Make sure to seal any gaps between the panels and frame to improve insulation and prevent drafts. Properly installed panels not only protect your plants but also optimize light transmission for their growth.
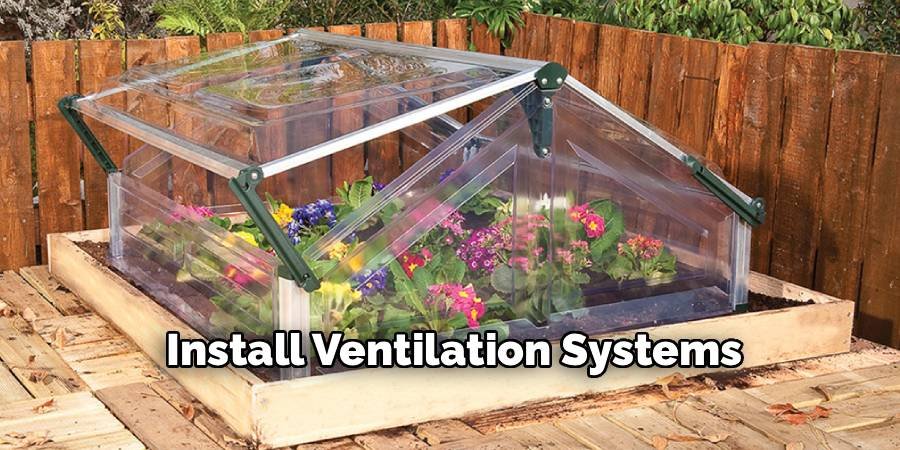
Step 7: Install Ventilation Systems
Proper ventilation is essential for regulating temperature and humidity inside your greenhouse, ensuring your plants thrive. Install vents or fans at strategic locations, such as roof vents for hot air escape and side vents for airflow. If you’re using automatic vents, follow the manufacturer’s instructions for setup and calibration. Ensure vents open and close smoothly and are free from obstructions. Effective ventilation helps prevent overheating, reduces the risk of fungal diseases, and creates a more balanced environment for your plants.
Frequently Asked Questions
1. Do I need a foundation for my greenhouse?
Yes, even small greenhouses benefit from a foundation because it offers stability, improves drainage, and keeps the structure level.
2. How deep should a greenhouse foundation be?
For concrete or block foundations, dig below the frost line, typically 6–12 inches, depending on your climate. For gravel or wooden bases, 4–6 inches is usually enough.
3. Can I use soil as a foundation?
While you can place your greenhouse directly on soil, it’s not recommended. Soil can shift over time, causing the greenhouse to become unstable.
4. How do I protect a wooden foundation from rotting?
Use pressure-treated wood or naturally resistant options like cedar. Seal the wood with a weatherproof treatment and ensure good drainage around the base.
5. Can I build a greenhouse foundation myself?
Yes, most greenhouse foundations are DIY-friendly with basic tools and supplies. However, for larger or more complex foundations, you might want to hire a professional for assistance.
Conclusion
Building a greenhouse foundation might take some effort, but it’s worth every minute. A strong foundation keeps your greenhouse steady, ensures good drainage, and helps it stay secure through harsh conditions. Whether you choose a wooden, concrete, or gravel base, following this step-by-step guide will help you create a solid start for your gardening adventures. Remember, when it comes to greenhouses, the foundation truly is everything!
About Ravuk Barg
B.Sc. Horticulture Science | Certified Master Gardener
Ravuk Barg has spent more than a decade with his hands in the soil and his head full of questions about why some gardens thrive while others struggle. What started as a single raised bed of tomatoes and basil in a modest backyard has grown into a deep, working knowledge of everything from seed germination and soil amendment to companion planting and seasonal pruning.
Over the years, Ravuk has gardened through drought summers, waterlogged springs, and pest invasions that would make most gardeners hang up their trowels for good. Those hard seasons, he’ll tell you, taught him more than any perfect growing year ever could. He writes from that earned experience—covering vegetable growing, ornamental planting, houseplant care, composting, and garden design with equal confidence and curiosity.
Philosophy & Approach
Ravuk’s approach to gardening is rooted in practicality. He favors organic methods not out of dogma, but because they work long-term—resulting in healthier soil, fewer inputs, and stronger plants. He has a particular fondness for heirloom vegetable varieties (the kind with proper flavor), unruly cottage-style flower beds, and the stubborn houseplants that everyone else gave up on.
The Mission: Give readers the honest, experience-backed advice that helps them actually succeed in their gardens—not just the ideal version, but the real one; weeds, failures, and all.
Education & Credentials
-
B.Sc. in Horticulture Science
-
Greenfield Agricultural University
-
Focus: Plant Physiology, Soil Ecology, and Sustainable Crop Production
-
-
Master Gardener Certification
-
Cooperative Extension Service
-
Focus: 200+ hours of hands-on practical training and community garden work
-
Continuing Education
-
Organic Pest Management
-
Native Plant Landscaping
-
Sustainable Crop Production