

Installing a gate on level ground is a fairly straightforward project, but what happens when you have a sloped driveway or an uneven yard? It can seem like a complex puzzle. Many homeowners get discouraged, thinking it requires expensive professional help. However, learning how to build a gate on a slope is an achievable DIY project with the right approach and careful planning. This guide will walk you through every step, from measuring the incline to hanging the final gate, ensuring you can create a functional and attractive entrance that perfectly fits your unique landscape.

Why a Sloped Gate Matters
Building a gate on sloped terrain presents unique challenges that a standard installation doesn’t. The primary issue is ensuring the gate can open and close without scraping the ground or leaving a large, insecure gap. A poorly installed gate can sag, bind against the posts, or fail to latch properly, compromising both security and aesthetics. Understanding how to address the incline—whether by building a custom angled gate or adjusting the hinges—is crucial for a successful outcome. This project not only improves your property’s access and security but also adds a polished, professional look to your fencing.
8 Step Methods Guide: How to Build a Gate on a Slope
Step 1: Measure the Slope and Plan Your Design
First, determine the grade of the slope where you’ll install the gate. Place a long, straight board on the ground spanning the gate opening. Use a level on top of the board to find the horizontal plane. Measure the vertical distance from the end of the board to the ground at both the highest and lowest points. This difference is your total drop. These measurements are critical for deciding your gate’s design, whether it will swing uphill or downhill, and how you will accommodate the change in elevation.

Step 2: Set Your Gate Posts Securely
Your gate posts must be exceptionally sturdy to support the weight and movement of the gate, especially on an incline. Dig post holes that are at least one-third the length of the post, ensuring they go below the frost line for your area to prevent heaving. Set your posts in concrete and use a level on all sides to ensure they are perfectly plumb. Allow the concrete to cure for at least 48-72 hours before attempting to hang anything from them. Properly set posts are the foundation of a long-lasting gate.
Step 3: Choose Your Gate Style and Hinge Type
There are two primary methods for hanging a gate on a slope. The first is to build a standard rectangular gate and hang it with adjustable hinges that allow it to lift as it opens. The second, and often more seamless method, is to build a custom gate with an angled bottom that parallels the slope. For this guide, we’ll focus on the angled bottom design. You will also need heavy-duty hinges that can support the gate’s weight without sagging over time. Double-strap hinges or adjustable J-bolt hinges are excellent choices.
Step 4: Build the Gate Frame
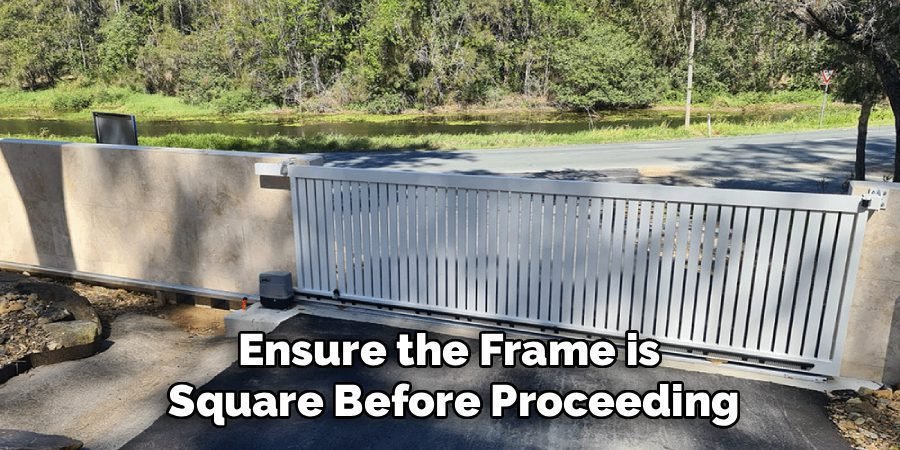
Construct a rectangular frame for your gate using durable, weather-resistant wood like cedar or pressure-treated pine. Cut your top and bottom rails and your vertical stiles to size. Assemble the frame on a flat surface using strong joinery, such as half-lap joints, and exterior-grade screws or bolts. Add a diagonal brace running from the bottom hinge-side corner to the top latch-side corner. This brace is essential for preventing sag, which is an even greater risk on a sloped installation. Ensure the frame is square before proceeding.
Step 5: How to Build a Gate on a Slope by Scribing the Angle
With your basic frame built, it’s time to transfer the slope’s angle to the gate. Temporarily clamp the gate frame to the posts in the closed position, using shims to create a level top rail and appropriate spacing. Now, use a straight board or a chalk line to mark a line along the bottom of the frame that runs parallel to the ground. This scribed line shows you exactly where to cut the bottom rail and any vertical pickets to match the slope perfectly.
Step 6: Cut the Angle and Attach Pickets
Remove the gate frame from the posts and place it back on your flat work surface. Use a circular saw or jigsaw to carefully cut along the scribed line you marked on the bottom rail. This creates the custom angle. Once the frame is cut, begin attaching your face boards or pickets. Start from one side and work your way across, ensuring even spacing. Allow the bottoms of the pickets to extend past the angled bottom rail, as you will trim them in the next step.
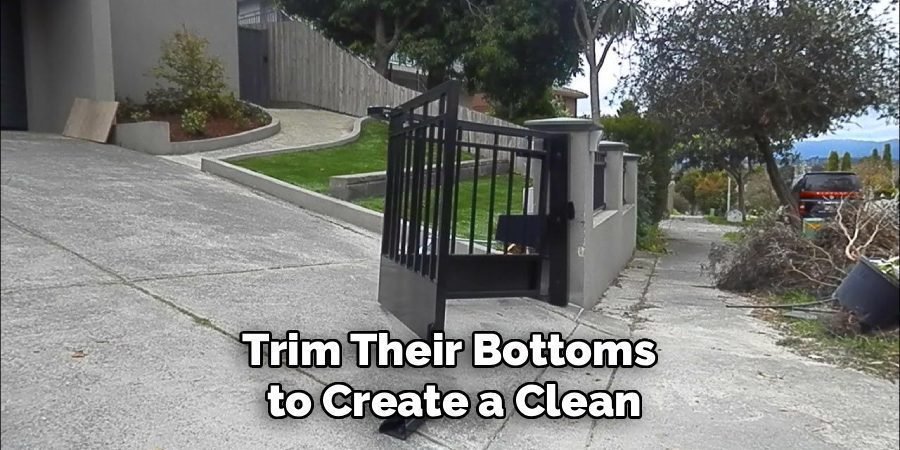
Step 7: Trim the Pickets to Match the Slope
After all the pickets are securely fastened to the frame, you will need to trim their bottoms to create a clean, uniform line that follows the slope. Flip the gate over and use the angled bottom rail of the frame as your guide. Run your circular saw along the rail to trim the excess length from all the pickets at once. This technique ensures a professional and consistent gap between the bottom of the gate and the ground when it’s closed, providing both security and a tidy appearance.
Step 8: Hang the Gate and Install Hardware
Now it’s time for the final installation. Attach the hinges to the gate post first, then to the gate itself. This is often easier with a helper to hold the gate in place. Use shims to maintain proper gaps around the gate as you work. Once the gate is hung, test its swing. It should open and close smoothly without binding. Finally, install the latch and any other hardware, like a gate stop, to prevent the gate from swinging too far and damaging the hinges.
Frequently Asked Questions (FAQ)
What Is the Best Hinge for a Gate on a Slope?
The best hinge for a sloped gate depends on your gate’s weight and design. For heavy wooden gates, adjustable J-bolt hinges are an excellent choice because they allow for fine-tuning the gate’s position and swing. Heavy-duty strap hinges are also very strong and reliable. If you are hanging a standard rectangular gate, specialized hardware like the GForce Rising Hinge can lift the gate as it opens, clearing the rising ground automatically. Always choose hinges rated for a weight greater than your gate’s actual weight.
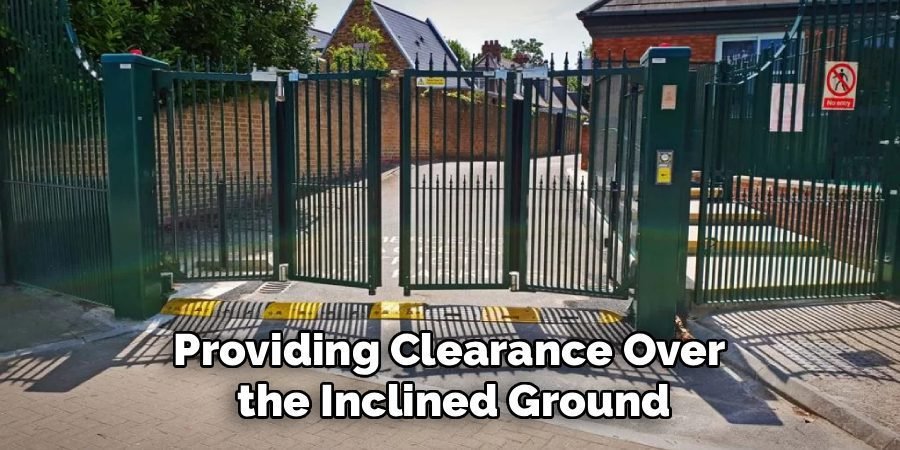
Can I Make a Gate Swing Uphill on a Slope?
Yes, you can make a gate swing uphill, but it requires a specific approach. The most common method is to use rising hinges, which are designed to lift the gate as it swings open, providing clearance over the inclined ground. Another option is to hang the gate high enough so the bottom edge clears the highest point of the slope within its swing path, though this will create a large gap at the bottom when closed. For a more custom fit, you can build a gate that follows the slope and swings uphill.
How Do I Stop My Gate From Sagging?
Preventing sag is crucial, especially for a heavy gate on a slope. The most effective method is to install a diagonal cross-brace on the gate’s frame. The brace should run from the bottom corner on the hinge side up to the top corner on the latch side, creating a tension rod that supports the gate’s weight. Using strong, properly installed gate posts and heavy-duty hinges rated for the gate’s weight are also essential foundational steps to prevent sagging over time.
What Is the Ideal Gap Under a Gate?
The ideal gap under a gate is typically between 2 and 4 inches. This provides enough clearance for the gate to swing freely without getting caught on small obstacles or uneven ground, but is small enough to keep most pets and pests from squeezing underneath. On a slope, you should aim to maintain this gap consistently along the entire bottom of the gate when it is in the closed position. This is why scribing and cutting the gate to match the slope is so effective.
Should I Use Wood or Metal for a Sloped Gate?
Both wood and metal are viable options. Wood, such as cedar or treated pine, is easier for a DIYer to customize and cut to an angle. It offers a classic, natural look but requires more maintenance, like sealing or staining, to prevent rot and warp. Metal gates, such as aluminum or steel, are more durable and lower maintenance but are harder to customize. If you need to match a specific slope, a custom-fabricated metal gate can be expensive, making wood a more practical choice for many homeowners.
Conclusion
Building a gate on an incline may seem daunting, but it’s a project that is well within your reach. By carefully measuring the slope, setting strong posts, and building a frame designed to handle the angle, you can create a secure and professional-looking entrance for your property. The key is to take your time with each step, especially when scribing and cutting the angle to match the ground. Now that you know how to build a gate on a slope, you have the skills to tackle this challenge and add significant value and function to your home.
About Ravuk Barg
B.Sc. Horticulture Science | Certified Master Gardener
Ravuk Barg has spent more than a decade with his hands in the soil and his head full of questions about why some gardens thrive while others struggle. What started as a single raised bed of tomatoes and basil in a modest backyard has grown into a deep, working knowledge of everything from seed germination and soil amendment to companion planting and seasonal pruning.
Over the years, Ravuk has gardened through drought summers, waterlogged springs, and pest invasions that would make most gardeners hang up their trowels for good. Those hard seasons, he’ll tell you, taught him more than any perfect growing year ever could. He writes from that earned experience—covering vegetable growing, ornamental planting, houseplant care, composting, and garden design with equal confidence and curiosity.
Philosophy & Approach
Ravuk’s approach to gardening is rooted in practicality. He favors organic methods not out of dogma, but because they work long-term—resulting in healthier soil, fewer inputs, and stronger plants. He has a particular fondness for heirloom vegetable varieties (the kind with proper flavor), unruly cottage-style flower beds, and the stubborn houseplants that everyone else gave up on.
The Mission: Give readers the honest, experience-backed advice that helps them actually succeed in their gardens—not just the ideal version, but the real one; weeds, failures, and all.
Education & Credentials
-
B.Sc. in Horticulture Science
-
Greenfield Agricultural University
-
Focus: Plant Physiology, Soil Ecology, and Sustainable Crop Production
-
-
Master Gardener Certification
-
Cooperative Extension Service
-
Focus: 200+ hours of hands-on practical training and community garden work
-
Continuing Education
-
Organic Pest Management
-
Native Plant Landscaping
-
Sustainable Crop Production