

Mint is notorious for its aggressive growth habits, and learning how to get rid of mint in the garden becomes essential when this aromatic herb takes over your carefully planned landscape. What starts as a small, innocent plant can quickly transform into a sprawling green carpet that chokes out other plants and spreads far beyond its intended boundaries.
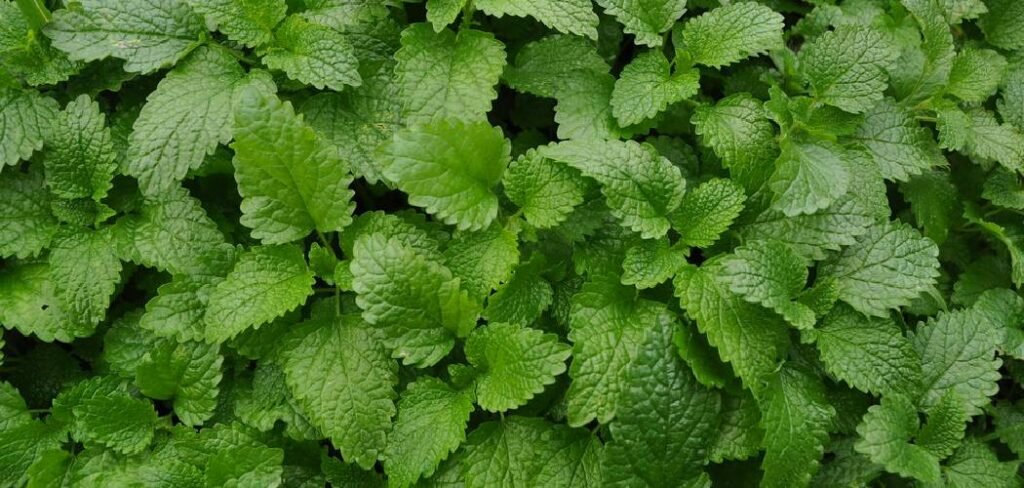
This hardy perennial spreads through underground runners called rhizomes, which can travel several feet from the original plant. Even tiny root fragments left in the soil can regenerate into new plants, making mint removal particularly challenging.
The good news is that with the right approach and persistence, you can successfully eliminate unwanted mint from your garden. Whether you’re dealing with spearmint, peppermint, or any other variety, this comprehensive guide will walk you through proven methods to reclaim your garden space and prevent future invasions.
Why You Need to Remove Mint
Mint’s invasive nature poses serious threats to garden health and diversity. Its aggressive root system can spread up to three feet underground, creating dense mats that prevent other plants from establishing proper root systems. This herb also releases allelopathic compounds that inhibit the growth of nearby plants. These natural chemicals give mint a competitive advantage but create dead zones where other vegetation struggles to thrive.
Left unchecked, mint can completely dominate flower beds, vegetable gardens, and even lawns. Its rapid growth means that what seems manageable one season can become overwhelming the next, requiring more intensive removal methods and potentially damaging desirable plants in the process.
10 Step-by-Step Guide: How to Get Rid of Mint in the Garden
Step 1: Choose the Right Timing
Begin removal efforts during late fall or early spring when mint plants are less vigorous. During these periods, the plant’s energy reserves are at their lowest, making it more vulnerable to removal efforts.
Fall removal is particularly effective because the plant has finished its growing season and hasn’t yet stored maximum energy in its root system. Spring removal, before new growth begins, prevents the plant from using stored energy to regenerate.
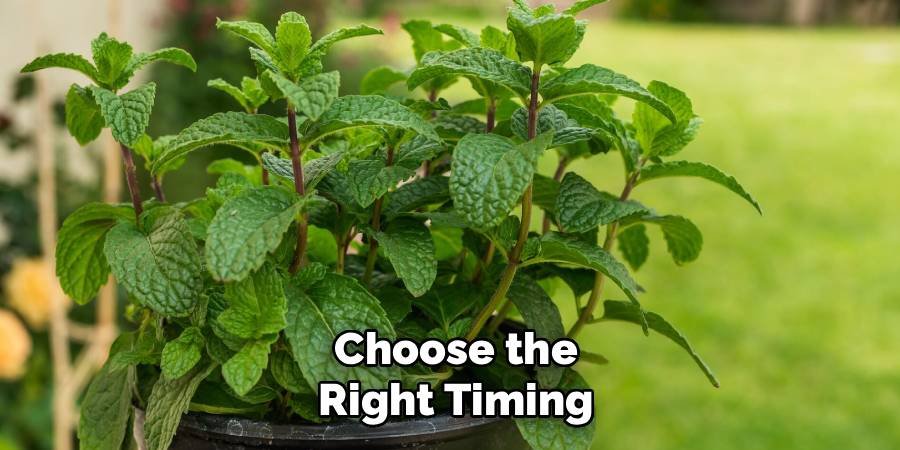
Avoid removal during summer when mint is at peak strength. Hot weather also makes the physical work more challenging and increases stress on any desirable plants you’re trying to preserve nearby.
Step 2: Cut Back All Visible Growth
Start by cutting all mint stems down to ground level using sharp garden shears or pruning scissors. This initial step removes the plant’s ability to photosynthesize and begins weakening the root system.
Dispose of cut material in municipal yard waste collection rather than composting. Even severed stems can sometimes root if conditions are right, and composting may not generate enough heat to kill all plant material.
This cutting process also reveals the extent of the mint colony and makes it easier to identify where the root system is most concentrated for targeted removal efforts.
Step 3: Water the Area Thoroughly
Saturate the soil around the mint colony 24-48 hours before digging. Moist soil makes root extraction significantly easier and reduces the likelihood of breaking rhizomes into fragments that can regenerate.
Use a soaker hose or sprinkler to ensure deep water penetration. The goal is to soften the soil to at least 12 inches deep, which is typically where most mint roots are concentrated.
Well-hydrated soil also reduces dust during removal and makes it easier to spot and follow underground runners as you work through the extraction process.
Step 4: Begin Systematic Digging
Start digging at the perimeter of the mint colony and work inward. Use a sharp spade to cut clean edges around the affected area, then begin removing soil in manageable sections.
Dig to a depth of at least 12 inches, as mint rhizomes can extend quite deep. Work methodically to avoid missing sections, as even small root fragments can regenerate into new plants.
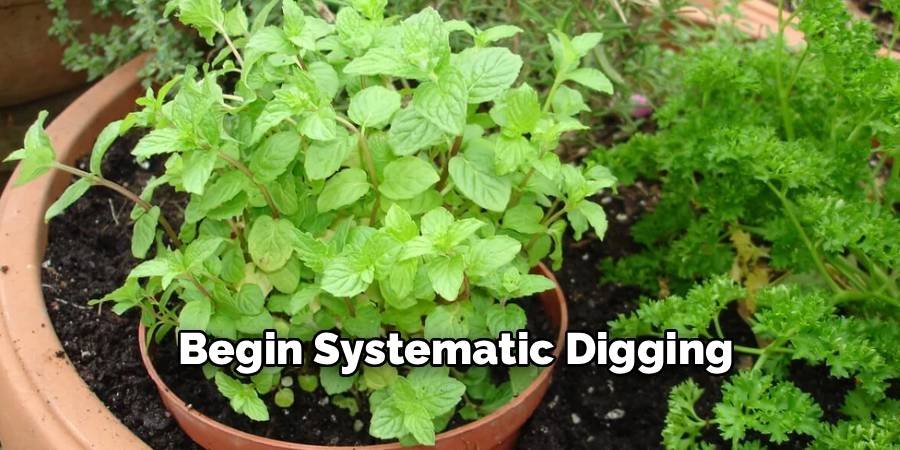
Keep removed soil separate from clean garden soil. You’ll need to carefully inspect all removed soil for root fragments before deciding whether it can be returned to the garden.
Step 5: Hand-Remove All Root Material
Once you’ve loosened the soil, begin the meticulous process of hand-removing every visible root and rhizome. Mint roots are typically white to light brown and have a distinctive minty smell when broken.
Follow each runner to its end, as they can extend several feet from the main plant. Use your fingers or a small hand tool to trace underground stems, being careful not to break them into pieces.
This step requires patience and thoroughness. Missing even small root fragments can result in new mint colonies appearing in the following growing season.
Step 6: Sift and Inspect Removed Soil
Screen all removed soil through hardware cloth or a coarse sieve to catch remaining root fragments. Mint roots can be surprisingly small and still viable for regeneration.
Pay particular attention to soil from the center of the colony, where root density is typically highest. Look for white, fibrous roots and any pieces that smell minty when crushed.
Set aside any questionable soil for later inspection. When in doubt, dispose of suspicious soil rather than risk reintroducing mint to your garden.
Step 7: Apply Targeted Herbicide Treatment
For persistent colonies or areas where complete excavation isn’t practical, apply glyphosate-based herbicide to any remaining growth. Choose a calm day to prevent drift onto desirable plants.
Mix herbicide according to label directions and apply using a foam brush or small spray bottle for precise application. Target individual shoots rather than broadcasting over large areas.

Multiple applications may be necessary, spaced 2-3 weeks apart. Monitor treated areas closely and reapply to any new growth that emerges from missed root sections.
Step 8: Install Root Barriers
If mint is spreading from neighboring properties or areas you can’t treat, install physical barriers to prevent future invasion. Bury landscape edging or plastic barriers 12-18 inches deep.
Create a continuous barrier with no gaps, as mint runners can exploit even small openings. Overlap barrier sections by at least 6 inches and seal joints with landscaping adhesive.
Check barriers annually for damage or shifting that might create new entry points. Root barriers require maintenance but provide long-term protection against reinvasion.
Step 9: Monitor and Retreat
Check treated areas weekly during the growing season for new mint shoots. Quick response to new growth prevents root system reestablishment and makes subsequent removal easier.
Keep a detailed log of where mint appeared and when treatments were applied. This information helps identify problem areas that may need additional attention or different treatment approaches.
New shoots often appear 4-6 weeks after initial treatment. Don’t be discouraged by regrowth – persistence is key to successful long-term mint elimination.
Step 10: Replant with Competitive Species
Once you’re confident the mint is eliminated, replant the area with vigorous, competitive plants that can help prevent reinvasion. Dense groundcovers or established perennials create natural barriers.
Choose plants appropriate for your growing conditions that will quickly establish and fill available space. Native species often work well because they’re adapted to local conditions and can compete effectively.
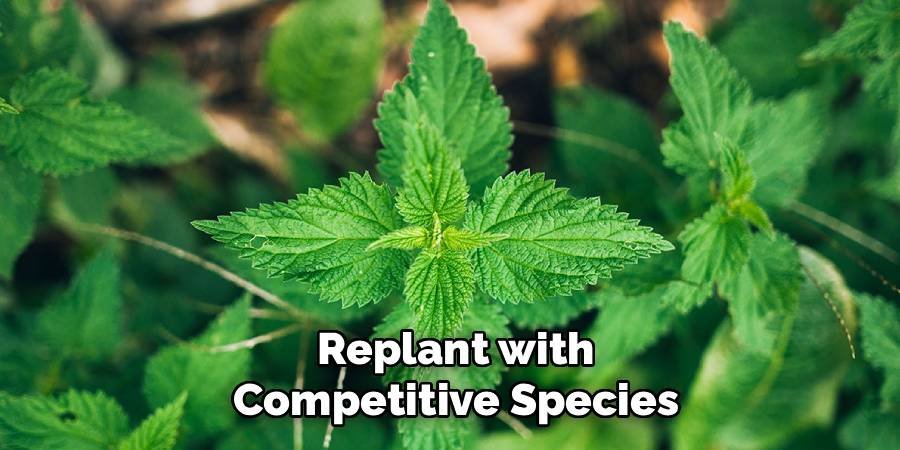
Maintain newly planted areas well to encourage rapid establishment. Healthy, vigorous plants are your best defense against future mint invasions or other aggressive weeds.
Maintaining Your Mint-Free Garden
Regular monitoring is essential for long-term success in keeping mint from returning to treated areas. Schedule monthly inspections during growing season, paying particular attention to areas where mint was previously established.
Maintain healthy soil and robust plant communities that can naturally resist invasive species. Well-fed, properly spaced plants create competition that makes it difficult for mint to reestablish.
Consider creating a maintenance calendar that includes mint inspection dates, along with other garden tasks. Consistency in monitoring makes early detection and treatment much more manageable.
Common Mistakes to Avoid
The biggest mistake gardeners make is incomplete root removal during initial treatment efforts. Leaving even small root fragments virtually guarantees mint will return, often more vigorously than before.
Don’t rely solely on chemical treatments without addressing the underlying root system. Surface applications may kill visible growth but rarely eliminate the extensive underground network completely.
Avoid composting mint material unless you’re certain your compost pile reaches temperatures above 140°F consistently. Home composting systems rarely achieve the heat necessary to kill all mint plant material reliably.
FAQ Frequently Asked Questions
How Long Does It Take to Completely Eliminate Mint From a Garden?
Complete mint elimination typically takes 2-3 growing seasons with consistent monitoring and retreatment. The timeline depends on colony size, soil conditions, and treatment methods used.
Can I Use Vinegar or Salt to Kill Mint Naturally?
While vinegar can damage mint foliage, it rarely kills the root system completely. Salt solutions can harm soil health and nearby plants, making them unsuitable for most garden situations.
Will Mint Grow Back From Tiny Root Fragments?
Yes, mint can regenerate from root fragments as small as an inch long. This remarkable regenerative ability makes thorough root removal absolutely critical for successful elimination efforts.
Is It Safe to Use Herbicides Near Vegetable Gardens?
Glyphosate-based herbicides break down in soil within weeks and don’t persist. However, always follow label directions and avoid application during windy conditions to prevent drift contamination.
How Deep Do Mint Roots Typically Grow?
Mint roots and rhizomes typically concentrate in the top 12 inches of soil, though they can extend deeper in loose, well-drained conditions. Most removal efforts focus on this critical zone.
Conclusion
Successfully learning how to get rid of mint in the garden requires patience, persistence, and thorough execution of proven removal techniques. The key lies in understanding mint’s growth habits and addressing both visible plants and the extensive underground root system.
Remember that mint elimination is a process, not a one-time event. Regular monitoring and quick response to new growth are essential for long-term success. Don’t be discouraged if mint reappears – this is normal and expected.
Your dedication to proper removal techniques will pay dividends in restored garden health and diversity. With consistent effort and the right approach, you can successfully reclaim your garden space from this aggressive invader.
The methods outlined in this guide have helped countless gardeners restore balance to their landscapes. Your garden will thank you for the effort, and you’ll gain valuable experience in managing other potential invasive species threats.
About Ravuk Barg
B.Sc. Horticulture Science | Certified Master Gardener
Ravuk Barg has spent more than a decade with his hands in the soil and his head full of questions about why some gardens thrive while others struggle. What started as a single raised bed of tomatoes and basil in a modest backyard has grown into a deep, working knowledge of everything from seed germination and soil amendment to companion planting and seasonal pruning.
Over the years, Ravuk has gardened through drought summers, waterlogged springs, and pest invasions that would make most gardeners hang up their trowels for good. Those hard seasons, he’ll tell you, taught him more than any perfect growing year ever could. He writes from that earned experience—covering vegetable growing, ornamental planting, houseplant care, composting, and garden design with equal confidence and curiosity.
Philosophy & Approach
Ravuk’s approach to gardening is rooted in practicality. He favors organic methods not out of dogma, but because they work long-term—resulting in healthier soil, fewer inputs, and stronger plants. He has a particular fondness for heirloom vegetable varieties (the kind with proper flavor), unruly cottage-style flower beds, and the stubborn houseplants that everyone else gave up on.
The Mission: Give readers the honest, experience-backed advice that helps them actually succeed in their gardens—not just the ideal version, but the real one; weeds, failures, and all.
Education & Credentials
-
B.Sc. in Horticulture Science
-
Greenfield Agricultural University
-
Focus: Plant Physiology, Soil Ecology, and Sustainable Crop Production
-
-
Master Gardener Certification
-
Cooperative Extension Service
-
Focus: 200+ hours of hands-on practical training and community garden work
-
Continuing Education
-
Organic Pest Management
-
Native Plant Landscaping
-
Sustainable Crop Production