

Starting seeds indoors is an exciting first step for any gardener. It gives you a head start on the growing season and lets you nurture tiny plants from the very beginning. However, getting those seeds to sprout and thrive requires careful attention, especially when it comes to moisture. Knowing exactly how to water seed trays can make the difference between a tray full of healthy seedlings and one that struggles to grow. This guide will walk you through everything you need to know, from preparing your trays to mastering the right watering techniques for strong, vibrant plants.
Why Proper Watering Matters for Seedlings
Before a seed can germinate, it needs to absorb water. This process, called imbibition, triggers the embryo inside to start growing. Consistent moisture is crucial during this early stage. However, the delicate nature of seedlings makes them highly susceptible to both overwatering and underwatering. Too much water can suffocate the roots and lead to fungal diseases like damping-off, which causes seedlings to rot at the soil line.
On the other hand, letting the soil dry out completely can stop germination in its tracks or cause newly sprouted seedlings to wilt and die. Mastering the art of watering is about finding the perfect balance to create a healthy environment for growth.
A Step-by-Step Guide on How to Water Seed Trays
Step 1: Prepare Your Seed Starting Mix
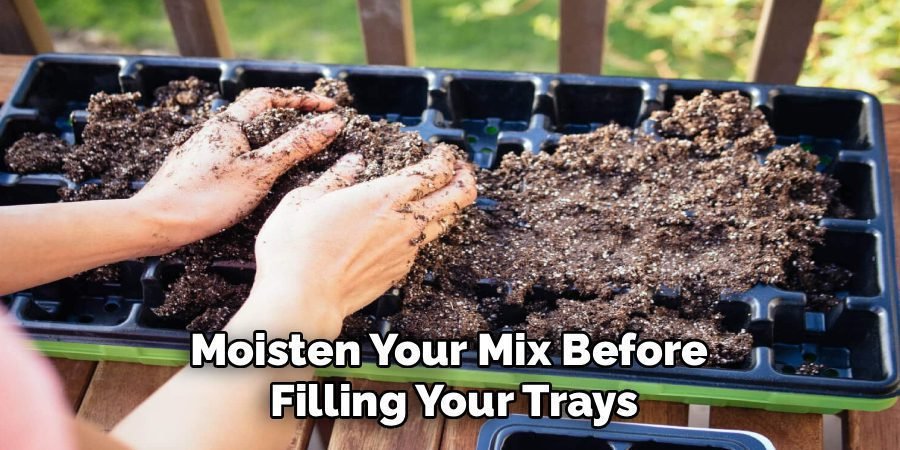
Before you even think about water, start with the right foundation. A good seed starting mix is light, airy, and designed to hold moisture without becoming waterlogged. Moisten your mix before filling your trays. Place it in a bucket or tub and gradually add warm water, mixing it with your hands until it has the consistency of a damp sponge. When you squeeze a handful, it should hold its shape but only release a few drops of water. This pre-moistening ensures that the entire soil column is evenly hydrated from the start.
Step 2: Choose the Right Seed Tray
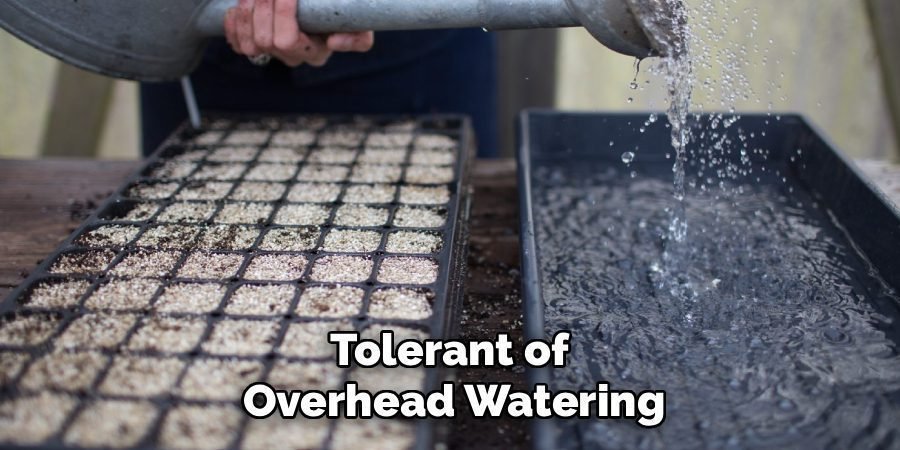
Seed trays come in various forms, but for effective watering, choose one with adequate drainage holes and a solid bottom tray to catch excess water. The drainage holes are non-negotiable, as they prevent water from pooling around the delicate roots. The solid tray underneath, often called a reservoir tray, is essential for bottom watering, which is the preferred method for seedlings. This setup allows you to control moisture levels precisely and prevents soil compaction that can occur from watering overhead.
Step 3: Fill Your Trays and Sow Your Seeds
Once your soil mix is perfectly damp, fill the cells of your seed tray. Lightly press the mix down to eliminate any large air pockets, but avoid compacting it too tightly. A firm but light soil structure allows roots to penetrate easily. After filling the trays, sow your seeds according to the packet instructions, paying attention to the recommended planting depth. Some seeds need light to germinate and should be pressed onto the surface, while others require being buried in the soil.
Step 4: Add Water to the Bottom Tray
This step is the core of an effective strategy for how to water seed trays. Instead of watering from above, pour about a half-inch to an inch of lukewarm water directly into the solid bottom tray. Place the seed-filled tray inside the reservoir. This technique, known as bottom watering, allows the soil to absorb moisture from the bottom up through capillary action. It encourages deeper root growth as the roots reach down for water and keeps the fragile stems and leaves dry, significantly reducing the risk of fungal diseases.
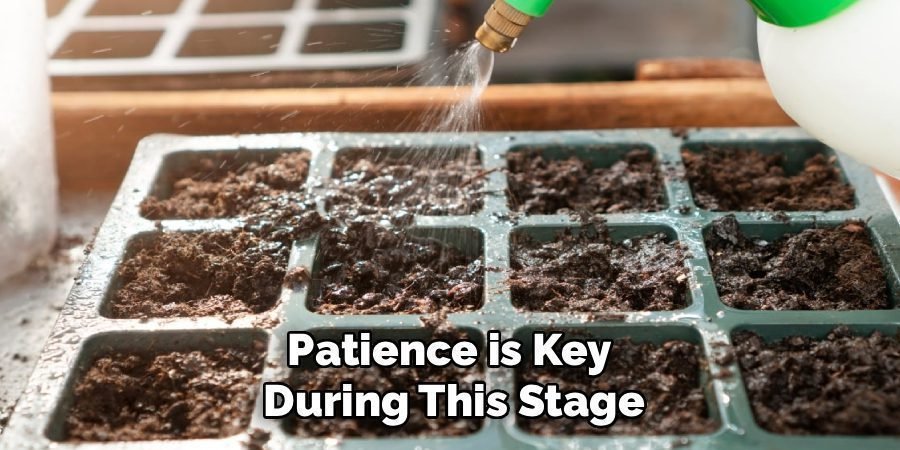
Step 5: Allow Time for Absorption
Patience is key during this stage. Let the seed tray sit in the water-filled reservoir for about 30 to 60 minutes. During this time, you will see the surface of the soil darken as it wicks up the moisture. The goal is for the soil surface to become visibly damp but not saturated. This ensures that the entire soil plug is evenly hydrated. Once the top looks moist, you know the process is complete. This is a critical part of knowing how to water seed trays correctly.
Step 6: Drain the Excess Water
Once the soil has absorbed enough moisture, it is crucial to remove the seed tray from the reservoir and pour out any remaining water. Never leave your seed trays sitting in standing water for extended periods. Allowing them to remain in a puddle can lead to waterlogged soil, which suffocates the roots by cutting off oxygen supply. This is one of the most common mistakes new gardeners make and often leads to root rot and weak, unhealthy seedlings. Draining the excess is just as important as the watering itself.
Step 7: Cover with a Humidity Dome
After the initial watering, cover your seed tray with a clear plastic humidity dome. This traps moisture and warmth, creating a mini-greenhouse effect that is ideal for germination. The dome keeps the soil from drying out too quickly, reducing the need for frequent watering. You may not need to water again until after the seeds have sprouted. Check the soil daily, but the trapped humidity will do most of the work for you during this early phase of growth.
Monitor and Adjust Your Watering Schedule
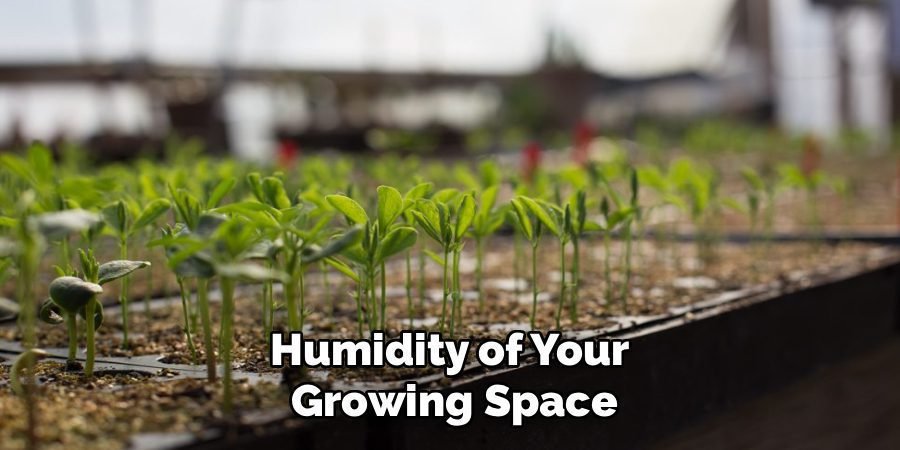
Once your seeds sprout, remove the humidity dome to improve air circulation. Now, you must monitor the moisture levels daily. The best way to check is by feeling the weight of the tray or touching the soil surface. A tray that feels light or has light-brown soil on top needs water. Repeat the bottom-watering process as needed, typically every two to four days, depending on the temperature and humidity of your growing space. Adjust your frequency based on your observations to keep the soil consistently moist.
Maintenance
Once your seedlings are established, maintaining their growth requires consistent care. Ensure they receive adequate light, either from natural sunlight or grow lights positioned 2–3 inches above the tray. Rotate the tray daily to ensure even light distribution and prevent the seedlings from leaning. Monitor the temperature in your growing space to keep it within the ideal range for your plant type, typically between 65°F and 75°F. Additionally, watch for signs of overcrowding, and thin out weaker seedlings if necessary to provide room for stronger ones to thrive. With proper maintenance, your plants will develop into healthy, vigorous specimens.
Frequently Asked Questions (FAQ)
How Often Should I Water My Seed Trays?
The frequency depends on several factors, including the ambient temperature, humidity, and the size of your seed tray cells. As a general rule, check your trays daily. A good method is to lift the tray to feel its weight; a light tray needs water. You can also touch the top of the soil. If it feels dry, it’s time to water. Typically, you might water every 2–4 days after seedlings have sprouted, but always let the tray be your guide.
Should I Water My Seeds Every Day?
It is rarely necessary to water seeds every day, especially before they germinate. A humidity dome will keep the soil moist for several days. Daily watering often leads to overwatering, which can cause seeds to rot or seedlings to develop fungal diseases like damping-off. Instead of watering on a fixed schedule, check the soil moisture daily and only water when the soil begins to dry out. This approach promotes healthier and more resilient seedlings.
Is It Better to Mist Seedlings or Water from the Bottom?
Bottom watering is overwhelmingly preferred for seedlings. Misting can be useful for keeping the soil surface from crusting over before germination, but it doesn’t provide the deep, consistent moisture that roots need. Furthermore, misting wets the leaves and stems, creating a damp environment that encourages fungal growth. Bottom watering delivers water directly to the root zone, encourages strong root development, and keeps the foliage dry, making it a much safer and more effective method.
Can You Overwater Seeds Before They Germinate?
Yes, you can absolutely overwater seeds before they germinate. While seeds need moisture to start the germination process, soil that is completely saturated will lack oxygen. Seeds, like all living things, need to respire. If the soil is waterlogged, the seeds can suffocate and rot before they ever have a chance to sprout. This is why it is essential to use a well-draining mix and to ensure you pour out any excess water after bottom watering.
When Should I Stop Bottom Watering My Seedlings?
You can continue bottom watering your seedlings right up until you are ready to transplant them into your garden or larger containers. It remains an effective method for providing consistent moisture without disturbing the plants. Once the seedlings have several sets of true leaves and a more robust root system, they become more tolerant of overhead watering. However, many gardeners choose to stick with bottom watering because it is reliable and helps prevent disease throughout the entire indoor growing phase.
Conclusion
Growing plants from seed is a rewarding process that connects you directly to the lifecycle of your garden. By mastering how to water seed trays, you give your seedlings the best possible start. Remember to begin with a pre-moistened, well-draining mix and to use the bottom-watering technique to encourage strong roots and prevent disease. Check your trays daily, let the soil guide your schedule, and always drain excess water. With these steps, you are well-equipped to nurture your tiny seeds into strong, healthy plants ready for the garden.
About Ravuk Barg
B.Sc. Horticulture Science | Certified Master Gardener
Ravuk Barg has spent more than a decade with his hands in the soil and his head full of questions about why some gardens thrive while others struggle. What started as a single raised bed of tomatoes and basil in a modest backyard has grown into a deep, working knowledge of everything from seed germination and soil amendment to companion planting and seasonal pruning.
Over the years, Ravuk has gardened through drought summers, waterlogged springs, and pest invasions that would make most gardeners hang up their trowels for good. Those hard seasons, he’ll tell you, taught him more than any perfect growing year ever could. He writes from that earned experience—covering vegetable growing, ornamental planting, houseplant care, composting, and garden design with equal confidence and curiosity.
Philosophy & Approach
Ravuk’s approach to gardening is rooted in practicality. He favors organic methods not out of dogma, but because they work long-term—resulting in healthier soil, fewer inputs, and stronger plants. He has a particular fondness for heirloom vegetable varieties (the kind with proper flavor), unruly cottage-style flower beds, and the stubborn houseplants that everyone else gave up on.
The Mission: Give readers the honest, experience-backed advice that helps them actually succeed in their gardens—not just the ideal version, but the real one; weeds, failures, and all.
Education & Credentials
-
B.Sc. in Horticulture Science
-
Greenfield Agricultural University
-
Focus: Plant Physiology, Soil Ecology, and Sustainable Crop Production
-
-
Master Gardener Certification
-
Cooperative Extension Service
-
Focus: 200+ hours of hands-on practical training and community garden work
-
Continuing Education
-
Organic Pest Management
-
Native Plant Landscaping
-
Sustainable Crop Production