

A front tine tiller can be a gardener’s best friend, transforming compacted soil into a perfect, aerated bed for planting. However, for a beginner, this powerful machine can seem intimidating. This guide is here to change that. We will walk you through everything you need to know about how to Use Front Tine Tiller safely and effectively. From preparing your garden plot to making those final passes, you’ll gain the confidence to operate this essential tool like a seasoned pro. Get ready to make your gardening tasks easier and more efficient, setting the stage for a thriving garden.
Why Use a Front Tine Tiller?
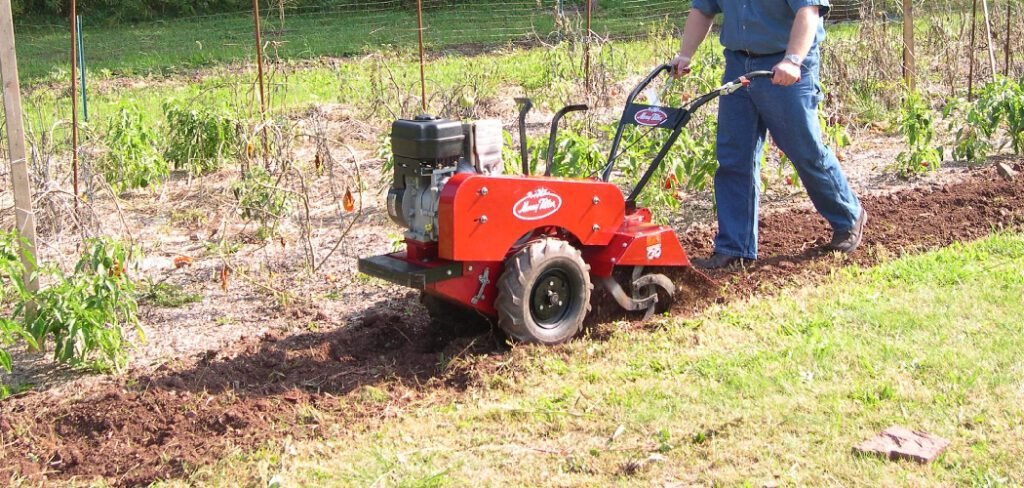
Front tine tillers are excellent for home gardeners dealing with small to medium-sized plots. Their design, with tines at the front, makes them highly maneuverable and perfect for navigating existing garden beds, cultivating between rows, and weeding. These machines are generally lighter and more compact than their rear-tine counterparts, making them easier to transport and store.
They excel at breaking up soil that has been previously worked, preparing seedbeds, and mixing in amendments like compost or fertilizer. For general garden maintenance and light-duty soil breaking, a front tine tiller offers a fantastic combination of power and control.
8 Step Methods Guide on How to Use Front Tine Tiller
Step 1: Prepare the Tilling Area
Before you even start the engine, a thorough inspection of your garden plot is essential. Walk the entire area you plan to till and remove any potential obstacles. Look for large rocks, thick roots, stray branches, garden hoses, or children’s toys that could get tangled in the tines or damage the machine. Clearing the area not only protects your tiller but also ensures a safer and smoother operation. This simple preparation step prevents sudden jolts and stops, allowing you to maintain better control over the tiller and achieve a more consistent tilling depth across your entire garden bed.

Step 2: Perform a Safety and Maintenance Check
Safety should always be your top priority. Before each use, conduct a quick maintenance check on your tiller. Ensure the fuel and oil levels are adequate for the job. Examine the tines for any damage or built-up debris like vines or string, and make sure they are securely attached. Check that all nuts, bolts, and guards are tight and in place. It’s also crucial to wear appropriate safety gear. This includes sturdy, closed-toe shoes or boots, long pants, safety glasses to protect your eyes from flying debris, and gloves to improve your grip and protect your hands.
Step 3: Start the Tiller Correctly
Starting a front tine tiller is similar to starting a lawnmower. Move the machine to a flat, clear area, away from the soil you intend to till. If your tiller has a fuel shut-off valve, make sure it is in the “On” position. Set the choke to the “Start” or “Choke” position, and if it has a primer bulb, press it a few times as indicated in the owner’s manual. Set the throttle to the appropriate starting speed. Firmly grasp the handle with one hand and pull the starter cord with a swift, strong motion. Once the engine starts, gradually move the choke to the “Run” position.
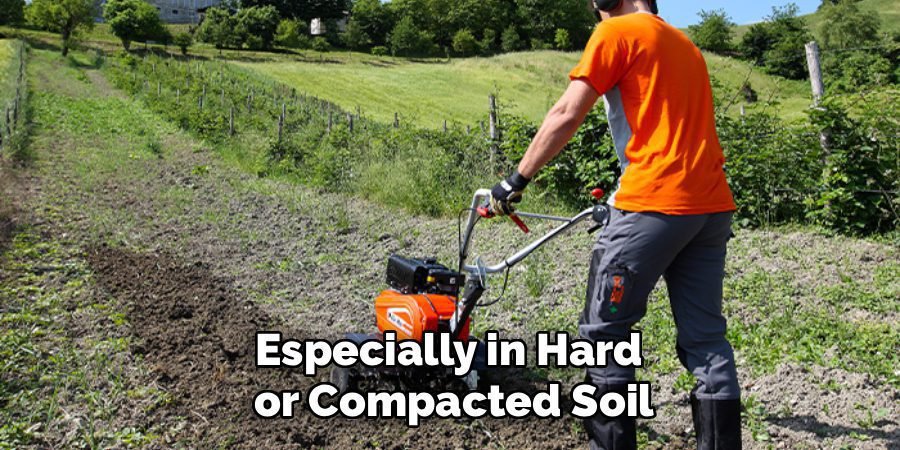
Step 4: Set the Depth Bar
The depth bar, or drag stake, is a critical component located at the rear of the tiller. It controls how deeply the tines dig into the soil. For your first pass, especially in hard or compacted soil, you should set the depth bar to a shallow setting. This allows the tiller to skim the surface and break up the top layer without trying to dig too deep, which can cause it to jump or become difficult to control. Adjusting the depth bar is usually a simple process involving removing a pin, repositioning the bar, and reinserting the pin.
Step 5: Begin Your First Tilling Pass
With the engine running smoothly and the depth bar set, you are ready to start tilling. Engage the tines according to your model’s instructions, which typically involves squeezing a lever on the handlebar. The tiller will immediately want to lurch forward as the tines bite into the ground. Your job is to provide resistance by holding back on the handlebars. This is the key to how to use a front tine tiller effectively. By pulling back, you force the tines to dig down and churn the soil rather than just pulling the machine across the surface. Walk slowly and let the machine do the work.
Step 6: Master the Tilling Pattern
For the most thorough results, till your garden in a consistent pattern. Start by making your first pass along one edge of the plot. At the end of the row, carefully turn the tiller around and begin your next pass, slightly overlapping the first one by a few inches. This overlap ensures no strips of untilled ground are left behind. Continue this pattern until you have covered the entire area. This methodical approach breaks up the soil evenly and creates a uniform foundation for your garden. This initial pass is about breaking the surface, not achieving full depth.
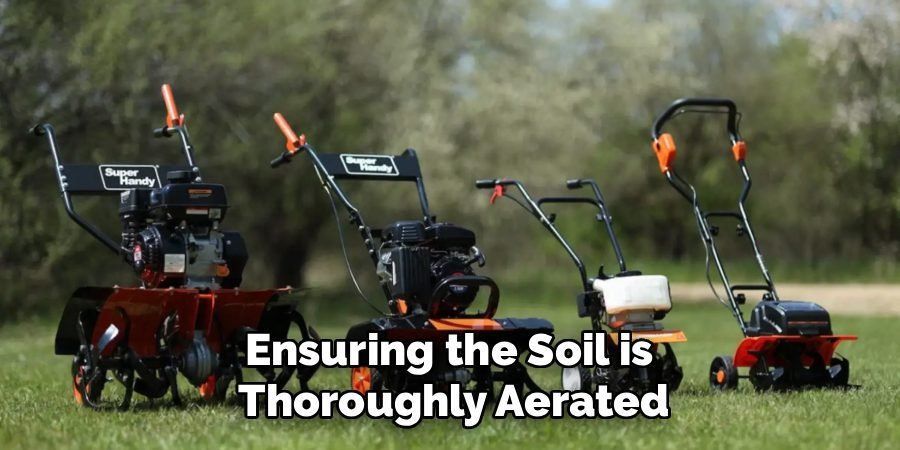
Step 7: How to Use a Front Tine Tiller for Deeper Cultivation
After completing your initial pass over the entire garden, it’s time to go deeper. Adjust the depth bar to a lower setting to allow the tines to penetrate further into the soil. Now, repeat the tilling process, but this time, make your passes perpendicular to your first set of rows. This cross-hatch pattern is highly effective for breaking up remaining clumps of dirt and ensuring the soil is thoroughly aerated. You will notice the tiller moves more easily on this second pass as the ground is already loosened. Continue to provide resistance to control the machine’s forward motion.
Step 8: Clean and Store Your Tiller
Once your garden is tilled to your satisfaction, proper cleanup and storage will keep your tiller in good condition for years to come. Turn off the engine and let it cool down completely before you begin cleaning. Use a stiff brush or a putty knife to remove all soil, rocks, and plant debris from the tines and the tine shield. Wiping down the engine and handles is also a good practice. Store the tiller in a dry, protected location like a shed or garage to prevent rust and other weather-related damage.
Frequently Asked Questions (FAQ)
Can You Till Wet Soil?
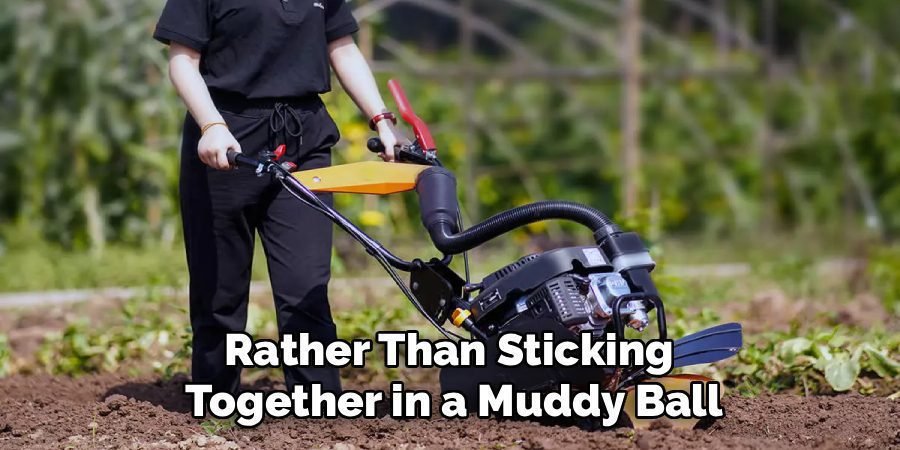
It is highly recommended that you avoid tilling wet soil. Tilling soggy ground can create large, dense clods that are difficult to break up once they dry. It also compacts the soil structure underneath, ruining its drainage and aeration. For best results, wait a day or two after a heavy rain. The ideal soil moisture is when a handful of soil crumbles easily when you squeeze it, rather than sticking together in a muddy ball.
How Deep Should a Front Tine Tiller Go?
For most gardening purposes, you should aim to till to a depth of 6 to 8 inches. This is deep enough for the roots of most annual vegetables and flowers to establish themselves. Start with a shallow pass of 2 to 3 inches to break the surface, then make subsequent passes, adjusting the depth bar lower each time until you reach your desired depth. This gradual approach is more effective and easier to control than trying to till deeply all at once.
What Is the Difference Between a Tiller and a Cultivator?
While they look similar, tillers and cultivators serve different functions. A tiller is a more powerful machine designed for breaking new ground and working compacted soil over a large area. A cultivator is smaller, lighter, and used for secondary tasks, such as:
- Loosening soil in existing beds
- Weeding between garden rows
- Mixing in soil amendments
A cultivator is not powerful enough to break hard, untilled ground.
How Do You Control the Speed of a Front Tine Tiller?
You control the forward speed of a front tine tiller primarily by applying resistance. The spinning tines naturally pull the machine forward. By holding back on the handlebars, you slow its advance and allow the tines to dig deeper and churn the soil more effectively. Some models may have a throttle to control engine speed, but your physical control and the depth bar setting are the main factors in managing its tilling speed and depth.
Do I Need to Add Amendments Before or After Tilling?
It is best to spread amendments like compost, aged manure, or fertilizer over the surface of the garden plot before you begin tilling. As you till the soil, the machine will do an excellent job of mixing these organic materials evenly into the top several inches of your garden bed. This process ensures the nutrients are distributed throughout the root zone, creating a rich, fertile environment for your plants to grow and thrive.
Conclusion
Tackling your garden with a front tine tiller can transform a tough, laborious job into a manageable and rewarding task. By following the steps outlined—from preparing your plot and checking your equipment to using a methodical tilling pattern—you can create the perfect soil bed for a bountiful garden. Remember that control is key; resisting the tiller’s forward pull is what allows it to dig in and do its job effectively. With a little practice, you will master how to use a front tine tiller and wonder how you ever gardened without one. Now you are equipped with the knowledge to turn your soil with confidence.
About Ravuk Barg
B.Sc. Horticulture Science | Certified Master Gardener
Ravuk Barg has spent more than a decade with his hands in the soil and his head full of questions about why some gardens thrive while others struggle. What started as a single raised bed of tomatoes and basil in a modest backyard has grown into a deep, working knowledge of everything from seed germination and soil amendment to companion planting and seasonal pruning.
Over the years, Ravuk has gardened through drought summers, waterlogged springs, and pest invasions that would make most gardeners hang up their trowels for good. Those hard seasons, he’ll tell you, taught him more than any perfect growing year ever could. He writes from that earned experience—covering vegetable growing, ornamental planting, houseplant care, composting, and garden design with equal confidence and curiosity.
Philosophy & Approach
Ravuk’s approach to gardening is rooted in practicality. He favors organic methods not out of dogma, but because they work long-term—resulting in healthier soil, fewer inputs, and stronger plants. He has a particular fondness for heirloom vegetable varieties (the kind with proper flavor), unruly cottage-style flower beds, and the stubborn houseplants that everyone else gave up on.
The Mission: Give readers the honest, experience-backed advice that helps them actually succeed in their gardens—not just the ideal version, but the real one; weeds, failures, and all.
Education & Credentials
-
B.Sc. in Horticulture Science
-
Greenfield Agricultural University
-
Focus: Plant Physiology, Soil Ecology, and Sustainable Crop Production
-
-
Master Gardener Certification
-
Cooperative Extension Service
-
Focus: 200+ hours of hands-on practical training and community garden work
-
Continuing Education
-
Organic Pest Management
-
Native Plant Landscaping
-
Sustainable Crop Production