

Welcome to the wonderful world of gardening! If you’re looking for a tool that can do almost everything, you’ve come to the right place. The hori hori knife, a traditional Japanese gardening tool, is a game-changer for gardeners of all levels. Its name translates to “dig dig,” which perfectly captures its primary function, but its versatility goes far beyond that. With its sharp, semi-concave blade marked with measurements, it’s part trowel, part knife, and part weeder.
This guide will walk you through exactly how to use a hori hori knife, transforming it from a curious object into your most trusted gardening companion. Whether you’re planting bulbs, removing stubborn weeds, or dividing perennials, this multipurpose tool will simplify your tasks and make your time in the garden more productive and enjoyable.
Why a Hori Hori Knife Belongs in Your Tool Kit
In a world of specialized gardening gadgets, the hori hori knife stands out for its simplicity and incredible versatility. Why focus on just one tool? Because this single instrument can replace a handful of others, saving you space, money, and time. For a beginner gardener, it eliminates the confusion of choosing between a trowel, a weeder, a bulb planter, and a knife.
For the experienced gardener, it offers efficiency and precision that other tools can’t match. The blade, often made of high-carbon or stainless steel, is strong enough to tackle compacted soil and tough roots, while the serrated edge provides sawing power. The inscribed measurements on the blade make planting depths precise and consistent.
7 Step-by-Step Guide on How to Use a Hori Hori Knife
Step 1: Get Acquainted with Your Tool
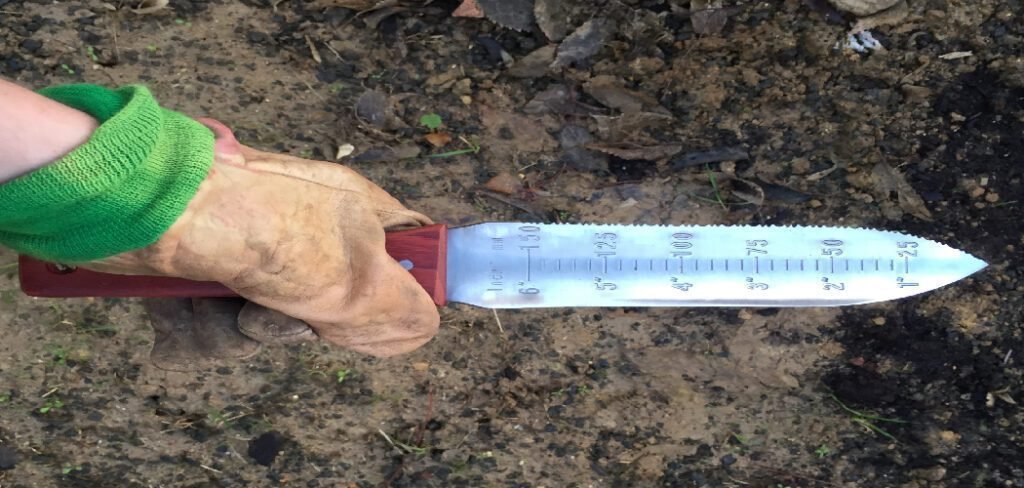
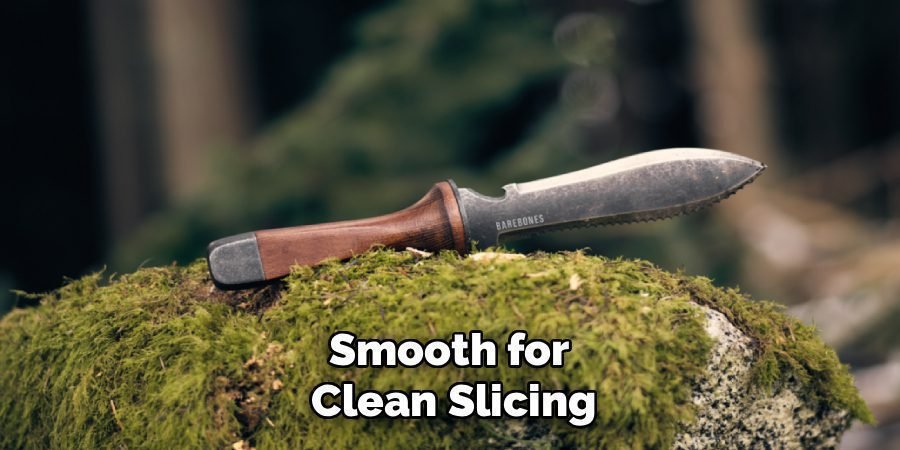
Before you dig in, take a moment to familiarize yourself with the hori hori’s features. Hold it in your hand to feel its weight and balance. Notice the strong, full-tang construction where the metal of the blade extends into the handle, providing strength and durability. One edge of the blade is sharp and smooth for clean slicing, while the other is serrated for sawing through tough roots or twine. The blade itself is slightly curved, making it perfect for scooping soil like a trowel. Finally, look at the measurement markings, typically in both inches and millimeters, which are invaluable for planting bulbs and seeds at the correct depth.
Step 2: Weeding with Precision
Weeding is one of the hori hori’s greatest strengths. For taprooted weeds like dandelions or thistle, plunge the blade vertically into the soil alongside the root. Wiggle the knife back and forth to loosen the soil around the root system. Once loosened, you can use the pointed tip to get underneath the root crown and lever the entire weed out, taproot and all. This method is far more effective than just pulling the tops, as it prevents regrowth. For fibrous-rooted weeds, use the sharp edge to sever them just below the soil surface, or use the tip to pry them out of tight spaces.
Step 3: Planting Bulbs and Seedlings
The hori hori knife makes planting a breeze. To plant bulbs, use the measurement guide on the blade to determine the correct depth. Plunge the knife into the soil to your desired depth, pull it back toward you to create a narrow hole, and drop the bulb in, pointed side up. Remove the knife and push the soil back into place, gently tamping it down. For transplanting seedlings from a pot or tray, use the knife to dig a hole that is slightly wider and deeper than the seedling’s root ball. The concave shape of the blade is perfect for scooping out just the right amount of soil.
Step 4: How to Use a Hori Hori Knife for Dividing Perennials
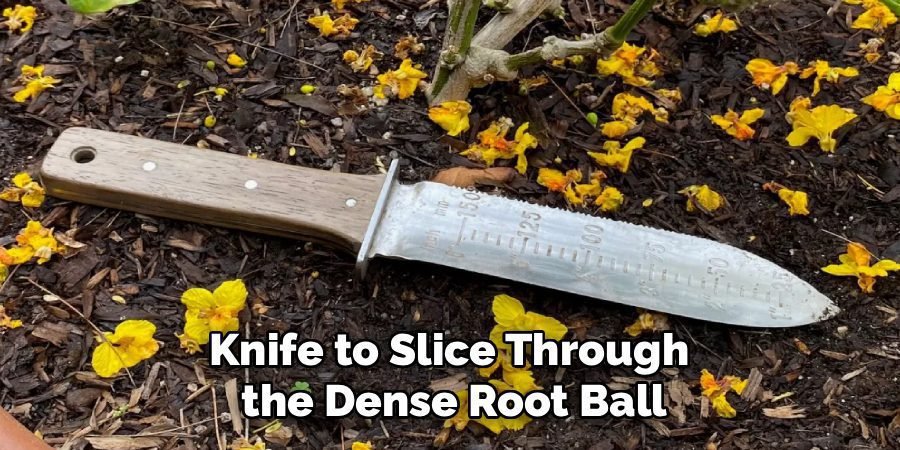
When perennials like hostas, daylilies, or irises become too large, dividing them is necessary to maintain their health and vigor. After digging up the entire plant clump, use your hori hori knife to slice through the dense root ball. The serrated edge is particularly useful here, allowing you to saw through tough, woody crowns and tangled roots with minimal effort. The sharp, pointed tip helps you get into tight spots and make precise divisions. This ensures each new plant section has a healthy amount of both roots and shoots, giving it the best chance to thrive once replanted.
Step 5: Cultivating and Aerating Soil
In small garden beds or containers, the hori hori is an excellent tool for light cultivation. Use the sharp tip to break up compacted surface soil, which improves water penetration and aeration for plant roots. You can work the knife in a back-and-forth motion to loosen the top few inches of soil around your plants, being careful not to disturb their root systems. This is also a great way to mix in compost or granular fertilizer into the top layer of soil, ensuring that nutrients are readily available to your plants. This task helps keep your garden beds healthy and receptive to moisture.
Step 6: Sawing Through Roots and Twine
The serrated edge of your hori hori is not just for show. It acts as a small, powerful saw. When you encounter stubborn roots while digging a hole for a new shrub or tree, you don’t need to run back to the shed for a different tool. Simply use the serrated edge to saw through them. This feature is also incredibly handy for cutting open bags of mulch or soil, trimming landscape fabric, or cutting through thick garden twine. The strength and sharpness of this edge make quick work of materials that might otherwise require a separate utility knife or pair of pruners.
Step 7: Creating Furrows for Sowing Seeds
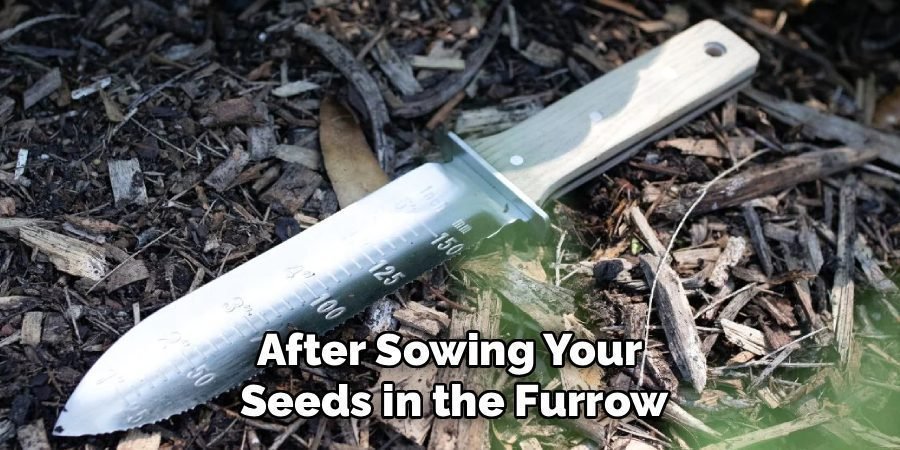
For planting seeds in neat rows, the hori hori knife is an ideal tool. Hold the knife with the tip pointing down and drag it through your prepared garden bed to create a shallow furrow. The pointed tip allows you to make a perfectly straight and consistent channel at the right depth for your seeds. After sowing your seeds in the furrow, use the flat side of the blade to gently push the soil back over them. This ensures good seed-to-soil contact, which is essential for successful germination. It’s much more precise than using a bulky trowel or your hands.
Maintaining Your Hori Hori Knife
Proper care will ensure your hori hori knife lasts for many seasons. After each use, wipe the blade clean of soil and moisture to prevent rust, especially if it is made of high-carbon steel. Use a stiff brush if necessary to remove stubborn dirt. Periodically, you should sharpen both the straight and serrated edges using a sharpening stone or a file designed for garden tools. A sharp blade is safer and more effective. It is also wise to occasionally oil the blade with a light machine oil or camellia oil to protect it from corrosion, and check that the handle remains secure.
Frequently Asked Questions (FAQ)
What Is the Difference Between a Hori Hori and a Regular Trowel?
While both are used for digging, a hori hori is far more versatile than a trowel. A trowel is primarily a scooping tool with a wide, blunt blade. A hori hori features a sharper, narrower, semi-concave blade with one serrated edge and one smooth edge, along with measurement markings. This design allows it to not only dig and scoop but also to cut roots, saw branches, weed with precision, and transplant effectively. It essentially combines a trowel, knife, saw, and weeder into a single, robust tool.
Is Stainless Steel or Carbon Steel Better for a Hori Hori?
The choice between stainless steel and carbon steel depends on your priorities. Carbon steel is generally harder, holds a sharp edge longer, and is very durable. However, it is more prone to rust and requires regular cleaning and oiling. Stainless steel is highly resistant to rust and corrosion, making it lower maintenance. While it may not hold its edge quite as long as carbon steel, it is still very strong and is often the preferred choice for gardeners who want a reliable tool without the extra upkeep.

How Do You Sharpen the Serrated Edge?
Sharpening the serrated edge requires a different technique than the straight edge. You will need a tapered sharpening rod or a small, triangular file that can fit into the individual gullets (the dips between the teeth). Place the rod in the first gullet, matching the bevel angle of the tooth, and push it forward a few times. Repeat this process for each gullet along the serrated edge. Avoid filing the flat back of the blade, as this will alter the shape of the teeth.
Can a Hori Hori Be Used for Pruning?
While a hori hori is not a replacement for dedicated pruning shears or loppers, it can handle light pruning tasks in a pinch. The serrated edge is effective for sawing through small branches, woody stems, or thick stalks that are too tough for hand pruners. The sharp, straight edge can be used to make clean cuts on softer green stems. However, for precise pruning cuts that are critical for the health of plants like roses or fruit trees, a pair of sharp bypass pruners is always the better choice.
What Should I Look for When Buying a Hori Hori Knife?
When purchasing a hori hori, look for a full-tang construction, where the metal of the blade extends all the way through the handle for maximum strength. A comfortable, ergonomic handle made of wood or a non-slip material is also important. Check that the measurement markings on the blade are clearly etched or stamped so they won’t wear off. Finally, consider whether you prefer a high-carbon or stainless steel blade based on your maintenance preferences, and ensure it comes with a durable sheath for safe storage and transport.

Conclusion
The hori hori knife is more than just a tool; it’s a versatile partner for nearly every task your garden presents. From the initial soil preparation to planting, weeding, and dividing, its thoughtful design simplifies complex jobs and streamlines your workflow. By now, you should feel confident in your ability to wield this powerful instrument. We’ve covered how to use it for precise weeding, effortless planting, dividing tough perennials, and even light sawing tasks. Remember to keep it clean and sharp to ensure it serves you well for years to come. Now that you know how to use a hori hori knife, it’s time to get out there and put your new skills to the test. Happy gardening
About Ravuk Barg
B.Sc. Horticulture Science | Certified Master Gardener
Ravuk Barg has spent more than a decade with his hands in the soil and his head full of questions about why some gardens thrive while others struggle. What started as a single raised bed of tomatoes and basil in a modest backyard has grown into a deep, working knowledge of everything from seed germination and soil amendment to companion planting and seasonal pruning.
Over the years, Ravuk has gardened through drought summers, waterlogged springs, and pest invasions that would make most gardeners hang up their trowels for good. Those hard seasons, he’ll tell you, taught him more than any perfect growing year ever could. He writes from that earned experience—covering vegetable growing, ornamental planting, houseplant care, composting, and garden design with equal confidence and curiosity.
Philosophy & Approach
Ravuk’s approach to gardening is rooted in practicality. He favors organic methods not out of dogma, but because they work long-term—resulting in healthier soil, fewer inputs, and stronger plants. He has a particular fondness for heirloom vegetable varieties (the kind with proper flavor), unruly cottage-style flower beds, and the stubborn houseplants that everyone else gave up on.
The Mission: Give readers the honest, experience-backed advice that helps them actually succeed in their gardens—not just the ideal version, but the real one; weeds, failures, and all.
Education & Credentials
-
B.Sc. in Horticulture Science
-
Greenfield Agricultural University
-
Focus: Plant Physiology, Soil Ecology, and Sustainable Crop Production
-
-
Master Gardener Certification
-
Cooperative Extension Service
-
Focus: 200+ hours of hands-on practical training and community garden work
-
Continuing Education
-
Organic Pest Management
-
Native Plant Landscaping
-
Sustainable Crop Production