

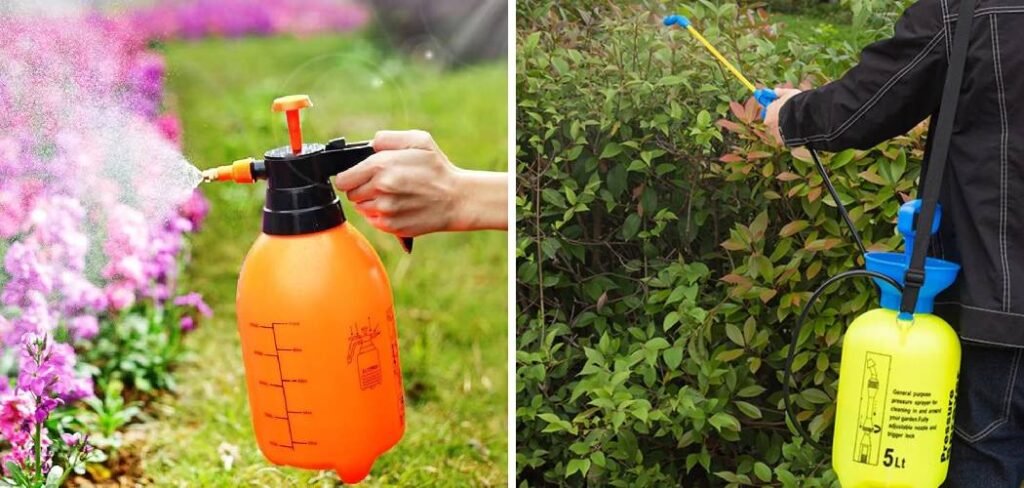
A garden sprayer is an indispensable tool for maintaining a healthy and vibrant garden. Whether you need to apply fertilizers, pesticides, herbicides, or even just water delicate seedlings, a sprayer ensures even and efficient coverage. For many new gardeners, these devices can seem a bit intimidating. With pumps, nozzles, and various solutions to mix, it’s easy to feel unsure where to begin. This guide is here to demystify the process.
We will walk you through everything you need to know, from selecting the right sprayer and solution to the final cleanup. Learning the correct technique for how to use a garden sprayer tasks will not only save you time and effort but also protect your plants and ensure you get the best possible results. This comprehensive walkthrough will give you the confidence to tackle any spraying job like a seasoned pro, turning a potentially confusing task into a simple and effective part of your gardening routine.
8 Step-by-Step Guide on How to Use a Garden Sprayer
Step 1: Choose the Right Sprayer
The first step is selecting a sprayer that suits your garden’s size and your specific needs. For small jobs like tending to a few container plants or spot-treating weeds, a simple handheld trigger sprayer might be sufficient. These are typically small, holding a quart or less, and operate with a simple squeeze handle. For medium-sized gardens, a one- or two-gallon pump sprayer is a popular choice.
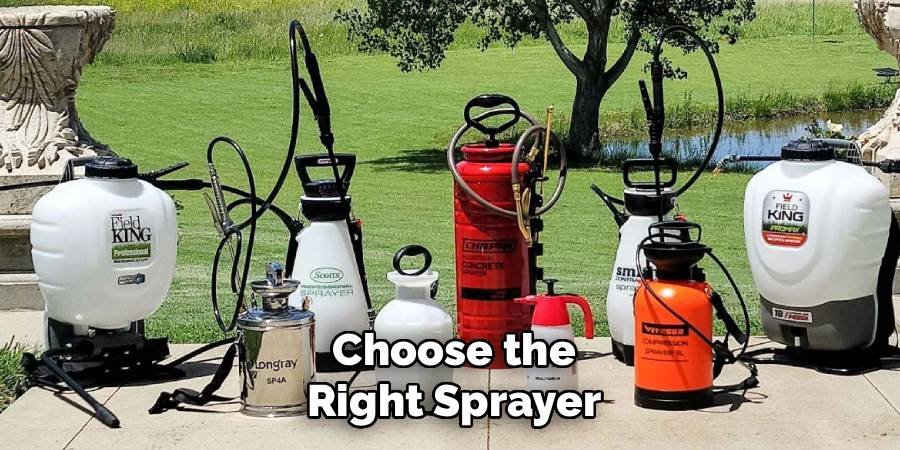
These models have a tank that you pressurize by pumping a handle, allowing for continuous spraying without constant effort. For larger properties, a backpack sprayer is ideal. These can hold four or more gallons and are worn on your back, making it much easier to cover extensive areas without frequent refills. Consider the types of solutions you plan to use; some chemicals may require sprayers with specific seals or materials to prevent corrosion.
Step 2: Read the Safety and Product Labels
Before you mix or spray anything, your most important task is to thoroughly read all labels. This includes the instructions for your garden sprayer and, critically, the label on the product you intend to apply, whether it’s an insecticide, fungicide, or fertilizer. The product label is a legal document that provides vital information on proper mixing ratios, application methods, and required personal protective equipment (PPE).
It will specify what gear you need, which often includes safety glasses or goggles, chemical-resistant gloves, long sleeves, long pants, and closed-toe shoes. Ignoring these guidelines can pose risks to your health, your plants, and the surrounding environment. The label will also tell you the best time of day to spray and under what weather conditions to avoid drift and maximize effectiveness.
Step 3: Prepare Your Spraying Solution
Once you understand the safety requirements, it’s time to mix your solution. Always mix chemicals in a well-ventilated area, preferably outdoors. Start by filling your sprayer tank about halfway with water. This prevents foaming and ensures the concentrate mixes evenly. Next, carefully measure the required amount of the product concentrate using a dedicated measuring cup—never use one from your kitchen.
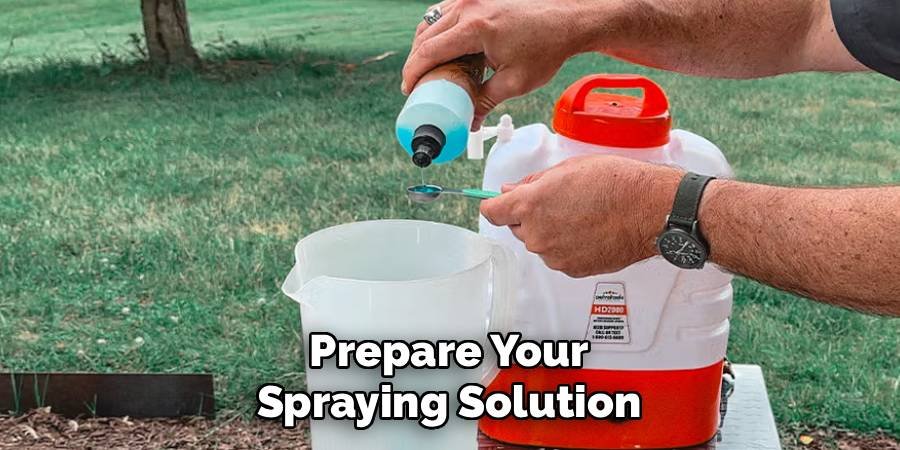
Pour the measured concentrate into the tank. Then, add the remaining amount of water to reach the final desired volume as specified by the product label. Secure the lid tightly on the sprayer tank. Once it’s sealed, gently shake the sprayer for a minute or two to ensure the concentrate and water are completely mixed. For pump sprayers, do not pressurize the tank until after the solution is fully mixed.
Step 4: Pressurize the Sprayer
With your solution mixed and the lid sealed, you can pressurize the tank. For pump-style sprayers, this involves using the handle at the top. Place the sprayer on a stable, level surface. Unlock the pump handle if necessary, then push and pull it up and down in smooth, steady strokes. You will start to feel resistance as the pressure builds inside the tank. Most sprayers require about 10 to 20 pumps to reach optimal pressure.
Be careful not to over-pressurize, as this can damage the seals or create a safety hazard. Some models have a pressure relief valve that will hiss when the maximum pressure is reached. Once pressurized, you can lock the handle back in place. For backpack sprayers, the pump handle is usually located on the side for easy pumping while you wear it.
Step 5: Test and Adjust the Nozzle
Before you start spraying your plants, it’s wise to perform a quick test on a patch of bare ground, a driveway, or a piece of cardboard. This allows you to check the spray pattern and make any necessary adjustments to the nozzle. Most garden sprayers come with an adjustable nozzle that can be twisted to change the spray from a fine mist to a direct stream. A fine mist is ideal for broad coverage of foliage when applying insecticides or fungicides.
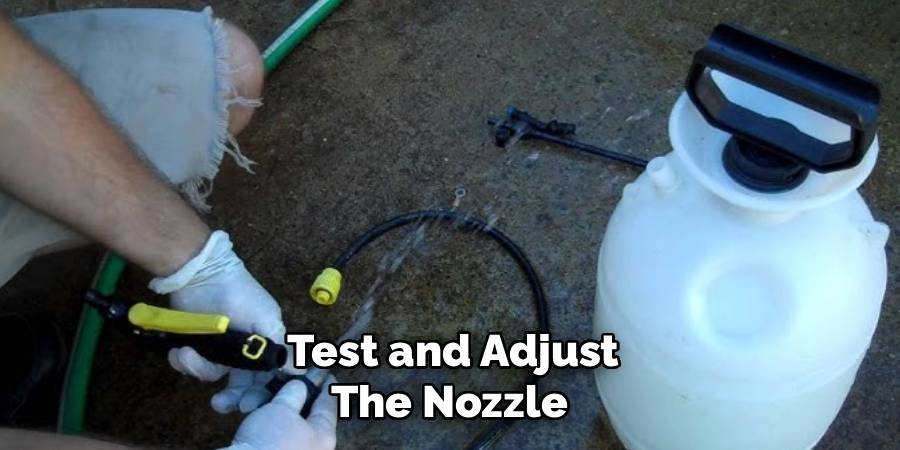
A coarser, more direct stream is better for spot-treating weeds at the base or targeting specific pests, as it minimizes drift onto desirable plants. Point the wand away from you and squeeze the trigger. Observe the pattern and adjust the nozzle until you achieve the desired spray type for your specific application. This test also confirms the sprayer is working correctly before you walk over to your prized plants.
Step 6: Apply the Solution Evenly
Now you are ready to spray. When applying the solution to plants, aim for complete and even coverage. Hold the nozzle about 12 to 18 inches away from the foliage. Begin spraying, moving the wand in a steady, sweeping motion. Make sure you cover all parts of the plant, including the tops and undersides of the leaves, where many pests and diseases tend to hide. Spray until the leaves are wet, but stop just before the point of runoff—when the liquid starts dripping off the leaves.
Over-applying is wasteful and can sometimes harm the plant or lead to excess chemicals in the soil. Pay close attention to the weather. It is best to spray on a calm, cool, and overcast day to prevent the solution from evaporating too quickly or drifting onto non-target areas. Avoid spraying in direct sunlight or during the hottest part of the day, as this can cause the leaves to burn.
Step 7: Depressurize and Clean the Sprayer
Proper cleaning after each use is the most critical step for maintaining your sprayer and ensuring its longevity. First, release any remaining pressure in the tank. Most sprayers have a pressure relief valve for this purpose; if yours doesn’t, point the wand in a safe direction and spray until the pressure is gone, then slowly and carefully unscrew the pump handle. Empty any leftover solution according to the product label’s disposal instructions—never pour it down a drain or into a storm sewer.

Rinse the tank thoroughly with clean water, then fill it about one-third full with more clean water. Reseal and pressurize the sprayer, then spray the clean water through the hose, wand, and nozzle for at least a minute to flush out any chemical residue. This prevents cross-contamination between products and stops dried chemicals from causing clogs.
Step 8: Store Your Sprayer Properly
After a thorough cleaning, your final task is to store the sprayer correctly. Disassemble the main components—the tank, hose, wand, and nozzle—if your model allows. This helps everything dry completely and prevents moisture from getting trapped, which could lead to mold growth or degradation of the seals. Leave the pump assembly out of the tank to allow air to circulate and dry the interior.
Store all parts indoors in a shed, garage, or utility closet where they will be protected from direct sunlight and freezing temperatures. UV rays can degrade the plastic tank over time, and freezing water can crack the tank and other components. Proper storage keeps your equipment in top condition, ensuring it’s ready to go the next time you need it.
Frequently Asked Questions
1. What is the best time of day to spray my garden?
The ideal time to spray is early in the morning or late in the evening when temperatures are cool, the wind is calm, and there is no direct sunlight. This prevents the spray from evaporating too quickly, reduces the risk of burning plant leaves, and minimizes wind drift.
2. Can I use the same sprayer for both herbicides and fertilizers?
It is highly recommended to use separate, clearly labeled sprayers for herbicides (weed killers) and other products like fertilizers or insecticides. Even with thorough cleaning, trace amounts of herbicide can remain and harm or kill your desirable plants during the next application.
3. How do I unclog a sprayer nozzle?
First, depressurize the tank and remove the nozzle. Try soaking it in warm, soapy water and then use a small brush or a fine wire to gently clear the opening. For stubborn clogs, you may need to disassemble the nozzle completely and clean each part individually before reassembling.
4. How often should I pump my sprayer?
You will need to periodically pump the handle to maintain consistent pressure as you spray. You’ll notice the spray pattern weakening as the pressure drops. A few pumps every couple of minutes are usually enough to keep the pressure at an optimal level for a consistent application.
5. Is it safe to spray on a windy day?
No, you should avoid spraying on windy days. Wind can cause the spray to drift onto other plants you don’t want to treat, your neighbor’s property, or into areas where it could harm pets or wildlife. Always wait for a calm day to ensure the spray only goes where you intend.
Conclusion
Mastering how to use a garden Sprayer applications is a straightforward skill that elevates your ability to care for your plants. By following these steps, you can confidently and safely apply any treatment your garden requires. The key is preparation: always read the labels, wear your protective gear, and mix your solutions carefully. Proper application technique ensures every leaf gets the coverage it needs without waste or damage.
Finally, remember that cleaning and storing your equipment correctly is just as important as the spraying itself, as it guarantees your sprayer will be reliable for years to come. With this knowledge, you are well-equipped to protect and nourish your garden, ensuring it remains a healthy and beautiful space. Your plants will thank you for the precise and gentle care a sprayer provides.
About Ravuk Barg
B.Sc. Horticulture Science | Certified Master Gardener
Ravuk Barg has spent more than a decade with his hands in the soil and his head full of questions about why some gardens thrive while others struggle. What started as a single raised bed of tomatoes and basil in a modest backyard has grown into a deep, working knowledge of everything from seed germination and soil amendment to companion planting and seasonal pruning.
Over the years, Ravuk has gardened through drought summers, waterlogged springs, and pest invasions that would make most gardeners hang up their trowels for good. Those hard seasons, he’ll tell you, taught him more than any perfect growing year ever could. He writes from that earned experience—covering vegetable growing, ornamental planting, houseplant care, composting, and garden design with equal confidence and curiosity.
Philosophy & Approach
Ravuk’s approach to gardening is rooted in practicality. He favors organic methods not out of dogma, but because they work long-term—resulting in healthier soil, fewer inputs, and stronger plants. He has a particular fondness for heirloom vegetable varieties (the kind with proper flavor), unruly cottage-style flower beds, and the stubborn houseplants that everyone else gave up on.
The Mission: Give readers the honest, experience-backed advice that helps them actually succeed in their gardens—not just the ideal version, but the real one; weeds, failures, and all.
Education & Credentials
-
B.Sc. in Horticulture Science
-
Greenfield Agricultural University
-
Focus: Plant Physiology, Soil Ecology, and Sustainable Crop Production
-
-
Master Gardener Certification
-
Cooperative Extension Service
-
Focus: 200+ hours of hands-on practical training and community garden work
-
Continuing Education
-
Organic Pest Management
-
Native Plant Landscaping
-
Sustainable Crop Production