

A lush, green lawn is more than just grass; it’s a living carpet that enhances your home’s curb appeal and provides a beautiful space for relaxation and play. Many homeowners dream of having a perfect lawn but feel overwhelmed by the process. You might look at your patchy, weed-filled yard and wonder where to even begin. The good news is that achieving a vibrant, healthy lawn is entirely possible with the right approach and a little bit of effort.

This guide is designed for beginners, providing clear, actionable steps on how to transform your lawn from a source of frustration into a source of pride. We will walk you through everything from assessing your soil to establishing a consistent maintenance routine, ensuring you have all the knowledge needed to create the outdoor oasis you’ve always wanted.
Why Transforming Your Lawn Matters
Beyond just looking nice, a healthy lawn offers numerous benefits for both your property and the environment. A thick, well-maintained turf acts as a natural filter, trapping dust and pollutants from the air and improving overall air quality. Its root system helps prevent soil erosion by holding the earth in place, which is particularly important on slopes or in areas with heavy rainfall.
A beautiful lawn also significantly increases your property’s value. It creates an inviting first impression and extends your living space outdoors, offering a safe and comfortable area for children, pets, and social gatherings. Furthermore, the process of nurturing your lawn can be a rewarding hobby, connecting you with nature and providing a sense of accomplishment. A transformed lawn isn’t just an aesthetic upgrade; it’s an investment in your home, your well-being, and the local ecosystem.
8 Step-by-Step Guide on How to Transform Your Lawn
Step 1: Assess Your Current Lawn and Soil
The first step in any successful lawn transformation is to understand what you’re working with. Take a close look at your yard. Identify the types of weeds present, note any bare or thinning patches, and check for signs of disease or pests. Next, you need to test your soil. You can purchase a simple DIY soil test kit or send a sample to a local cooperative extension for a more detailed analysis. This test will reveal your soil’s pH level and nutrient deficiencies. Understanding your starting point is crucial for choosing the right treatments and amendments to create a healthy foundation for new growth.

Step 2: Remove Weeds and Unwanted Growth
Before you can build a new lawn, you must clear out the old, unwanted growth. For a few scattered weeds, hand-pulling is effective. For widespread weed problems, a selective or non-selective herbicide may be necessary. A selective herbicide targets specific weeds without harming the grass, while a non-selective one will kill all vegetation it touches. Always read and follow the product instructions carefully. For a more organic approach, you can smother weeds with cardboard or use a vinegar-based solution. Removing this competition gives your future grass seeds the best chance to thrive without fighting for water and nutrients.
Step 3: Aerate and Dethatch Your Lawn
Compacted soil and a thick layer of thatch can prevent water, air, and nutrients from reaching the grass roots. Thatch is the layer of dead grass, roots, and other organic matter that accumulates between the soil surface and the green grass blades. If this layer is more than half an inch thick, it needs to be removed. You can rent a power rake or dethatcher for this job. After dethatching, it’s time to aerate. Core aeration involves pulling small plugs of soil from the lawn, which reduces compaction and allows the root system to breathe and grow deeper. This is one of the most beneficial things you can do for your lawn’s health.

Step 4: Amend the Soil Based on Test Results
With your soil test results in hand, you can now correct any imbalances. If your soil is too acidic (low pH), you will need to add lime to raise the pH. If it’s too alkaline (high pH), adding sulfur or organic matter like peat moss can help lower it. The test will also indicate which nutrients are lacking, such as nitrogen, phosphorus, or potassium. You can apply a slow-release fertilizer that is formulated to address these specific deficiencies. Spreading a thin layer of high-quality compost over your lawn is another excellent way to add rich organic matter and improve soil structure, creating a nutrient-dense environment for new grass.
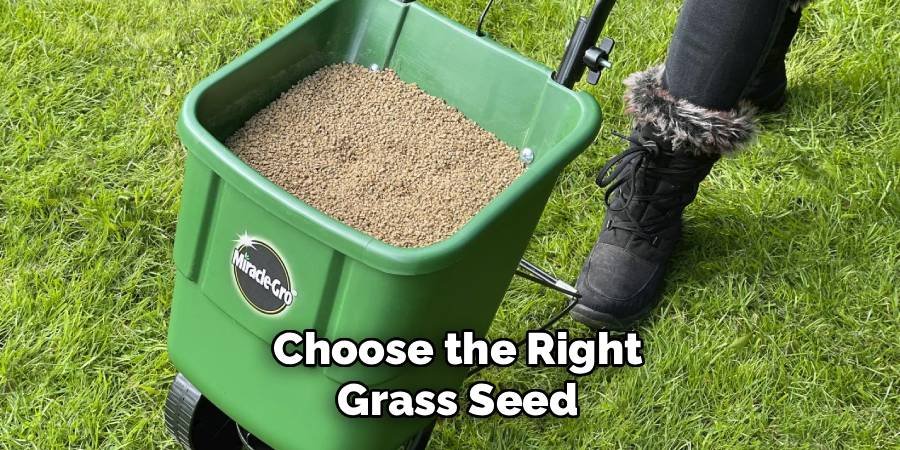
Step 5: Choose the Right Grass Seed
Selecting the right type of grass seed is critical for long-term success. Your choice should be based on your climate, the amount of sun or shade your yard receives, and how you plan to use your lawn. Cool-season grasses like Kentucky bluegrass, fescue, and ryegrass thrive in regions with cold winters and hot summers. Warm-season grasses such as Bermuda, Zoysia, and St. Augustine are better suited for areas with mild winters and hot summers. Many seed products are a blend of different grass types, offering a more resilient and versatile lawn. Don’t hesitate to ask for advice at your local garden center.
Step 6: How to Transform Your Lawn by Seeding and Fertilizing
Now it’s time to plant your new lawn. For the most even distribution, use a broadcast or drop spreader to apply the seed. Follow the recommended seeding rate on the packaging—applying too much seed can lead to weak, overcrowded seedlings that compete for resources. After seeding, apply a starter fertilizer. These fertilizers are specially formulated with a higher phosphorus content to promote strong root development. Applying seed and starter fertilizer together ensures your new grass has everything it needs to germinate and establish itself quickly, which is a key part of how to transform your lawn.
Step 7: Water Your New Lawn Consistently
Water is essential for seed germination and early growth. For the first few weeks, you will need to water the newly seeded area lightly but frequently, perhaps once or twice a day. The goal is to keep the top inch of soil consistently moist but not waterlogged. Once the grass seedlings have emerged and grown to about an inch tall, you can gradually reduce the frequency of watering while increasing the duration. This encourages the roots to grow deeper into the soil in search of water, which will make the lawn more drought-tolerant in the long run.
Step 8: Mow High and Mow Often
Your first mow is a significant milestone. Wait until the new grass reaches about 3 to 4 inches in height. For this first cut, set your mower to its highest setting and only trim the top third of the grass blades. Mowing high helps the grass develop a deep, strong root system and shades the soil, which helps prevent weed seeds from sprouting. Make sure your mower blade is sharp; a dull blade tears the grass, leaving it vulnerable to disease. Continue to mow regularly, never removing more than one-third of the blade height at a time.

Frequently Asked Questions
What Is the Best Time of Year to Start a Lawn Transformation?
The best time depends on your climate and the type of grass you are planting. For cool-season grasses (like fescue and bluegrass), early fall is ideal. The soil is still warm from the summer, which encourages germination, while the cooler air temperatures reduce stress on the young grass. Spring is the second-best option. For warm-season grasses (like Bermuda and Zoysia), the best time to plant is late spring or early summer when temperatures are consistently warm.
How Long Does It Take to See Results?
You can expect to see the first signs of germination within 7 to 21 days, depending on the grass type and weather conditions. With consistent watering and care, you should have a visibly fuller lawn in about 4 to 6 weeks. However, a complete transformation into a dense, mature, and resilient lawn can take a full growing season or even up to a year. Patience and consistent care are key.
Should I Use Seed or Sod for My New Lawn?
Both seed and sod have their pros and cons. Seeding is much more affordable and offers a wider variety of grass types to choose from. However, it requires more time and initial care to establish. Sod provides an “instant lawn” and is great for preventing soil erosion on slopes. On the downside, sod is significantly more expensive and offers fewer grass choices. Your decision will depend on your budget, timeline, and specific needs.
How Do I Deal With Pests and Diseases in My New Lawn?
The best defense against pests and diseases is a healthy, thriving lawn. Proper mowing, watering, and fertilizing make your grass less susceptible to problems. If you do notice signs of trouble, such as brown patches or visible insects, it’s important to identify the specific issue correctly before applying any treatment. You can take a sample or a photo to your local garden center for diagnosis. Use targeted pesticides or fungicides only when necessary, and always follow the label directions.
Can I Transform My Lawn Organically?
Yes, an organic lawn transformation is entirely possible. It involves using natural products and methods instead of synthetic chemicals. You can control weeds by hand-pulling or using corn gluten meal as a pre-emergent. Improve soil health with compost and other organic amendments. Use natural, slow-release fertilizers like bone meal or blood meal. While an organic approach may require more patience and effort, it creates a safe, chemical-free environment for your family and pets.
Conclusion
Creating a beautiful, healthy lawn is a journey, not a destination. By following these steps—from assessing your soil and removing weeds to choosing the right seed and establishing a proper care routine—you are building a strong foundation for a yard that will flourish for years to come. Remember that consistency is crucial. Regular mowing, appropriate watering, and seasonal feeding will keep your turf looking its best. Now that you understand how to transform your lawn, you have the power to turn your vision into a reality. Embrace the process, and soon you’ll be enjoying the lush, green results of your hard work.
About Ravuk Barg
B.Sc. Horticulture Science | Certified Master Gardener
Ravuk Barg has spent more than a decade with his hands in the soil and his head full of questions about why some gardens thrive while others struggle. What started as a single raised bed of tomatoes and basil in a modest backyard has grown into a deep, working knowledge of everything from seed germination and soil amendment to companion planting and seasonal pruning.
Over the years, Ravuk has gardened through drought summers, waterlogged springs, and pest invasions that would make most gardeners hang up their trowels for good. Those hard seasons, he’ll tell you, taught him more than any perfect growing year ever could. He writes from that earned experience—covering vegetable growing, ornamental planting, houseplant care, composting, and garden design with equal confidence and curiosity.
Philosophy & Approach
Ravuk’s approach to gardening is rooted in practicality. He favors organic methods not out of dogma, but because they work long-term—resulting in healthier soil, fewer inputs, and stronger plants. He has a particular fondness for heirloom vegetable varieties (the kind with proper flavor), unruly cottage-style flower beds, and the stubborn houseplants that everyone else gave up on.
The Mission: Give readers the honest, experience-backed advice that helps them actually succeed in their gardens—not just the ideal version, but the real one; weeds, failures, and all.
Education & Credentials
-
B.Sc. in Horticulture Science
-
Greenfield Agricultural University
-
Focus: Plant Physiology, Soil Ecology, and Sustainable Crop Production
-
-
Master Gardener Certification
-
Cooperative Extension Service
-
Focus: 200+ hours of hands-on practical training and community garden work
-
Continuing Education
-
Organic Pest Management
-
Native Plant Landscaping
-
Sustainable Crop Production