

As the gardening season winds down and the chill of autumn sets in, you might find yourself with pots and containers full of used soil. It can be tempting to just toss it out, but what if you could save it for next year? Reusing your potting mix is an excellent way to save money and reduce waste.
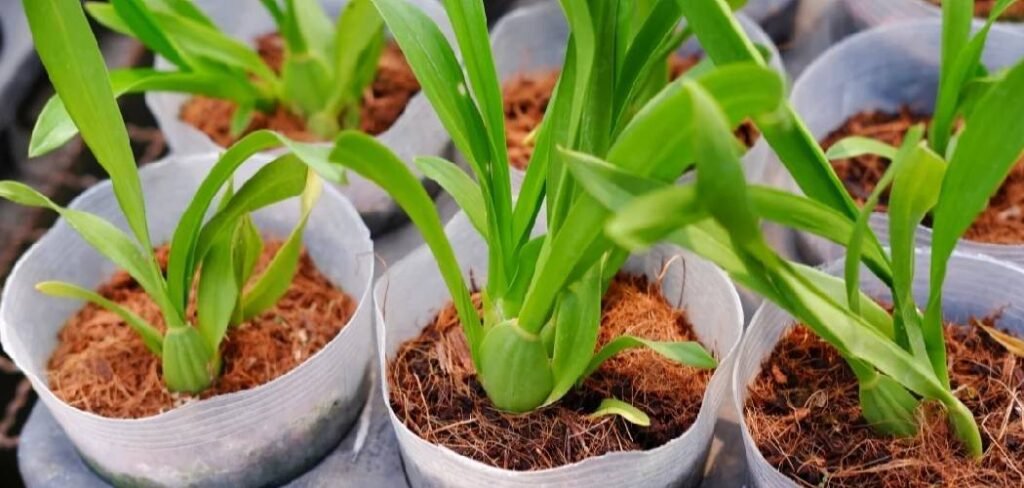
However, you can’t just leave the pots outside and hope for the best.Learning how to store used potting soil over winter is a simple process that ensures your soil remains healthy and ready for spring planting.This guide will walk you through everything you need to know, from clearing out old plant matter to refreshing the soil for a new season of growth.
Why Storing Used Potting Soil Matters
Properly storing your used potting soil is more than just a matter of convenience; it’s a crucial step for the health of your future garden. When left exposed to the elements, soil can become a breeding ground for pests, diseases, and fungal spores. Freezing and thawing cycles can also degrade the soil’s structure, turning it into a dense, compacted block that offers poor drainage and aeration for new roots.
By taking the time to store your soil correctly, you are actively protecting your investment. You prevent the spread of pathogens like powdery mildew or root rot that may have affected last season’s plants. Furthermore, this process allows you to amend and rejuvenate the soil, replenishing nutrients that were depleted. A well-stored batch of soil gives your new plants a clean, healthy, and nutrient-rich start, setting them up for vigorous growth when spring arrives. It’s an economical and sustainable practice that every gardener can benefit from.
7 Step-by-Step Guide: How to Store Used Potting Soil Over Winter
Follow these simple steps to ensure your potting mix is safe, clean, and ready for another successful growing season.
Step 1: Remove Old Plant Material
Before you can store your soil, you must thoroughly clean it. Start by pulling out all the old plants from your pots, making sure to get the entire root ball. It’s important to be meticulous during this stage. Any lingering roots, stems, or leaves can decompose over the winter and become a source of disease or attract pests
If your plants suffered from any fungal issues or pest infestations, it is especially critical to remove every trace. Shake as much soil as possible from the root balls back into the container, and discard the plant debris in your compost or green waste bin.
Step 2: Sift the Soil for Debris
Once the large plant matter is gone, it’s time to sift the soil. This step helps remove smaller roots, rocks, clumps, and any stowaway pests like grubs or beetle larvae. You can use a dedicated soil sieve or create a DIY version by stretching hardware cloth or chicken wire over a wooden frame. Pour the soil through the sieve over a wheelbarrow or a large tarp. This process not only cleans the soil but also aerates it, breaking up compacted sections and improving its texture. A fine, well-sifted soil is much easier to work with and provides a better environment for new roots next spring.
Step 3: Sterilize the Soil (Optional but Recommended)
Sterilizing the soil is a key step to eliminate any lingering pathogens, weed seeds, or insect eggs. There are several ways to do this. One popular method is solarization. Moisten the soil, place it in a clear plastic bag or spread it thinly on a plastic sheet in a sunny location. Seal it up and let the sun’s heat bake it for four to six weeks. For a quicker method, you can bake small batches in your oven. Spread the soil on a baking sheet, cover it with foil, and heat it at 180-200°F (82-93°C) for about 30 minutes. Be warned, this can create an earthy smell in your home.
Step 4: Dry the Soil Completely
Moisture is the enemy when it comes to long-term soil storage. Damp soil can encourage mold, mildew, and fungal growth, ruining your efforts. After sifting and sterilizing, you must let the soil dry out completely. Spread it in a thin layer on a tarp or concrete slab in a sheltered, dry location like a garage, shed, or covered patio. Turn the soil with a rake or shovel every day or two to expose all parts to the air. The soil is ready for storage when it feels light, crumbly, and completely dry to the touch. This process may take several days, depending on your climate and humidity levels.
Step 5: Choose the Right Storage Container
Now that your soil is clean and dry, it’s time to pack it away. The ideal storage container will protect the soil from moisture and pests. Options include sturdy plastic bins with tight-fitting lids, breathable burlap sacks, or heavy-duty plastic bags. Avoid containers that aren’t airtight or durable, as they can let in water or be chewed through by rodents. If you are reusing the original pots, make sure to wash them thoroughly with soap and water, followed by a rinse with a 10% bleach solution to kill any pathogens before refilling them with the dry soil.
Step 6: Label and Store in a Sheltered Location
Organization will save you a headache next spring. Clearly label each container with the date and the type of soil if you have different mixes. This is especially helpful if you’ve already amended some batches but not others. Store the containers in a dry, protected location where they won’t be exposed to rain or snow. A garage, basement, or garden shed is perfect. Stacking bins can save space, but make sure they are sealed tightly to prevent any moisture from seeping in from the floor. Proper storage ensures your soil remains dormant and safe until you’re ready to use it again.
Step 7: Rejuvenate the Soil Before Planting
When spring returns and you’re ready to plant, your stored soil will need a boost. Over the previous season, plants used up many of the available nutrients. Before using the soil, dump it into a wheelbarrow or onto a tarp and mix in fresh amendments. Add a generous amount of compost, aged manure, or worm castings to reintroduce organic matter and beneficial microbes.
You can also mix in a slow-release granular fertilizer to provide essential nutrients for your new plants. Perlite or vermiculite can be added to improve drainage and aeration, giving your soil the perfect structure for a new season of healthy growth.
Maintenance and Care
Proper maintenance and care are essential for ensuring your garden thrives throughout the growing season. Regularly check your plants for signs of pests or diseases, and take immediate action to prevent them from spreading. Water your garden consistently, keeping in mind the specific needs of each plant; some may require more frequent watering, while others thrive with minimal moisture.
Mulching around the base of your plants can help retain soil moisture, regulate temperature, and suppress weed growth. Periodic pruning of dead or overgrown foliage will keep your plants healthy and encourage new growth. Remember to reapply fertilizers as needed, following the recommended schedule, to ensure your plants receive a steady supply of nutrients. With consistent care, your garden will flourish beautifully.
Common Mistakes to Avoid
When preparing your soil for planting, there are a few common mistakes that can hinder the success of your garden. One major error is over-tilling the soil. While aeration is essential, excessive tilling can break down soil structure and lead to compaction over time. Another frequent mistake is neglecting to test soil pH and nutrient levels.
Without this crucial information, it’s easy to over-fertilize or under-fertilize, which could harm your plants. Additionally, avoid using fresh manure directly in your soil as it can burn plant roots and introduce unwanted pathogens. Lastly, skipping the step of incorporating organic matter can result in nutrient-poor soil that struggles to sustain healthy plant growth. By addressing these pitfalls, you can set your garden up for a season of vibrant, thriving plants.
Frequently Asked Questions
Can I Leave Used Soil in Pots Outside Over Winter?
It is generally not recommended. Leaving soil in pots outside exposes it to harsh weather, which can lead to:
- Compaction: Freeze-thaw cycles destroy soil structure, making it dense.
- Disease: Lingering plant material can rot and harbor pathogens.
- Pests: Soil can become a winter home for insects and their eggs.
Storing it properly in a sheltered location preserves its quality for the next season.
What’s the Best Way to Revive Old Potting Soil?
To revive old potting soil, you need to replenish its nutrients and improve its structure. Start by mixing in a healthy amount of organic matter, such as compost or worm castings, which adds nutrients and beneficial microbes. Then, consider adding a balanced, slow-release fertilizer to feed your new plants. To improve drainage and aeration, mix in materials like perlite, pumice, or coarse sand. This process transforms depleted soil into a rich, healthy medium for your plants.
Is It Safe to Reuse Soil from Diseased Plants?
Reusing soil from diseased plants is risky, but it can be done with caution. If you choose to reuse it, sterilization is not optional—it’s essential. You must heat the soil thoroughly, either through solarization (using the sun’s heat under plastic for 4-6 weeks) or by baking it in an oven at 180°F for at least 30 minutes. This process kills most harmful pathogens, fungal spores, and bacteria. However, for severe infections like late blight or root rot, it’s often safer to discard the soil entirely.
How Many Times Can I Reuse Potting Soil?
With proper care and amendment, you can reuse potting soil for several years. The key is to rejuvenate it each season. After two or three years, you may notice the soil’s structure breaking down, becoming finer and more compacted. At this point, it’s a good idea to mix it into your garden beds or a larger compost pile and start with a fresh batch for your containers. By continually adding fresh compost and other amendments, you can significantly extend its lifespan.
What Should I Add to Old Potting Soil in the Spring?
When refreshing your stored soil in the spring, focus on adding three key components:
- Organic Matter: Mix in about one-third compost, leaf mold, or aged manure to restore soil life and structure.
- Nutrients: Incorporate a balanced, all-purpose granular fertilizer to provide essential food for plants.
- Aeration: Add perlite or vermiculite to keep the soil light and improve drainage, which is crucial for healthy root development in containers.
Conclusion
Taking the time to properly prepare your potting mix for the cold months is a rewarding task that pays dividends in the spring. By following these steps, you not only save money and reduce waste but also give your future plants a significant advantage with a clean, well-aerated, and nutrient-rich growing medium.
It might seem like an extra chore at the end of a long season, but mastering how to store used potting soil over winter is a sustainable practice that will make you a more resourceful and successful gardener. When planting season rolls around, you’ll be glad you made the effort.
About Ravuk Barg
B.Sc. Horticulture Science | Certified Master Gardener
Ravuk Barg has spent more than a decade with his hands in the soil and his head full of questions about why some gardens thrive while others struggle. What started as a single raised bed of tomatoes and basil in a modest backyard has grown into a deep, working knowledge of everything from seed germination and soil amendment to companion planting and seasonal pruning.
Over the years, Ravuk has gardened through drought summers, waterlogged springs, and pest invasions that would make most gardeners hang up their trowels for good. Those hard seasons, he’ll tell you, taught him more than any perfect growing year ever could. He writes from that earned experience—covering vegetable growing, ornamental planting, houseplant care, composting, and garden design with equal confidence and curiosity.
Philosophy & Approach
Ravuk’s approach to gardening is rooted in practicality. He favors organic methods not out of dogma, but because they work long-term—resulting in healthier soil, fewer inputs, and stronger plants. He has a particular fondness for heirloom vegetable varieties (the kind with proper flavor), unruly cottage-style flower beds, and the stubborn houseplants that everyone else gave up on.
The Mission: Give readers the honest, experience-backed advice that helps them actually succeed in their gardens—not just the ideal version, but the real one; weeds, failures, and all.
Education & Credentials
-
B.Sc. in Horticulture Science
-
Greenfield Agricultural University
-
Focus: Plant Physiology, Soil Ecology, and Sustainable Crop Production
-
-
Master Gardener Certification
-
Cooperative Extension Service
-
Focus: 200+ hours of hands-on practical training and community garden work
-
Continuing Education
-
Organic Pest Management
-
Native Plant Landscaping
-
Sustainable Crop Production