

Creating a thriving garden without disturbing the soil might seem counterintuitive, but learning how to start no till garden transforms your approach to sustainable cultivation. This method works with nature’s systems rather than against them, preserving beneficial microorganisms and earthworms that create rich, fertile soil.
While traditional gardening relies on tilling to prepare beds, no-till methods focus on building soil through organic matter and natural processes. Vermicomposting plays a crucial role here—these hardworking worms break down kitchen waste into nutrient-rich castings that feed your plants naturally. The worms create tunnels that improve drainage and aeration without mechanical disruption.
Your garden becomes a living ecosystem where beneficial bacteria, fungi, and earthworms work together. This approach reduces labor, conserves moisture, and creates healthier soil over time. You’ll spend less time fighting weeds and more time enjoying abundant harvests.
The beauty of no-till gardening lies in its simplicity. You’re not fighting against natural soil processes—you’re enhancing them. This method builds carbon sequestration, improves water retention, and creates habitat for beneficial insects and soil creatures that make your garden thrive.
Why You Need to Start No-Till Gardening
Traditional tilling disrupts the intricate web of soil life that takes years to develop. Each time you turn the earth, you’re destroying fungal networks, killing beneficial microorganisms, and bringing weed seeds to the surface where they can germinate.
No-till gardening preserves these vital soil relationships. Mycorrhizal fungi form partnerships with plant roots, extending their reach and improving nutrient uptake. These networks can’t function when constantly disrupted by mechanical cultivation.
Your soil structure improves dramatically without tilling. Earthworms and other soil creatures create natural channels for water and air movement. These biological pathways work better than any mechanical aeration tool.
Water retention increases significantly in no-till systems. Organic matter holds moisture like a sponge, reducing irrigation needs by up to 50%. This saves time, money, and conserves precious water resources during dry spells.
8 Step Methods Guide on How to Start No Till Garden
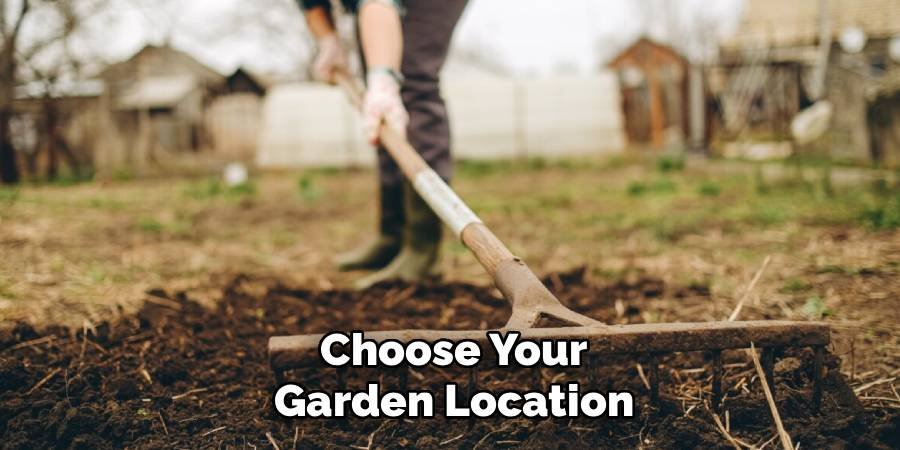
Step 1: Choose Your Garden Location
Start by selecting the perfect location for your no-till garden. Look for a spot that receives at least 6-8 hours of direct sunlight daily, as most vegetables and flowers thrive in sunny conditions. Additionally, consider accessibility to water for easy irrigation and proximity to your home for convenience. Ensure the area has good drainage to prevent waterlogging, and avoid spots heavily shaded by buildings or large trees. A well-chosen location lays the foundation for a productive no-till garden.
Step 2: Remove Existing Vegetation
To begin preparing your no-till garden, you’ll need to eliminate any existing vegetation in the chosen area. This can be achieved by smothering the grass and weeds using a technique called sheet mulching. Start by laying down a thick layer of cardboard or newspaper, ensuring it overlaps to block sunlight completely. Wet the material to keep it in place and accelerate decomposition. Cover this layer with organic material, such as compost or mulch, to hold it down and enrich the soil underneath. Over time, the vegetation will break down naturally, creating a fertile base for planting without disrupting the soil structure.
Step 3: Apply Cardboard Layer
Begin by collecting plain, unwaxed cardboard boxes or sheets that are free of any glossy finishes, tape, or staples. Carefully lay the cardboard over the area you wish to prepare, ensuring there are no gaps. Overlap the edges by a few inches to completely block sunlight, which prevents weeds from growing. Once the cardboard is in place, thoroughly wet it with water to help it adhere to the ground and start the decomposition process. This layer will act as a barrier to suppress unwanted vegetation while promoting healthy soil development beneath.
Step 4: Add Coarse Organic Matter
After securing the cardboard layer, spread a thick layer of coarse organic matter, such as straw, wood chips, or shredded bark, over the top. Aim for a depth of 3 to 4 inches to ensure adequate coverage. This layer provides insulation, retains moisture, and continues to suppress weeds, while gradually breaking down to enrich the soil. Be sure to distribute the material evenly, avoiding thick clumps that might restrict air and water flow to the ground below. This step is essential for fostering a nutrient-rich environment that promotes robust plant growth.
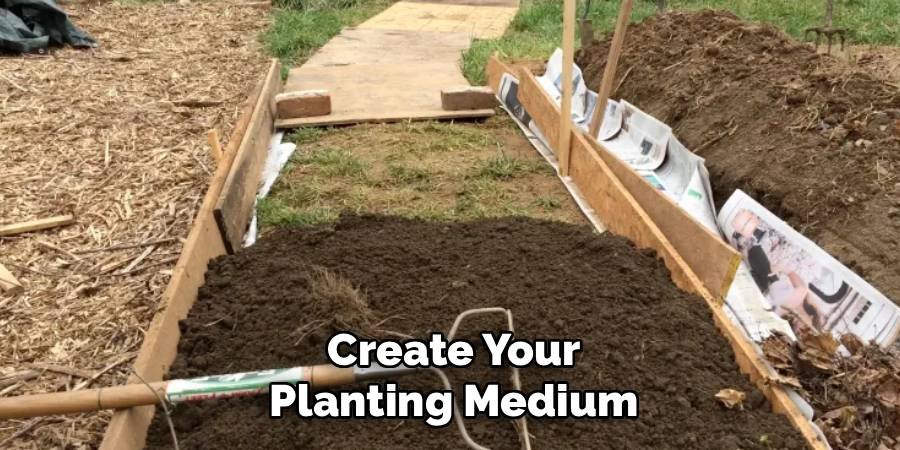
Step 5: Create Your Planting Medium
To ensure healthy plant growth, prepare a planting medium that suits the needs of the specific plants you intend to grow. Begin by loosening the soil with a garden fork or tiller, breaking up any large clumps to promote better drainage and root penetration. Consider mixing in compost or a balanced organic fertilizer to enrich the soil with essential nutrients. If your plants prefer a specific pH level, test the soil and make adjustments by incorporating materials like lime to raise pH or sulfur to lower it. For container gardening, opt for a high-quality potting mix that offers good aeration and water retention. A well-prepared planting medium lays the foundation for thriving, vigorous plants.
Step 6: Install Drip Irrigation or Soaker Hoses
Efficient watering is essential for healthy plants and water conservation. Installing a drip irrigation system or soaker hoses ensures that water is delivered directly to the roots where it is needed most, minimizing evaporation and runoff. For drip irrigation, position the emitters near the base of plants, and use a timer for consistent watering schedules. If you choose soaker hoses, weave them through your garden beds, ensuring even distribution of moisture. Both options are easy to set up and can be adjusted to meet the specific needs of your plants, making them an ideal solution for maintaining a sustainable and productive garden.
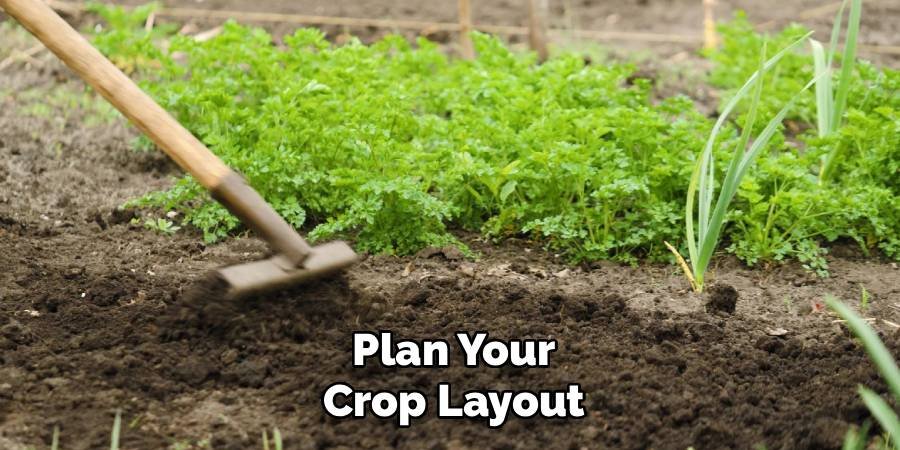
Step 7: Plan Your Crop Layout
A well-thought-out crop layout is essential for maximizing your garden’s productivity and efficiency. Begin by grouping plants with similar sunlight, water, and soil requirements to simplify maintenance. Consider crop rotation principles to prevent soil depletion and reduce the risk of pests and diseases. Tall plants like corn or sunflowers should be positioned in areas where they won’t cast shade over smaller, sun-loving crops. Additionally, take advantage of companion planting by pairing plants that benefit each other, such as tomatoes with basil or carrots with onions. Mapping out your garden layout ahead of time ensures optimal use of space and resources while promoting healthy plant growth.
Step 8: Start Planting
With your garden layout planned and soil prepared, it’s time to begin planting. Follow the specific planting instructions for each crop, paying attention to the recommended depth and spacing. Seeds should be sown at the correct depth to ensure proper germination, and seedlings should be transplanted gently to avoid damaging their roots. Water each plant thoroughly after planting to help them settle into the soil. For an organized and thriving garden, label your rows or sections with markers to keep track of what you’ve planted. Regularly monitor your garden as plants begin to grow, addressing any issues like pests or weeds early.
Maintaining Your No-Till Garden
Caring for a no-till garden requires consistent observation and thoughtful intervention. Start by keeping the soil covered with organic mulch, such as straw, leaves, or grass clippings, to retain moisture and suppress weeds. Avoid disturbing the soil structure, as the microbial activity within the undisturbed layers is crucial to plant health. If weeds emerge, pull them gently by hand to minimize any disruption to the soil.
Regularly water your garden, preferably early in the morning, to give plants the hydration they need while reducing evaporation. Incorporate natural compost or organic fertilizers to ensure the soil remains nutrient-rich without compromising its ecosystem. By practicing mindful and sustainable maintenance, your no-till garden can thrive throughout the growing season.
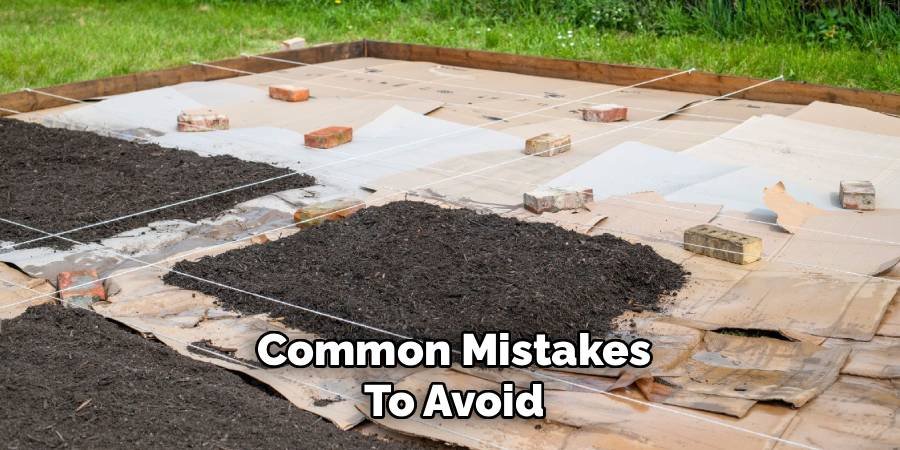
Common Mistakes to Avoid
When managing a no-till garden, it is important to be aware of some common pitfalls that can compromise its success. One major mistake is overwatering, which can lead to waterlogged soil and harm the delicate root systems of your plants. Another error is neglecting to add organic matter, as this can result in depleted nutrients and poor soil health over time.
Using chemical fertilizers or pesticides is also discouraged, as these can disrupt the natural soil ecosystem that no-till gardening aims to preserve. Additionally, failing to mulch properly—either by using incorrect materials or not applying enough—can leave the soil exposed to erosion and weed growth. By understanding these potential missteps, you can nurture a healthy and productive no-till garden while maintaining its ecological balance.
FAQ Frequently Asked Questions
How Long Does It Take to Establish a No-Till Garden?
Initial setup takes one weekend, but full soil development requires two to three years of consistent organic matter addition and minimal disturbance practices.
Can I Start No-Till Gardening in Any Season?
Fall installation works best, allowing winter decomposition time. Spring starts work too, but require longer establishment periods before planting desired crops.
What’s the Difference Between No-Till and Traditional Gardening Costs?
Initial setup costs more due to organic materials, but ongoing expenses decrease significantly through reduced soil amendments, water usage, and tool needs.
Do No-Till Gardens Produce as Much as Conventional Gardens?
Established no-till gardens typically produce higher yields due to improved soil health, water retention, and beneficial organism activity supporting plant growth.
How Do I Deal With Compacted Soil Without Tilling?
Organic matter addition and earthworm activity naturally break up compaction over time. Avoid walking on planting areas and use permanent pathways.
Conclusion
Learning how to start no till garden opens the door to sustainable, productive gardening that works with natural systems rather than against them. This method transforms your relationship with soil from something to be conquered into a living ecosystem to be nurtured and supported. The initial investment in organic materials and setup time pays dividends through reduced maintenance, improved harvests, and healthier soil that continues improving year after year. Your garden becomes a carbon sink that supports biodiversity while producing abundant food for your family.
Remember that no-till gardening is a process, not a destination. Each season brings new learning opportunities and improvements to your system. Start small, observe carefully, and expand your no-till areas as you gain experience and confidence in these natural methods. The soil creatures, beneficial insects, and thriving plants in your established no-till garden will demonstrate the power of working with nature’s processes. Your garden—and the entire ecosystem it supports—will thank you for choosing this sustainable approach to food production.
About Ravuk Barg
B.Sc. Horticulture Science | Certified Master Gardener
Ravuk Barg has spent more than a decade with his hands in the soil and his head full of questions about why some gardens thrive while others struggle. What started as a single raised bed of tomatoes and basil in a modest backyard has grown into a deep, working knowledge of everything from seed germination and soil amendment to companion planting and seasonal pruning.
Over the years, Ravuk has gardened through drought summers, waterlogged springs, and pest invasions that would make most gardeners hang up their trowels for good. Those hard seasons, he’ll tell you, taught him more than any perfect growing year ever could. He writes from that earned experience—covering vegetable growing, ornamental planting, houseplant care, composting, and garden design with equal confidence and curiosity.
Philosophy & Approach
Ravuk’s approach to gardening is rooted in practicality. He favors organic methods not out of dogma, but because they work long-term—resulting in healthier soil, fewer inputs, and stronger plants. He has a particular fondness for heirloom vegetable varieties (the kind with proper flavor), unruly cottage-style flower beds, and the stubborn houseplants that everyone else gave up on.
The Mission: Give readers the honest, experience-backed advice that helps them actually succeed in their gardens—not just the ideal version, but the real one; weeds, failures, and all.
Education & Credentials
-
B.Sc. in Horticulture Science
-
Greenfield Agricultural University
-
Focus: Plant Physiology, Soil Ecology, and Sustainable Crop Production
-
-
Master Gardener Certification
-
Cooperative Extension Service
-
Focus: 200+ hours of hands-on practical training and community garden work
-
Continuing Education
-
Organic Pest Management
-
Native Plant Landscaping
-
Sustainable Crop Production