

As the snow melts and the first signs of spring appear, your lawn will soon need its first cut of the season. After months of sitting idle, your lawn mower might be a bit stubborn. You pull the cord, and nothing happens. This is a common frustration for many homeowners, but it’s usually an easy fix.
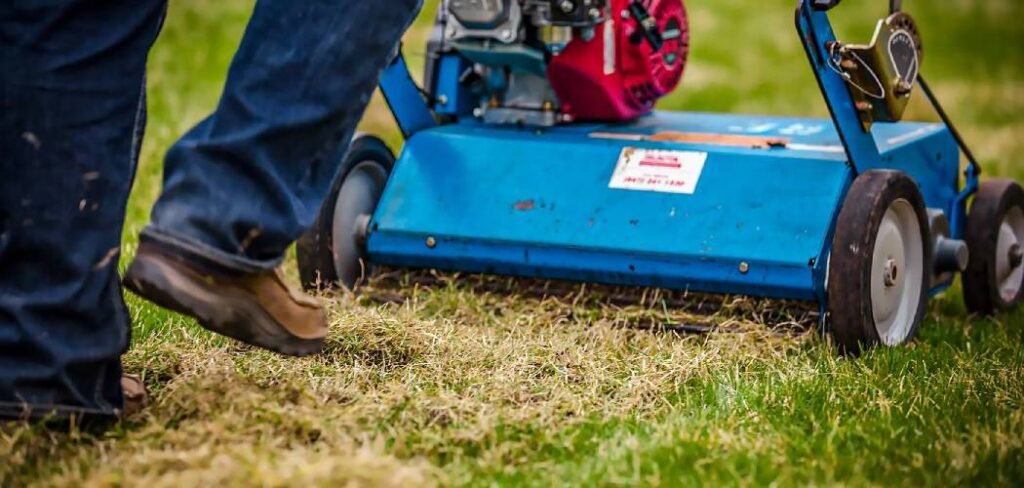
Understanding how to start lawn mower after winter is a valuable skill that saves you time, money, and a trip to the repair shop. This guide will walk you through the simple, pre-start checks and maintenance steps needed to get your machine running smoothly. With a little preparation, you can ensure your mower starts on the first or second pull, ready to tackle the season’s growth and keep your yard looking its best.
Why Prepping Your Mower After Winter is Crucial
Letting a lawn mower sit for several months can lead to a few predictable problems. The primary issue is old fuel. Gasoline can degrade in as little as 30 days, leaving behind gummy deposits that clog the carburetor and fuel lines. This is the number one reason a mower won’t start after storage. Additionally, spark plugs can become fouled, batteries can lose their charge, and air filters can get clogged with dust and debris.
Addressing these items before you even attempt to start the engine is essential. A few minutes of preventative maintenance not only guarantees a successful start but also extends the life of your mower, improves its performance, and ensures it runs efficiently throughout the entire mowing season.
7 Step-by-Step Guide on How to Start Lawn Mower After Winter
Step 1: Move the Mower to a Ventilated Area
Before you begin any work, your first priority should be safety. Move the lawn mower out of the garage or shed and into a well-ventilated space, like your driveway or a patio. This is critical because you will be working with gasoline, which releases flammable fumes.

Working outdoors prevents these fumes from accumulating in an enclosed area, significantly reducing the risk of an accidental fire. It also gives you ample room to move around the machine and access all its components without feeling cramped. Good ventilation ensures that any fuel spills evaporate quickly and keeps you from inhaling potentially harmful vapors while you work on the engine.
Step 2: Check and Replace the Old Fuel
Stale gasoline is the most common culprit behind a mower that won’t start. Over the winter, fuel degrades and can gum up the carburetor and fuel system. First, check the fuel tank. If you left gas in it over the winter, you must drain it. Use a siphon pump to safely transfer the old fuel into an approved container for disposal. Never tip the mower on its side to drain the fuel, as this can cause oil to leak into the carburetor or exhaust. Once the tank is empty, refill it with fresh gasoline—ideally, high-octane, ethanol-free fuel if available, as it is more stable.
Step 3: Inspect and Clean the Carburetor
Even after replacing old fuel, some gummy residue might remain in the carburetor, blocking the tiny jets that deliver the fuel-air mixture to the engine. If your mower still won’t start with fresh gas, the carburetor is the next logical place to check. You can often clean it without removing it entirely. Start by tapping the side of the carburetor’s float bowl gently with the handle of a screwdriver. This can sometimes dislodge a stuck float. For a more thorough cleaning, spray a carburetor cleaner into the air intake while attempting to start the engine. This can dissolve varnish and deposits, clearing the passages.
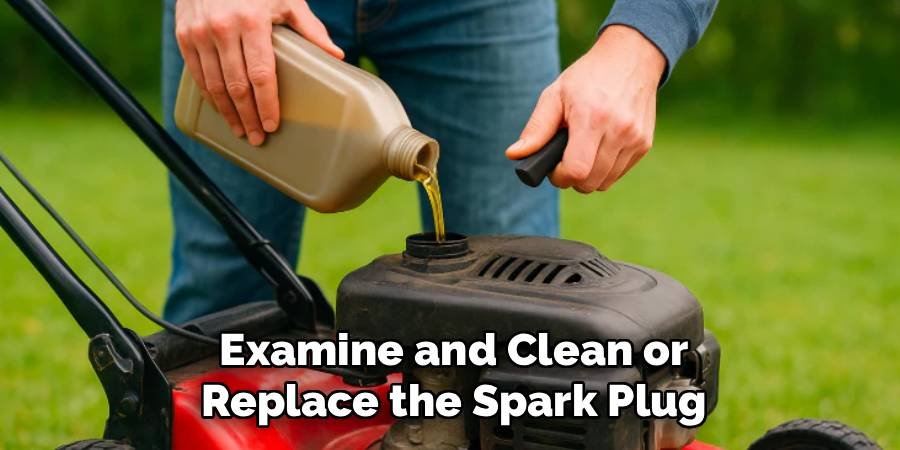
Step 4: Examine and Clean or Replace the Spark Plug
The spark plug is essential for igniting the fuel in the engine. A dirty, fouled, or damaged spark plug will fail to create the necessary spark. To check it, disconnect the spark plug wire and use a spark plug socket to carefully remove the plug. Inspect the electrode at the tip. If it is covered in black, sooty deposits or looks wet with oil, it needs attention. You can clean a lightly fouled plug with a wire brush and a cloth. However, spark plugs are inexpensive, so replacing it with a new one is often the best and easiest solution to guarantee a strong, consistent spark for ignition.
Step 5: Clean or Replace the Air Filter
The engine needs a steady flow of clean air to run properly. The air filter prevents grass, dust, and other debris from getting sucked into the carburetor and engine, where it can cause significant damage. Over time, this filter becomes clogged, restricting airflow and choking the engine. Locate the air filter housing, which is usually a plastic or metal cover on the side of the engine. Remove the cover and take out the filter. If you have a paper filter that looks dirty, it’s best to replace it. If it’s a foam filter, you can often wash it with soap and water, let it dry completely, and then re-oil it before reinstalling.
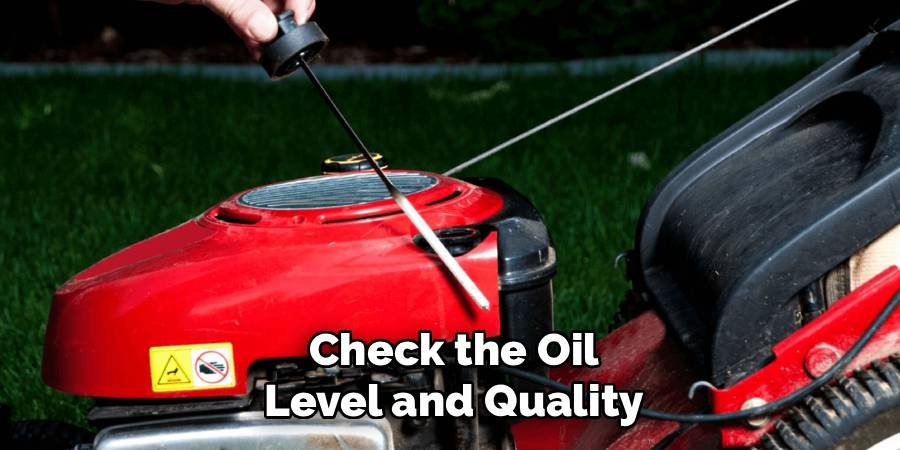
Step 6: Check the Oil Level and Quality
Engine oil lubricates the moving parts of your mower’s engine, preventing overheating and excessive wear. Running a mower with low or old oil can cause catastrophic engine failure. Before starting the mower for the first time, check the oil. Remove the dipstick, wipe it clean, reinsert it fully, and then pull it out again to check the level. The oil should be between the “Full” and “Add” marks. Also, examine the oil’s color. Fresh oil is typically a light amber color. If it appears dark, black, or gritty, it’s time for an oil change. Changing the oil is a simple but vital part of your mower’s spring maintenance routine.
Step 7: Sharpen and Balance the Mower Blade
A dull mower blade doesn’t cut grass; it tears it. This tearing action damages the grass, leaving it with ragged, brown tips and making your lawn more susceptible to disease. Before your first mow, inspect the blade. First, disconnect the spark plug to prevent accidental starting.
Then, carefully tip the mower on its side (with the carburetor facing up) to access the blade. If it has nicks or feels dull to the touch, it needs to be sharpened. You can do this yourself with a file or a bench grinder, or take it to a local hardware store. After sharpening, ensure the blade is balanced to prevent vibrations that can damage the mower.
Charge or Replace the Battery (for Electric-Start Mowers)
If you have an electric-start mower, a dead battery is a common reason it won’t start after winter. Batteries naturally lose their charge over long periods of inactivity, especially in cold temperatures. Connect the battery to its charger and let it charge fully. Most mower batteries will take several hours to reach a full charge.
If the battery is several years old and no longer holds a charge, you will need to replace it. A healthy, fully charged battery will provide the necessary power to the starter motor, ensuring a quick and effortless start every time you turn the key or push the button. This step is a key part of how to start lawn mower after winter if it has an electric start feature.
Frequently Asked Questions (FAQ)
What Should I Do if My Mower Won’t Start After Following These Steps?
If your mower still refuses to start, the issue might be more complex. The problem could lie with a clogged fuel line, a faulty ignition coil, or a sheared flywheel key. At this point, it may be wise to consult your mower’s manual for advanced troubleshooting or contact a small engine repair professional. They have the diagnostic tools and expertise to identify and fix deeper mechanical or electrical issues that go beyond standard maintenance.
How Can I Prevent Starting Issues Next Year?
Prevention is the best strategy. Before storing your mower for the winter, add a fuel stabilizer to the gas tank and run the engine for a few minutes to circulate it through the system. This prevents the fuel from degrading and gumming up the carburetor. Alternatively, you can run the mower until the tank is completely empty. Also, consider storing it in a clean, dry location to prevent rust and keeping the battery on a tender if it’s an electric-start model.
Is It Okay to Use Last Year’s Gas if I Used a Stabilizer?
Yes, if you added a quality fuel stabilizer to the gasoline before storing the mower, the fuel should still be viable. Fuel stabilizers can keep gasoline fresh for up to 24 months. They work by preventing oxidation and the formation of gummy deposits. However, for best performance, it is always recommended to start the new season with a fresh tank of gasoline if possible.

What if I See White Smoke When the Mower Starts?
Seeing a puff of white or blue smoke when the mower first starts is often not a major concern, especially if you tipped the mower over to work on the blade. This can cause a small amount of oil to seep into the combustion chamber, which then burns off when the engine starts. The smoke should clear up within a minute. If the smoke is persistent and heavy, it could indicate a more serious problem, such as worn piston rings.
Can I Use Starting Fluid to Start My Lawn Mower?
Starting fluid can be an effective way to determine if you have a fuel delivery problem or an ignition problem. A small spray into the carburetor’s air intake should make the engine fire briefly if the ignition system is working. However, use it very sparingly. Starting fluid is highly volatile and provides no lubrication, and excessive use can cause serious internal engine damage. It should be used as a diagnostic tool, not a regular starting aid.
Conclusion
Waking your lawn mower from its winter slumber doesn’t have to be a chore. By following a methodical approach—checking the fuel, inspecting the spark plug, cleaning the air filter, and performing other basic maintenance—you can avoid the frustration of a non-starting engine. These simple checks address the most common issues that arise during long-term storage and set you up for a trouble-free mowing season. Now that you know how to start lawn mower after winter, you are well-equipped to get your machine running smoothly. Taking these proactive steps not only ensures your mower starts reliably but also prolongs its life and keeps your lawn looking healthy and neat from the first cut to the last.
About Ravuk Barg
B.Sc. Horticulture Science | Certified Master Gardener
Ravuk Barg has spent more than a decade with his hands in the soil and his head full of questions about why some gardens thrive while others struggle. What started as a single raised bed of tomatoes and basil in a modest backyard has grown into a deep, working knowledge of everything from seed germination and soil amendment to companion planting and seasonal pruning.
Over the years, Ravuk has gardened through drought summers, waterlogged springs, and pest invasions that would make most gardeners hang up their trowels for good. Those hard seasons, he’ll tell you, taught him more than any perfect growing year ever could. He writes from that earned experience—covering vegetable growing, ornamental planting, houseplant care, composting, and garden design with equal confidence and curiosity.
Philosophy & Approach
Ravuk’s approach to gardening is rooted in practicality. He favors organic methods not out of dogma, but because they work long-term—resulting in healthier soil, fewer inputs, and stronger plants. He has a particular fondness for heirloom vegetable varieties (the kind with proper flavor), unruly cottage-style flower beds, and the stubborn houseplants that everyone else gave up on.
The Mission: Give readers the honest, experience-backed advice that helps them actually succeed in their gardens—not just the ideal version, but the real one; weeds, failures, and all.
Education & Credentials
-
B.Sc. in Horticulture Science
-
Greenfield Agricultural University
-
Focus: Plant Physiology, Soil Ecology, and Sustainable Crop Production
-
-
Master Gardener Certification
-
Cooperative Extension Service
-
Focus: 200+ hours of hands-on practical training and community garden work
-
Continuing Education
-
Organic Pest Management
-
Native Plant Landscaping
-
Sustainable Crop Production