

Growing okra is a rewarding experience for any home gardener, offering a delicious and versatile vegetable right from your backyard. One of the secrets to a successful okra crop lies in giving the seeds the best possible start. If you’ve ever struggled with slow or inconsistent sprouting, learning how to soak okra seeds before planting can make a significant difference. This simple yet effective technique kickstarts the germination process, leading to stronger seedlings and a more abundant harvest. This guide will walk you through every step, ensuring you have the confidence to prepare your seeds like a pro.
Why Soaking Okra Seeds is Important
Okra seeds have a tough, protective outer coating. This hard shell is a natural defense mechanism, but it can also prevent water from reaching the embryo inside, which is necessary to trigger germination. When you plant dry seeds directly into the soil, it can take a long time for this coating to break down, resulting in slow, staggered, or even failed sprouting.
Soaking the seeds essentially gives them a head start. By immersing them in water, you soften this hard outer layer, allowing moisture to penetrate the seed more quickly and efficiently. This process, known as scarification, signals to the seed that conditions are right for growth. It awakens the dormant embryo and initiates the metabolic processes required for germination. As a result, soaked seeds tend to sprout faster and more uniformly, giving you a healthier and more consistent stand of okra plants in your garden.
8 Step Methods Guide: How to Soak Okra Seeds Before Planting
Step 1: Select High-Quality Okra Seeds
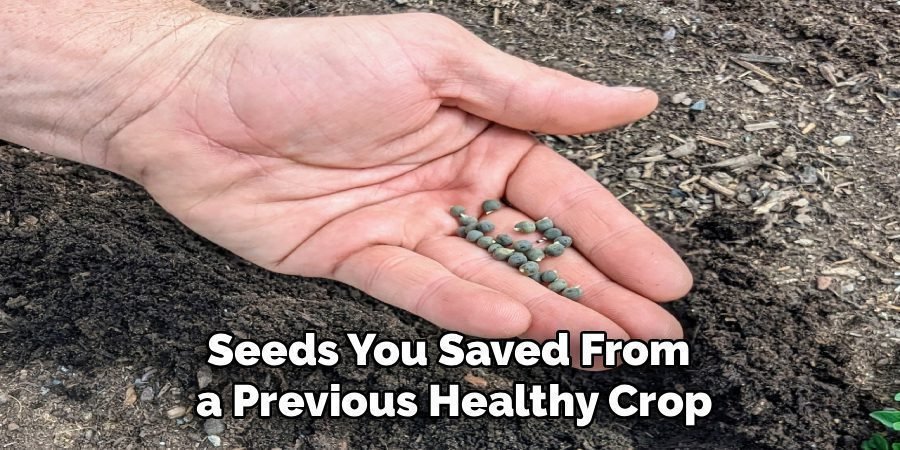
Your journey begins with choosing the right seeds. Start with a reputable source, whether it’s a trusted seed company, a local nursery, or seeds you saved from a previous healthy crop. Look for seeds that are plump, firm, and uniform in color, typically a dark green or blackish hue. Avoid any that appear shriveled, discolored, or show signs of mold or damage. High-quality seeds have a much higher viability rate, meaning they are more likely to germinate and grow into robust plants, making your preparation efforts worthwhile.
Step 2: Gather Your Soaking Supplies
You don’t need any fancy equipment for this process. Simply gather a small, clean container like a bowl, jar, or even a cup. Ensure it is large enough to hold your seeds and twice their volume in water, as the seeds will swell slightly. You will also need lukewarm water. Using water that is too hot can damage or cook the delicate embryos inside the seeds, while cold water can slow down the soaking process. Room temperature or slightly warm water is perfect for encouraging the seeds to absorb moisture effectively.
Step 3: Measure the Right Amount of Seeds
Before you begin soaking, decide how many okra plants you want to grow. This will help you determine the number of seeds to prepare. It’s always a good practice to soak about 20-25% more seeds than the number of plants you plan to cultivate. This accounts for any seeds that may not germinate, even with soaking. This small buffer ensures you will have enough viable seedlings to achieve your desired crop size without having to restart the process. Count out your seeds and place them aside, ready for the next step.
Step 4: Add Lukewarm Water to the Container
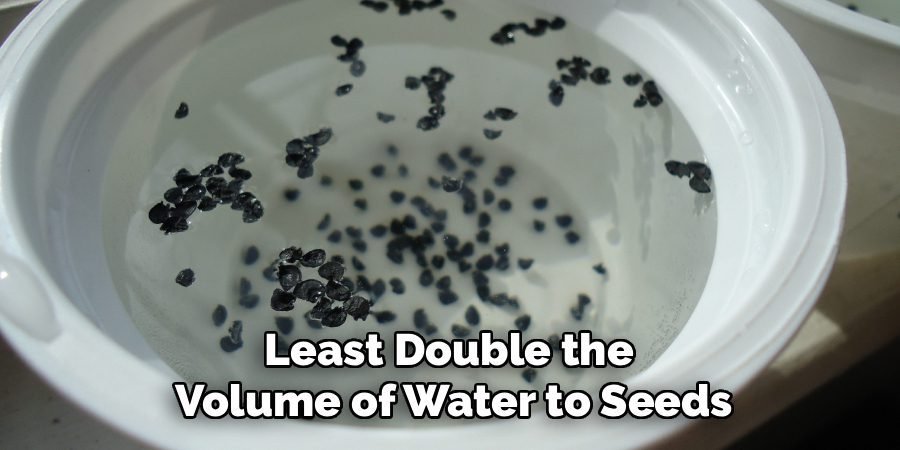
Now it’s time to start the soaking process. Place your selected okra seeds into your chosen container. Pour lukewarm water over them, ensuring the seeds are completely submerged. A good rule of thumb is to use at least double the volume of water to seeds. This provides ample moisture for absorption and prevents the water from being fully soaked up before the process is complete. Swirl the container gently to make sure all the seeds are wet and not clumped together at the bottom or floating on the surface.
Step 5: Let the Seeds Soak for 12 to 24 Hours
Patience is key during this stage. Allow the okra seeds to soak in the lukewarm water for a period of 12 to 24 hours. The ideal duration can vary based on the age and hardness of the seeds. For most fresh seeds, a 12-hour soak is sufficient. Older or particularly hard seeds may benefit from a full 24 hours. Avoid soaking them for longer than a day, as this can lead to rot or oxygen deprivation, which will kill the seed. Place the container in a warm spot, out of direct sunlight.
Step 6: Monitor the Seeds and Change the Water (Optional)
If you decide to soak your seeds for the full 24 hours, it’s a good idea to check on them after about 12 hours. You may notice the water has become cloudy or discolored. This is normal, as the seeds release compounds from their outer coating. To ensure a fresh environment, you can carefully drain the old water and replace it with fresh, lukewarm water for the remainder of the soaking period. This optional step helps prevent the growth of any harmful bacteria and keeps the seeds healthy.
Step 7: How to Soak Okra Seeds Before Planting: Draining and Rinsing
After the soaking period is complete, the next step is to prepare the seeds for planting. Carefully drain all the water from the container. You can use a fine-mesh sieve or simply tilt the container and use your hand to block the seeds from falling out. Once drained, give the seeds a gentle rinse with fresh, clean water. This removes any residue that may have leached out from the seed coats during the soak. Your seeds should now appear slightly swollen and ready for their new home in the soil.
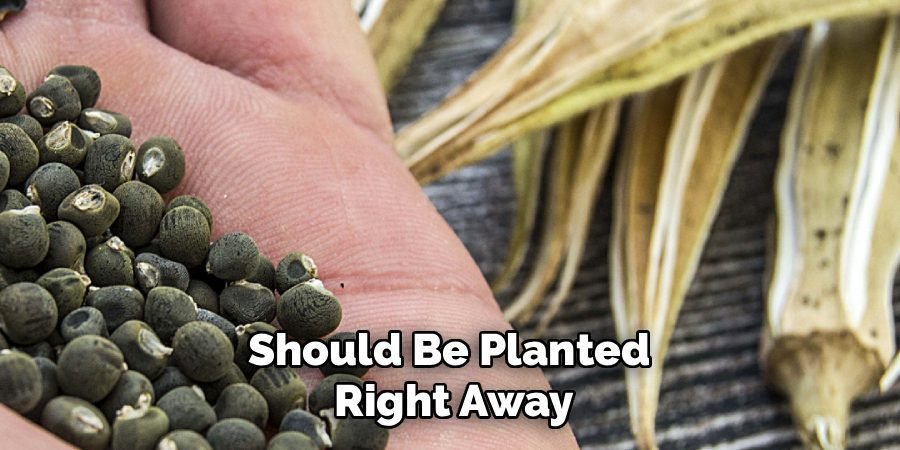
Step 8: Plant the Soaked Seeds Immediately
This is the most critical part of the process. Soaked seeds are primed for growth and should be planted right away. Do not let them dry out again, as this can reverse the benefits of soaking and may even render the seeds unviable. Plant them in prepared soil or seed-starting trays at the recommended depth, which is typically about half an inch to one inch deep. Water them gently after planting to settle the soil around them. This immediate action is crucial for a successful transition from soaking to sprouting.
Provide Proper Care After Planting
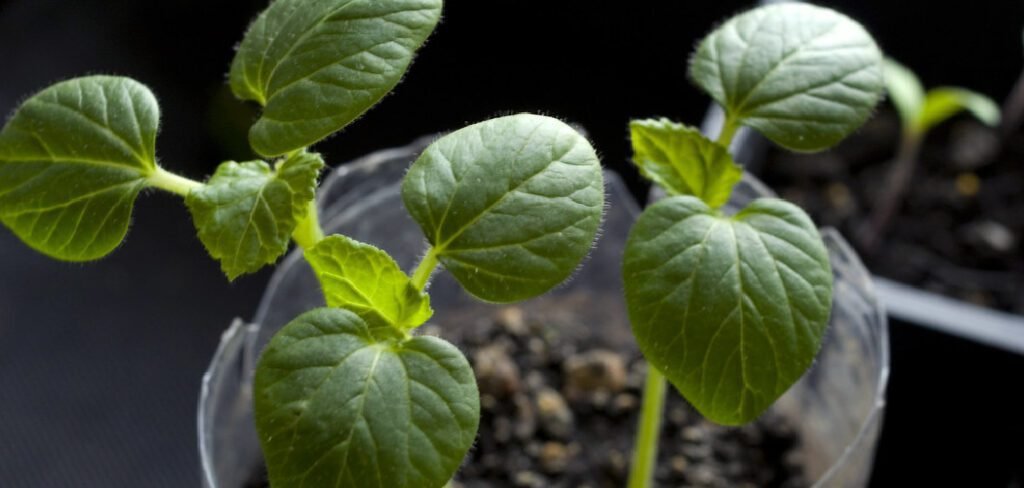
Once the seeds are planted, maintaining the right conditions is essential for successful germination and growth. Keep the soil consistently moist, but avoid overwatering, as excess water can lead to fungal issues or rot. Ensure the planting area receives the appropriate amount of sunlight based on the specific needs of the plant species. Monitor temperature and humidity closely, especially if you are using seed-starting trays indoors. Regularly check for any signs of pests or diseases and address them promptly to protect the young seedlings. Proper care during these early stages will set the foundation for strong, healthy plants.
Transplanting Seedlings to Their Permanent Location
Once your seedlings have grown strong and healthy, it’s time to transplant them to their permanent location. Begin by hardening off the seedlings, gradually exposing them to outdoor conditions over a period of 7-10 days. This process helps them adjust to changes in light, temperature, and wind. Prepare the soil in the transplanting area by loosening it and adding compost or organic matter to ensure proper nutrients. Carefully remove the seedlings from their trays, taking care not to damage the roots, and plant them at the appropriate depth based on their species.

Water thoroughly after transplanting to help the roots settle and establish in their new environment. Continue to monitor and care for the transplanted seedlings as they adapt to their new surroundings.
Frequently Asked Questions (FAQ)
What Happens If You Plant Okra Seeds Without Soaking?
Planting okra seeds without soaking them first is entirely possible, but it often leads to slower and less uniform germination. The hard seed coat can significantly delay moisture absorption from the soil, meaning it might take much longer for the seeds to sprout. You may also find that some seeds sprout weeks after the first ones, creating an uneven stand of plants. Soaking helps bypass this delay, ensuring a faster, more consistent start for your entire crop, which is especially helpful in regions with shorter growing seasons.
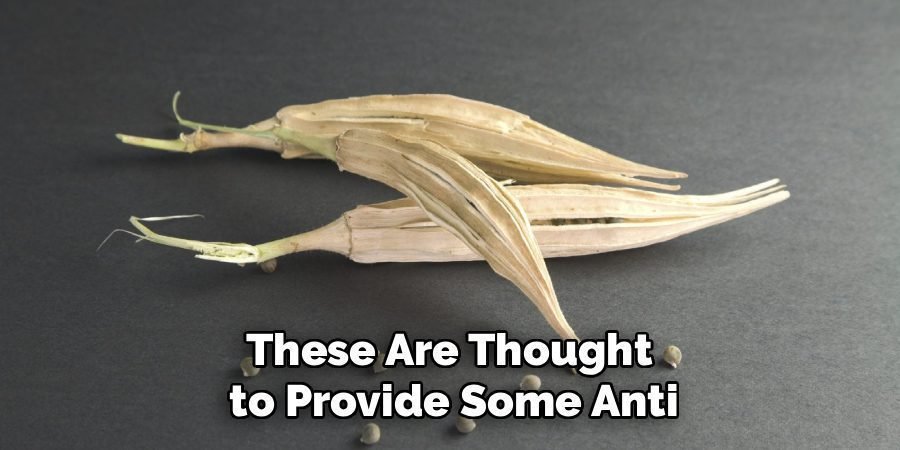
Can I Use Something Other Than Water to Soak Okra Seeds?
While plain lukewarm water is the most common and effective medium, some gardeners experiment with other solutions. Diluted compost tea or a weak chamomile tea solution are popular alternatives. These are thought to provide some anti-fungal properties and a minor nutrient boost to the seeds before planting. However, for beginners, clean water is the simplest and most reliable option. Avoid using any solutions with salt or high concentrations of fertilizer, as these can damage or dehydrate the seeds, preventing germination altogether.
Should Soaked Okra Seeds Float or Sink?
When you first add okra seeds to water, many of them might float. This is normal and is often due to air trapped on the surface of the hard seed coat. As they absorb water over the next several hours, most of the viable seeds will sink to the bottom of the container. Seeds that are still floating after 12-24 hours may be old, underdeveloped, or not viable. While it’s not a foolproof test, planting the seeds that sink gives you a better chance of successful germination.
How Long Does It Take for Soaked Okra Seeds to Germinate?
Soaked okra seeds typically germinate much faster than their unsoaked counterparts. After planting soaked seeds in warm soil (at least 65°F or 18°C), you can expect to see sprouts emerge within 3 to 7 days. In comparison, dry-planted seeds may take 10 to 21 days to sprout under the same conditions. The pre-soaking process effectively shaves off a week or more from the germination time, allowing your okra plants to establish themselves more quickly in the garden.
Can I Store Soaked Okra Seeds?
It is strongly advised not to store okra seeds after they have been soaked. The soaking process initiates the germination cycle, awakening the embryo inside the seed. If you allow the seeds to dry out after this process has started, the embryo will likely die, rendering the seed useless. For the best results, you should plan to plant your soaked seeds immediately after they have been drained and rinsed. If you must delay planting, keep them moist in a sealed plastic bag for no more than a day.
Conclusion
Mastering how to soak okra seeds before planting is a simple technique that yields powerful results. By softening the seed’s tough exterior, you accelerate germination, encourage more uniform sprouting, and give your plants a vigorous start. This leads to a healthier, more productive garden and a more satisfying harvest. This guide has provided you with all the necessary steps, from selecting quality seeds to planting them at the perfect moment. We encourage you to try this method with your next crop of okra and witness the remarkable difference it can make.
About Ravuk Barg
B.Sc. Horticulture Science | Certified Master Gardener
Ravuk Barg has spent more than a decade with his hands in the soil and his head full of questions about why some gardens thrive while others struggle. What started as a single raised bed of tomatoes and basil in a modest backyard has grown into a deep, working knowledge of everything from seed germination and soil amendment to companion planting and seasonal pruning.
Over the years, Ravuk has gardened through drought summers, waterlogged springs, and pest invasions that would make most gardeners hang up their trowels for good. Those hard seasons, he’ll tell you, taught him more than any perfect growing year ever could. He writes from that earned experience—covering vegetable growing, ornamental planting, houseplant care, composting, and garden design with equal confidence and curiosity.
Philosophy & Approach
Ravuk’s approach to gardening is rooted in practicality. He favors organic methods not out of dogma, but because they work long-term—resulting in healthier soil, fewer inputs, and stronger plants. He has a particular fondness for heirloom vegetable varieties (the kind with proper flavor), unruly cottage-style flower beds, and the stubborn houseplants that everyone else gave up on.
The Mission: Give readers the honest, experience-backed advice that helps them actually succeed in their gardens—not just the ideal version, but the real one; weeds, failures, and all.
Education & Credentials
-
B.Sc. in Horticulture Science
-
Greenfield Agricultural University
-
Focus: Plant Physiology, Soil Ecology, and Sustainable Crop Production
-
-
Master Gardener Certification
-
Cooperative Extension Service
-
Focus: 200+ hours of hands-on practical training and community garden work
-
Continuing Education
-
Organic Pest Management
-
Native Plant Landscaping
-
Sustainable Crop Production