

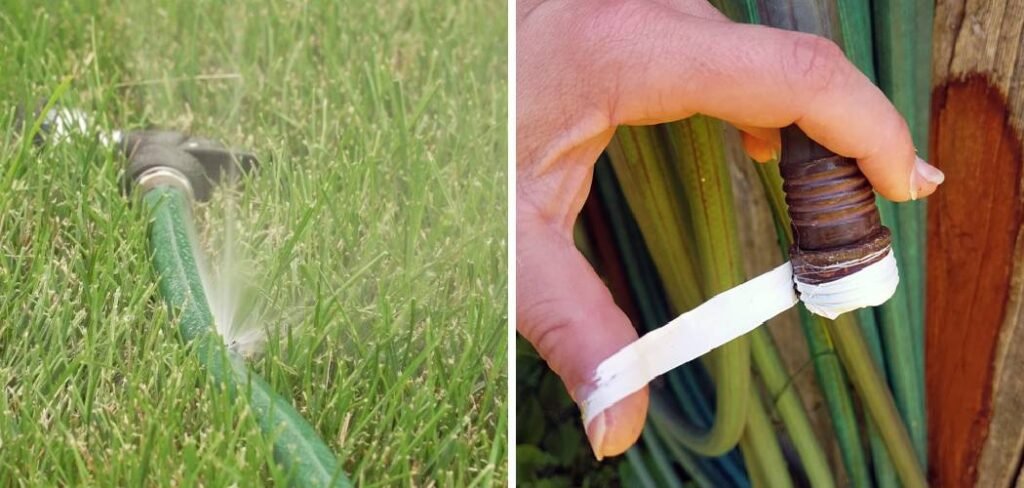
A leak in your garden hose can be frustrating, especially when you’re in the middle of watering your plants. Water sprays everywhere except where you need it, wasting water and creating a muddy mess. Before you decide to throw the hose away and buy a new one, consider a simple, effective, and temporary solution.
Knowing how to repair a garden hose duct tape can save you time, money, and a trip to the store. This guide will walk you through a reliable method to patch up leaks and get your hose back in working order for the short term, allowing you to finish your gardening tasks without interruption. This quick fix is perfect for small punctures and splits, giving you a functional hose until a more permanent repair or replacement can be made.
Why You Should Repair Your Garden Hose
Repairing a garden hose instead of immediately replacing it is both economical and environmentally responsible. A new hose can be a significant expense, while a simple repair costs very little. By fixing minor leaks, you extend the life of your equipment and reduce waste. Fewer discarded hoses end up in landfills, which is a small but meaningful step toward more sustainable living. A quick patch also prevents water waste from a constant drip or spray, conserving a valuable resource and potentially lowering your water bill. It’s a practical skill that empowers you to maintain your tools and manage your garden more efficiently.
8-Step Guide: How to Repair a Garden Hose Duct Tape
This step-by-step process will guide you through patching your hose effectively. While this method is a temporary fix, it can be surprisingly durable if done correctly, allowing you to use your hose for several more watering sessions.
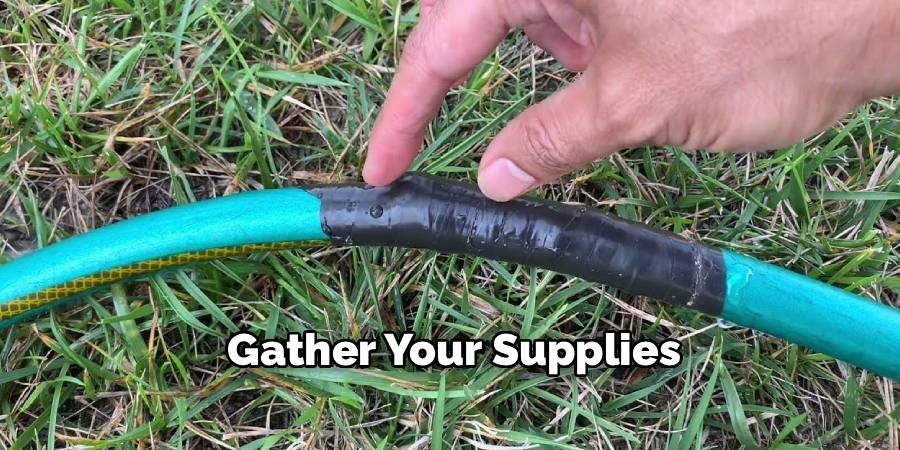
Step 1: Gather Your Supplies
Before you begin, gather all the necessary materials to ensure a smooth repair process. You will need a roll of high-quality, waterproof duct tape, a pair of sharp scissors or a utility knife, and a clean, dry cloth or rag. It is also helpful to have a bucket of soapy water and a scrub brush on hand for cleaning the hose thoroughly. Ensuring you have everything ready will prevent you from having to stop midway through the repair, which could compromise the quality of the seal. A good setup makes the entire process faster and more efficient.
Step 2: Locate the Leak
The first crucial step is to find the exact source of the leak. Turn on the water and watch the hose carefully. Small pinholes might only produce a fine mist, while larger splits will be more obvious. Once you see water escaping, mark the location. You can use a permanent marker, a piece of tape, or even a clothespin to clearly identify the spot. It’s a good idea to check the entire length of the hose, as there may be more than one damaged area that needs attention. Finding all the leaks now will save you from having to repeat the process later.
Step 3: Turn Off the Water and Relieve Pressure
Once you have marked all the leaks, turn off the water supply at the spigot. It is not enough to simply shut off the water; you must also relieve the pressure remaining inside the hose. Squeeze the nozzle or let the open end of the hose drain completely until water stops flowing out. This step is critical because any remaining water pressure can push against the duct tape from the inside, preventing it from adhering properly and creating a strong seal. A depressurized hose provides the ideal surface for the repair to hold firm.
Step 4: Clean the Damaged Area Thoroughly
For the duct tape to stick effectively, the surface of the hose must be completely clean. Use your scrub brush and soapy water to wash the area around the leak, removing any dirt, mud, grease, or algae. Grime and debris will prevent the tape’s adhesive from making a strong bond with the rubber or vinyl material of the hose. After scrubbing, rinse the area with clean water to wash away any soap residue. This thorough cleaning creates the perfect canvas for a successful and lasting temporary repair.
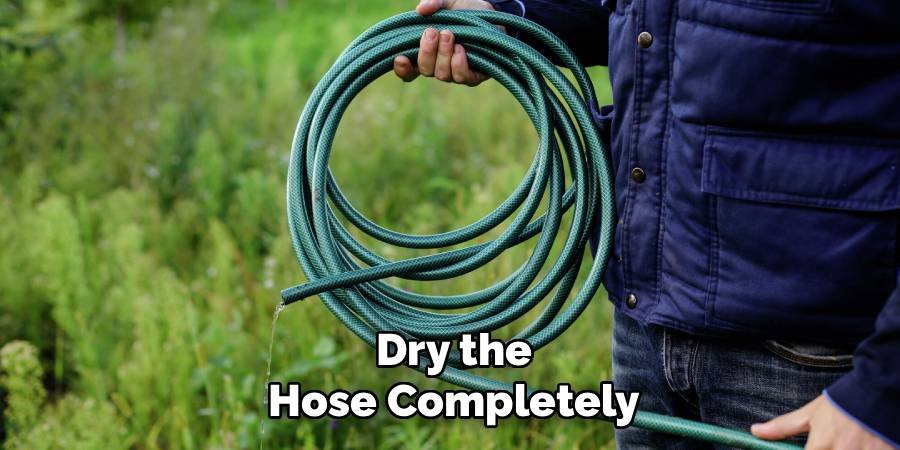
Step 5: Dry the Hose Completely
This is arguably the most important step for a successful duct tape repair. The hose must be bone dry. Use your clean cloth to wipe down the cleaned section, then let it air dry completely. For faster results, you can place it in direct sunlight for a while or even use a hairdryer on a low heat setting. Any moisture left on the surface will severely weaken the duct tape’s adhesive and compromise the seal. Patience here is key; attempting to apply tape to a damp surface will only lead to the patch failing as soon as you turn the water back on.
Step 6: Cut Your First Piece of Duct Tape
With the hose clean and dry, it’s time to prepare the duct tape. Using your scissors or utility knife, cut a piece of tape that is long enough to wrap around the hose at least one and a half times. This initial piece will serve as the primary seal directly over the puncture or split. A clean, straight cut will help the tape lay flat without bunching up. Having the piece ready before you start wrapping ensures you can apply it smoothly and without fumbling, which is important for creating an airtight initial layer.
Step 7: Apply the First Layer of Tape
Carefully place the center of your cut duct tape piece directly over the leak. Press down firmly to ensure it makes solid contact with the hose material. Begin to wrap the tape around the hose, pulling it taut as you go. Overlap the tape as you circle the hose to create a secure seal. The goal is to eliminate any air bubbles or wrinkles, which could become weak points. This first layer is the most critical for stopping the leak, so take your time to apply it with firm, even pressure.
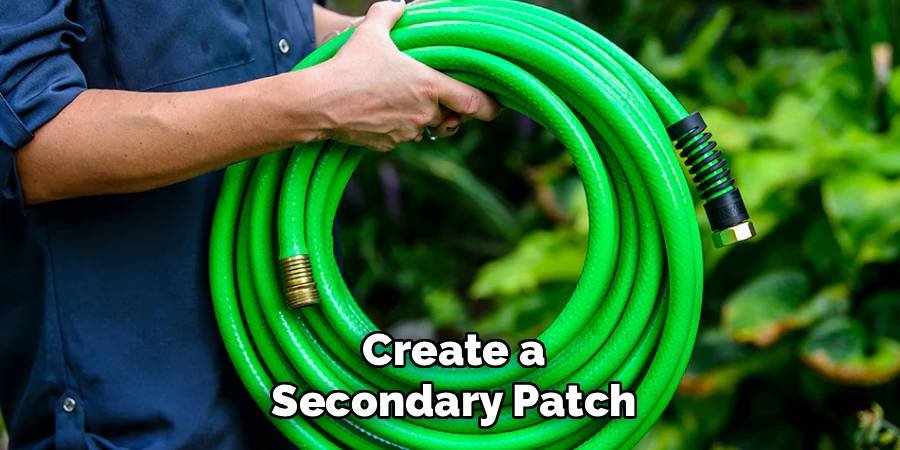
Step 8: Create a Secondary Patch
For added strength, especially for larger splits, a secondary patch is recommended. Cut another piece of duct tape, this time slightly longer than the leak itself. Place this piece lengthwise along the hose, directly over the first wrapped layer. This longitudinal strip helps to brace the damaged area against the pressure that runs along the length of the hose when water is flowing. Press it down firmly, smoothing it out from the center toward the edges to ensure there are no trapped air pockets.
Maintaining Your Repaired Hose
To get the most out of your duct tape repair, handle the hose with a bit more care. Avoid dragging the patched section across rough surfaces like concrete or gravel, as this can wear away the tape. When you are finished using the hose, relieve the water pressure before storing it. Storing the hose coiled neatly and out of direct sunlight will also help prolong the life of both the hose and the repair. Periodically check the patch for any signs of peeling or new leaks, and apply another layer of tape if needed.
Common Mistakes to Avoid
A few common errors can cause a duct tape repair to fail. The most frequent mistake is not cleaning and drying the hose surface properly. Any dirt or moisture will prevent the tape from sticking. Another error is not pulling the tape tightly enough during application; a loose wrap won’t hold against water pressure. Finally, avoid using old or low-quality duct tape. A fresh roll of strong, waterproof tape will provide a much more reliable and durable seal. Taking the time to avoid these pitfalls will ensure your temporary fix lasts as long as possible.
FAQ Frequently Asked Questions
How Long Will a Duct Tape Repair on a Garden Hose Last?
A well-applied duct tape patch can last for several weeks or even a few months, depending on usage and the severity of the original leak.
Can I Use Duct Tape on Any Type of Garden Hose?
Yes, duct tape generally adheres well to common hose materials like vinyl, rubber, and polyurethane, provided the surface is clean and completely dry before application.
Is There a Specific Type of Duct Tape That Works Best?
For the best results, use a high-quality, waterproof, or all-weather duct tape. These types have stronger adhesives that are more resistant to moisture and temperature changes.
What Should I Do if the Leak Is Near the End of the Hose?
If the leak is very close to the spigot or nozzle connection, it is often better to cut off the damaged section and install a new hose-end connector.
Can This Method Fix a Large Tear or Split?
This method is best for small punctures and minor splits. For very large tears, a duct tape repair is unlikely to hold and a more permanent repair kit is needed.
Conclusion
Learning how to repair a garden hose duct tape is a practical skill that can quickly solve a common gardening problem, saving you from an unnecessary purchase and reducing waste. While this fix is considered temporary, a carefully applied patch can extend the life of your hose significantly, allowing you to complete your watering tasks without issue. By following the steps of cleaning, drying, and wrapping the hose properly, you can create a surprisingly strong seal. This simple and cost-effective solution empowers you to maintain your tools and keep your garden thriving. Your garden will thank you for the consistent watering, and your wallet will thank you for the savings.
About Ravuk Barg
B.Sc. Horticulture Science | Certified Master Gardener
Ravuk Barg has spent more than a decade with his hands in the soil and his head full of questions about why some gardens thrive while others struggle. What started as a single raised bed of tomatoes and basil in a modest backyard has grown into a deep, working knowledge of everything from seed germination and soil amendment to companion planting and seasonal pruning.
Over the years, Ravuk has gardened through drought summers, waterlogged springs, and pest invasions that would make most gardeners hang up their trowels for good. Those hard seasons, he’ll tell you, taught him more than any perfect growing year ever could. He writes from that earned experience—covering vegetable growing, ornamental planting, houseplant care, composting, and garden design with equal confidence and curiosity.
Philosophy & Approach
Ravuk’s approach to gardening is rooted in practicality. He favors organic methods not out of dogma, but because they work long-term—resulting in healthier soil, fewer inputs, and stronger plants. He has a particular fondness for heirloom vegetable varieties (the kind with proper flavor), unruly cottage-style flower beds, and the stubborn houseplants that everyone else gave up on.
The Mission: Give readers the honest, experience-backed advice that helps them actually succeed in their gardens—not just the ideal version, but the real one; weeds, failures, and all.
Education & Credentials
-
B.Sc. in Horticulture Science
-
Greenfield Agricultural University
-
Focus: Plant Physiology, Soil Ecology, and Sustainable Crop Production
-
-
Master Gardener Certification
-
Cooperative Extension Service
-
Focus: 200+ hours of hands-on practical training and community garden work
-
Continuing Education
-
Organic Pest Management
-
Native Plant Landscaping
-
Sustainable Crop Production