

Growing stunning dahlias is a rewarding experience for any gardener. Their vibrant, complex blooms can transform a garden plot into a kaleidoscope of color. But the secret to these magnificent flowers isn’t just in the tubers you plant; it’s rooted deep in the ground they grow in. Excellent soil preparation is the foundation for healthy, robust plants that produce an abundance of flowers. For beginners, understanding how to prepare soil for dahlias can seem daunting, but it’s a straightforward process that pays off all season long. This guide will walk you through every step, ensuring your garden bed is the perfect home for your new dahlias.
Why Soil Preparation Matters for Dahlias
The quality of your soil directly impacts every aspect of a dahlia’s life. Dahlias are heavy feeders that require well-draining, nutrient-rich soil to thrive. Poor soil can lead to a host of problems, including weak stems, fewer blooms, and an increased risk of tuber rot, a devastating fungal disease. Compacted, clay-heavy soil retains too much moisture, suffocating the roots and promoting rot. Conversely, overly sandy soil drains too quickly, washing away essential nutrients before the plant can absorb them. By taking the time to amend and prepare your garden bed, you create an ideal environment that supports strong root development, vigorous growth, and the spectacular floral display every dahlia enthusiast dreams of.
10 Step Methods Guide on How to Prepare Soil for Dahlias
Follow these steps to create the perfect soil environment for your dahlias to flourish.
Step 1: Choose the Right Location
Before you even touch the soil, selecting the perfect spot is crucial. Dahlias are sun-worshippers and require at least six to eight hours of direct sunlight each day to produce the energy needed for their large, prolific blooms. Morning sun is particularly beneficial as it helps to dry dew from the foliage, reducing the risk of fungal diseases like powdery mildew. Observe your garden throughout the day to identify a location that receives ample light. Also, consider protection from strong winds, as the tall, heavy stems of many dahlia varieties can be susceptible to breaking.

Step 2: Test Your Soil pH
Understanding your soil’s chemistry is a fundamental step. Dahlias prefer a slightly acidic to neutral soil pH, ideally between 6.5 and 7.0. You can easily check your soil’s pH using a simple home testing kit available at most garden centers. To get an accurate reading, take samples from a few different spots in your planting area and mix them together. If your soil is too acidic (below 6.5), you can amend it by adding garden lime. If it’s too alkaline (above 7.0), incorporating elemental sulfur or peat moss will help lower the pH into the optimal range for your dahlias.
Step 3: Clear and Till the Area
Once you have your location, it’s time to get to work. Start by clearing the entire planting area of any weeds, grass, rocks, or other debris. This step is vital as it eliminates competition for water and nutrients, giving your dahlias the best possible start. After the surface is clear, you need to loosen the soil. Use a garden fork, spade, or rototiller to dig down and turn over the soil to a depth of about 10 to 12 inches. This process, known as tilling, breaks up compacted earth, improves aeration, and makes it easier for dahlia roots to grow deep.
Step 4: Improve Soil Drainage
Dahlias absolutely despise “wet feet,” meaning their tubers are highly prone to rot in waterlogged soil. Therefore, ensuring excellent drainage is non-negotiable. If you have heavy clay soil that retains too much water, you must amend it to improve its structure. Incorporate coarse sand, small pea gravel, or perlite to create air pockets and help water move through the soil more freely. Mixing in organic matter like compost also works wonders for improving the texture of dense clay. For gardeners with extremely poor drainage, building a raised bed is an excellent alternative that gives you complete control over the soil environment.

Step 5: Incorporate Rich Organic Matter
This is a critical part of how to prepare soil for dahlias. Dahlias are heavy feeders and thrive in soil rich with organic material. After tilling, spread a generous two- to four-inch layer of well-rotted compost, aged manure, or leaf mold over the entire bed. This addition serves multiple purposes: it enriches the soil with a slow-release source of essential nutrients, improves soil structure for both clay and sandy types, enhances moisture retention without becoming waterlogged, and encourages a healthy ecosystem of beneficial soil microbes. Work this organic matter thoroughly into the top 8 to 10 inches of your prepared soil.
Step 6: Add a Balanced, Low-Nitrogen Fertilizer
While compost provides a great baseline of nutrients, giving your dahlias an extra boost at planting time is a good practice. Choose a balanced granular fertilizer that is low in nitrogen. A formula like 5-10-10 or 10-20-20 is ideal. High nitrogen levels encourage lush, green foliage at the expense of flowers, which is the opposite of what you want. Apply the fertilizer according to the package directions, scattering it evenly over the soil surface. Gently rake it into the top few inches of the bed. This initial feeding will support strong root establishment and early growth.
Step 7: Let the Soil Settle
After all your hard work of tilling, amending, and fertilizing, it’s best to give the bed some time to rest. Allow the soil to settle for at least a week, or even two, before you plant your dahlia tubers. This waiting period allows the organic amendments and fertilizers to begin integrating into the soil. It also lets the soil structure stabilize, creating a more uniform and welcoming environment for the tubers. Just before planting, you can lightly rake the surface one last time to create a smooth, level bed ready for your dahlias.
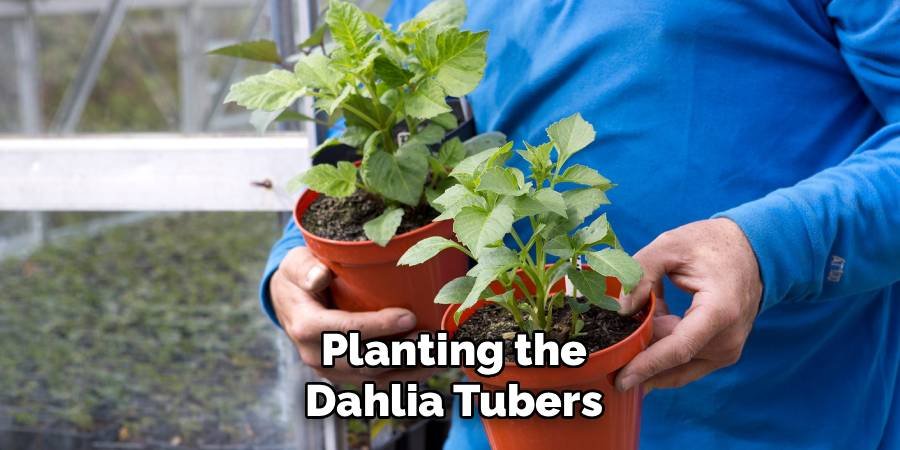
Step 8: Planting the Dahlia Tubers
Once the soil is ready, it’s time to plant your dahlia tubers. Begin by digging a hole about 4-6 inches deep for each tuber, making sure to leave at least 18-24 inches of space between them to allow for proper growth. Place the tuber in the hole with the “eye,” or sprout, facing upward. Gently cover the tuber with soil, leaving a small mound on top to ensure it’s well supported. Avoid watering immediately after planting, as excessive moisture could cause the tubers to rot before they begin to grow. Instead, wait until you see signs of growth above the soil before watering thoroughly.
Step 9: Caring for Growing Plants
Once your plants begin to sprout, consistent care is essential to ensure healthy growth. Regularly check the soil moisture and water as needed to keep it evenly moist but not waterlogged. Adding a layer of mulch around the base of the plants can help retain soil moisture and suppress weeds. Fertilize periodically with a balanced fertilizer to provide essential nutrients. Additionally, monitor for signs of pests or diseases, and address any issues promptly using appropriate treatments. Proper care during this stage will promote robust and vigorous plants.
Step 10: Pruning and Maintenance
Pruning is an essential aspect of maintaining healthy and productive plants. Regularly remove dead, damaged, or diseased branches to encourage better air circulation and reduce the risk of pests and diseases. For flowering or fruiting plants, pruning can also help shape the plant and direct energy into producing blooms or fruits. Use clean, sharp tools to make precise cuts and avoid damaging the plant tissue. Additionally, inspect the plants frequently for weeds or other competing vegetation, removing them to ensure your plants receive adequate nutrients and sunlight. Consistent maintenance will help your plants thrive and yield the best results.
Frequently Asked Questions (FAQ)
Can I Use Potting Soil for Dahlias in the Ground?
It is generally not recommended or cost-effective to use bagged potting soil to fill an entire garden bed. Potting mixes are specifically formulated for containers and can have drainage and density properties that are not ideal for in-ground planting. Instead, it is far better to amend your existing garden soil. Use your native soil as a base and enrich it with:
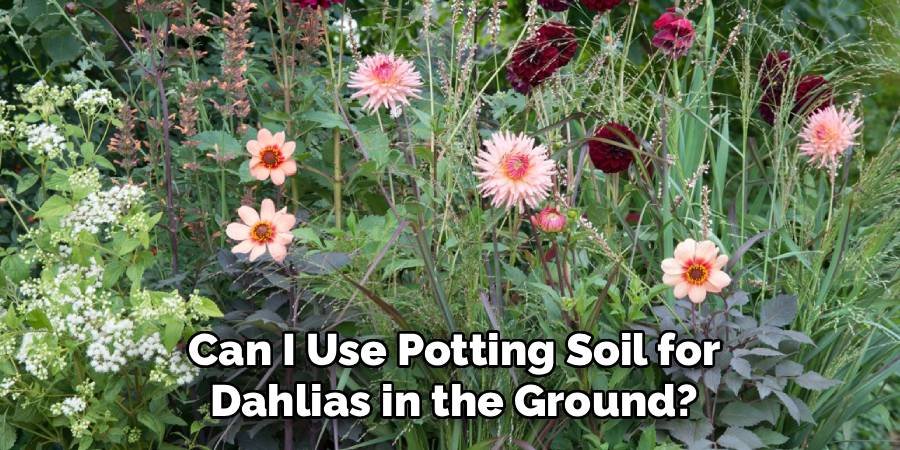
- Compost
- Aged manure
- Leaf mold
These amendments improve the structure and fertility of your natural soil, creating a superior and more sustainable environment for dahlias.
How Often Should I Fertilize My Dahlias After Planting?
After the initial fertilizer application during soil preparation, you should begin a regular feeding schedule once the plants are established and about a foot tall. Feed your dahlias every 3 to 4 weeks throughout the growing season. It’s crucial to continue using a low-nitrogen, high-phosphorus and potassium fertilizer (like a 5-10-10 blend) to encourage blooming rather than excessive leafy growth. Stop fertilizing in late summer or early fall (around late August or early September) to allow the plant to prepare for dormancy and focus energy on tuber development.
What Is the Best Mulch to Use for Dahlias?
Mulching is highly beneficial for dahlias. It helps retain soil moisture, suppresses weed growth, and keeps the soil cool. The best mulches are organic materials that will break down over time and add nutrients to the soil. Good options include:
- Straw
- Shredded bark
- Leaf mold
- Pine needles
Apply a 2- to 3-inch layer of mulch around the base of the plants after they have emerged from the soil, being careful not to pile it directly against the stems, which can promote rot.
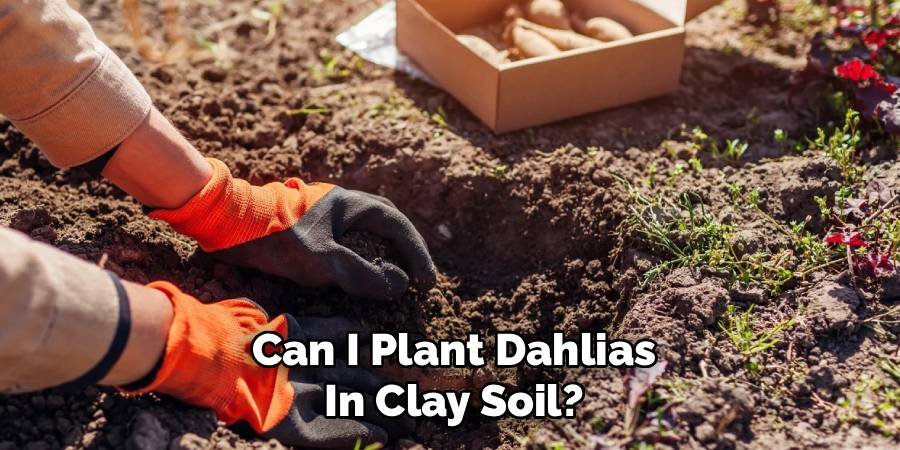
Can I Plant Dahlias in Clay Soil?
You can plant dahlias in clay soil, but you absolutely must amend it first. Heavy clay soil retains too much water and is easily compacted, creating an environment where dahlia tubers are very likely to rot. To make clay soil suitable, you need to improve its drainage and aeration. Thoroughly mix in generous amounts of organic matter like compost and materials that improve structure, such as coarse sand or perlite. Tilling deeply is also essential. For very heavy clay, building a raised garden bed is often the easiest and most successful solution.
Do I Need to Prepare the Soil Every Year?
Yes, it’s best practice to refresh your dahlia beds each spring. Dahlias are heavy feeders and will deplete the soil of many nutrients over a single growing season. Each year, before replanting your tubers, you should add a fresh 2- to 3-inch layer of compost and a balanced, low-nitrogen fertilizer to the bed. Tilling this into the top 6 to 8 inches will replenish the nutrients and keep the soil structure loose and friable. This annual refreshment ensures your dahlias have everything they need for another season of spectacular growth.
Conclusion
Creating the perfect soil environment is the most significant step you can take toward a garden filled with breathtaking dahlias. By focusing on a sunny location, testing and balancing your soil’s pH, improving drainage, and enriching the bed with plenty of organic matter, you set the stage for success. These foundational efforts ensure your tubers develop into strong, healthy plants capable of producing the stunning blooms dahlias are famous for. Now that you know how to prepare soil for dahlias, you are well on your way to enjoying a vibrant and flourishing display all season long.
About Ravuk Barg
B.Sc. Horticulture Science | Certified Master Gardener
Ravuk Barg has spent more than a decade with his hands in the soil and his head full of questions about why some gardens thrive while others struggle. What started as a single raised bed of tomatoes and basil in a modest backyard has grown into a deep, working knowledge of everything from seed germination and soil amendment to companion planting and seasonal pruning.
Over the years, Ravuk has gardened through drought summers, waterlogged springs, and pest invasions that would make most gardeners hang up their trowels for good. Those hard seasons, he’ll tell you, taught him more than any perfect growing year ever could. He writes from that earned experience—covering vegetable growing, ornamental planting, houseplant care, composting, and garden design with equal confidence and curiosity.
Philosophy & Approach
Ravuk’s approach to gardening is rooted in practicality. He favors organic methods not out of dogma, but because they work long-term—resulting in healthier soil, fewer inputs, and stronger plants. He has a particular fondness for heirloom vegetable varieties (the kind with proper flavor), unruly cottage-style flower beds, and the stubborn houseplants that everyone else gave up on.
The Mission: Give readers the honest, experience-backed advice that helps them actually succeed in their gardens—not just the ideal version, but the real one; weeds, failures, and all.
Education & Credentials
-
B.Sc. in Horticulture Science
-
Greenfield Agricultural University
-
Focus: Plant Physiology, Soil Ecology, and Sustainable Crop Production
-
-
Master Gardener Certification
-
Cooperative Extension Service
-
Focus: 200+ hours of hands-on practical training and community garden work
-
Continuing Education
-
Organic Pest Management
-
Native Plant Landscaping
-
Sustainable Crop Production