

Creating defined garden spaces transforms your outdoor area from chaos to organized beauty. Learning how to make a garden border with wood gives you an affordable, attractive solution that complements any landscape style.
Wooden garden borders serve multiple practical purposes beyond aesthetics. They prevent grass from creeping into flower beds, contain mulch and soil, and create clear pathways for maintenance. The natural warmth of wood blends seamlessly with plants while providing the structure your garden needs.
Whether you’re a weekend warrior or complete beginner, wooden borders offer forgiveness in installation and endless customization options. You can adjust heights, create curves, and even incorporate decorative elements. Best of all, most projects require only basic tools and can be completed in a single weekend.
This guide walks you through everything from material selection to finishing touches, ensuring your wooden garden border looks professional and lasts for years.
Why You Need Garden Borders
Garden borders create essential separation between different landscape elements. Without clear boundaries, grass invades flower beds, mulch spreads onto walkways, and your carefully planned garden loses its intended design.
Wooden borders excel at soil retention, especially important for raised beds or sloped areas. They prevent erosion during heavy rains while keeping your expensive topsoil exactly where you want it.
Maintenance becomes significantly easier with defined borders. You can mow right up to the edge without worrying about damaging plants. Weeding becomes more manageable when you can clearly see what belongs where.
The visual impact cannot be overstated. Clean lines create professional appearance that increases property value while showcasing your plants more effectively.
9 Step-by-Step Guide: How to Make a Garden Border with Wood
Step 1: Plan Your Border Layout
Start by mapping your desired border path using spray paint or a garden hose. Walk around your marked area several times, viewing it from different angles including your home’s windows. Consider how the border interacts with existing landscape features like trees, walkways, and irrigation systems.
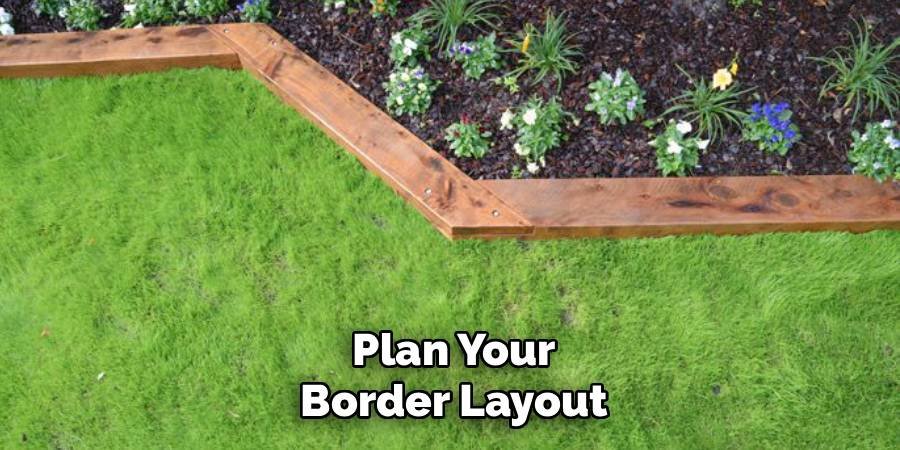
Measure the total linear footage needed and add 10% extra for cuts and mistakes. Take photos of your planned layout to reference during shopping. Consider future plant growth when determining border width – what looks proportional now might feel cramped in two years.
Step 2: Choose Your Wood Materials
Cedar and redwood offer natural rot resistance, making them ideal for ground contact applications. Pressure-treated pine costs less but requires careful selection of appropriate treatment ratings for soil contact. Composite lumber eliminates maintenance but costs significantly more upfront.
For most borders, 2×6 or 2×8 boards provide adequate height while remaining cost-effective. Thinner boards like 1×6 work for low borders but may warp over time. Always inspect boards for excessive knots, warping, or splitting before purchase.
Consider your local climate when making material choices. Humid areas benefit from naturally rot-resistant species, while arid climates allow more wood type flexibility.
Step 3: Gather Necessary Tools
Essential tools include a shovel for digging, level for ensuring straight installation, and measuring tape for accurate cuts. A circular saw or miter saw handles cutting duties, while a drill drives screws efficiently. Safety equipment includes eye protection and work gloves.
Additional helpful tools include a string line for maintaining straight borders, rubber mallet for adjustments, and wheelbarrow for moving materials. A post-hole digger speeds up stake installation for taller borders.
Rent specialized tools rather than purchasing items you’ll rarely use. Many home centers offer tool rental programs for weekend projects.
Step 4: Prepare the Installation Area
Begin by calling your local utility marking service to identify underground lines. Remove all vegetation along your marked border path, extending 6 inches beyond the planned border width. This prevents grass and weeds from growing against your new border immediately.

Excavate a shallow trench approximately 2-3 inches deep and slightly wider than your board width. This trench helps stabilize the border and creates a clean appearance. Remove rocks and debris that could prevent level installation.
Use a rake to smooth the trench bottom, checking for consistent depth along the entire path. Compact loose soil by walking along the trench or using a hand tamper.
Step 5: Cut Boards to Required Lengths
Measure twice and cut once to minimize waste and ensure proper fit. Create a cutting list before starting, organizing cuts by length to maximize board usage. Mark all cuts clearly with a pencil before beginning.
For curved sections, make relief cuts every few inches on the back of the board to allow bending. Take time with these cuts – rushing leads to mistakes that waste materials and delay completion.
Sand cut ends smooth to prevent splinters and create professional appearance. Apply wood preservative to cut ends if using naturally rot-resistant lumber, as cutting exposes untreated wood.
Step 6: Install Corner and End Pieces First
Starting with corners establishes your border’s framework and ensures everything aligns properly. Use a speed square to verify 90-degree angles at corner joints. Secure corners with exterior wood screws, pre-drilling holes to prevent splitting.
For curved sections, bend boards gradually to avoid cracking. Soak boards in water for several hours beforehand to increase flexibility if needed. Stake curved sections frequently to maintain desired shape during installation.
Check corner alignment using the 3-4-5 triangle method: measure 3 feet along one side, 4 feet along the perpendicular side, and verify the diagonal measures exactly 5 feet.
Step 7: Connect Straight Sections
Work systematically from your established corners, connecting straight sections with appropriate joinery methods. Butt joints work for most applications when reinforced with stakes. For visible areas, consider mitered joints for cleaner appearance.
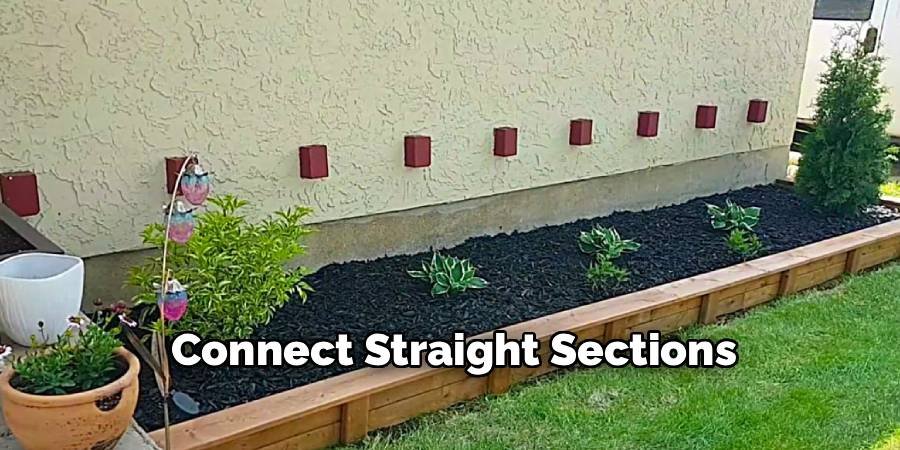
Maintain consistent height throughout installation by referencing a string line stretched between end points. Adjust individual boards up or down as needed to follow your string line precisely.
Drive stakes every 6-8 feet along straight runs, and more frequently in loose soil conditions. Stakes should extend at least 12 inches into undisturbed soil for adequate support.
Step 8: Secure Borders with Stakes
Cut stakes from pressure-treated 2×2 lumber, making them 18-24 inches long for standard border heights. Sharpen one end to a point for easier driving. Position stakes every 6 feet minimum, with additional stakes at joints and corners.
Drive stakes using a sledgehammer, checking frequently that they remain plumb. Stakes should extend 6-8 inches below the border bottom for proper support. If you hit rocks or roots, reposition stakes slightly rather than forcing them.
Attach stakes to borders using 3-inch exterior screws, placing screws below the final soil line when possible. This hidden attachment method creates cleaner appearance while providing necessary support.
Step 9: Level and Align Your Border
Use a 4-foot level to check both individual board sections and overall border alignment. Make adjustments by adding or removing soil beneath boards rather than forcing them into position.
For long borders, establish level reference points every 20 feet using a transit level or water level. Work between reference points to maintain consistent grade throughout your installation.
Pay special attention to drainage considerations. Borders should follow natural site drainage patterns or incorporate slight slope away from structures. Standing water against borders accelerates deterioration.
Maintaining Your Wooden Garden Border
Regular inspection prevents small problems from becoming major repairs. Check for loose stakes, rotting sections, or shifting boards at least twice yearly. Early spring provides ideal timing for maintenance activities before growing season begins.
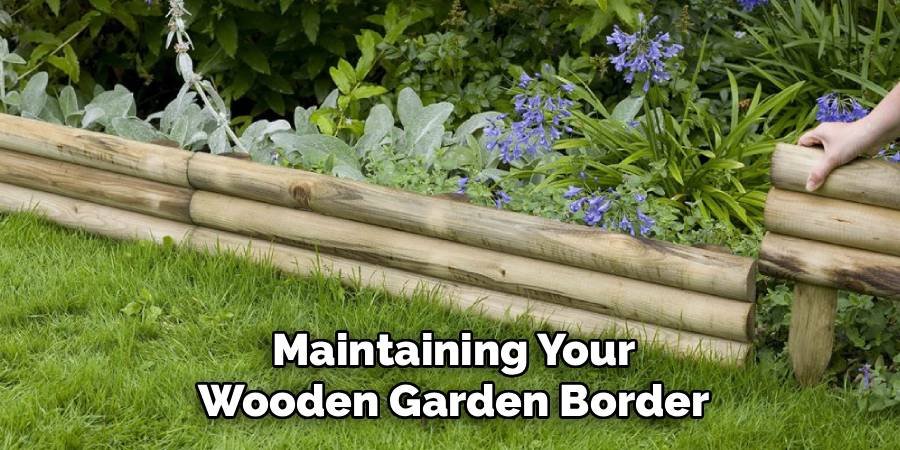
Reapply wood preservative every 2-3 years to extend lifespan, focusing on areas showing weathering signs. Keep borders clear of debris buildup that traps moisture against the wood surface.
Monitor for insect damage, particularly in areas with known termite activity. Replace damaged sections promptly to prevent further deterioration and maintain structural integrity.
Common Mistakes to Avoid
Skipping the utility marking step risks serious injury and expensive repairs. Always call before you dig, regardless of project size. Underground utilities exist in unexpected locations.
Using inappropriate fasteners accelerates failure. Galvanized or stainless steel screws resist corrosion far better than regular steel hardware. The small additional cost prevents premature replacement.
Inadequate soil preparation creates ongoing problems. Taking time to properly excavate and prepare the installation area ensures professional results and long-term satisfaction.
Ignoring drainage considerations leads to standing water, accelerated rot, and plant problems. Design borders to work with natural water flow patterns rather than against them.
FAQ Frequently Asked Questions
How Deep Should I Bury Wooden Garden Borders?
Bury borders 2-3 inches deep for stability while leaving most of the height visible above ground. Deeper installation provides better support but reduces effective border height.
What Type of Wood Lasts Longest for Garden Borders?
Cedar and redwood offer superior longevity due to natural rot resistance. Properly treated pressure-treated lumber also performs well at lower cost for most applications.
Can I Install Wooden Borders on Slopes?
Yes, but stepped installation works better than following slope contours. Create level sections connected by short vertical transitions for best appearance and function.
How Do I Create Curved Wooden Garden Borders?
Make relief cuts every 4-6 inches on the back of boards to allow bending. Soak boards in water beforehand and stake frequently to maintain desired curves.
Should I Seal or Stain Wooden Garden Borders?
Natural weathering creates attractive appearance, but clear preservative extends lifespan. Avoid solid stains that may look artificial in garden settings.
Conclusion
Learning how to make a garden border with wood opens up endless possibilities for creating organized, attractive outdoor spaces. The combination of functionality and natural beauty makes wooden borders an excellent investment in your property’s appearance and value.
Remember that patience during installation pays dividends in final results. Taking time to properly plan, prepare, and execute each step ensures your border will provide years of reliable service while enhancing your garden’s beauty.
Your wooden garden border will age gracefully, developing character as it weathers naturally. The plants you showcase within these defined spaces will thrive with improved drainage, reduced competition, and easier maintenance access.
Start planning your wooden garden border project today. With basic tools, quality materials, and the techniques outlined in this guide, you’ll create professional-looking results that transform your outdoor space into the organized, beautiful garden you’ve always wanted.
About Ravuk Barg
B.Sc. Horticulture Science | Certified Master Gardener
Ravuk Barg has spent more than a decade with his hands in the soil and his head full of questions about why some gardens thrive while others struggle. What started as a single raised bed of tomatoes and basil in a modest backyard has grown into a deep, working knowledge of everything from seed germination and soil amendment to companion planting and seasonal pruning.
Over the years, Ravuk has gardened through drought summers, waterlogged springs, and pest invasions that would make most gardeners hang up their trowels for good. Those hard seasons, he’ll tell you, taught him more than any perfect growing year ever could. He writes from that earned experience—covering vegetable growing, ornamental planting, houseplant care, composting, and garden design with equal confidence and curiosity.
Philosophy & Approach
Ravuk’s approach to gardening is rooted in practicality. He favors organic methods not out of dogma, but because they work long-term—resulting in healthier soil, fewer inputs, and stronger plants. He has a particular fondness for heirloom vegetable varieties (the kind with proper flavor), unruly cottage-style flower beds, and the stubborn houseplants that everyone else gave up on.
The Mission: Give readers the honest, experience-backed advice that helps them actually succeed in their gardens—not just the ideal version, but the real one; weeds, failures, and all.
Education & Credentials
-
B.Sc. in Horticulture Science
-
Greenfield Agricultural University
-
Focus: Plant Physiology, Soil Ecology, and Sustainable Crop Production
-
-
Master Gardener Certification
-
Cooperative Extension Service
-
Focus: 200+ hours of hands-on practical training and community garden work
-
Continuing Education
-
Organic Pest Management
-
Native Plant Landscaping
-
Sustainable Crop Production