

Creating a beautiful landscape isn’t just about planting pretty flowers randomly across your yard. Understanding how to layer landscaping is the secret to designing outdoor spaces that look professionally crafted and naturally balanced. This technique involves strategically placing plants of different heights, textures, and colors to create depth, visual interest, and year-round appeal.
Layered landscaping mimics nature’s own design principles, where tall trees provide a canopy, medium shrubs fill the middle space, and ground-level plants carpet the forest floor. When you apply this same approach to your garden, you create a cohesive look that draws the eye naturally through your outdoor space.
Whether you’re starting with a blank canvas or renovating an existing garden, mastering the art of layered design will transform your property into a stunning retreat. You’ll learn to create focal points, establish privacy, and maximize your garden’s seasonal beauty through strategic plant placement and thoughtful design choices.
Why You Need to Layer Your Landscape
Layering your landscape is essential for creating depth, texture, and a visually appealing outdoor space. By organizing plants and features in tiers—ranging from ground covers and perennials to shrubs and towering trees—you introduce a sense of dimension that makes your garden more dynamic and engaging. This technique also promotes biodiversity by accommodating a variety of plants that support different wildlife, such as pollinators and birds. Furthermore, layered landscapes help improve the ecological balance by reducing soil erosion, enhancing water retention, and providing shade that cools your property. Whether you’re aiming to boost curb appeal or create a serene environment, layering ensures your garden has structure, balance, and year-round interest.
8 Step-by-Step Guide: How to Layer Landscaping
Step 1: Assess Your Space and Conditions
Begin by carefully evaluating your property’s unique characteristics, including sunlight patterns, soil conditions, drainage, and existing features. Walk around your yard at different times of day to identify sunny, partially shaded, and fully shaded areas. Note where water collects after rain and observe wind patterns that might affect plant growth.

Measure your available planting areas and identify any slopes, level changes, or architectural features that will influence your design. Take photos from various angles to help visualize potential improvements. Understanding these baseline conditions ensures you’ll select appropriate plants and create realistic expectations for your layered landscape project.
Step 2: Choose Your Backdrop Plants
The backdrop layer consists of the tallest elements in your landscape design, typically including large trees, tall shrubs, and architectural features like fences or pergolas. These elements provide structure and define your garden’s outer boundaries while creating privacy and wind protection.
Select backdrop plants that will reach mature heights of 15-30 feet or more, depending on your space size. Consider evergreen options for year-round screening or deciduous trees for seasonal interest and summer shade. Popular choices include oak trees, maple varieties, arborvitae, or bamboo screens. Plant these elements first, as they’ll influence the placement and selection of all other layers.
Step 3: Plan Your Middle Layer Shrubs
The middle layer bridges the gap between your tall backdrop and lower foreground plants. This layer typically includes shrubs and small trees ranging from 4-15 feet in mature height. These plants provide structure, seasonal color, and often serve as focal points within your design.

Choose a mix of evergreen and deciduous shrubs to maintain year-round interest while providing seasonal variation. Consider flowering varieties like hydrangeas, rhododendrons, or native flowering shrubs that support local wildlife. Group odd numbers of the same plant together for maximum visual impact, and vary bloom times to extend seasonal color throughout your garden.
Step 4: Select Ground Cover and Low Plants
The lowest layer includes plants under 4 feet in height, encompassing ground covers, perennials, annuals, and small ornamental grasses. This layer provides color, texture, and seasonal interest while suppressing weeds and completing your design’s visual flow.
Mix different plant types to create varied textures and bloom times. Combine spreading ground covers like pachysandra or vinca with upright perennials such as hostas, daylilies, or ornamental grasses. Include both spring and fall bloomers to maintain color throughout growing seasons. Consider foliage plants with interesting leaf shapes or colors to provide interest even when flowers aren’t blooming.
Step 5: Create Focal Points
Every well-layered landscape needs attention-grabbing focal points that draw the eye and create visual anchors throughout the space. These can include specimen plants with unique shapes or colors, decorative elements like sculptures or water features, or architectural features such as arbors or decorative containers.
Position focal points strategically within your layered design, ensuring they’re visible from key viewing areas like patios, windows, or garden paths. A specimen tree with interesting bark or unusual form can serve as a dramatic backdrop focal point, while a colorful perennial border might create foreground interest. Limit focal points to prevent visual chaos while ensuring each garden area has something special to discover.
Step 6: Consider Seasonal Interest
Successful layered landscapes provide visual appeal throughout all four seasons, not just during peak growing periods. Plan your plant selections to include spring bulbs, summer flowers, fall foliage, and winter structure or evergreen plants.

Include plants with different seasonal highlights across all layers. Spring-flowering trees like dogwood or cherry provide early backdrop color, while fall-foliage shrubs like burning bush or maple varieties offer autumn drama. Winter interest comes from evergreen plants, ornamental grasses that remain standing, or shrubs with colorful bark or persistent berries. This approach ensures your layered landscape remains attractive and engaging year-round.
Step 7: Plan for Texture and Color Harmony
Successful layering involves more than just height variation – texture and color coordination create cohesive, professional-looking results. Mix fine-textured plants like ornamental grasses with bold-leaved specimens such as hostas or coral bells to create visual interest and contrast.
Develop a color scheme that flows naturally through all layers, using complementary or analogous color combinations rather than random color placement. Consider foliage colors as well as flower colors, since leaves provide longer-lasting visual impact. Repeat key colors throughout different layers to create unity, while varying shades and intensities to maintain interest and depth.
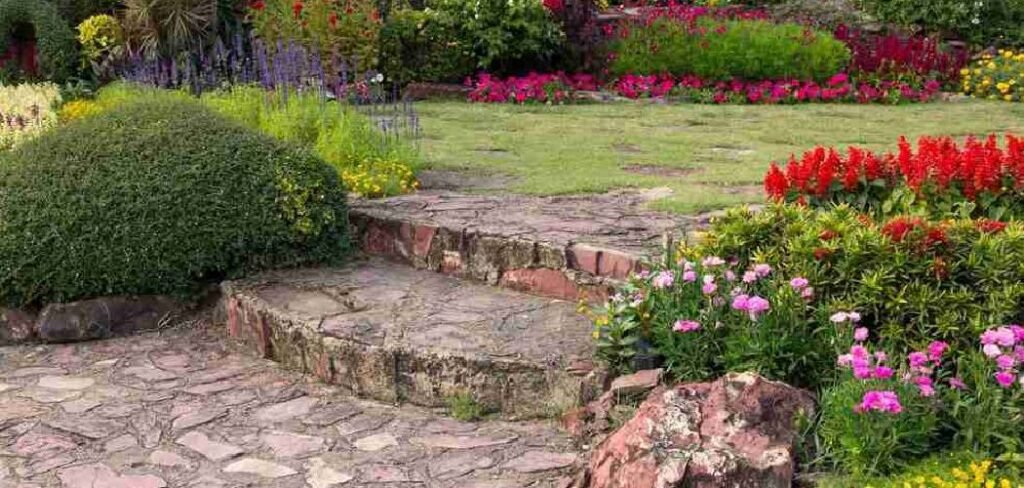
Step 8: Install Hardscape Elements
Incorporate non-plant elements like paths, retaining walls, decorative stones, or garden structures that support and enhance your layered plant design. These hardscape features provide structure, define spaces, and often solve practical problems like drainage or accessibility.
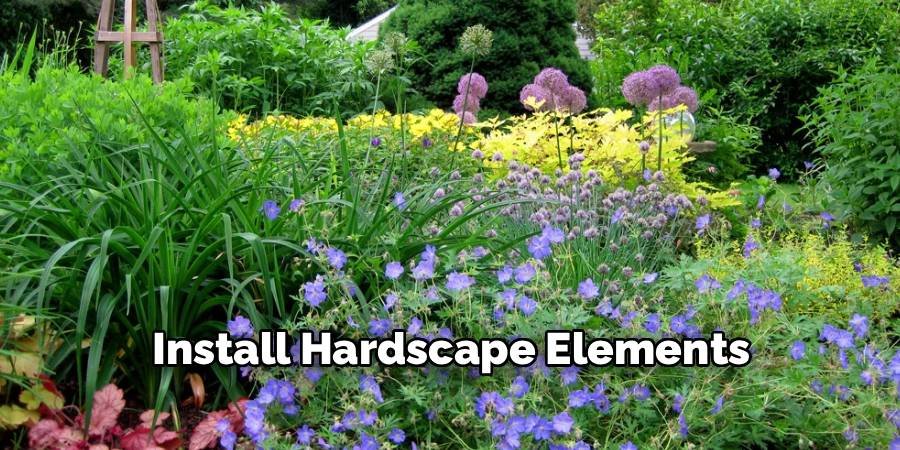
Install major hardscape elements before final planting to avoid damaging established plants. Consider how these features will interact with your planned plant layers – a stone retaining wall might serve as backdrop support for middle-layer shrubs, while stepping stone paths can wind through lower-layer plantings to create intimate garden experiences.
Maintaining Your Layered Landscape
Proper maintenance keeps your layered landscape looking its best while ensuring plants remain healthy and properly sized for their intended roles. Regular seasonal tasks prevent small problems from becoming major design disruptions.
Spring maintenance includes removing winter debris, refreshing mulch layers, and conducting any necessary pruning before active growth begins. Summer care focuses on consistent watering, deadheading flowers, and monitoring for pest or disease issues that could affect plant health.
Fall preparation involves planting new additions, dividing overgrown perennials, and cleaning up fallen leaves that might harbor diseases. Winter protection may include wrapping sensitive plants or applying anti-desiccant sprays to evergreens in harsh climates.
Common Mistakes to Avoid
Many homeowners make predictable errors when attempting layered landscape designs. The most frequent mistake is planting for current size rather than mature dimensions, leading to overcrowded gardens within a few years.
Another common error involves ignoring growing conditions, placing sun-loving plants in shade or moisture-sensitive species in wet areas. This results in poor plant performance and eventual replacement costs.
Failing to consider maintenance requirements often leads to overwhelming upkeep needs. Choose plants appropriate for your available maintenance time and physical abilities to ensure long-term success.
Finally, many people create monotonous designs by using too many similar plants or colors. Embrace variety within your chosen color scheme and texture palette for more engaging results.
Frequently Asked Questions (FAQ)
What Is the Best Time of Year to Start Layered Landscaping?
Fall is ideal for most regions because cooler temperatures reduce plant stress while allowing root establishment before winter dormancy. Spring planting is also successful but requires more careful attention to watering during hot summer months.
How Much Should I Budget for a Layered Landscape Design?
Costs vary widely based on property size, plant choices, and hardscape elements, typically ranging from $3,000-15,000 for average residential projects. Starting with smaller areas and expanding gradually helps manage expenses while allowing design refinements.
Can I Create Layered Landscaping in Small Spaces?
Absolutely! Use dwarf varieties and vertical elements like trellises or container gardens to create height variation. Even balconies and tiny yards can benefit from layering principles using appropriate plant sizes.
How Do I Choose Plants That Work Well Together?
Consider mature sizes, growing requirements, and bloom times when selecting companion plants. Native plant combinations often work well together since they’ve evolved in similar conditions and support local ecosystems.
Should I Hire a Professional or Design It Myself?
DIY approaches work well for smaller projects or gardening enthusiasts, while complex designs or large properties benefit from professional landscape design expertise. Consider consulting with a designer even if you plan to install plants yourself.
Conclusion
Learning how to layer landscaping transforms ordinary yards into extraordinary outdoor spaces that provide year-round beauty and functionality. This systematic approach to garden design creates natural-looking environments that require less maintenance while delivering maximum visual impact.
Remember that successful layered landscapes develop over time as plants mature and establish their intended roles within your design. Start with a solid plan, choose appropriate plants for your conditions, and be patient as your vision comes to life.
Your new layered landscape will provide years of enjoyment while increasing your property value and supporting local wildlife. The investment in thoughtful design and quality plants pays dividends through reduced maintenance needs and enhanced outdoor living experiences.
Whether you’re creating intimate seating areas, establishing privacy screening, or simply wanting a more professional-looking yard, layered landscaping techniques deliver results that impress neighbors and provide personal satisfaction. Your garden will become a true outdoor retreat that reflects your personal style while working harmoniously with nature’s own design principles.
About Ravuk Barg
B.Sc. Horticulture Science | Certified Master Gardener
Ravuk Barg has spent more than a decade with his hands in the soil and his head full of questions about why some gardens thrive while others struggle. What started as a single raised bed of tomatoes and basil in a modest backyard has grown into a deep, working knowledge of everything from seed germination and soil amendment to companion planting and seasonal pruning.
Over the years, Ravuk has gardened through drought summers, waterlogged springs, and pest invasions that would make most gardeners hang up their trowels for good. Those hard seasons, he’ll tell you, taught him more than any perfect growing year ever could. He writes from that earned experience—covering vegetable growing, ornamental planting, houseplant care, composting, and garden design with equal confidence and curiosity.
Philosophy & Approach
Ravuk’s approach to gardening is rooted in practicality. He favors organic methods not out of dogma, but because they work long-term—resulting in healthier soil, fewer inputs, and stronger plants. He has a particular fondness for heirloom vegetable varieties (the kind with proper flavor), unruly cottage-style flower beds, and the stubborn houseplants that everyone else gave up on.
The Mission: Give readers the honest, experience-backed advice that helps them actually succeed in their gardens—not just the ideal version, but the real one; weeds, failures, and all.
Education & Credentials
-
B.Sc. in Horticulture Science
-
Greenfield Agricultural University
-
Focus: Plant Physiology, Soil Ecology, and Sustainable Crop Production
-
-
Master Gardener Certification
-
Cooperative Extension Service
-
Focus: 200+ hours of hands-on practical training and community garden work
-
Continuing Education
-
Organic Pest Management
-
Native Plant Landscaping
-
Sustainable Crop Production