

Learning how to layer a garden bed is one of the most important skills for any gardener. When you layer your garden bed correctly, you create the perfect environment for plants to grow strong and healthy. This method helps improve soil quality, saves water, and reduces weeds naturally.
Garden bed layering, also known as lasagna gardening or sheet mulching, mimics how nature builds soil in the forest. By adding different materials in layers, you create rich, fertile soil that plants love. This guide will show you exactly how to layer a garden bed.
Benefits of Layered Garden Beds
Learning how to layer a garden bed offers many advantages over traditional gardening methods. Layered beds improve soil structure, increase water retention, and reduce the need for chemical fertilizers.
The stratification process creates a habitat for beneficial insects and soil organisms. These helpful creatures improve soil health and help naturally control garden pests. Your plants will grow stronger with less effort on your part.
Stratified garden beds also effectively suppress weeds. The dense layers block sunlight from reaching weed seeds, so fewer weeds can grow. This saves you time and effort during the growing season.
10 Step-by-Step Guide on How to Layer a Garden Bed
Step 1: Choose the Right Location for Your Garden Bed
The first step in how to layer a garden bed is picking the perfect spot. Look for an area that gets 6-8 hours of sunlight each day. Most vegetables and flowers need plenty of sun to grow well. Make sure the area has good drainage. Water should not pool or stagnate after rain. If your yard has clay soil that drains slowly, you may need to build raised beds or add drainage materials.
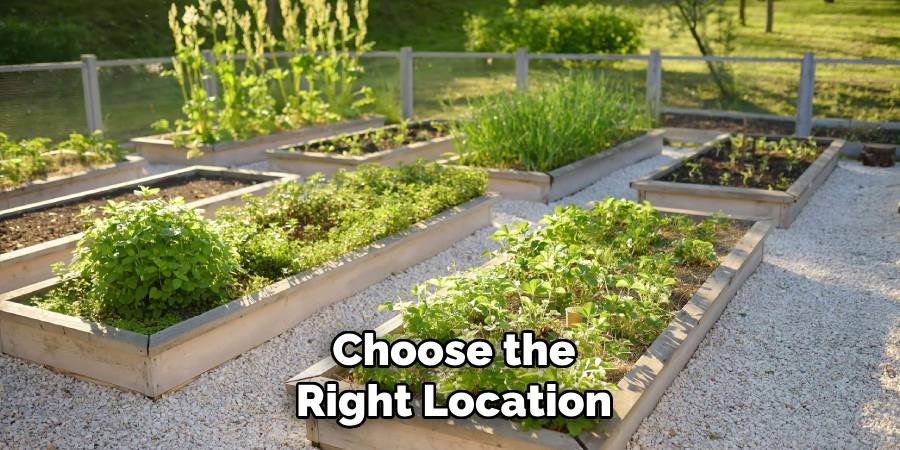
Check that you can easily reach all parts of your garden bed for watering and harvesting. A 4-foot wide center reach is best because you can reach the center from either side without having to set foot on the ground.
Step 2: Clear and Prepare the Ground
Before you begin layering, you need to properly prepare the soil. Remove any large weeds, rocks, or debris from the area. There is no need to dig up grass or small weeds, as these will break down under your layer.
Cut away any tall grass or weeds at ground level with a mower or trimmer. This will make it easier to layer the layers evenly. If you have tough weeds, you can cover them with cardboard first.
Mark the edges of your garden bed with markers and string or spray paint. This will help you see exactly where to place your materials and will make your bed look nice.
Step 3: Add the Cardboard Base Layer
Cardboard forms the base of your layered garden bed. This layer prevents weeds and grass from growing through your soil and slowly breaks down to provide nutrients to the soil. Use large pieces of cardboard without glossy printing or tape. Overlap the edges by at least 6 inches to prevent weeds from getting through the gaps. Remove any staples or plastic tape before placing the cardboard. Water the cardboard thoroughly after placing it. Wet cardboard breaks down faster and stays in place better. This base layer is crucial for successful garden bed layering.
Step 4: Create the Brown Layer Foundation
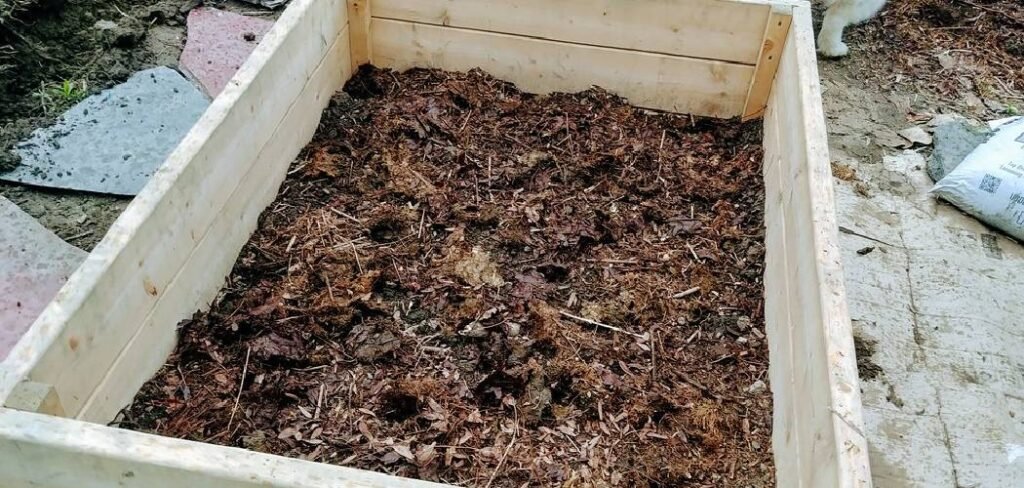
Brown materials are the carbon-rich base of your layered garden bed. These materials break down slowly and help build good soil structure. Common brown materials include dry leaves, straw, newspaper, and small twigs. Spread your brown materials 4-6 inches thick on the cardboard. Make sure all areas are covered evenly. Dry leaves work especially well because they pack nicely and break down at the right rate. Avoid using fresh grass clippings or green materials in this layer. Save these for the next step. The brown layer should feel dry and crumbly to your hands.
Step 5: Add Green Materials for Nitrogen
Green materials provide nitrogen, which is essential for strong, healthy plant growth. These materials break down quickly and heat your compost pile. Good green materials include fresh grass clippings, kitchen scraps, and coffee grounds.
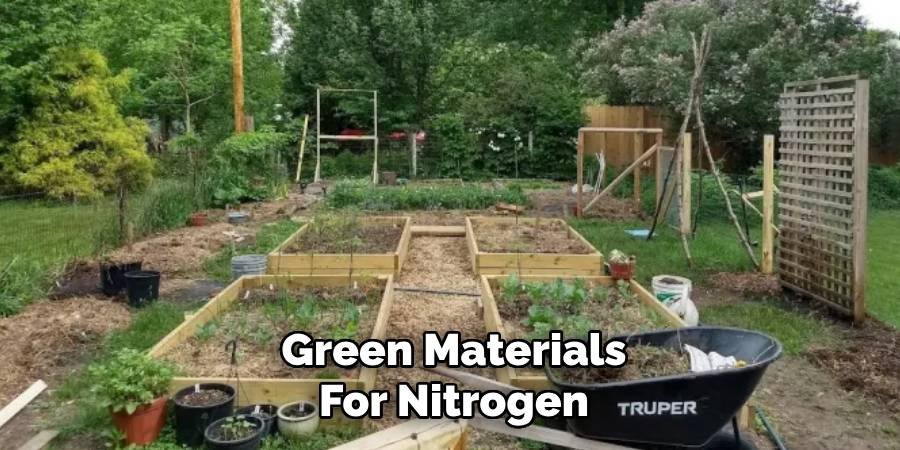
Layer your green materials 2-3 inches thick over the brown layer. Don’t make this layer too thick, or it can start to smell as it breaks down. Kitchen scraps like vegetable peels and coffee grounds work great. Avoid adding meat, dairy, or oily foods to your green layer. These can attract pests and create odors. Stick to plant-based materials for best results.
Step 6: Alternate Brown and Green Layers
Continue building your garden bed by alternating layers of brown and green. This creates the perfect balance for healthy soil development. Aim for about three parts brown materials to 1 part green materials. Add 2-3 more sets of brown and green layers, making each layer slightly thinner than the layer below. Your total pile should be about 18-24 inches tall when you are finished layering. Water each layer lightly as you build. This helps break down the materials and keeps your pile from blowing away in strong winds.
Step 7: Apply Quality Compost Layer
A good compost layer provides immediate nourishment to your plants when your other layers break down. Use ready-made compost that looks dark and crumbly. You can buy compost or make your own if you have time.
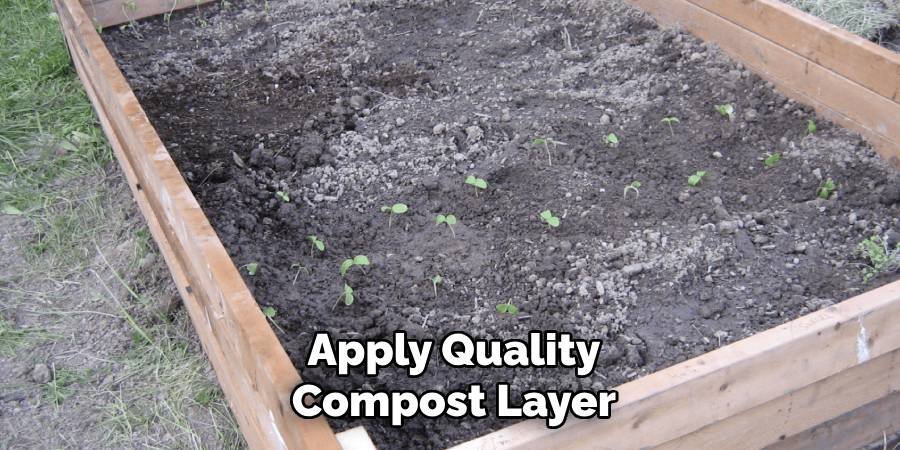
Spread 2-3 inches of compost over your last brown layer. This layer should cover the entire bed evenly. Good compost has an earthy smell and feels soft to your hands. If you don’t have enough compost for your entire bed, focus on where you plan to plant first. You can add more compost to other areas later when it becomes available.
Step 8: Add the Final Mulch Layer
The top layer of mulch protects your garden bed and retains moisture in the soil. Good mulch materials include straw, shredded leaves, or wood chips. Avoid fresh wood chips, which can steal nitrogen from your plants.
Apply 2-4 inches of mulch over the fertilizer layer. Pull the mulch back slightly where you plan to plant or transplant seeds. This final layer will look nice and cover all the soil.
Leave a small gap around the trunk to prevent insect problems. The mulch should not touch the tree trunk directly, as this can cause rot.
Step 9: Water the Completed Garden Bed
After completing the layers, water the entire garden bed thoroughly. Water helps break down all the materials and helps them clump together. Use a gentle spray to avoid washing away the carefully placed layers.
Water until you see moisture seeping through all the layers. This may take more water than you expect because dry materials absorb a lot of moisture before they are saturated.
Test the moisture level by pushing your hand into the layers. The materials should be damp but not wet throughout the pile.
Step 10: Let the Garden Bed Settle and Plant
Let your layered garden bed sit for 2-4 weeks before planting. During this time, the materials will begin to break down, and the pile will shrink slightly. This settling time helps create better growing conditions.

If necessary, you can plant immediately by making planting holes through the layers down to the cardboard. Fill these holes with additional fertilizer or potting soil for the new plant.Add more mulch if necessary to maintain a 2-3 inch layer on top. Your layered garden bed will continue to improve over time as the materials break down into rich soil.
Common Mistakes to Avoid
Many gardeners make mistakes when learning how to layer a garden bed. One common error is making layers too thick, especially the green layers. Thick green layers can become slimy and smell bad.
Another mistake is using the wrong materials. Avoid diseased plant materials, weed seeds, or materials that have been treated with chemicals. These can cause problems in your garden later.
Be sure to water your layers during construction. Dry materials take longer to break down and do not set properly. Each layer should be moist but not waterlogged.
Maintaining Your Layered Garden Bed
Once you know how to layer a garden bed, maintaining it becomes easy. Add new organic materials whenever they become available. Kitchen scraps, grass clippings, and fallen leaves can all be added throughout the year.
Refresh the mulch layer every few months to maintain good coverage. As the bottom layers break down, you will need to add new material on top to maintain the benefits. Test your soil every year or two to maintain nutrient balance. Most layered beds require very little additional fertilizer because they create their rich soil.
Conclusion
Learning how to layer a garden bed transforms your gardening success and creates healthier growing conditions for all your plants. This natural method improves soil quality, conserves water, and reduces maintenance throughout the growing season. By following these 10 easy steps, you can create a more productive garden bed every year.
The layering process mimics nature’s soil-building process, creating the rich, fertile soil that plants love. Start with a good cardboard base layer, alternate brown and green materials properly, and finish with quality compost and mulch. Be sure to water each layer during construction and allow time to settle before planting.
Your layered garden bed will continue to improve over time as the materials break down into nutrient-rich soil. This sustainable gardening method saves money, reduces waste, and creates beautiful growing spaces that produce healthy, bountiful crops for years to come.
About Ravuk Barg
B.Sc. Horticulture Science | Certified Master Gardener
Ravuk Barg has spent more than a decade with his hands in the soil and his head full of questions about why some gardens thrive while others struggle. What started as a single raised bed of tomatoes and basil in a modest backyard has grown into a deep, working knowledge of everything from seed germination and soil amendment to companion planting and seasonal pruning.
Over the years, Ravuk has gardened through drought summers, waterlogged springs, and pest invasions that would make most gardeners hang up their trowels for good. Those hard seasons, he’ll tell you, taught him more than any perfect growing year ever could. He writes from that earned experience—covering vegetable growing, ornamental planting, houseplant care, composting, and garden design with equal confidence and curiosity.
Philosophy & Approach
Ravuk’s approach to gardening is rooted in practicality. He favors organic methods not out of dogma, but because they work long-term—resulting in healthier soil, fewer inputs, and stronger plants. He has a particular fondness for heirloom vegetable varieties (the kind with proper flavor), unruly cottage-style flower beds, and the stubborn houseplants that everyone else gave up on.
The Mission: Give readers the honest, experience-backed advice that helps them actually succeed in their gardens—not just the ideal version, but the real one; weeds, failures, and all.
Education & Credentials
-
B.Sc. in Horticulture Science
-
Greenfield Agricultural University
-
Focus: Plant Physiology, Soil Ecology, and Sustainable Crop Production
-
-
Master Gardener Certification
-
Cooperative Extension Service
-
Focus: 200+ hours of hands-on practical training and community garden work
-
Continuing Education
-
Organic Pest Management
-
Native Plant Landscaping
-
Sustainable Crop Production