

Learn how to lay down sod over existing lawn with our complete 8-step guide. Get tips for successful sod installation, soil preparation, and lawn renovation without removing old grass.
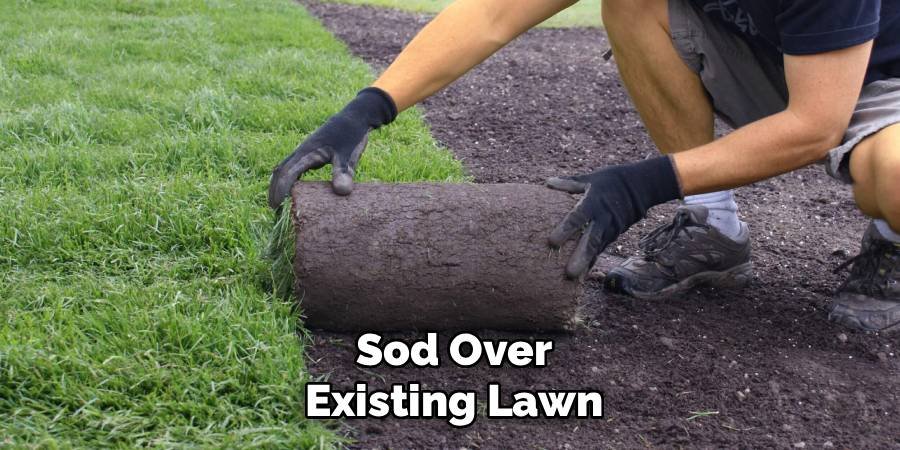
Are you tired of looking at your patchy, brown, or damaged lawn? Installing new sod over your existing lawn can give you a beautiful, green yard quickly. While many people think they need to remove all the old grass first, you can actually lay sod over existing lawn if you follow the right steps. This method saves time and effort while still giving you great results.
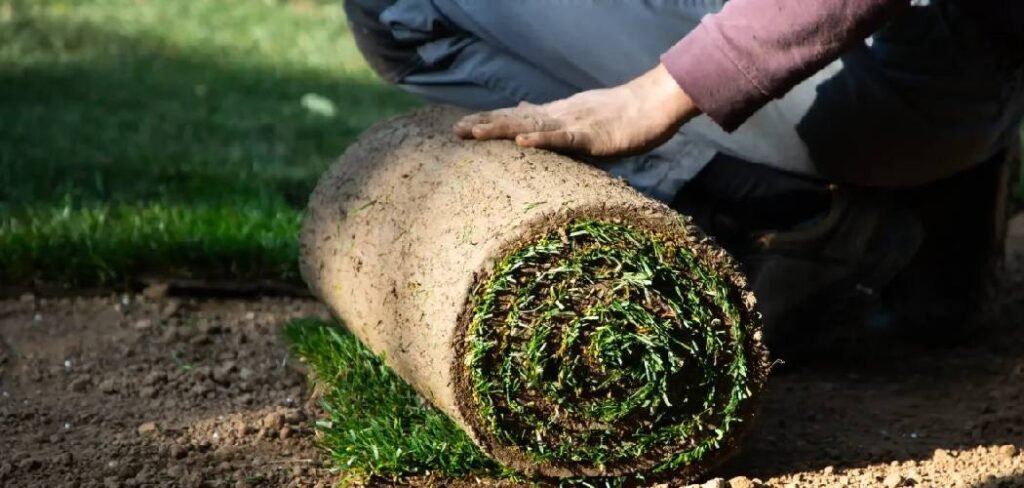
Many homeowners choose sod installation because it provides instant results. Unlike seeding, which takes weeks to grow, new sod gives you a full lawn right away. The process of laying sod over existing grass requires careful planning and proper technique, but it’s something most people can do themselves.
Understanding Sod Installation Over Existing Lawn
Installing sod over existing lawn is possible when your current grass is mostly dead or very thin. The old grass will decompose under the new sod and actually help feed your new lawn. This method works best when your existing lawn has bare spots, dead patches, or very weak grass.
Before starting your sod installation project, you need to check if your existing lawn is suitable. Look for areas where grass is completely dead or very sparse. If your current lawn is thick and healthy, you might need to remove some of it first.
The key to successful sod installation over existing grass is proper soil preparation. Your new sod needs good contact with the soil underneath to establish strong roots. This means you’ll need to do some work on your existing lawn before laying the new sod.
8 Step-by-Step Guide on How to Lay Down Sod Over Existing Lawn
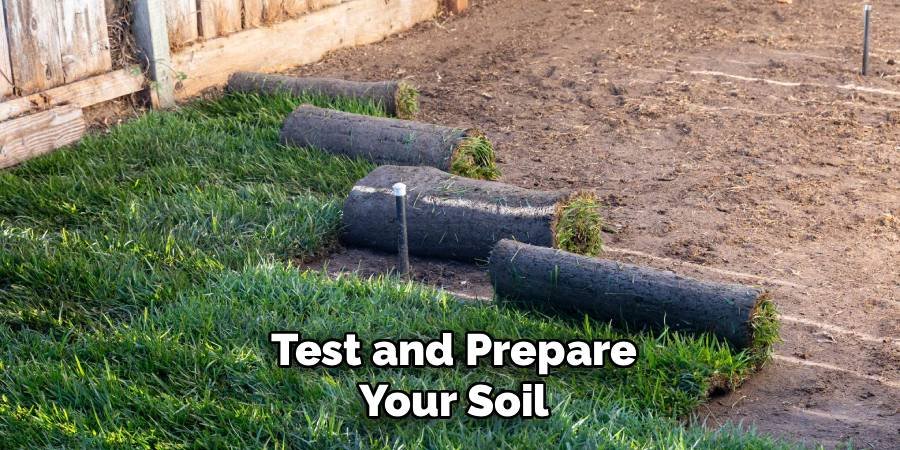
Step 1: Test and Prepare Your Soil
Start by testing your soil pH and nutrient levels. Most grass types grow best in soil with a pH between 6.0 and 7.0. You can buy a simple soil test kit from any garden center or hardware store. If your soil is too acidic, add lime to raise the pH. If it’s too alkaline, add sulfur to lower it. Also check if your soil needs fertilizer. Good soil preparation is crucial for successful sod installation. Remove any rocks, sticks, or debris from your lawn area. This step ensures your new sod will lay flat and make good contact with the soil underneath.
Step 2: Mow Your Existing Lawn Very Short
Cut your existing grass as short as possible using your lawn mower. Set the mower to its lowest setting and mow the entire area where you plan to install new sod.
After mowing, rake up all the grass clippings and remove them from the area. Leaving clippings on the ground can create air pockets under your new sod, which prevents proper root establishment.
A very short existing lawn allows your new sod to make better contact with the soil. This contact is essential for the sod roots to grow into the ground below.
Step 3: Water the Existing Lawn Area
Lightly water your existing lawn area the day before sod installation. The soil should be moist but not muddy or waterlogged. Moist soil makes it easier to work with and helps the new sod establish roots quickly.
Don’t overwater at this stage. Soggy soil can cause problems when you’re laying the sod pieces. The ground should feel slightly damp when you walk on it.
Check the weather forecast before watering. You don’t want to water if heavy rain is expected, as this could make your soil too wet for sod installation.
Step 4: Order and Prepare Your Sod
Measure your lawn area carefully to determine how much sod you need. Most sod comes in rectangular pieces that cover about 10 square feet each. Add 5-10% extra to account for cutting and waste.
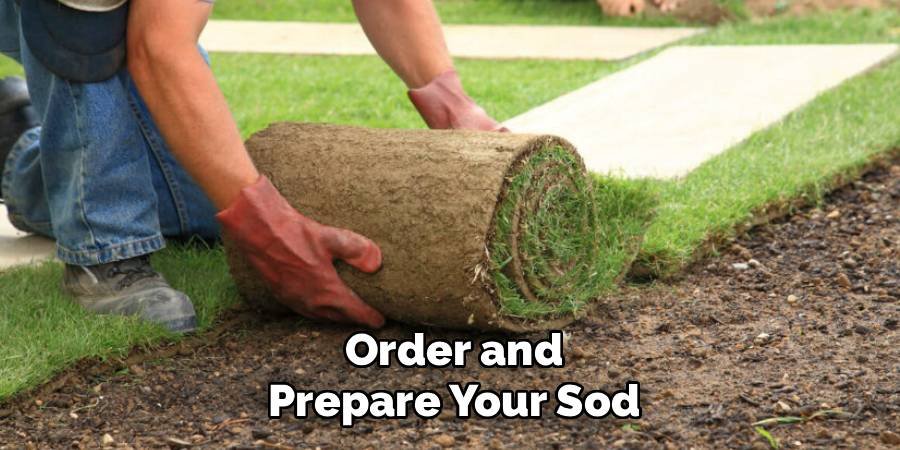
Order your sod to arrive the day you plan to install it. Fresh sod should be installed within 24 hours of delivery for best results. Sod that sits too long can dry out or start to yellow. Keep your sod in a shaded area until you’re ready to use it. If the weather is hot, lightly mist the sod with water to keep it from drying out.
Step 5: Start Laying Sod from One Edge
Begin installing your sod along the longest straight edge of your lawn area. This might be along a sidewalk, driveway, or property line. Starting with a straight edge helps ensure your sod rows stay aligned.
Place the first piece of sod carefully, making sure it makes good contact with the ground. Press down gently to eliminate air pockets, but don’t step on the sod pieces as this can damage them. Work systematically across your lawn area, laying one row at a time. This organized approach helps prevent gaps and overlaps in your sod installation.
Step 6: Fit Sod Pieces Tightly Together
As you lay each piece of sod, make sure the edges fit tightly against the previous pieces. There should be no gaps between sod pieces, but don’t overlap them either.
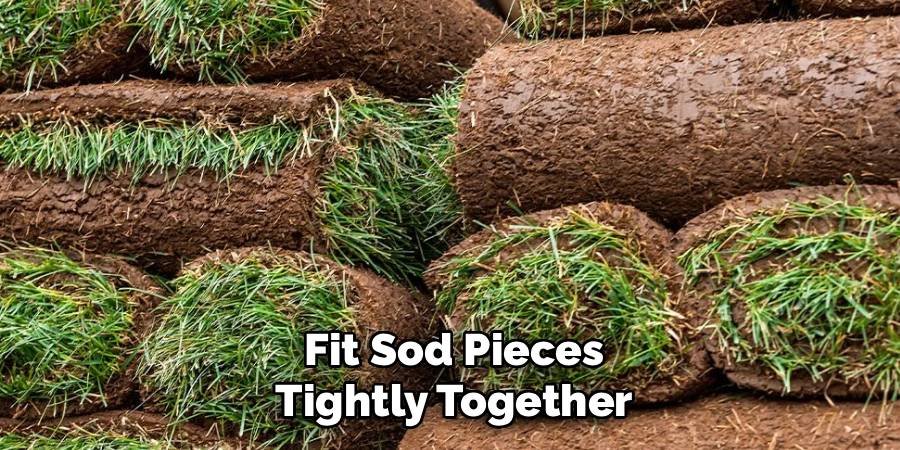
Use a sharp knife to cut sod pieces to fit around obstacles like trees, flower beds, or sprinkler heads. Make clean, straight cuts for the best appearance and proper fit. Stagger the joints between rows, like laying bricks. This pattern helps the sod pieces hold together better and creates a more natural-looking lawn.
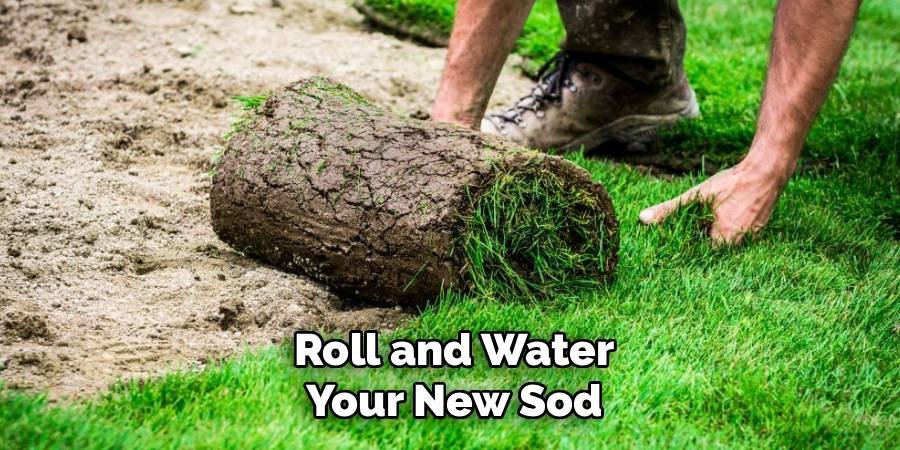
Step 7: Roll and Water Your New Sod
Once all your sod is installed, use a lawn roller to ensure good contact between the sod and soil. Roll the entire area in two directions – first lengthwise, then across the width.
If you don’t have a lawn roller, you can walk across the sod carefully, or use a lightweight roller filled partially with water. The goal is to press the sod down without damaging it. After rolling, water your new sod immediately. Give it a thorough soaking, applying about 1 inch of water. The water should soak through the sod and into the soil underneath.
Step 8: Maintain Your New Sod Properly
For the first two weeks after installation, water your new sod daily. Keep the soil consistently moist but not waterlogged. Light, frequent watering is better than heavy, infrequent watering during this establishment period. Avoid walking on your new sod for at least two weeks. The roots need time to grow into the soil and establish themselves. Heavy foot traffic can damage the developing root system.
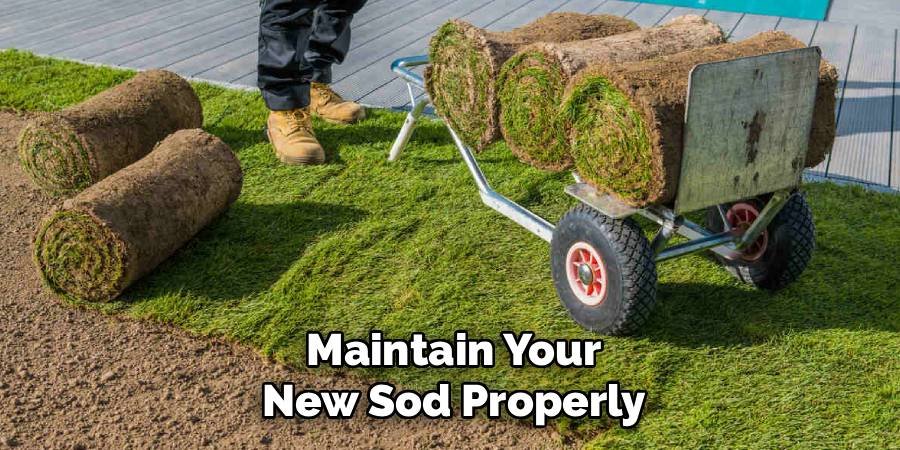
After about two weeks, you can reduce watering frequency but increase the amount each time. This encourages deeper root growth and helps your new lawn become more drought-resistant.
Common Mistakes to Avoid When Installing Sod
Many people make mistakes during sod installation that can lead to poor results. One common error is not preparing the soil properly. Skipping soil testing or failing to address pH problems can cause your new sod to struggle or die.
Another mistake is waiting too long to install sod after delivery. Fresh sod needs to be installed quickly to stay healthy. Sod that sits in the sun or heat for too long will start to die before you even install it. Improper watering is also a frequent problem. Both overwatering and underwatering can damage new sod. Follow a consistent watering schedule and adjust based on weather conditions and soil moisture levels.
Benefits of Laying Sod Over Existing Lawn
Installing sod over existing lawn offers several advantages over complete lawn removal and replacement. First, it saves significant time and labor. You don’t need to remove all the old grass, which is hard work and creates a lot of waste.
The existing grass and root system can actually benefit your new lawn. As the old grass decomposes, it adds organic matter to the soil, which improves soil structure and provides nutrients for your new sod. This method also prevents soil erosion during the installation process. Keeping some existing vegetation in place helps hold the soil together, especially on slopes or areas prone to erosion.
Frequently Asked Questions
Can I lay sod over existing grass without any preparation?
No, mulch cannot be applied to existing grass without proper preparation. While you don’t need to remove all of the old grass, you must properly prepare the area for successful grass installation. This includes mowing the existing lawn, removing debris, testing and adjusting the soil pH if necessary, and making sure the soil is level.
Proper preparation is essential because your new grass needs good contact with the soil below to establish strong roots. Without preparation, you could end up with air pockets, weak roots, and eventual grass failure. Old grass should be cut as short as possible, and any thick or healthy patches may need to be removed to prevent it from competing with your new grass.
How long does it take for sod to establish roots when laid over existing lawn?
When properly installed over existing lawn, new sod typically takes 2-3 weeks to establish strong roots in the soil below. During the first week, the sod develops initial root connections with the soil surface. By the second week, roots begin penetrating deeper into the ground.
Full establishment usually occurs within 3-4 weeks under ideal conditions. The timeline can vary based on factors like weather conditions, soil quality, grass type, and how well you maintain watering schedules. Cooler weather and consistent moisture help speed establishment, while hot, dry conditions can slow the process. You’ll know your sod is well-established when you can gently tug on a corner and feel resistance from the roots. Proper watering during this establishment period is crucial for success.
What type of sod works best over existing lawn?
The best sod type for installation over existing lawn depends on your climate, soil conditions, and how much sun your yard receives. Cool-season grasses like Kentucky bluegrass, tall fescue, and perennial ryegrass work well in northern climates and can establish successfully over existing lawn. These grasses are hardy and can compete well with decomposing grass underneath. Warm-season grasses like Bermuda, Zoysia, and St.
Augustine are better choices for southern regions. Tall fescue is particularly good for sod-over-sod installation because of its strong root system and ability to establish quickly. Choose sod that matches your existing growing conditions and climate zone. Your local sod supplier can recommend the best varieties for your specific area and situation.
Should I fertilize when laying sod over existing grass?
Yes, applying a starter fertilizer specifically designed for new sod is highly recommended when installing sod over existing grass. Apply the fertilizer to the prepared area just before laying the sod pieces. Starter fertilizers are high in phosphorus, which promotes root development – exactly what your new sod needs to establish successfully. The fertilizer helps the new roots grow through the decomposing grass layer and into the soil below.
However, avoid using regular lawn fertilizer, which is high in nitrogen and can promote leaf growth at the expense of root development. Follow the fertilizer package instructions for application rates. Some sod farms pre-fertilize their sod, so ask your supplier if additional fertilizer is needed. A soil test can also help determine if your soil needs specific nutrients beyond what starter fertilizer provides.
How much water does new sod need when installed over existing lawn?
New sod installed over existing lawn requires careful attention to watering, especially during the first two weeks. Immediately after installation, apply about 1 inch of water to thoroughly soak the sod and underlying soil. For the first week, water lightly but frequently – typically 2-3 times per day for 10-15 minutes each time.
The goal is to keep the sod constantly moist but not waterlogged. During the second week, reduce frequency to once or twice daily but increase duration to encourage deeper root growth. Check soil moisture by lifting a corner of the sod; the soil underneath should be moist but not muddy. After 2-3 weeks, transition to normal lawn watering patterns – less frequent but deeper watering sessions. Weather conditions affect water needs, so adjust accordingly. Hot, windy weather requires more frequent watering, while cool, humid conditions need less.
Conclusion
Learning how to lay down sod over existing lawn can transform your yard quickly and efficiently. This method saves time compared to complete lawn removal while still providing excellent results when done correctly. The key steps include proper soil preparation, cutting existing grass very short, ensuring good sod-to-soil contact, and maintaining consistent moisture during establishment.
Success depends on following each step carefully, from soil testing and preparation through the critical first few weeks of watering and maintenance. Remember that new sod needs time to establish strong roots, so patience and proper care during this period are essential. Avoid common mistakes like inadequate preparation, poor timing, or inconsistent watering.
With proper planning and execution, laying sod over existing lawn can give you the beautiful, green yard you want in just a few weeks. The investment in quality sod and careful installation will provide years of enjoyment and increased property value. Take time to choose the right sod variety for your climate and conditions, and don’t rush the installation process for the best long-term results.
About Ravuk Barg
B.Sc. Horticulture Science | Certified Master Gardener
Ravuk Barg has spent more than a decade with his hands in the soil and his head full of questions about why some gardens thrive while others struggle. What started as a single raised bed of tomatoes and basil in a modest backyard has grown into a deep, working knowledge of everything from seed germination and soil amendment to companion planting and seasonal pruning.
Over the years, Ravuk has gardened through drought summers, waterlogged springs, and pest invasions that would make most gardeners hang up their trowels for good. Those hard seasons, he’ll tell you, taught him more than any perfect growing year ever could. He writes from that earned experience—covering vegetable growing, ornamental planting, houseplant care, composting, and garden design with equal confidence and curiosity.
Philosophy & Approach
Ravuk’s approach to gardening is rooted in practicality. He favors organic methods not out of dogma, but because they work long-term—resulting in healthier soil, fewer inputs, and stronger plants. He has a particular fondness for heirloom vegetable varieties (the kind with proper flavor), unruly cottage-style flower beds, and the stubborn houseplants that everyone else gave up on.
The Mission: Give readers the honest, experience-backed advice that helps them actually succeed in their gardens—not just the ideal version, but the real one; weeds, failures, and all.
Education & Credentials
-
B.Sc. in Horticulture Science
-
Greenfield Agricultural University
-
Focus: Plant Physiology, Soil Ecology, and Sustainable Crop Production
-
-
Master Gardener Certification
-
Cooperative Extension Service
-
Focus: 200+ hours of hands-on practical training and community garden work
-
Continuing Education
-
Organic Pest Management
-
Native Plant Landscaping
-
Sustainable Crop Production