

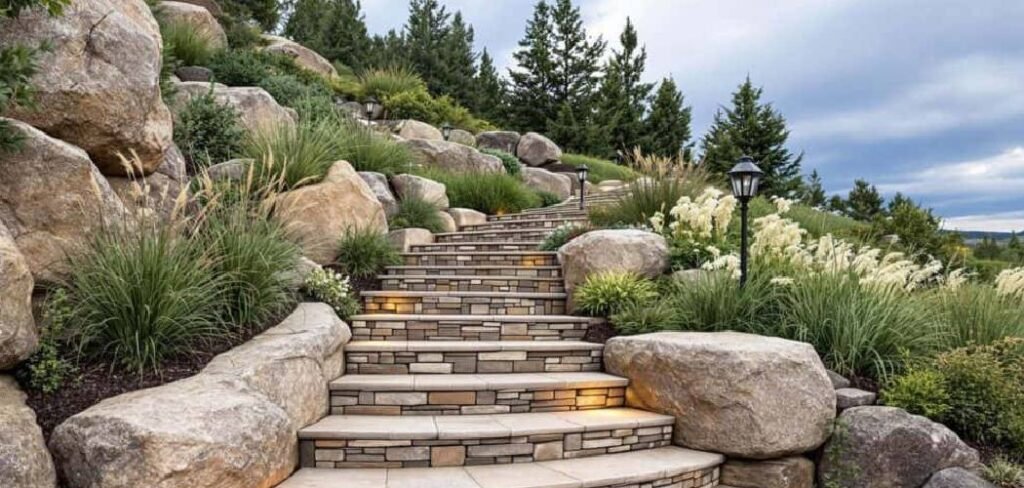
Rock gardens, or xeriscapes, offer a stunning, low-maintenance alternative to traditional lawns and flower beds. Their minimalist appeal, with carefully placed stones and drought-tolerant plants, can transform any outdoor space. However, this beautiful landscape can quickly be overrun by pesky weeds that sprout between the rocks, turning your serene oasis into a constant battle. The key to a pristine rockery is prevention.
This guide will provide a comprehensive look at how to keep weeds out of rock garden spaces using proactive and effective methods. We will walk you through everything from ground preparation to long-term maintenance, ensuring your beautiful rock garden remains weed-free and effortlessly gorgeous.
Why a Weed-Free Rock Garden Matters
Maintaining a pristine rock garden is not just about aesthetics; it’s about preserving the health and design of your landscape. Weeds compete with your chosen alpine and succulent plants for essential resources like water, sunlight, and soil nutrients. If left unchecked, aggressive weeds can choke out your desirable plants, ruining the delicate balance of your garden. Furthermore, removing established weeds from between heavy rocks can be a physically demanding and frustrating task. By focusing on prevention, you protect your investment of time and money, ensure your plants thrive, and keep your garden looking its best with minimal effort.
7 Step-by-Step Guide on How to Keep Weeds Out of Rock Garden Landscapes
Following a structured approach from the beginning is the most effective way to prevent weeds from ever taking hold. This guide breaks down the process into simple, manageable steps that will set your rock garden up for long-term success.
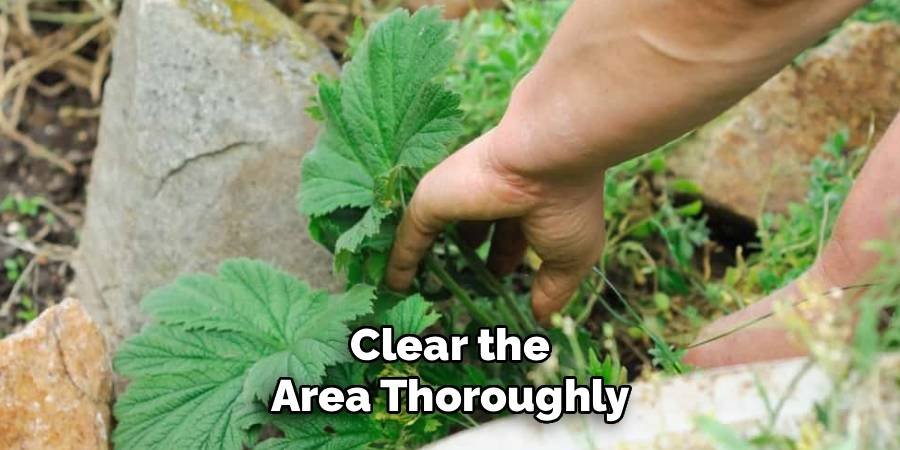
Step 1: Clear the Area Thoroughly
Before you lay a single stone, you must completely clear the designated area of all existing vegetation. This includes grass, existing weeds, and any roots left in the soil. For smaller areas, you can do this manually with a spade and garden hoe, ensuring you dig deep enough to remove the entire root system of perennial weeds. For larger plots, you might consider using a sod cutter to remove the top layer of turf. A non-selective herbicide can also be effective, but be sure to follow the manufacturer’s instructions carefully and allow enough time for it to work before proceeding to the next step.
Step 2: Excavate and Level the Soil
Once the surface is clear, excavate the soil to a depth of about 6 to 8 inches. This step is crucial for two reasons. First, it helps remove any remaining weed seeds or root fragments that are dormant deeper in the soil. Second, it creates the necessary foundation for the layers of weed barrier and drainage material that will follow. Use a shovel and a wheelbarrow to remove the soil. As you work, use a rake to level the excavated area, creating a smooth, even base for your rock garden. A slight slope away from your home’s foundation is also a good idea for proper water drainage.
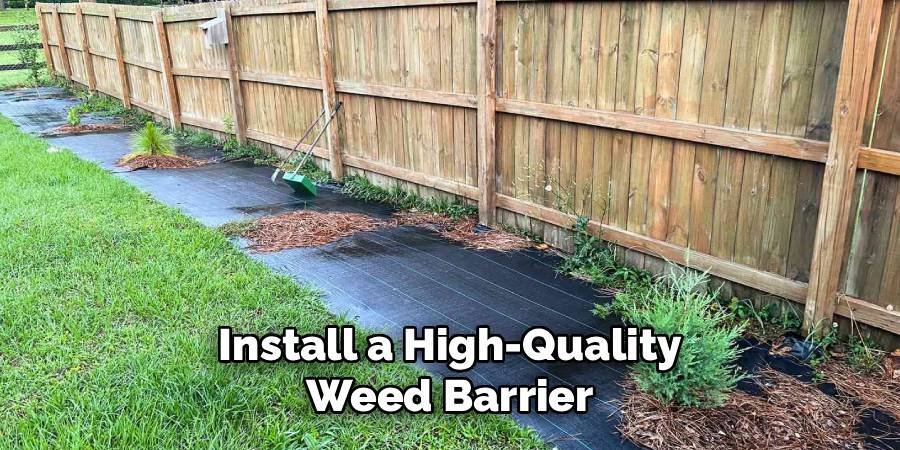
Step 3: Install a High-Quality Weed Barrier
This is arguably the most important step in preventing future weed growth. Choose a high-quality, commercial-grade landscape fabric. This material allows water and air to penetrate the soil, which is essential for any plants you add, but it physically blocks weeds from sprouting through to the surface. Roll the fabric over the entire leveled area, overlapping the seams by at least 6 inches to prevent weeds from finding a path through the gaps. Secure the fabric to the ground using landscape staples or pins, placing them every few feet along the edges and seams to keep it firmly in place.
Step 4: Add a Layer of Sand or Gravel
After securing the landscape fabric, add a 2 to 3-inch layer of coarse sand or small pea gravel on top of it. This layer serves multiple purposes. It provides excellent drainage, which is vital for the health of most rock garden plants like succulents and alpines that are susceptible to root rot. It also adds another physical barrier against any determined weeds that might try to push through. Furthermore, this layer helps to hold the landscape fabric down and provides a stable, even base for your larger decorative rocks and stones. Use a rake to spread the material evenly across the entire surface.
Step 5: Arrange Your Feature Rocks and Plants
Now for the creative part. Begin placing your larger decorative rocks and boulders to create the main structure of your garden. Arrange them in a way that looks natural, varying their sizes and positions. Once you are happy with the rock placement, you can add your plants. To do this, use a utility knife to cut an ‘X’ shape into the landscape fabric where you want each plant to go. Be careful to make the cut just large enough for the plant’s root ball. Dig out the sand and soil underneath, place the plant in the hole, and then backfill with soil, tucking the fabric flaps snugly around the plant’s base.

Step 6: Apply a Thick Layer of Decorative Mulch or Rocks
With your plants and feature stones in place, it’s time to add the final top layer. This can be decorative gravel, river rocks, lava rock, or another inorganic mulch of your choice. Apply a thick layer, aiming for 3 to 4 inches deep. This topdressing serves as the final line of defense against weeds. It blocks sunlight from reaching any stray weed seeds that may have blown into the garden, preventing them from germinating. It also helps to regulate soil temperature, retain moisture for your plants, and gives your rock garden a polished, finished look.
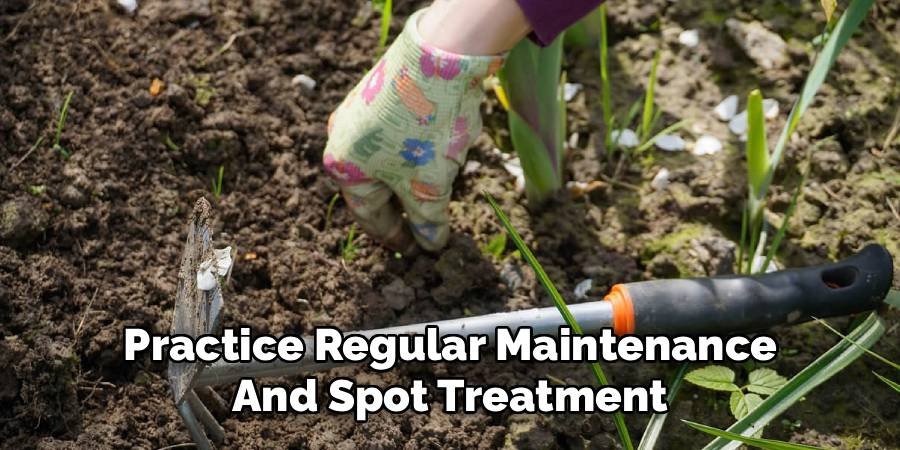
Step 7: Practice Regular Maintenance and Spot Treatment
Even with the best preparation, a few stray weeds might occasionally appear, often from seeds blown in by the wind. The key is to address them immediately before they have a chance to establish roots and go to seed. Conduct a weekly walk-through of your garden. Pull any small weeds you see by hand. For tougher weeds that have managed to root in the gravel, a targeted application of a post-emergent herbicide or a natural alternative like boiling water or horticultural vinegar can be effective. Consistent, proactive maintenance is the easiest way to ensure your garden remains pristine.
Frequently Asked Questions (FAQ)
What Is the Best Barrier to Put Under Rocks to Prevent Weeds?
The most effective barrier is a high-quality, woven landscape fabric. Unlike plastic sheeting, which can suffocate the soil and prevent water drainage, professional-grade fabric is permeable. This allows water, air, and nutrients to reach the soil, which is crucial if you have plants in your rock garden. The fabric acts as a physical shield, blocking weeds from growing up from the soil below. For maximum effectiveness, ensure you overlap any seams by at least six inches and secure it firmly with landscape staples.
Should I Put Plastic Down Before Rocks?
It is generally not recommended to use plastic sheeting under a rock garden. While it does block weeds effectively, it also blocks water and air. This can lead to several problems:
- Water will pool on top of the plastic, creating a soggy environment that can lead to root rot for your plants.
- The soil underneath will become compacted and unhealthy over time.
- The plastic can become brittle and break down from sun exposure, creating holes for weeds to exploit.
A permeable landscape fabric is a much better long-term solution.
How Do You Get Rid of Weeds in Rocks Permanently?
Achieving permanent weed removal involves a combination of proactive installation and consistent maintenance. The most crucial step is installing a durable landscape fabric under a thick layer of gravel and rock. This prevents the vast majority of weeds from ever emerging. For the few that may grow from seeds blown onto the surface, immediate removal is key. Hand-pulling them as soon as you spot them is effective. For a more permanent solution, you can use a propane weed torch to scorch and kill small weeds, but use extreme caution and check local fire regulations first.
Will Vinegar Kill Weeds in a Rock Garden?
Yes, horticultural vinegar (with 20-30% acetic acid) can be an effective natural weed killer in a rock garden. It works by burning the foliage of the plant on contact. However, it is a non-selective herbicide, meaning it will damage or kill any plant it touches, so you must be very careful to apply it only to the weeds. It is most effective on young, newly sprouted weeds and may require multiple applications for more established plants, as it does not always kill the root system.
Can I Use Salt to Kill Weeds in My Rocks?
Using salt (sodium chloride) is a common home remedy, but it should be avoided in a rock garden, especially if you have plants. Salt will kill weeds, but it will also sterilize the soil, making it impossible for any plants to grow there for a long time. It can also leach into surrounding garden beds or lawn areas, causing unintended damage. For this reason, salt is only a viable option for areas where you want absolutely no vegetation, such as in the cracks of a driveway or patio far from other plantings.
Conclusion
Creating and maintaining a beautiful, weed-free rock garden is an achievable goal for any gardener. The process hinges on diligent preparation and a commitment to proactive care. By properly clearing the area, installing a robust weed barrier, and applying a thick layer of inorganic mulch, you create a formidable defense against unwanted growth. Regular, simple maintenance checks will handle any stray intruders before they become a problem. By following these steps, you will master how to keep weeds out of rock garden areas, ensuring your landscape remains a source of pride and enjoyment for years to come.
About Ravuk Barg
B.Sc. Horticulture Science | Certified Master Gardener
Ravuk Barg has spent more than a decade with his hands in the soil and his head full of questions about why some gardens thrive while others struggle. What started as a single raised bed of tomatoes and basil in a modest backyard has grown into a deep, working knowledge of everything from seed germination and soil amendment to companion planting and seasonal pruning.
Over the years, Ravuk has gardened through drought summers, waterlogged springs, and pest invasions that would make most gardeners hang up their trowels for good. Those hard seasons, he’ll tell you, taught him more than any perfect growing year ever could. He writes from that earned experience—covering vegetable growing, ornamental planting, houseplant care, composting, and garden design with equal confidence and curiosity.
Philosophy & Approach
Ravuk’s approach to gardening is rooted in practicality. He favors organic methods not out of dogma, but because they work long-term—resulting in healthier soil, fewer inputs, and stronger plants. He has a particular fondness for heirloom vegetable varieties (the kind with proper flavor), unruly cottage-style flower beds, and the stubborn houseplants that everyone else gave up on.
The Mission: Give readers the honest, experience-backed advice that helps them actually succeed in their gardens—not just the ideal version, but the real one; weeds, failures, and all.
Education & Credentials
-
B.Sc. in Horticulture Science
-
Greenfield Agricultural University
-
Focus: Plant Physiology, Soil Ecology, and Sustainable Crop Production
-
-
Master Gardener Certification
-
Cooperative Extension Service
-
Focus: 200+ hours of hands-on practical training and community garden work
-
Continuing Education
-
Organic Pest Management
-
Native Plant Landscaping
-
Sustainable Crop Production