

You’ve spent time and money preparing your soil and spreading new grass seed, only to watch a heavy rainstorm wash all your hard work away. It’s a frustrating experience for any homeowner or gardener. Achieving a lush, green lawn starts with ensuring your seeds stay put long enough to germinate and take root. This guide is designed to help you with that exact problem. We will walk you through the essential techniques and professional tips on how to keep grass seed from washing away, protecting your investment and setting your lawn up for success from the very beginning.

Why Your Grass Seed Washes Away
Understanding why grass seed moves is the first step toward preventing it. When seeds are spread on bare soil, they have nothing to hold them in place. Gravity, wind, and especially water are their biggest enemies. Heavy rainfall or even over-enthusiastic watering can create surface runoff, creating tiny rivers that carry lightweight seeds downhill. This is particularly problematic on sloped areas of your yard. Furthermore, soil that is too compacted won’t allow seeds to settle in, leaving them exposed on the surface and vulnerable to being displaced by the slightest disturbance.
8 Step-by-Step Guide: How to Keep Grass Seed from Washing Away
Step 1: Prepare the Soil Correctly
Proper soil preparation is your first line of defense. Before you even think about seeding, you need to create a welcoming environment for your grass. Start by raking the area to remove rocks, dead grass, and other debris. Then, use a tiller or a garden rake to loosen the top two to three inches of soil. This process, known as aeration, breaks up compacted earth, creating small pockets where seeds can settle safely. This not only protects them from water runoff but also improves seed-to-soil contact, which is vital for germination.

Step 2: Choose the Right Time to Seed
Timing is everything. Seeding during your region’s optimal growing season gives your grass the best chance to establish quickly. For cool-season grasses like fescue and bluegrass, this is typically early fall or spring. For warm-season grasses like Bermuda and Zoysia, late spring is ideal. Check the weather forecast before you plant. Avoid seeding right before a major storm is predicted. A light, gentle rain can be beneficial, but a downpour can be disastrous. Aim for a period of several days with mild weather to let the seeds settle in.
Step 3: Amend the Soil for Better Structure
Amending your soil can dramatically improve its ability to hold both water and seeds. After tilling, mix in a one-inch layer of organic matter, such as compost or peat moss. This material acts like a sponge, absorbing moisture and preventing the rapid surface runoff that carries seeds away. Compost also enriches the soil with essential nutrients, giving your new seedlings a healthy start. This step improves soil structure, making it less prone to erosion and creating a more stable bed for your future lawn to thrive in.
Step 4: Use a Quality Starter Fertilizer
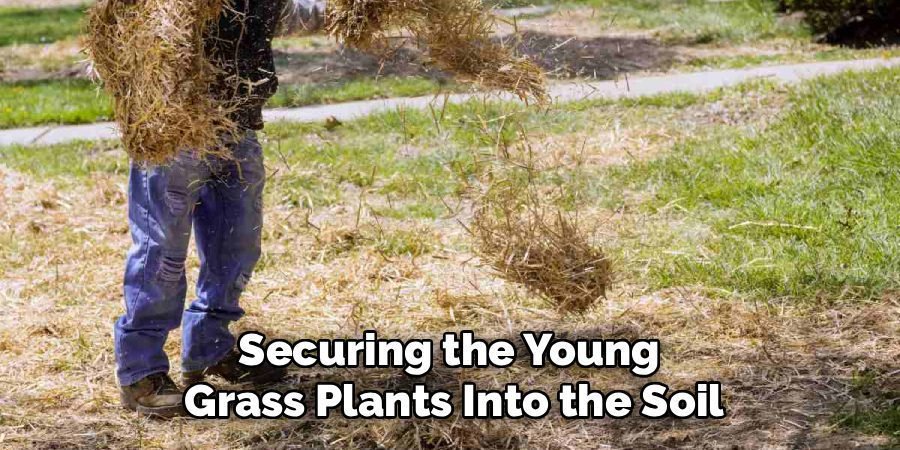
Applying a starter fertilizer is a crucial step that feeds your new seeds and helps anchor them. These specialized fertilizers are high in phosphorus, a nutrient that promotes strong root development. As the seeds germinate, the fertilizer encourages roots to grow downward quickly, securing the young grass plants into the soil. Apply the starter fertilizer according to the package directions on the same day you sow your seeds. A well-fed seedling will establish itself faster, reducing the window of time it is vulnerable to being washed out.
Step 5: Spread the Seed Evenly
How you spread the seed matters. For the best coverage and to prevent clumping, use a broadcast or drop spreader. These tools ensure an even distribution across your prepared soil. Follow the recommended seeding rate on the seed bag; applying too much seed can lead to competition and poor growth, while applying too little results in a sparse lawn. After spreading, gently rake the area one last time. This light raking helps work the seeds into the top quarter-inch of soil, providing immediate protection from wind and light rain.
Step 6: Cover the Seeds with Mulch
Covering your newly seeded area is one of the most effective methods for how to keep grass seed from washing away. A light layer of mulch, such as straw (not hay, which contains weed seeds), peat moss, or a commercial seed mulch, acts as a protective blanket. This cover shields the seeds from the direct impact of raindrops, reduces water evaporation, and helps hold them in place. Apply a very thin layer—you should still be able to see about 50% of the soil through the covering. This simple step can make a huge difference, especially on slopes.
Step 7: Consider Using an Erosion Control Blanket
For steep slopes or areas prone to heavy runoff, an erosion control blanket is an excellent solution. These biodegradable blankets, often made of jute, straw, or coconut fiber, are rolled out over the seeded area and staked down. The blanket physically holds the soil and seeds in place, even during heavy rain. Water can penetrate the material to reach the seeds, and as the grass grows, it will grow right through the blanket. Over time, the blanket will decompose, adding organic matter back into the soil.
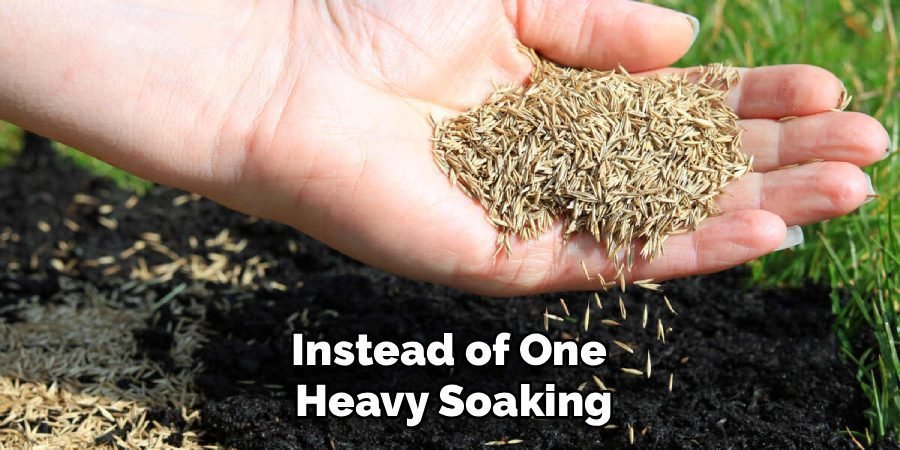
Step 8: Water Gently and Frequently
Your watering technique is critical after seeding. Instead of one heavy soaking, which can cause runoff, you should water lightly and frequently. The goal is to keep the top inch of soil consistently moist, but not waterlogged. Mist the area with a gentle spray nozzle two to four times a day for the first couple of weeks. This prevents the soil surface from drying out and crusting over, while also avoiding the creation of small streams that can displace your seeds. Proper watering ensures the seeds stay put and have the moisture needed for germination.
Monitor Growth and Make Adjustments
Once your seeds have begun to sprout, it’s essential to monitor their progress regularly. Keep an eye out for any signs of uneven growth or bare patches, which may indicate areas that need extra attention. Adjust your watering frequency as the seedlings grow; overwatering can lead to rot or disease, while underwatering may stunt their development. If necessary, re-seed sparse areas and continue with light watering until the new seeds germinate. Regular observation and timely adjustments will help ensure a healthy, lush area as the plants establish themselves.
Frequently Asked Questions (FAQ)
Can I Put Topsoil Over Grass Seed to Keep It From Washing Away?
Yes, applying a very thin layer of topsoil or high-quality compost over your grass seed is an effective technique. A layer no more than a quarter-inch thick will help hold the seeds in place, protect them from birds, and retain moisture. Be careful not to apply too much soil, as burying the seeds too deeply can prevent them from germinating. The key is a light dusting that provides cover without smothering the seeds, helping them establish a strong foothold in your lawn.
How Long Does It Take for Grass Seed to Root and Not Wash Away?
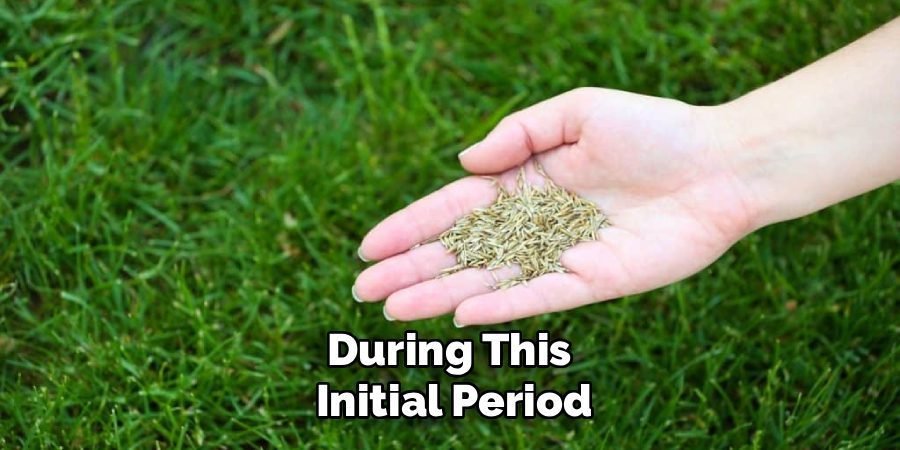
Generally, grass seed needs about two to three weeks to germinate and develop roots strong enough to anchor themselves in the soil. During this initial period, the seeds and young seedlings are most vulnerable to being washed away by heavy rain or improper watering. Once the grass reaches a height of about one inch, the developing root system provides a good anchor. However, full establishment can take several months, so continue to be mindful of erosion until your new lawn is thick and mature.
Will Burlap Keep Grass Seed From Washing Away?
Burlap is a great, cost-effective option for protecting grass seed, especially on slopes. Similar to an erosion control blanket, you can lay burlap sheets over the seeded area and secure them with stakes or landscape staples. The porous fabric allows water and sunlight to reach the seeds while holding them firmly in place against the soil. As the grass grows through the burlap, the material will naturally biodegrade over a few months, adding organic matter to the soil as it decomposes.
Is Straw or Hay Better for Covering New Grass Seed?
You should always use straw, not hay, to cover new grass seed. Straw is the stalk of cereal grains like wheat or oats after the seed heads have been harvested, so it contains very few, if any, weed seeds. Hay, on the other hand, is cut from fields of grasses and legumes and is full of seeds from various plants, including many weeds. Using hay will introduce a significant weed problem to your new lawn, creating more work for you down the line.
Should I Use a Lawn Roller After Seeding?
Using a lawn roller after seeding can be beneficial, but it must be done correctly. A light roller (filled about one-third with water) can gently press the seeds into the soil, ensuring good seed-to-soil contact. This contact is vital for germination and helps anchor the seeds. However, using a roller that is too heavy can over-compact the soil, making it difficult for roots and water to penetrate. If you choose to roll, do so lightly to firm up the seedbed without causing compaction.
Conclusion
Creating a vibrant, healthy lawn starts with giving your seeds the best possible chance to survive and thrive. By properly preparing your soil, choosing the right time to plant, and using protective coverings like mulch or erosion blankets, you can effectively prevent your investment from washing down the drain. Gentle, consistent watering will further secure your seeds as they begin their journey. Now that you know how to keep grass seed from washing away, you have the knowledge and confidence to tackle your next lawn project and watch your efforts grow into a beautiful, green carpet.
About Ravuk Barg
B.Sc. Horticulture Science | Certified Master Gardener
Ravuk Barg has spent more than a decade with his hands in the soil and his head full of questions about why some gardens thrive while others struggle. What started as a single raised bed of tomatoes and basil in a modest backyard has grown into a deep, working knowledge of everything from seed germination and soil amendment to companion planting and seasonal pruning.
Over the years, Ravuk has gardened through drought summers, waterlogged springs, and pest invasions that would make most gardeners hang up their trowels for good. Those hard seasons, he’ll tell you, taught him more than any perfect growing year ever could. He writes from that earned experience—covering vegetable growing, ornamental planting, houseplant care, composting, and garden design with equal confidence and curiosity.
Philosophy & Approach
Ravuk’s approach to gardening is rooted in practicality. He favors organic methods not out of dogma, but because they work long-term—resulting in healthier soil, fewer inputs, and stronger plants. He has a particular fondness for heirloom vegetable varieties (the kind with proper flavor), unruly cottage-style flower beds, and the stubborn houseplants that everyone else gave up on.
The Mission: Give readers the honest, experience-backed advice that helps them actually succeed in their gardens—not just the ideal version, but the real one; weeds, failures, and all.
Education & Credentials
-
B.Sc. in Horticulture Science
-
Greenfield Agricultural University
-
Focus: Plant Physiology, Soil Ecology, and Sustainable Crop Production
-
-
Master Gardener Certification
-
Cooperative Extension Service
-
Focus: 200+ hours of hands-on practical training and community garden work
-
Continuing Education
-
Organic Pest Management
-
Native Plant Landscaping
-
Sustainable Crop Production