

Creating a stunning garden involves more than just picking beautiful plants; it’s about arranging them thoughtfully. The art of grouping plants can transform a simple yard into a lush, cohesive, and visually appealing landscape. For beginners, figuring out how to group plants landscaping can seem like a complex puzzle. However, by understanding a few key principles of design and plant compatibility, you can create harmonious combinations that thrive together.
This guide will walk you through the essential concepts, from balancing colors and textures to considering each plant’s specific needs for sunlight, water, and soil. By learning to group plants effectively, you will not only enhance your garden’s beauty but also create a healthier, more sustainable environment for your plants to flourish. It’s a rewarding process that combines creativity with a bit of practical science.
Why You Need to Group Plants Thoughtfully
Thoughtful plant grouping is the secret behind professional-looking landscapes. When plants with similar needs are placed together, it simplifies maintenance significantly. Imagine watering one section of your garden knowing every plant there requires the same amount of moisture. This practice, known as hydrozoning, conserves water and prevents the overwatering or underwatering of individual plants.
Beyond practical benefits, strategic grouping creates visual impact. A lone plant can be beautiful, but a cluster of them makes a powerful statement. Grouping allows you to play with design principles like repetition, contrast, and balance, leading to a garden that feels intentional and harmonious rather than random and chaotic. It also helps plants support each other by creating microclimates that can shield them from harsh wind or sun.
8 Step-by-Step Guide on How to Group Plants Landscaping
Step 1: Assess Your Site’s Conditions
Before you buy a single plant, understand your canvas. Observe how sunlight moves across your yard throughout the day, noting areas that receive full sun, partial shade, or deep shade. Test your soil’s pH and composition—is it sandy, loamy, or clay-based? Consider the drainage in different spots, as some areas might stay wet longer after rain. Mapping these microclimates is the most critical first step. Grouping plants that thrive in the same conditions is the foundation of a low-maintenance, healthy garden. Ignoring this will lead to struggling plants, no matter how well you arrange them.

Step 2: Choose a Landscape Style
Defining a style provides a framework for your plant choices and groupings. Do you envision a formal English garden with structured hedges and symmetrical flowerbeds? Or perhaps a more relaxed, naturalistic cottage garden bursting with a mix of perennials and self-seeding annuals? Other options include modern minimalist designs with bold architectural plants, or xeriscaping with drought-tolerant succulents and grasses. Your chosen style will guide your plant palette and help you create a cohesive look. This theme will influence not just which plants you choose, but how you arrange them to evoke a specific feeling or aesthetic.
Step 3: Select a Color Palette
Color is one of the most powerful tools in garden design. You can create different moods using various color schemes. A monochromatic scheme, using different shades and tints of a single color, creates a serene and sophisticated look. Analogous colors, which are next to each other on the color wheel (like blue, purple, and pink), produce a harmonious and calming effect. For a bold, energetic feel, use complementary colors, which are opposite each other on the color wheel (like purple and yellow). Sticking to a limited palette of two or three colors will help unify the landscape and prevent it from looking cluttered.
Step 4: Play with Texture and Form
A garden with varied textures and forms is interesting even when nothing is in bloom. Contrast is key. Pair fine-textured plants like ferns or ornamental grasses with bold, large-leafed plants like Hostas or Rodgerias. The interplay between the different surfaces creates visual depth and excitement. Similarly, mix up plant forms. Combine upright, spiky plants like irises or salvia with mounding, rounded plants like geraniums or coral bells. Add in some weeping or trailing plants to soften edges. This variety in shape and size prevents the garden from looking flat and one-dimensional, adding layers of interest.

Step 5: Group Plants in Odd Numbers
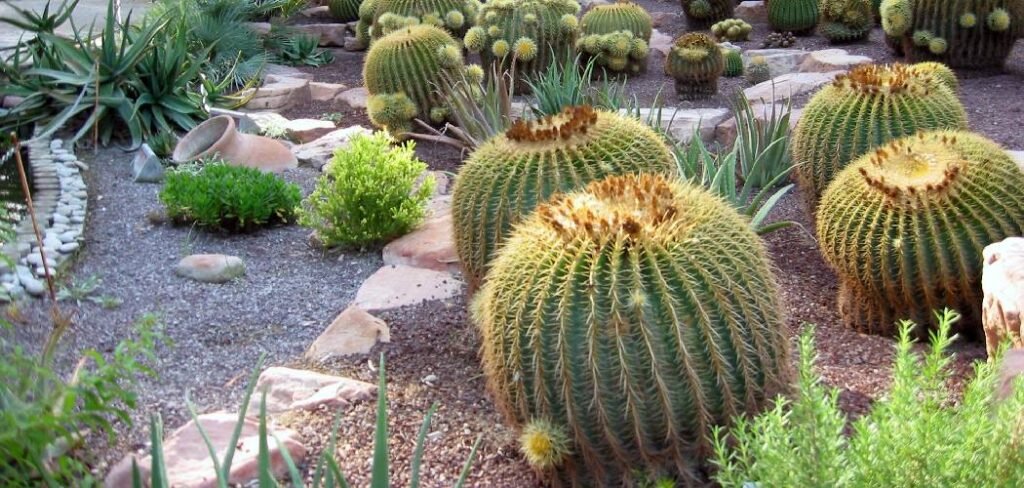
One of the most effective and simple design tricks is to group plants in odd numbers, such as threes, fives, or sevens. This approach creates a more natural and less contrived look than planting in pairs or even-numbered groups. Our eyes are drawn to the central point of an odd-numbered grouping, which makes the arrangement feel balanced and pleasing. Planting in clusters or drifts, rather than straight lines, mimics how plants grow in nature. This technique is particularly effective for perennials, grasses, and shrubs, helping you create a full, lush appearance more quickly and avoid a “polka dot” effect in your garden beds.
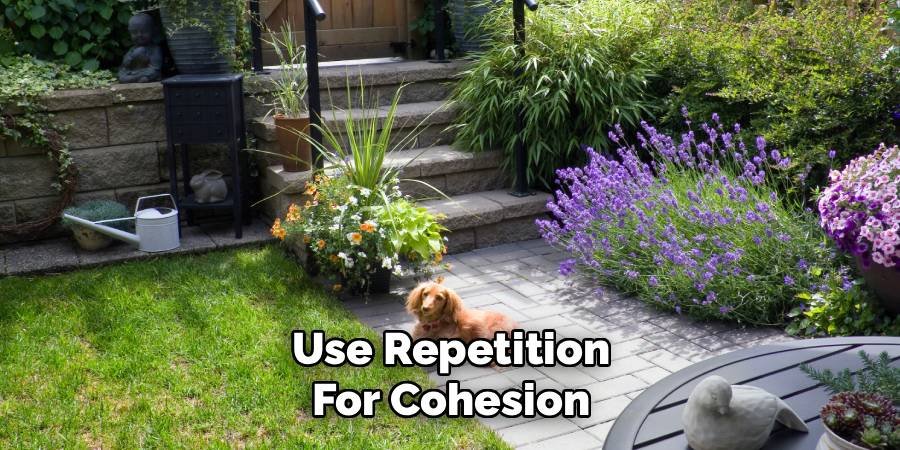
Step 6: Use Repetition for Cohesion
Repetition is the thread that ties your garden design together. By repeating certain plants, colors, or forms throughout your landscape, you create a sense of rhythm and unity. This doesn’t mean you should plant the same thing everywhere. Instead, choose a few key “anchor plants” and place them in several different areas. This could be a specific variety of ornamental grass, a flowering shrub, or a perennial with a distinctive color. The recurring element guides the eye through the garden, connecting separate spaces and making the entire design feel intentional and cohesive. Without repetition, a garden can feel like a disjointed collection of individual plants.
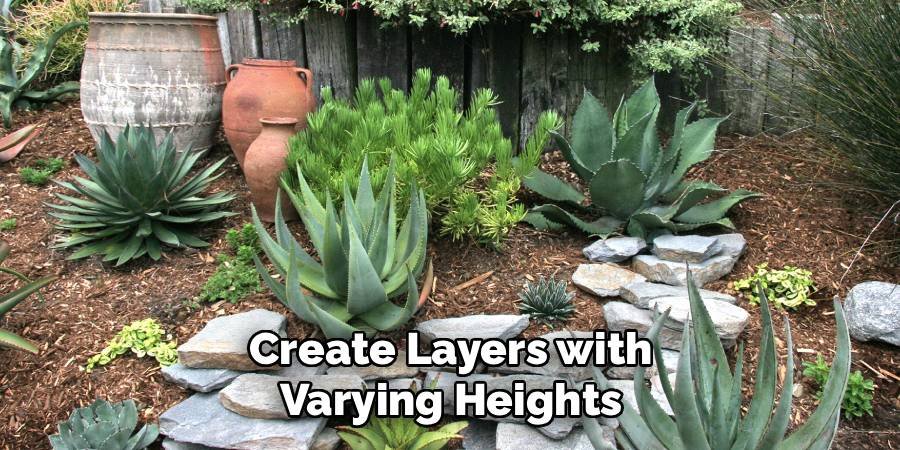
Step 7: Create Layers with Varying Heights
Effective plant grouping involves thinking in three dimensions. Create depth and visual interest by layering plants according to their mature height. Place the tallest plants, like shrubs or tall perennials, at the back of the border. In the middle layer, use medium-sized plants. Finally, place low-growing groundcovers and edging plants at the front. This “tall to short” arrangement ensures that all plants are visible and none are hidden. For island beds that can be viewed from all sides, place the tallest plants in the center and arrange shorter plants around them, creating a pyramid or mounded effect.
Step 8: Consider Bloom Time for Year-Round Interest
A truly spectacular garden offers something to see in every season. When selecting plants, pay close attention to their bloom times. Group plants that flower at different times of the year to ensure a continuous display of color. For example, combine spring-flowering bulbs like tulips and daffodils with summer-blooming perennials like coneflowers and black-eyed Susans. Add in some late-season stars like asters and sedums for autumn color. Don’t forget winter interest—include evergreen shrubs, plants with interesting bark like dogwoods, or ornamental grasses that look beautiful when touched by frost. This ensures your garden never has an “off-season.”
Maintaining Your Plant Groupings
Once your plants are in the ground, proper maintenance will keep your groupings looking their best. Regular weeding is crucial, as weeds can quickly overrun new plantings and compete for resources. Apply a layer of mulch around your plants to help retain soil moisture, suppress weeds, and regulate soil temperature.
Monitor your plants’ water needs, especially during their first year as they establish their root systems. Pruning and deadheading are also important tasks. Deadheading spent flowers encourages many perennials to re-bloom, while strategic pruning helps maintain the desired shape and size of shrubs and woody plants.
Common Mistakes to Avoid
One of the biggest errors is ignoring a plant’s mature size, leading to overcrowding and poor air circulation. Another frequent mistake is what’s called “one-of-everything syndrome,” where a garden is filled with individual specimens rather than cohesive groups, resulting in a chaotic look.
Failing to prepare the soil properly before planting can also set your groups up for failure. Finally, avoid placing plants with drastically different water or light needs together. Putting a sun-loving, drought-tolerant lavender next to a shade-loving, water-thirsty hosta is a recipe for stressing at least one of the plants. Planning ahead helps you avoid these common pitfalls.
FAQ Frequently Asked Questions
What is the 3-plant rule in landscaping?
The 3-plant rule, or rule of threes, suggests planting in odd-numbered groups of three, five, or seven. This creates a more natural and visually appealing arrangement than even-numbered groups.
How do you pair plants in a garden?
Pair plants by considering contrast and harmony. Combine plants with different textures, forms, and heights. Also, group plants that have similar needs for sunlight, water, and soil type.
How do you create a layered look in a garden?
Create layers by placing the tallest plants in the back, medium plants in the middle, and the shortest plants at the front of a border. This ensures all plants are visible.
Should I group plants with the same color together?
Grouping plants of the same color can create a powerful, monochromatic look. However, mixing harmonious or complementary colors often adds more visual interest and energy to the garden design.
How far apart should I space plants in a group?
Space plants according to their mature width. Check the plant tag for this information. Proper spacing prevents overcrowding and allows for healthy growth and good air circulation.
Conclusion
Mastering how to group plants landscaping is a journey that beautifully merges artistic vision with horticultural knowledge. By following these foundational steps—assessing your site, choosing a style, and layering color, texture, and form—you can move beyond simply planting and start truly designing your outdoor space.
The key is to group plants in odd numbers, use repetition for unity, and plan for interest throughout all four seasons. This thoughtful approach not only creates a visually stunning garden but also promotes a healthier ecosystem where plants thrive because their needs are met. Don’t be afraid to experiment and let your creativity grow along with your garden. Your efforts will be rewarded with a beautiful, harmonious landscape that brings you joy for years to come. Your garden will thank you.
About Ravuk Barg
B.Sc. Horticulture Science | Certified Master Gardener
Ravuk Barg has spent more than a decade with his hands in the soil and his head full of questions about why some gardens thrive while others struggle. What started as a single raised bed of tomatoes and basil in a modest backyard has grown into a deep, working knowledge of everything from seed germination and soil amendment to companion planting and seasonal pruning.
Over the years, Ravuk has gardened through drought summers, waterlogged springs, and pest invasions that would make most gardeners hang up their trowels for good. Those hard seasons, he’ll tell you, taught him more than any perfect growing year ever could. He writes from that earned experience—covering vegetable growing, ornamental planting, houseplant care, composting, and garden design with equal confidence and curiosity.
Philosophy & Approach
Ravuk’s approach to gardening is rooted in practicality. He favors organic methods not out of dogma, but because they work long-term—resulting in healthier soil, fewer inputs, and stronger plants. He has a particular fondness for heirloom vegetable varieties (the kind with proper flavor), unruly cottage-style flower beds, and the stubborn houseplants that everyone else gave up on.
The Mission: Give readers the honest, experience-backed advice that helps them actually succeed in their gardens—not just the ideal version, but the real one; weeds, failures, and all.
Education & Credentials
-
B.Sc. in Horticulture Science
-
Greenfield Agricultural University
-
Focus: Plant Physiology, Soil Ecology, and Sustainable Crop Production
-
-
Master Gardener Certification
-
Cooperative Extension Service
-
Focus: 200+ hours of hands-on practical training and community garden work
-
Continuing Education
-
Organic Pest Management
-
Native Plant Landscaping
-
Sustainable Crop Production