

A thriving garden is a source of pride for any homeowner, but efficient watering can be a challenge. Soaker hoses offer a fantastic solution, delivering water directly to the roots where plants need it most. This method reduces evaporation and prevents fungal diseases caused by wet foliage. While leaving them on the surface works, burying them takes your watering game to the next level.

It protects the hose from sun damage, keeps your garden looking tidy, and ensures even more water reaches the soil. If you’ve been wondering how to bury soaker hose systems for maximum efficiency and a cleaner look, you’ve come to the right place. This guide will walk you through the process, making it simple for even beginner gardeners.
Why Bury a Soaker Hose?
Burying your soaker hose system is more than just an aesthetic choice; it’s a strategic move for a healthier and more water-wise garden. When a hose is left on the surface, it’s exposed to UV rays, which can degrade the material over time, leading to cracks and leaks.
Additionally, a visible hose can be a tripping hazard and can be easily damaged by lawnmowers or foot traffic. By burying it, you create a permanent, hidden irrigation system that delivers water directly to the root zone, minimizing surface evaporation. This means more water for your plants and less on your utility bill. A buried hose also helps keep weeds at bay by concentrating water on your desired plants, not the surrounding soil.
8 Step-by-Step Guide on How to Bury Soaker Hose Systems
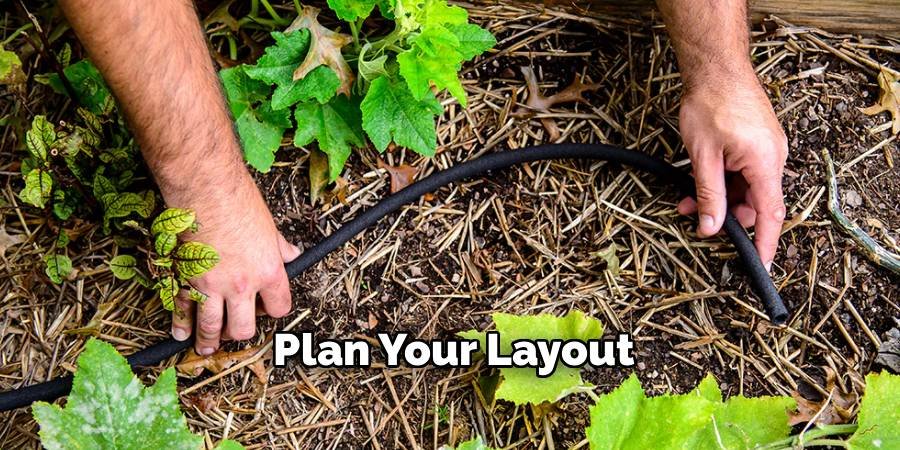
Step 1: Plan Your Layout
Before you pick up a shovel, take time to design your watering layout. Walk through your garden and sketch out the path the soaker hose will take. You’ll want to loop it around larger plants and trees and run it in straight lines through vegetable beds or flower rows. Aim to place the hose about 4 to 6 inches away from the base of each plant to ensure the water reaches the root zone without soaking the stem. Planning ahead prevents you from digging in the wrong spots and ensures you have enough hose to cover the entire area effectively.
Step 2: Gather Your Tools and Materials
Having everything you need on hand will make the process much smoother. You will need your soaker hose, a garden hose to connect it to the spigot, a pressure regulator, and a backflow preventer. For digging, a garden spade or a trenching shovel is ideal. You’ll also want a tape measure to ensure proper spacing, garden staples or landscape pins to secure the hose in place, and mulch to cover the area once you’re done. A pressure regulator is crucial because soaker hoses operate best at low pressure, and high pressure can cause them to split.
Step 3: Clear the Area and Prepare the Soil
Begin by clearing the path where you plan to lay the hose. Remove any weeds, rocks, sticks, or other debris that could interfere with the installation or potentially puncture the hose. If the soil in your garden bed is hard and compacted, now is an excellent time to loosen it. Use a garden fork or tiller to break up the soil along the planned trench line. Softer soil makes digging the trench much easier and also helps the water from the soaker hose disperse more evenly to your plants’ roots.
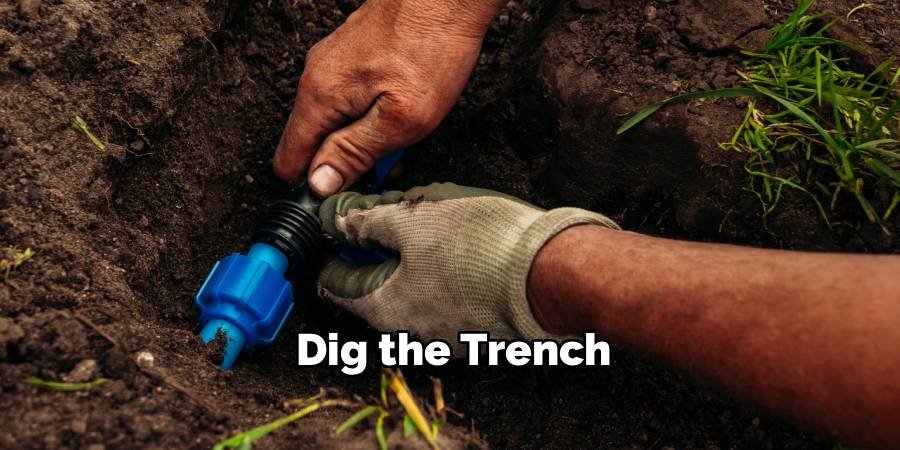
Step 4: Dig the Trench
With your path cleared, you can start digging the trench. The goal is a shallow trench, about 2 to 4 inches deep. This is deep enough to protect the hose from the sun and minor disturbances but shallow enough for the water to effectively reach the plant roots. Use your trenching shovel or garden spade to create a narrow channel along the path you designed earlier. Maintain a consistent depth throughout the trench to ensure the hose lays flat and distributes water evenly. Take care not to disturb the root systems of existing plants as you dig.
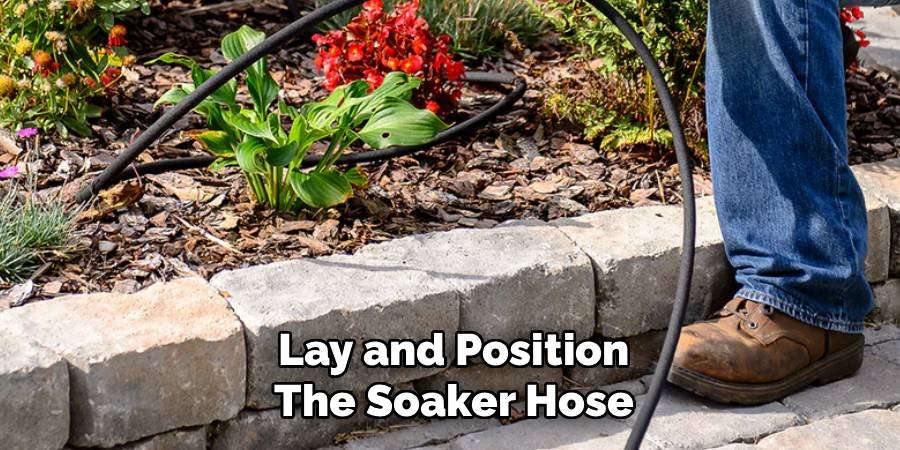
Step 5: Lay and Position the Soaker Hose
Unroll your soaker hose and let it sit in the sun for about an hour. This makes the material more flexible and easier to work with, helping to remove any kinks from its packaging. Carefully place the hose into the shallow trench you dug. Follow the layout you planned, looping it around plants and running it parallel to your rows. Make sure the hose lies flat at the bottom of the trench without any twists or sharp bends, as these can restrict water flow and cause uneven watering. This is a key part of learning how to bury soaker hose for optimal performance.
Step 6: Secure the Hose in Place
To prevent the hose from shifting or popping out of the trench over time, you need to secure it. Use garden staples or landscape pins to anchor the hose to the soil. Place a staple every few feet along straight sections and more frequently around curves to hold its shape. Press the staples firmly into the ground so they are flush with the soil surface. Securing the hose ensures it stays exactly where you intended, delivering water precisely to the root zones of your plants and maintaining the integrity of your irrigation layout.
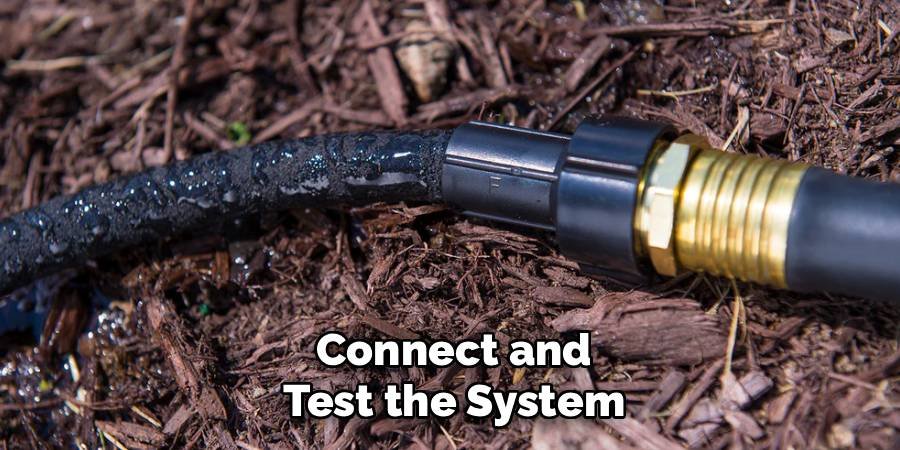
Step 7: Connect and Test the System
Before you bury everything, it’s essential to test your setup. Connect the soaker hose to your main garden hose, making sure to install the backflow preventer and pressure regulator at the spigot. Turn on the water at a low setting. Walk along the length of the hose to check for any leaks at the connections and to ensure water is weeping evenly from the entire length. You should see the soil slowly darkening as it becomes damp. Let it run for about 15-20 minutes to confirm everything is working correctly.
Step 8: Bury the Hose and Apply Mulch
Once you’ve confirmed the system works perfectly, it’s time for the final step. Carefully backfill the trench with the soil you removed earlier, covering the soaker hose completely. Gently pat the soil down, but avoid compacting it too much. After the hose is buried, apply a 2 to 3-inch layer of mulch over the entire garden bed. Mulch helps retain soil moisture, suppresses weeds, and further protects the hose. Completing this step finalizes the process of how to bury soaker hose installations, creating a hidden, efficient watering system.
Frequently Asked Questions (FAQ)
How Deep Should a Soaker Hose Be Buried?
You should bury your soaker hose between 2 and 4 inches deep. This depth is ideal because it protects the hose from UV rays, foot traffic, and gardening tools while still allowing water to efficiently reach the shallow roots of most plants. Burying it any deeper could make it harder for the water to get to the surface and may waste water in the subsoil. A shallow trench is easy to dig and provides all the benefits you need.
Can You Connect Multiple Soaker Hoses Together?
Yes, you can connect multiple soaker hoses, but it’s best to limit the total length to around 100 feet. Beyond this length, the water pressure can drop significantly, causing the far end of the hose to receive very little water. If you need to cover a larger area, consider running separate lines from a multi-port faucet adapter or creating different watering zones, each with its own hose line no longer than 100 feet.
How Long Should I Run a Buried Soaker Hose?
The ideal runtime depends on your soil type, climate, and your plants’ needs. A good starting point is to run it for 30 to 60 minutes, two to three times a week. Sandy soil drains quickly and may need more frequent, shorter watering sessions, while clay soil holds moisture longer and can be watered less often but for a longer duration. Check the soil moisture 6 inches deep to see if it’s damp. If it’s dry, increase the watering time.
Do I Need a Pressure Regulator for a Soaker Hose?
Yes, using a pressure regulator is highly recommended. Soaker hoses are designed to work under low water pressure, typically between 10 and 25 PSI. Standard household water pressure is often much higher, which can cause the hose to split, burst, or spray water instead of weeping it slowly. A pressure regulator attaches easily between the spigot and the hose, ensuring a gentle, consistent flow that protects your hose and waters your garden effectively.
Will Burying a Soaker Hose Prevent Weeds?
Burying a soaker hose can significantly help reduce weed growth. Because the hose delivers water directly to the soil around your plants’ roots, the surrounding soil surface stays drier. Most weed seeds need moisture at the surface to germinate, so this targeted watering method creates an environment that is less favorable for them. Combining a buried soaker hose with a thick layer of mulch is an excellent strategy for keeping your garden beds weed-free.
Conclusion
Creating an efficient and discreet watering system is easier than you might think. By following these steps, you can set up a buried soaker hose that saves water, protects your equipment, and helps your garden flourish. From planning your layout to covering the hose with mulch, each part of the process contributes to a healthier, low-maintenance garden. Now that you understand how to bury soaker hose systems, you’re ready to give your plants the consistent, deep watering they need to thrive all season long.
About Ravuk Barg
B.Sc. Horticulture Science | Certified Master Gardener
Ravuk Barg has spent more than a decade with his hands in the soil and his head full of questions about why some gardens thrive while others struggle. What started as a single raised bed of tomatoes and basil in a modest backyard has grown into a deep, working knowledge of everything from seed germination and soil amendment to companion planting and seasonal pruning.
Over the years, Ravuk has gardened through drought summers, waterlogged springs, and pest invasions that would make most gardeners hang up their trowels for good. Those hard seasons, he’ll tell you, taught him more than any perfect growing year ever could. He writes from that earned experience—covering vegetable growing, ornamental planting, houseplant care, composting, and garden design with equal confidence and curiosity.
Philosophy & Approach
Ravuk’s approach to gardening is rooted in practicality. He favors organic methods not out of dogma, but because they work long-term—resulting in healthier soil, fewer inputs, and stronger plants. He has a particular fondness for heirloom vegetable varieties (the kind with proper flavor), unruly cottage-style flower beds, and the stubborn houseplants that everyone else gave up on.
The Mission: Give readers the honest, experience-backed advice that helps them actually succeed in their gardens—not just the ideal version, but the real one; weeds, failures, and all.
Education & Credentials
-
B.Sc. in Horticulture Science
-
Greenfield Agricultural University
-
Focus: Plant Physiology, Soil Ecology, and Sustainable Crop Production
-
-
Master Gardener Certification
-
Cooperative Extension Service
-
Focus: 200+ hours of hands-on practical training and community garden work
-
Continuing Education
-
Organic Pest Management
-
Native Plant Landscaping
-
Sustainable Crop Production