

Hostas are loved for their lush, broad leaves and calm, shady beauty, but those smooth leaves can turn ragged fast when pests move in. If you are new to gardening, seeing bites, tears, and tiny holes can feel frustrating because the damage often appears overnight. The good news is that most hosta leaf damage has clear causes, and you can reduce it with simple habits.
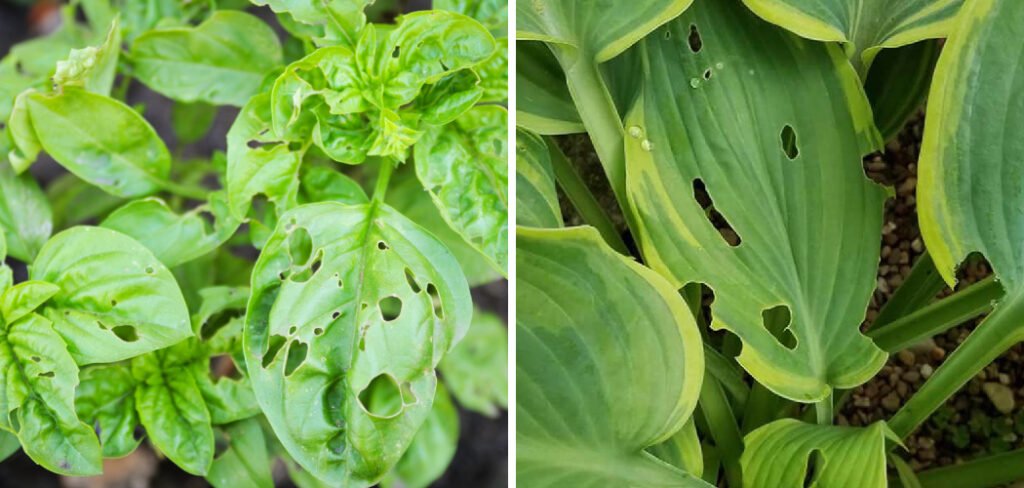
Learning how to prevent holes in hosta leaves starts with knowing what eats them, when damage happens, and how to protect plants without making garden care harder than it needs to be. This guide will walk you through practical, beginner-friendly steps to keep your hostas healthy, full, and attractive.
Why Preventing Holes in Hosta Leaves Matters
Hostas are shade perennials, which means they often grow in cool, damp spaces where slugs, snails, earwigs, and other pests feel right at home. When you stop leaf damage early, your plants can use more energy for strong roots, fresh growth, and a fuller shape instead of recovering from stress.
For first-time gardeners, prevention also builds confidence. You learn how watering, mulch, garden sanitation, and pest control work together. Instead of guessing after the leaves look shredded, you start reading signs in the garden. This helps you protect not only hostas, but also nearby plants that may face the same pest pressure.
Tools and Materials You’ll Need
You do not need a shed full of gear to protect hostas. Start with garden gloves, pruning shears, a small hand trowel, a watering can or hose with a gentle spray setting, and a flashlight for evening pest checks. Keep a small container nearby if you plan to handpick slugs or snails after dark.
For pest control, useful supplies include copper tape, diatomaceous earth, neem oil, and fresh mulch used in the right amount. You may also want compost to improve soil health and help plants recover from stress. One optional convenience item is a moisture meter, which helps you avoid overwatering in shaded beds where soil dries slowly.
8 Step-by-Step Guide on How to Prevent Holes in Hosta Leaves
Step 1 – Inspect Leaves and Identify the Damage
Begin by looking closely at the leaves, stems, soil surface, and the shaded area around each plant. Slug damage often looks like smooth, uneven holes or ragged edges, sometimes with a shiny slime trail nearby. Snails leave similar marks, while earwigs may create smaller, rougher chewing patterns.
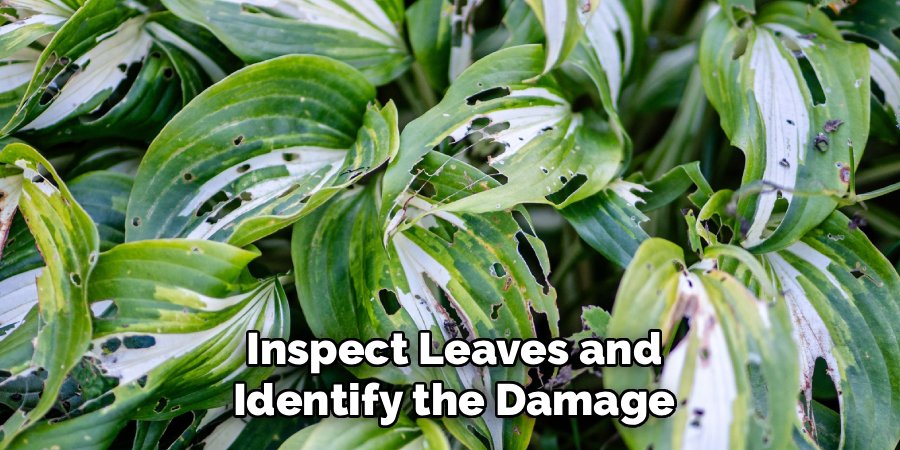
Check both the top and underside of the leaves. Many pests hide during the day, especially in cool, damp spots near mulch, stones, pots, and leaf litter. The first part of learning how to prevent holes in hosta leaves is matching the damage to the likely cause, so you choose the right fix instead of treating blindly.
Step 2 – Clean Up Hiding Places Around Plants
Good garden sanitation makes a big difference. Remove dead leaves, broken stems, weeds, and old plant debris around your hostas. These materials create dark, moist shelters where slugs, snails, and earwigs can rest during the day before feeding at night.
Keep the area tidy without stripping the bed bare. Hostas still benefit from healthy soil and some organic matter, but piles of wet leaves pressed against the crown invite trouble. As you clean, notice how the soil smells and feels. A fresh, earthy scent is good, while sour, soggy spots may mean drainage needs attention.
Step 3 – Water in the Morning
Watering habits can either help or hurt your hostas. Aim to water in the morning so leaves and soil surfaces have time to dry before evening. Slugs and snails love damp nighttime conditions, so late watering can make your garden more inviting to them.
Direct water toward the soil rather than soaking the leaves. Hostas enjoy steady moisture, but they do not need wet foliage sitting overnight. If the soil feels cool and lightly damp an inch below the surface, wait before watering again. This simple habit supports strong roots while reducing the moist surface pests prefer.
Step 4 – Use Mulch Carefully
Mulch helps hold soil moisture, cool the root zone, and reduce weeds, but too much mulch can create pest shelter. Spread a thin, even layer around the plant, and keep it a few inches away from the crown. The crown is where the leaves rise from the base, and it needs air circulation.
Choose a mulch that does not mat down into a wet blanket. Fine, compacted mulch can stay soggy in shade and encourage slug damage. If your hostas already sit in a damp area, use less mulch and fluff it now and then. A balanced mulch layer protects the plant without giving pests a perfect hiding place.
Step 5 – Create Barriers Against Crawling Pests
Physical barriers can slow down pests before they reach the leaves. Copper tape works well around pots, raised beds, or edging because slugs and snails dislike crossing it. Make sure the copper forms a complete ring, with no gaps, soil bridges, or leaves touching over the barrier.
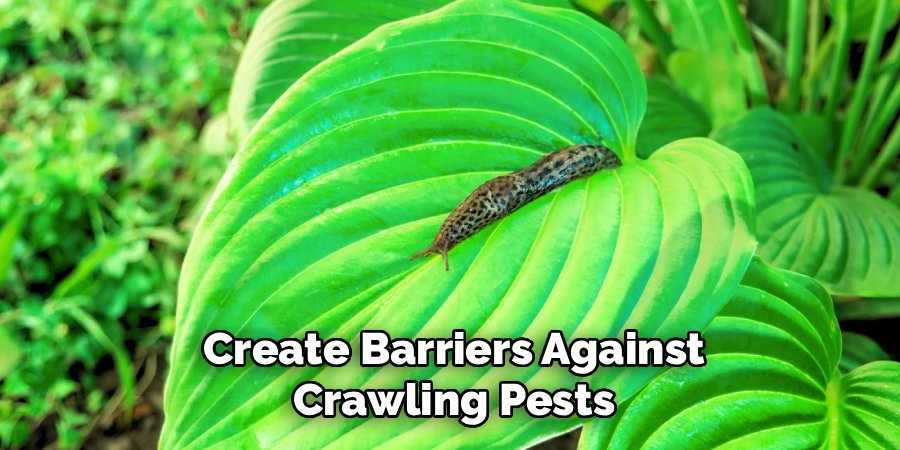
Diatomaceous earth can also help when applied in a dry ring around plants. It feels powdery to you, but it irritates soft-bodied pests. Reapply it after rain or heavy watering because it loses power when wet. Barriers work best as part of a plan, not as the only defense, especially in damp shade gardens.
Step 6 – Check for Pests at Night
Many hosta pests feed after sunset, so daytime checks may miss the real problem. Go outside with a flashlight on a mild, damp evening. Look along leaf edges, under leaves, near the crown, and around mulch. You may see slugs, snails, earwigs, or other insects moving slowly across the soil.
Handpicking may sound unpleasant, but it works well for small gardens. Wear gloves and drop pests into a container of soapy water. Repeat this for several nights in a row when damage is active. Regular night checks turn pest control into a simple routine instead of a guessing game.
Step 7 – Apply Gentle Treatments When Needed
If barriers and cleanup are not enough, use targeted treatments with care. Neem oil can help with some insect pests, but it is not the main answer for slugs or snails. Apply it in the evening or early morning, follow the label, and test a small area first to avoid leaf spotting.
For slug and snail pressure, choose pet-safe slug bait if children or animals visit the garden. Place it near hiding areas rather than dumping it on the plant. A smart treatment plan is part of how to prevent holes in hosta leaves without harming helpful insects or turning your garden into a chemical-heavy space.
Step 8 – Strengthen Plant Health Through the Season
Healthy hostas handle stress better than weak ones. Feed them with compost in spring, give them steady moisture, and divide crowded clumps when growth becomes tight. Good spacing improves airflow, which helps leaves dry faster and makes the area less friendly to pests.
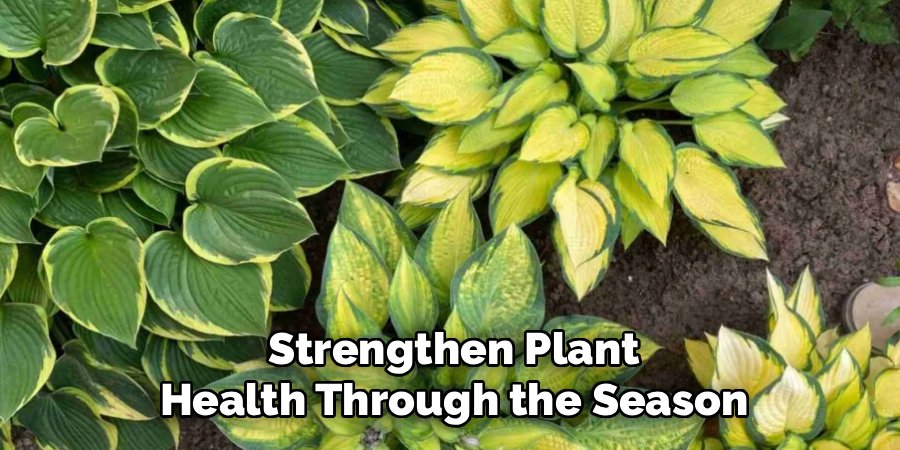
Watch your plants through the full growing season. Fresh holes after rain may point to renewed slug activity, while repeated chewing near dry hiding spots may suggest earwigs. Keep notes if you can. Over time, you will learn your garden’s patterns, and prevention will feel natural rather than complicated.
Common Mistakes When Preventing Holes in Hosta Leaves
One common mistake is treating every hole the same way. Hail, pets, rabbits, slugs, snails, and insects can all damage hostas, but they do not require the same response. If you skip inspection, you may waste time on neem oil when the real problem is nighttime slug feeding.
Another mistake is overmulching. Many beginners add thick mulch because they want to protect the plant, but deep, wet mulch can create the exact shelter pests need. Keep mulch thin, airy, and pulled back from the crown.
Watering late in the day also causes problems. Hostas like moisture, but wet leaves and damp soil at night invite pests and may increase disease risk. Morning watering gives plants what they need while making the bed less attractive after dark.
Some gardeners also wait too long to act. A few holes may not seem serious, but pests can multiply quickly in cool, rainy weather. Early action is easier than rescuing a shredded plant later.
Finally, avoid using harsh treatments without a plan. Strong sprays can harm helpful insects and stress tender leaves. Start with sanitation, watering changes, barriers, and careful identification before reaching for stronger control methods.
Expert Tips
Think of hosta protection as a routine, not a one-time fix. Walk your garden after rain, check shaded corners, and look under leaves when damage appears. Small habits catch problems before they spread.

Place hostas where they get bright shade, healthy soil, and enough airflow. Dense, crowded beds stay damp longer, which increases pest pressure. If your garden has heavy slug activity every year, consider thicker-leaved hosta varieties, which often resist chewing better than thin-leaved types.
Use several gentle methods together. Clean soil, smart watering, copper tape, diatomaceous earth, and careful night checks often work better than relying on one product.
Frequently Asked Questions
What is eating holes in my hosta leaves?
The most common causes are slugs and snails, especially if the holes are irregular and appear after damp nights. Earwigs, rabbits, deer, and insects can also cause leaf damage. Look for slime trails, ragged edges, droppings, or chewing patterns. Evening inspections with a flashlight usually reveal the culprit faster than daytime checks.
Can hostas recover after their leaves have holes?
Yes, hostas can recover if the crown and roots remain healthy. Damaged leaves will not repair themselves, but the plant can keep growing and may send up fresh leaves. Trim badly torn leaves if they look messy or diseased. Focus on reducing pests, improving watering habits, and supporting the plant with compost and steady care.
Does coffee grounds stop slugs on hostas?
Coffee grounds are often suggested, but they are not a reliable slug control method. They may slightly discourage pests in some cases, but results vary and too much can affect soil texture. You will get better results from garden sanitation, evening handpicking, copper tape, diatomaceous earth, and careful watering that keeps the area less damp at night.
Is neem oil safe to use on hostas?
Neem oil can be safe on hostas when used correctly, but it should be applied with care. Always follow the label, avoid spraying during hot sun, and test one leaf before treating the whole plant. Neem oil helps with some insect pests, but it will not solve most slug or snail problems, which need different control methods.
Should I cut off hosta leaves with holes?
You can remove badly damaged leaves if they make the plant look untidy or if they are yellowing, collapsing, or diseased. Use clean pruning shears and cut near the base without harming the crown. If the holes are minor, leave the leaf in place. It can still gather sunlight and help feed the plant.
Conclusion
Preventing holes in hosta leaves becomes much easier once you understand what causes the damage. Most problems come from damp conditions, hidden pests, crowded growth, or habits that make the garden too welcoming to slugs, snails, and earwigs. With simple steps, you can protect your plants before the leaves look ragged.
Start by inspecting your hostas, cleaning up debris, watering in the morning, and using mulch with care. Add barriers like copper tape or diatomaceous earth when needed, and check for pests at night during wet weather. These small actions build a strong, steady defense.
As you practice how to prevent holes in hosta leaves, you will become better at reading your garden and responding early. Your hostas do not need perfect conditions to look beautiful. They need consistent care, quick attention, and a few smart habits that keep their bold leaves healthy all season.
About Ravuk Barg
B.Sc. Horticulture Science | Certified Master Gardener
Ravuk Barg has spent more than a decade with his hands in the soil and his head full of questions about why some gardens thrive while others struggle. What started as a single raised bed of tomatoes and basil in a modest backyard has grown into a deep, working knowledge of everything from seed germination and soil amendment to companion planting and seasonal pruning.
Over the years, Ravuk has gardened through drought summers, waterlogged springs, and pest invasions that would make most gardeners hang up their trowels for good. Those hard seasons, he’ll tell you, taught him more than any perfect growing year ever could. He writes from that earned experience—covering vegetable growing, ornamental planting, houseplant care, composting, and garden design with equal confidence and curiosity.
Philosophy & Approach
Ravuk’s approach to gardening is rooted in practicality. He favors organic methods not out of dogma, but because they work long-term—resulting in healthier soil, fewer inputs, and stronger plants. He has a particular fondness for heirloom vegetable varieties (the kind with proper flavor), unruly cottage-style flower beds, and the stubborn houseplants that everyone else gave up on.
The Mission: Give readers the honest, experience-backed advice that helps them actually succeed in their gardens—not just the ideal version, but the real one; weeds, failures, and all.
Education & Credentials
-
B.Sc. in Horticulture Science
-
Greenfield Agricultural University
-
Focus: Plant Physiology, Soil Ecology, and Sustainable Crop Production
-
-
Master Gardener Certification
-
Cooperative Extension Service
-
Focus: 200+ hours of hands-on practical training and community garden work
-
Continuing Education
-
Organic Pest Management
-
Native Plant Landscaping
-
Sustainable Crop Production